You have never done a project like this have you? Pulling the engine in and out isn’t a big deal. Getting the engine swapped and running is the hurdle. Pulling the motor once that is all taken care of is nothing.
Well, between my 8 vehicles I’ll narrow it down to the two most recent swaps, a C5 RS6 and a B8.5 RS5 that I’ve had and engine out and in each twice. I know exactly what kind of work it is. But just bolting it in isn’t the same as getting a driveline, electrical, cooling, ECU, etc… all hooked up just to find out that the cylinders are scored or it needs Rod or Main bearings. Why wait until it is in and have to do the work twice?? The post above with the guy who’s on his second engine (V10) which looks like it has issues and with similar mileage to the poster. Following Audi’s factory Mx intervals doesn’t leave a healthy engine at 150k miles. I’ll just see what happens from here on out, but I’d at least throw a set of fresh Rod bearings in since the V10 has been known to occasioanlly eat Rod bearings.
You have never done a project like this have you?
Guilty. I’ve pulled and dropped in motors before but this is my first cross-platform swap I’ve taken on.
hahnmgh63 thank you its a valid point. Why put a motor in that’s not healthy? However, if for some reason this motor is toast I would just replace it with the exact same thing, still leaving driveline, electrical, cooling, ECU, etc… still to do. I know its running, but more thinking of the motor as a mock up piece for the project at this point.
Nevertheless, cylinder photos and leak down results incoming this weekend.
That comment wasnt meant for you. It was for Hahn. Keeping momentum on a large project is going to be key to getting it done. Taking on a full engine rebuild before even diving in is just going to empty your bank account and motivation. I can all but guarantee the engine will need to come back out for one reason or another before it is a fully running and driving car. For the first start the car isn’t going to be fully buttoned up. It will be no core support minimum components hooked up and you’d be able to pull it back out in under an hour. This is all just my opinion and based on taking on projects as a husband, father, with a full time job and side work. If you have nothing but free time and money obviously your path would be extremely different
1 Like
Agree with above. Get the engine and transmission situated. Martin Harp can get your immobilizer coded out and I can sent a pinout of the 8 or so wires that need to be connected for a first start.
Eventually get some coolant in it so you can run it long enough to see if there’s any abnormal smoking, or misfires. Then go from there. 
You got this bud!
1 Like
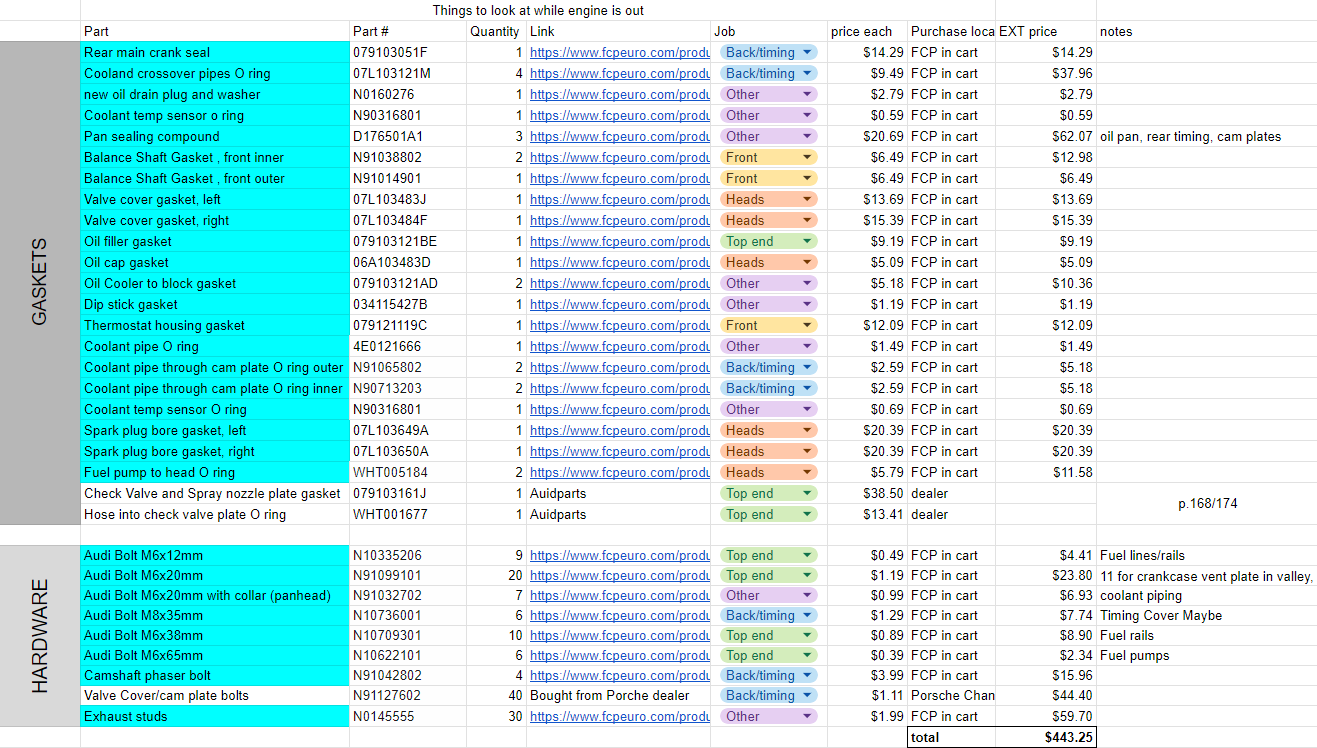
@Nordy1865 put together a great shopping list in a post on here for rebuilding the BXA V10. I present to you, my essentials list, based on what I think is worth replacing while the engine is out, but not trying to overhaul the motor. Call it a motor freshener.
Posting for others in the future who may end up where I am. I’ll probably make a google sheet link with copyable text and links later on in this thread, after more is compiled. Not a bad price tag for so many gaskets.
UPDATED SCREENSHOT: LINK TO SHEET
1 Like
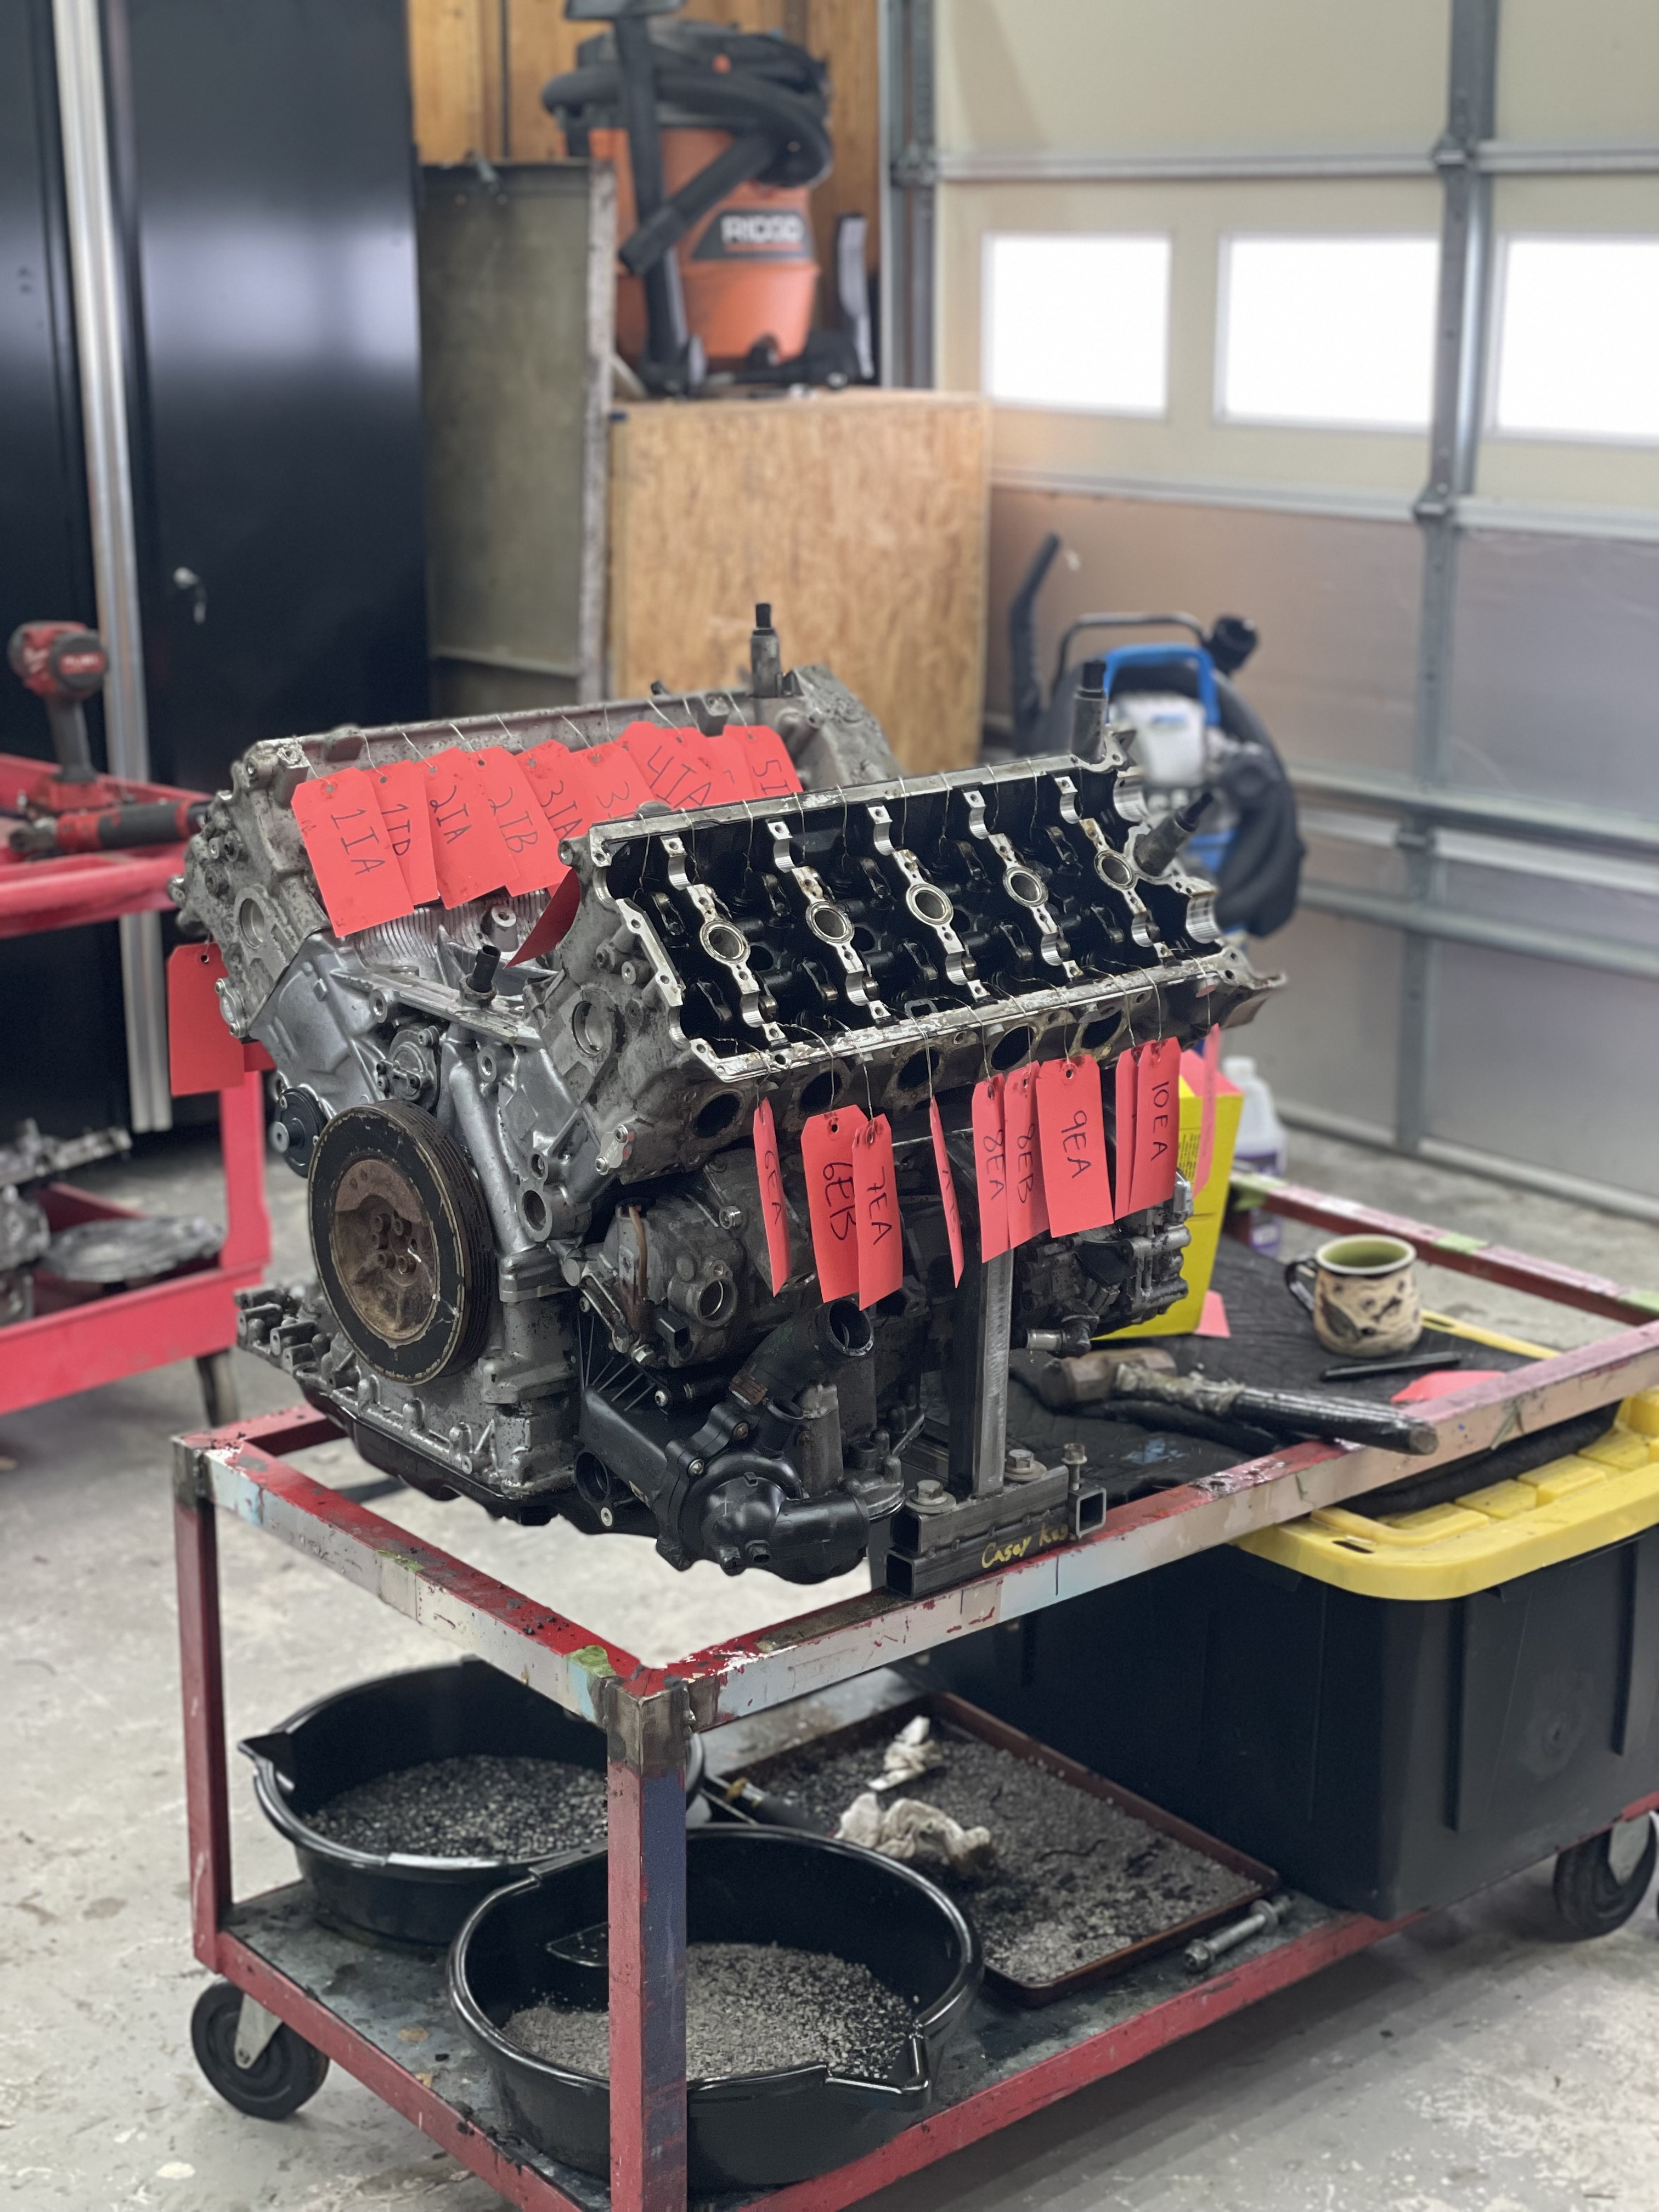
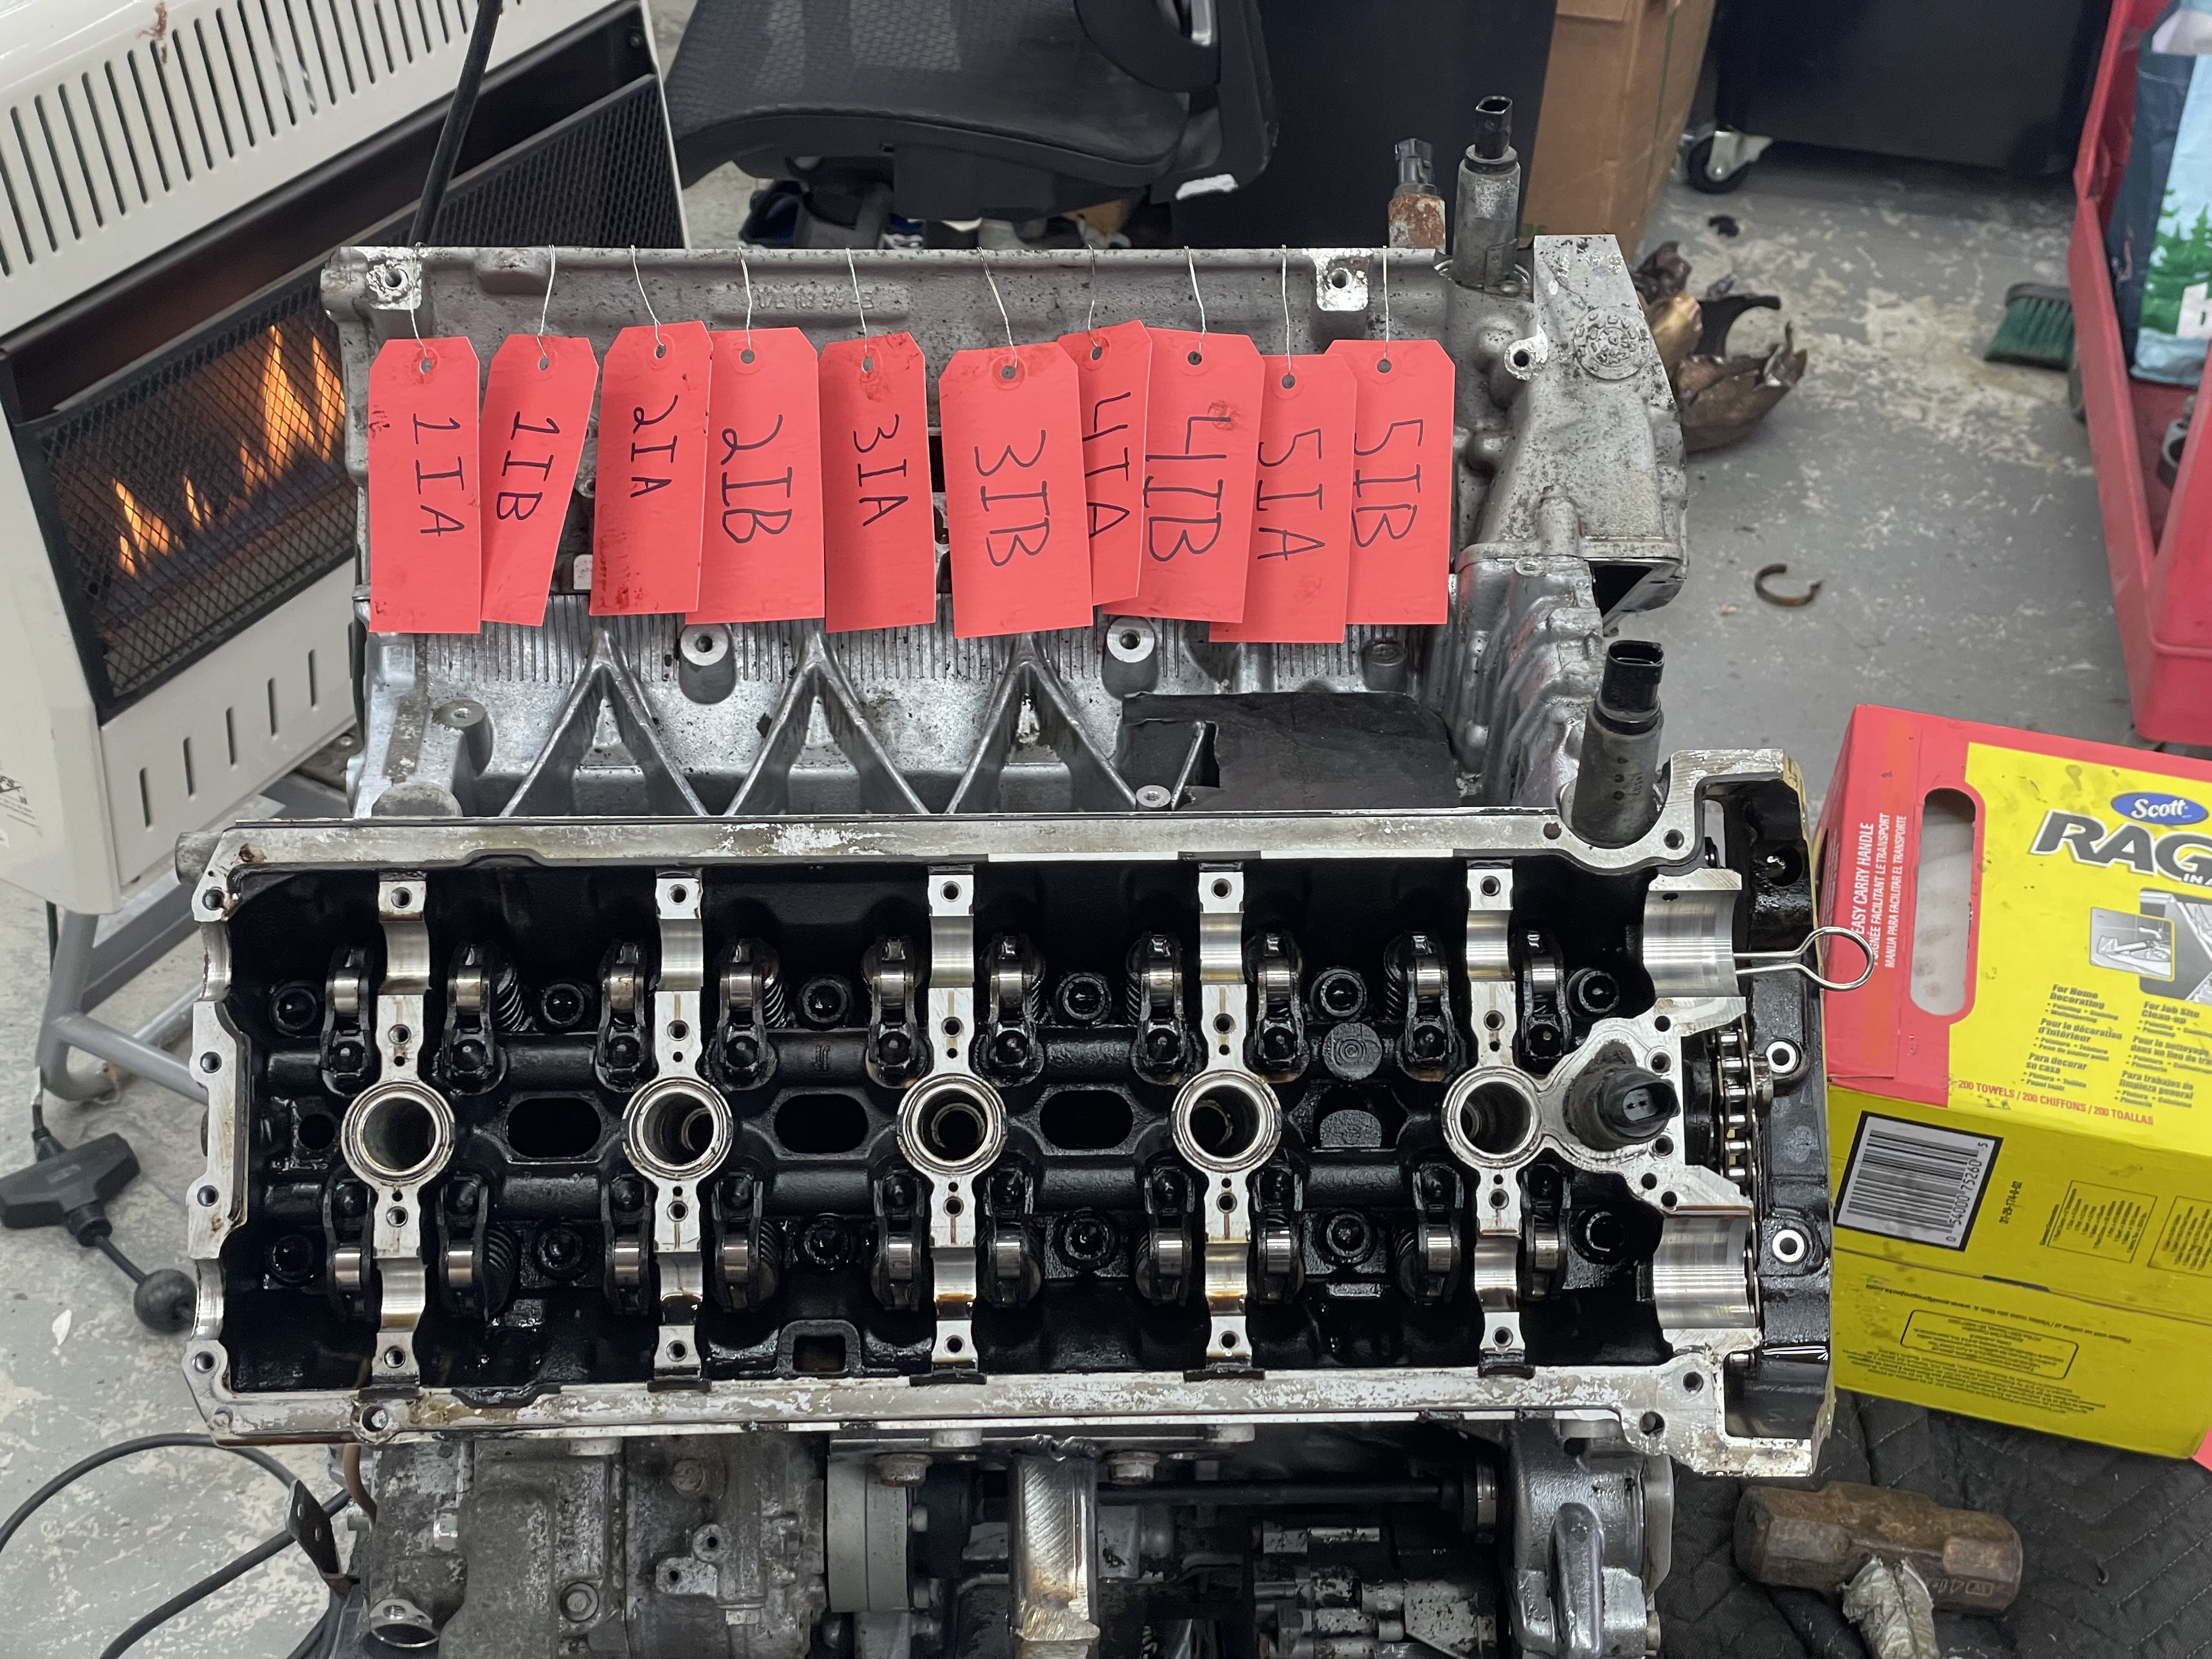
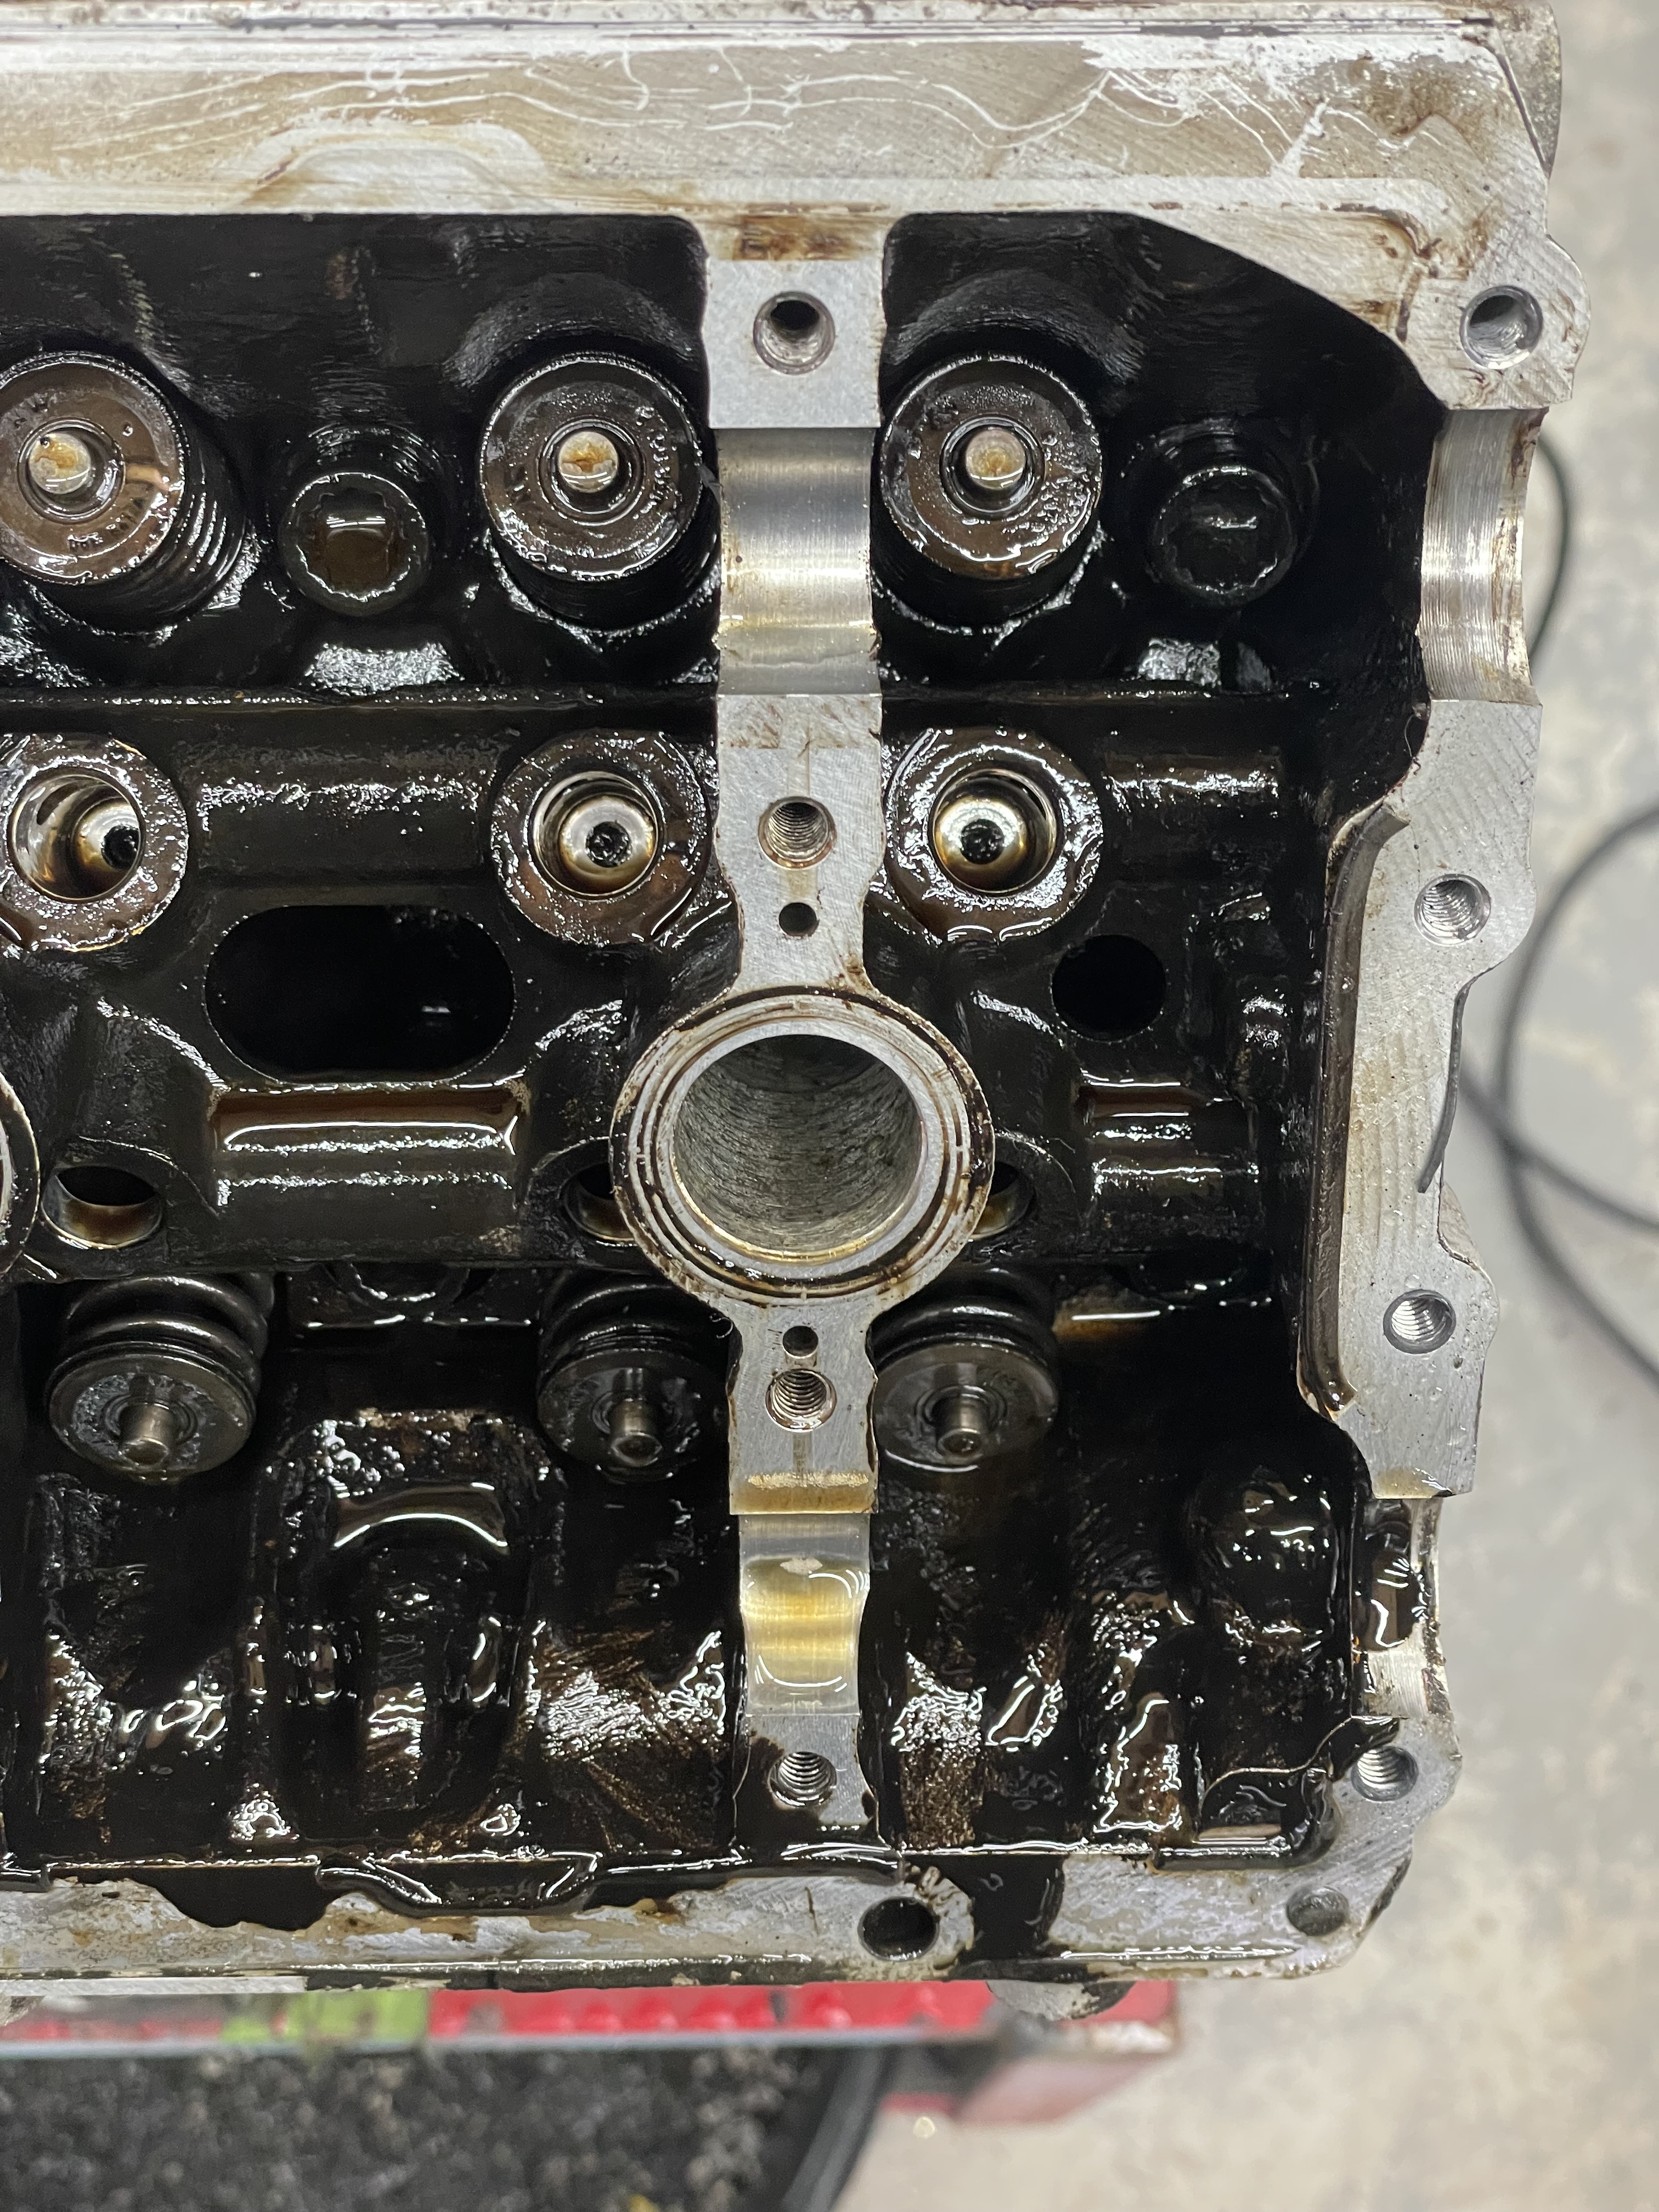
This as about as deep as I plan on going with the motor. Currently cleaning out the heads. Rockers go in the ultrasonic cleaner. Tedius!
I’ve been jokingly calling work on this project “garage therapy” but man is it true. I had to take a month off to remedy my ‘85 Benz, and coming back to this felt so good. Ball is rolling again.
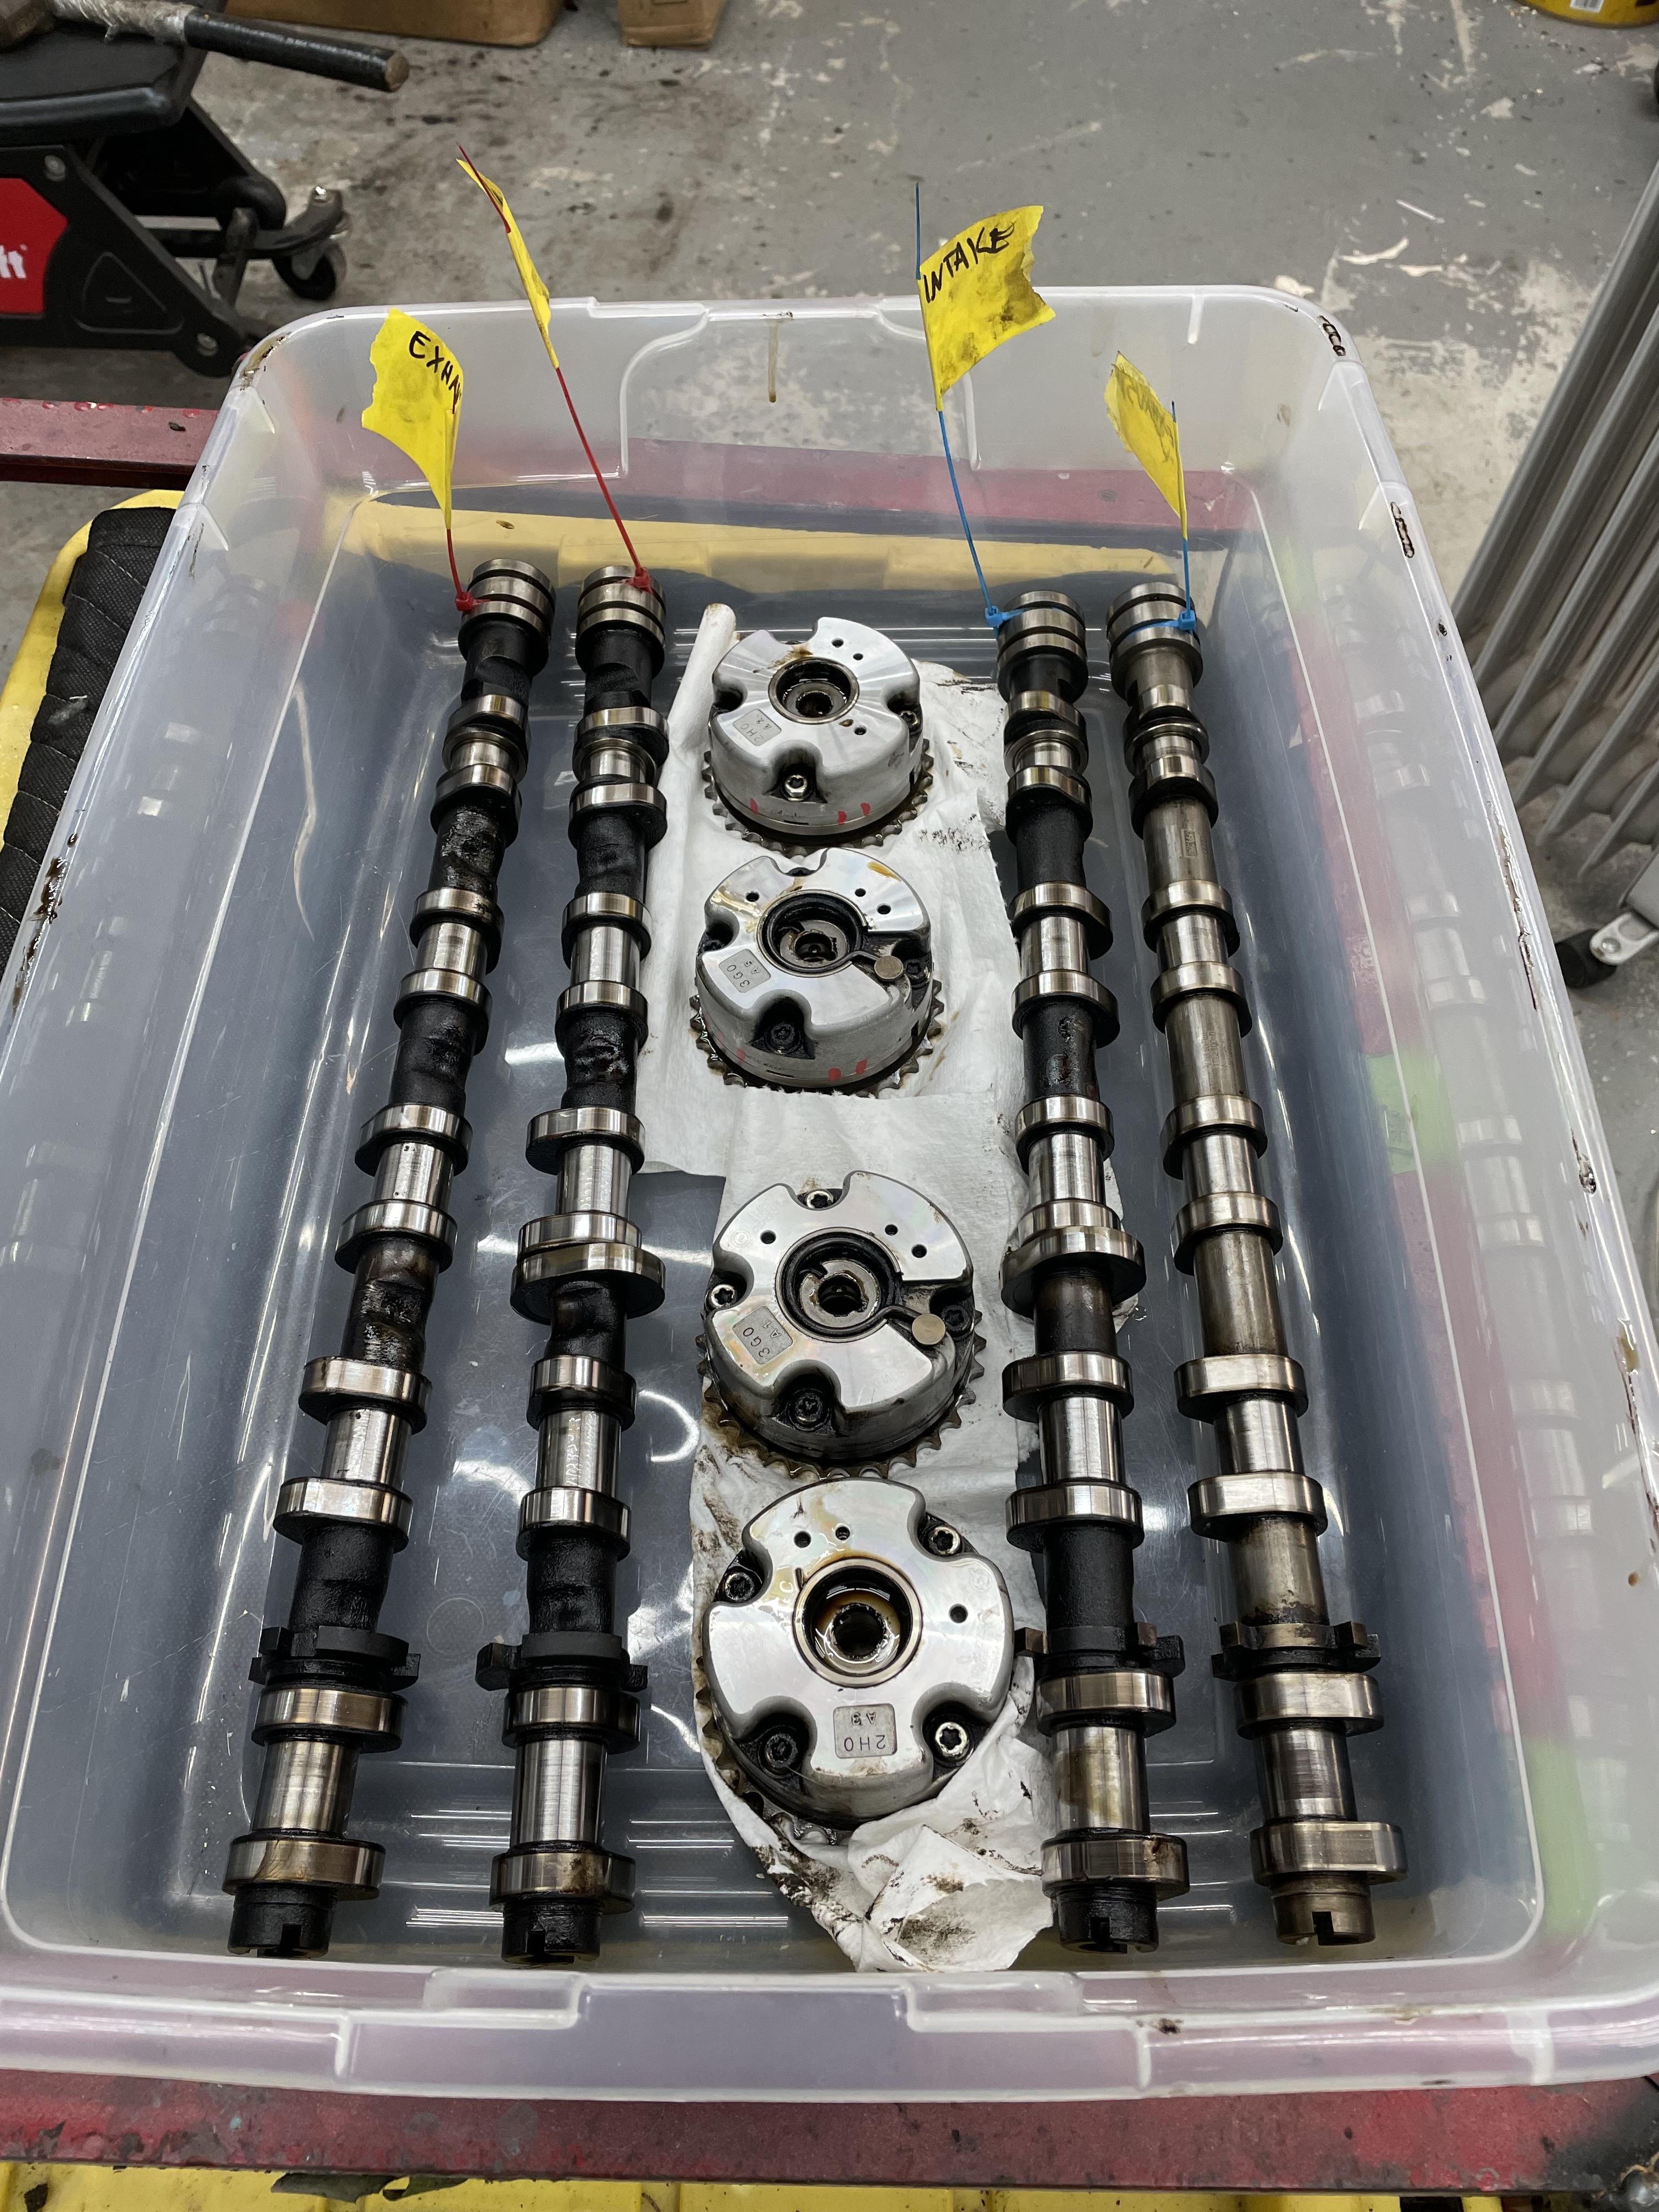
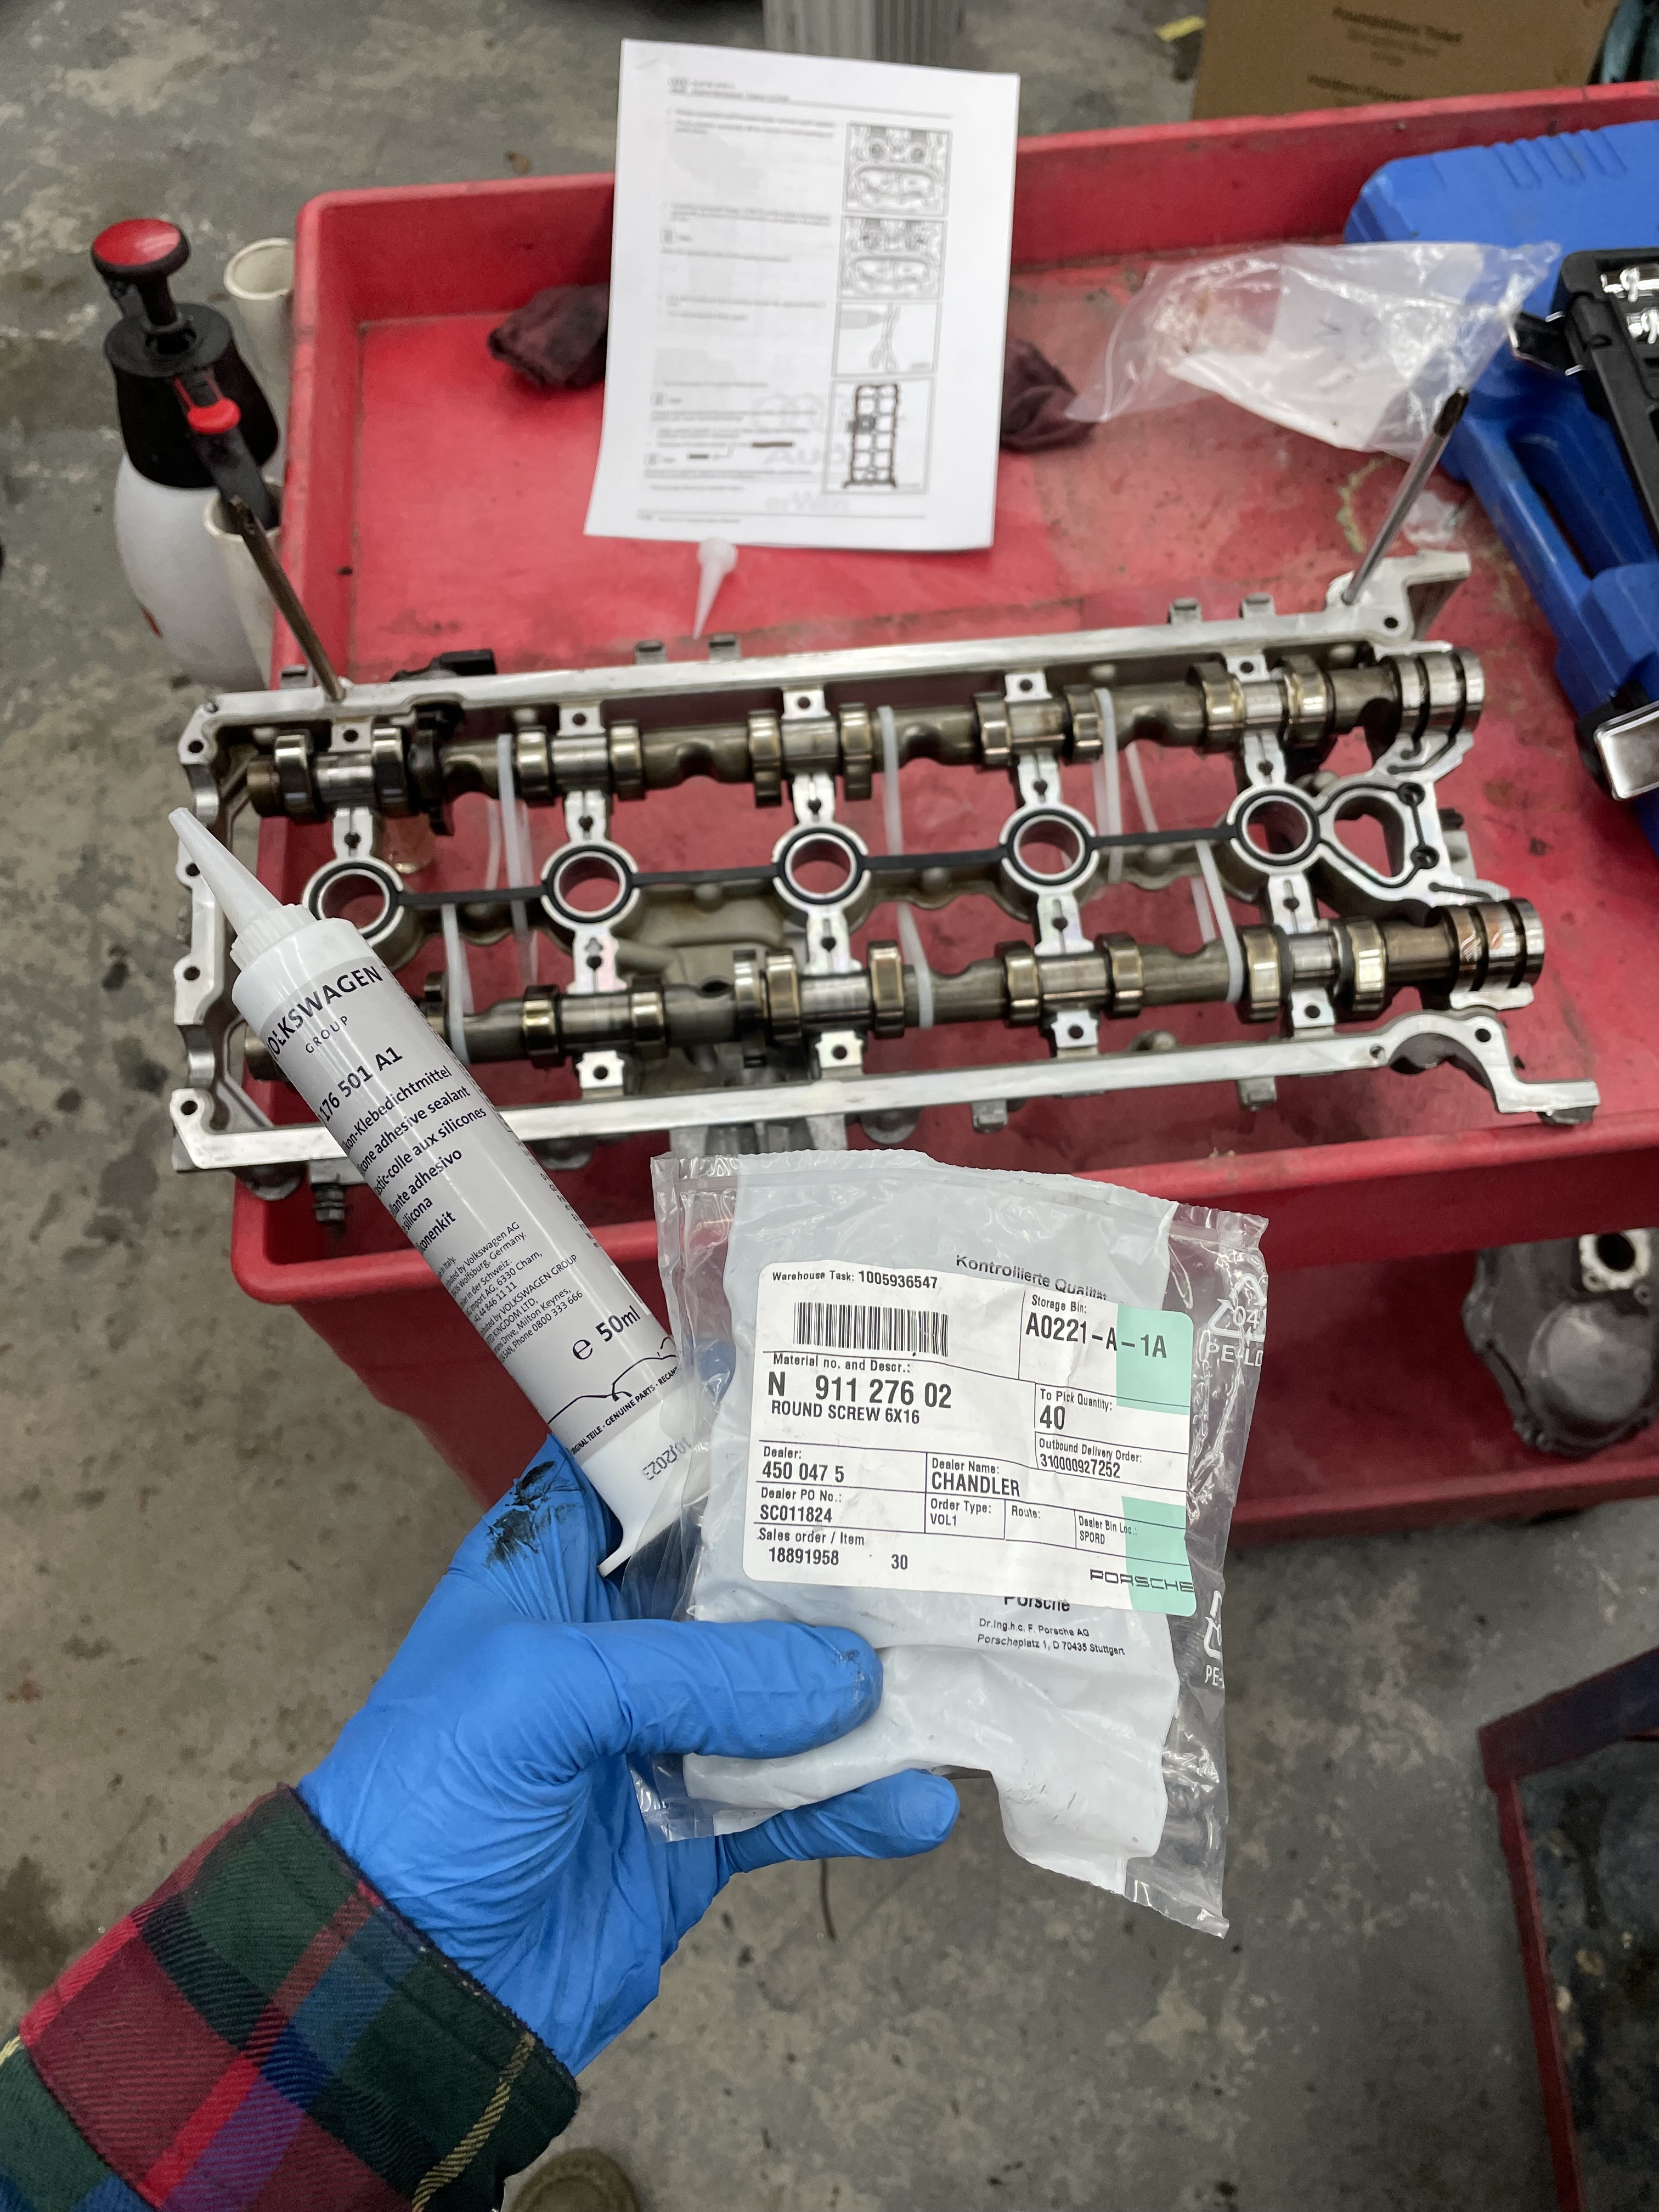
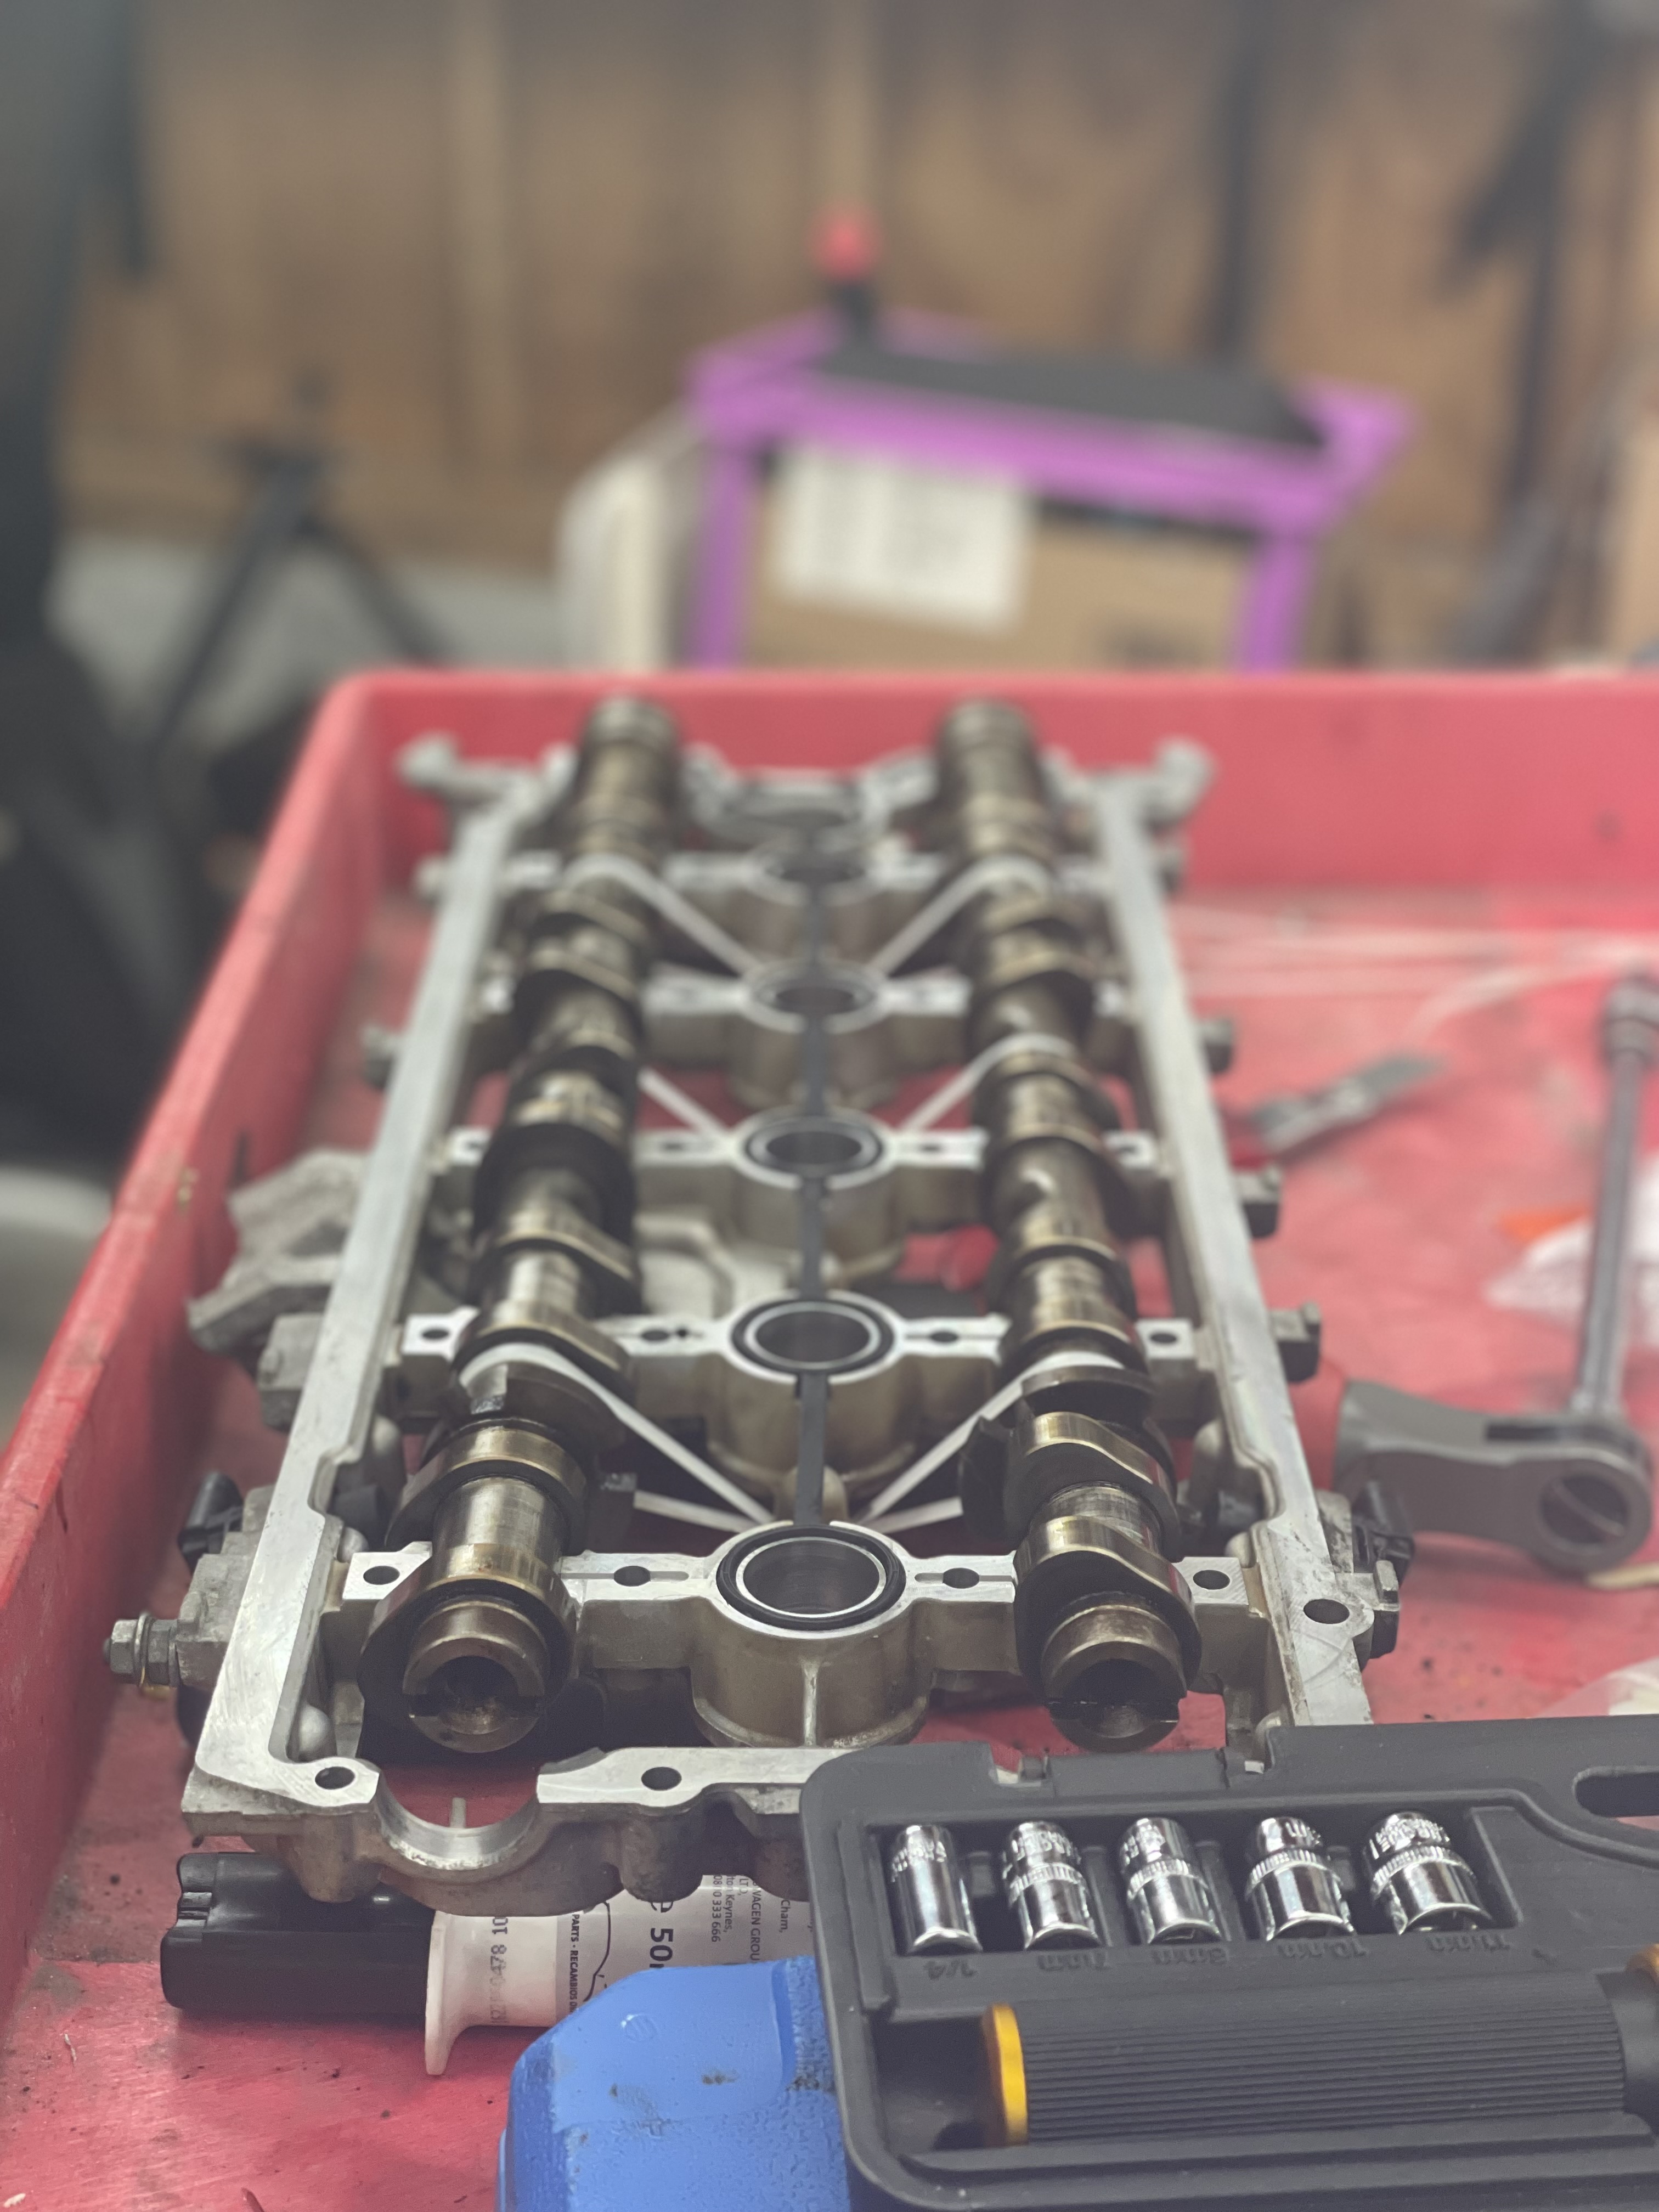
After ultrasonic cleaning rockers and hand cleaning heads, it was time to put the cam plates back on. I locked the cams in place with the tool, and used the zip tie method to hold cams onto the plate. Then nervously laid 2.5mm beads of VAG sealant in the 3 specc’d locations. I used 2 large phillips screwdrivers in the alignment holes for placement to the head. Shimmied down and then added the new hardware, hand tightening then waiting 30 minutes, and finally the 4 stage torquing sequence to 8nm+90. That was fun.
Next up, reassembling the rear of the motor, timing.
1 Like
Nice! That actually does look fun!
Super fun thread. Great work. Looking forward to watching this develop
1 Like
Inspiring!
I have started to tear into my S6 and preparing for the engine drop in my gravel driveway!
The Erwin manuals are a must!
1 Like
Awesome. It is a lot of time and patience, but it will be a joy to drive once you are done.
My engine has been great and has not developed any leaks.
1 Like
Crazy how a little bit of grinding and acetone make these rear timing covers weld up so nice and easy… thank God it’s not magnesium!!
I like how you used a slug vs me sitting there for 5 minutes filling it in with wire LOL.
Came out great dude!
1 Like
Wow dude I’m glad your timing cover didnt turn into a bacon strip with all the heat from filling the hole haha
A very condensed overview of installing the rear timing cover yesterday. One of the 6 internal bolts that come down through the head was stripped, and of course I didn’t know until I was going through the torque sequence. I added some JB weld to the threads, torqued it and let it be. Not the most favorable solution but should be fine. Worse case, timing goes on this motor and I need to pull the cover off, I can map gas it and impact it out.

I’m tightening up the cam phasers this weekend and throwing on the upper timing covers. Following that will be throwing ancillaries back on the block and a carbon clean. I scored a stage 3+ clutch off a turbo B7 RS4 for when I mate up the 0A3 trans.
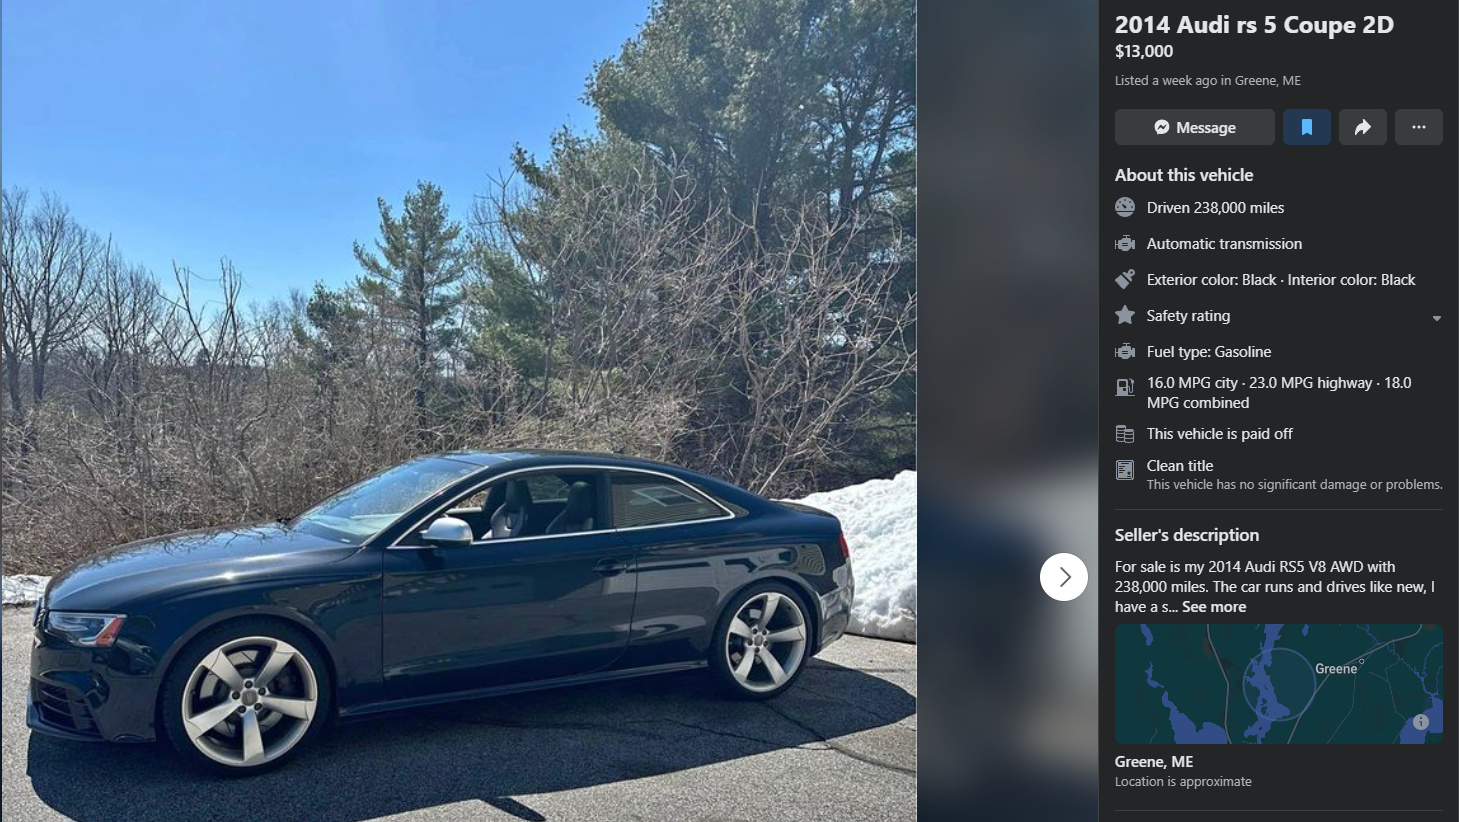
This high mile Rs5 came up locally that made me consider buying and pausing this project, but I think I would get bored and tear it apart anyway. Tempting though for 13k
Also got to show off the avant all stock at the New England Dustoff in Thompson, CT. Hopefully I can come back next year in the same car with a different powerplant.

Been enjoying driving this B5 as is, the 2.8 is slow but stout! About 100 miles left till I’m due for an oil change…so I’ll probably pull the motor then =]
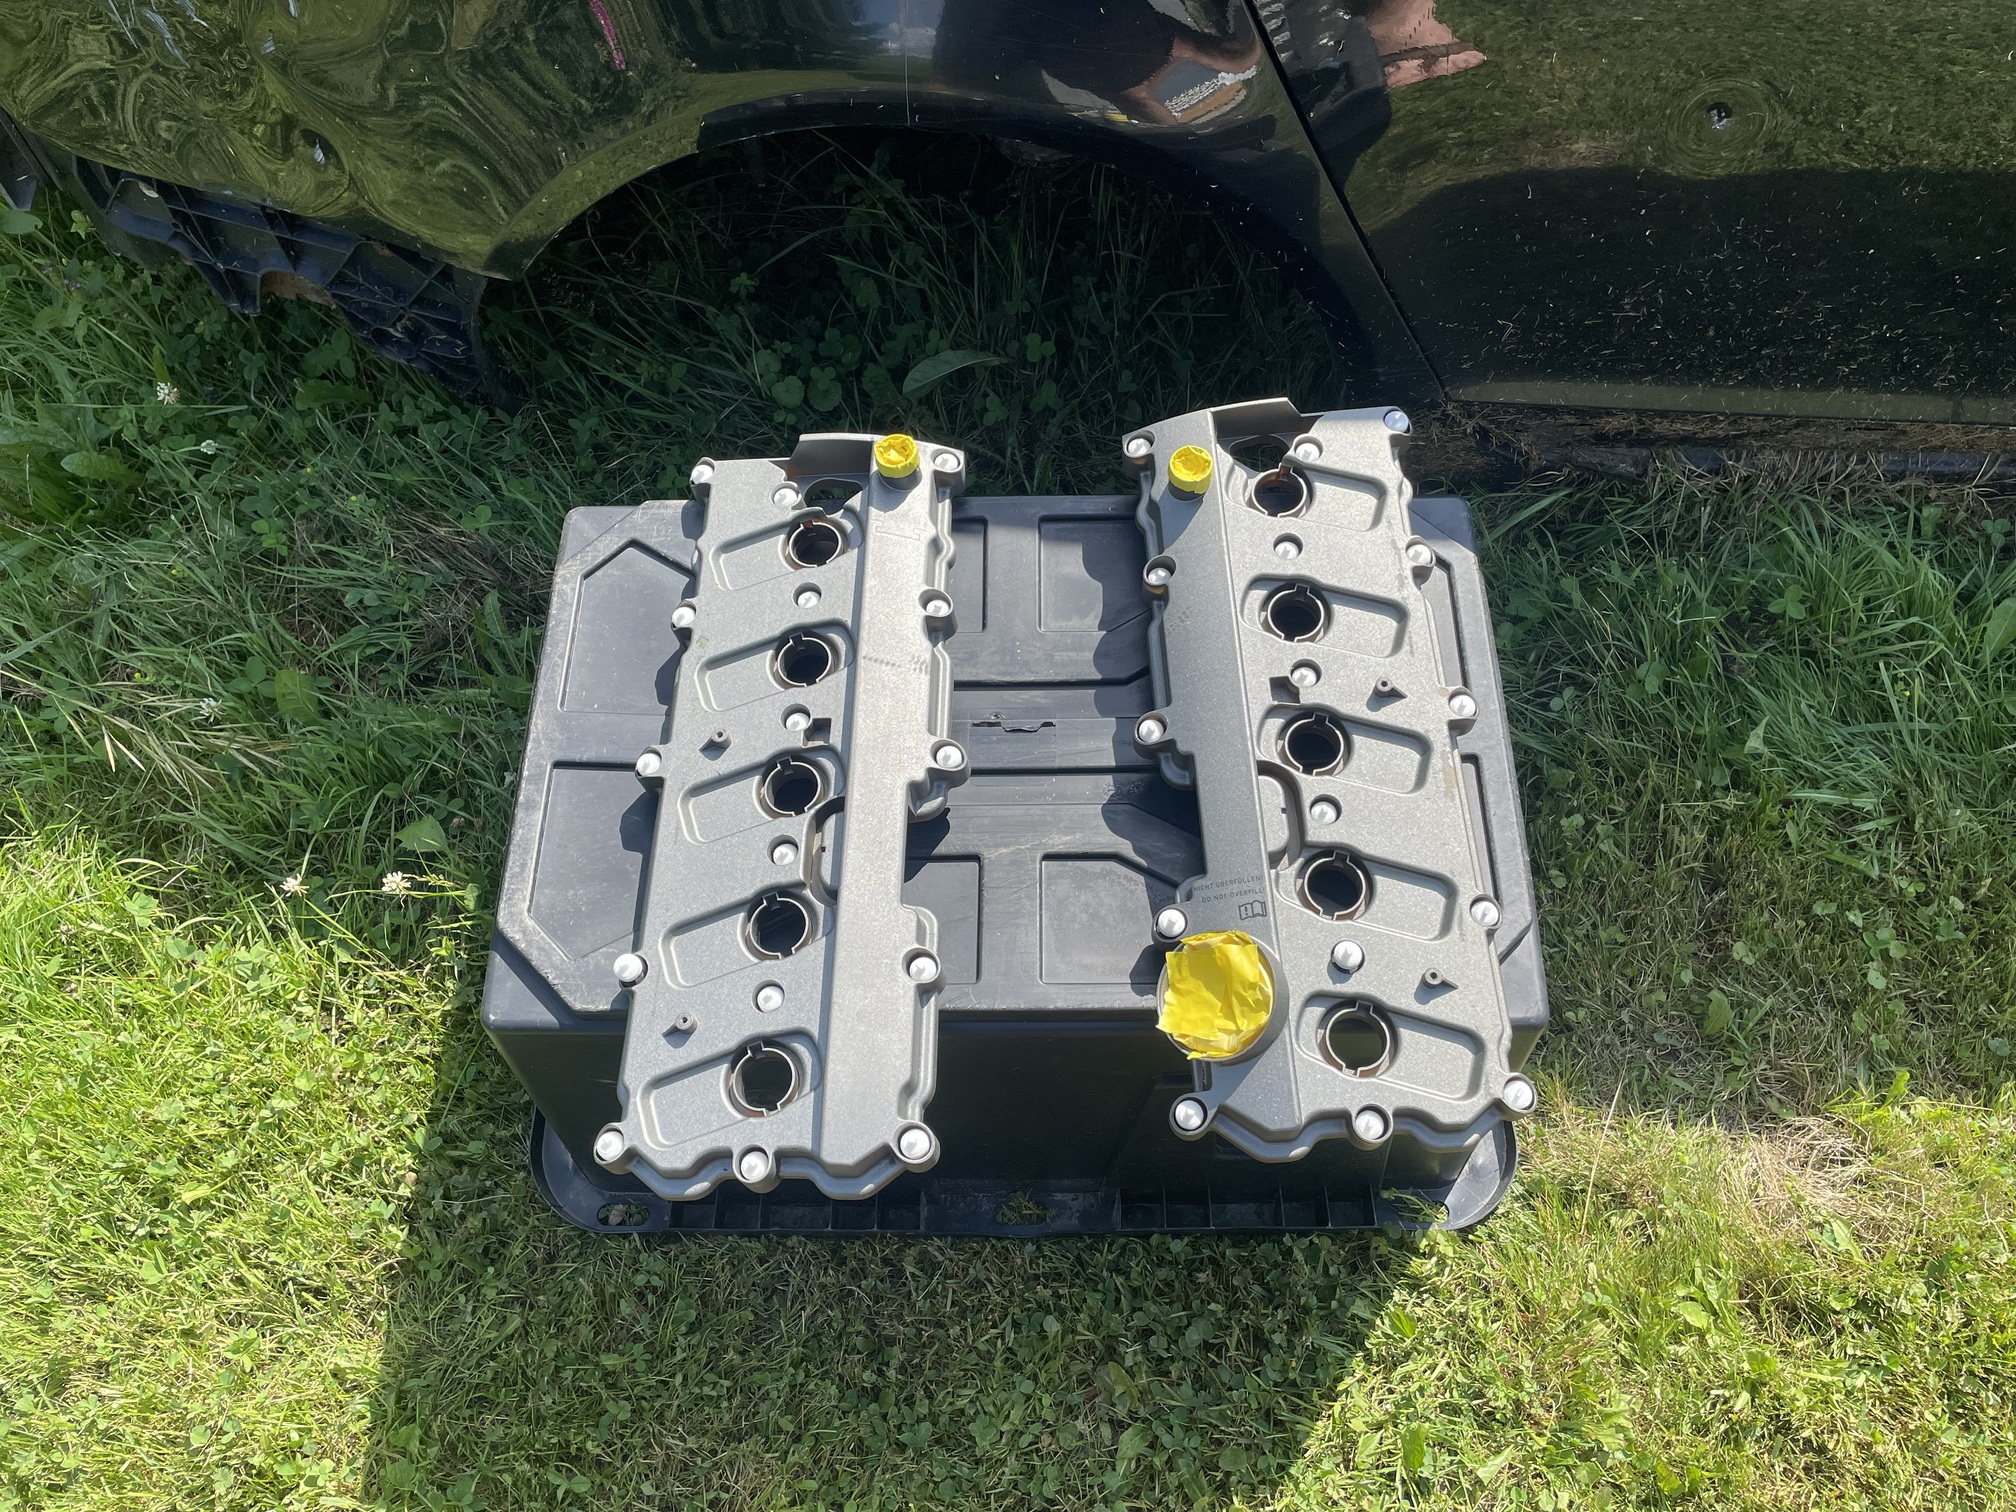
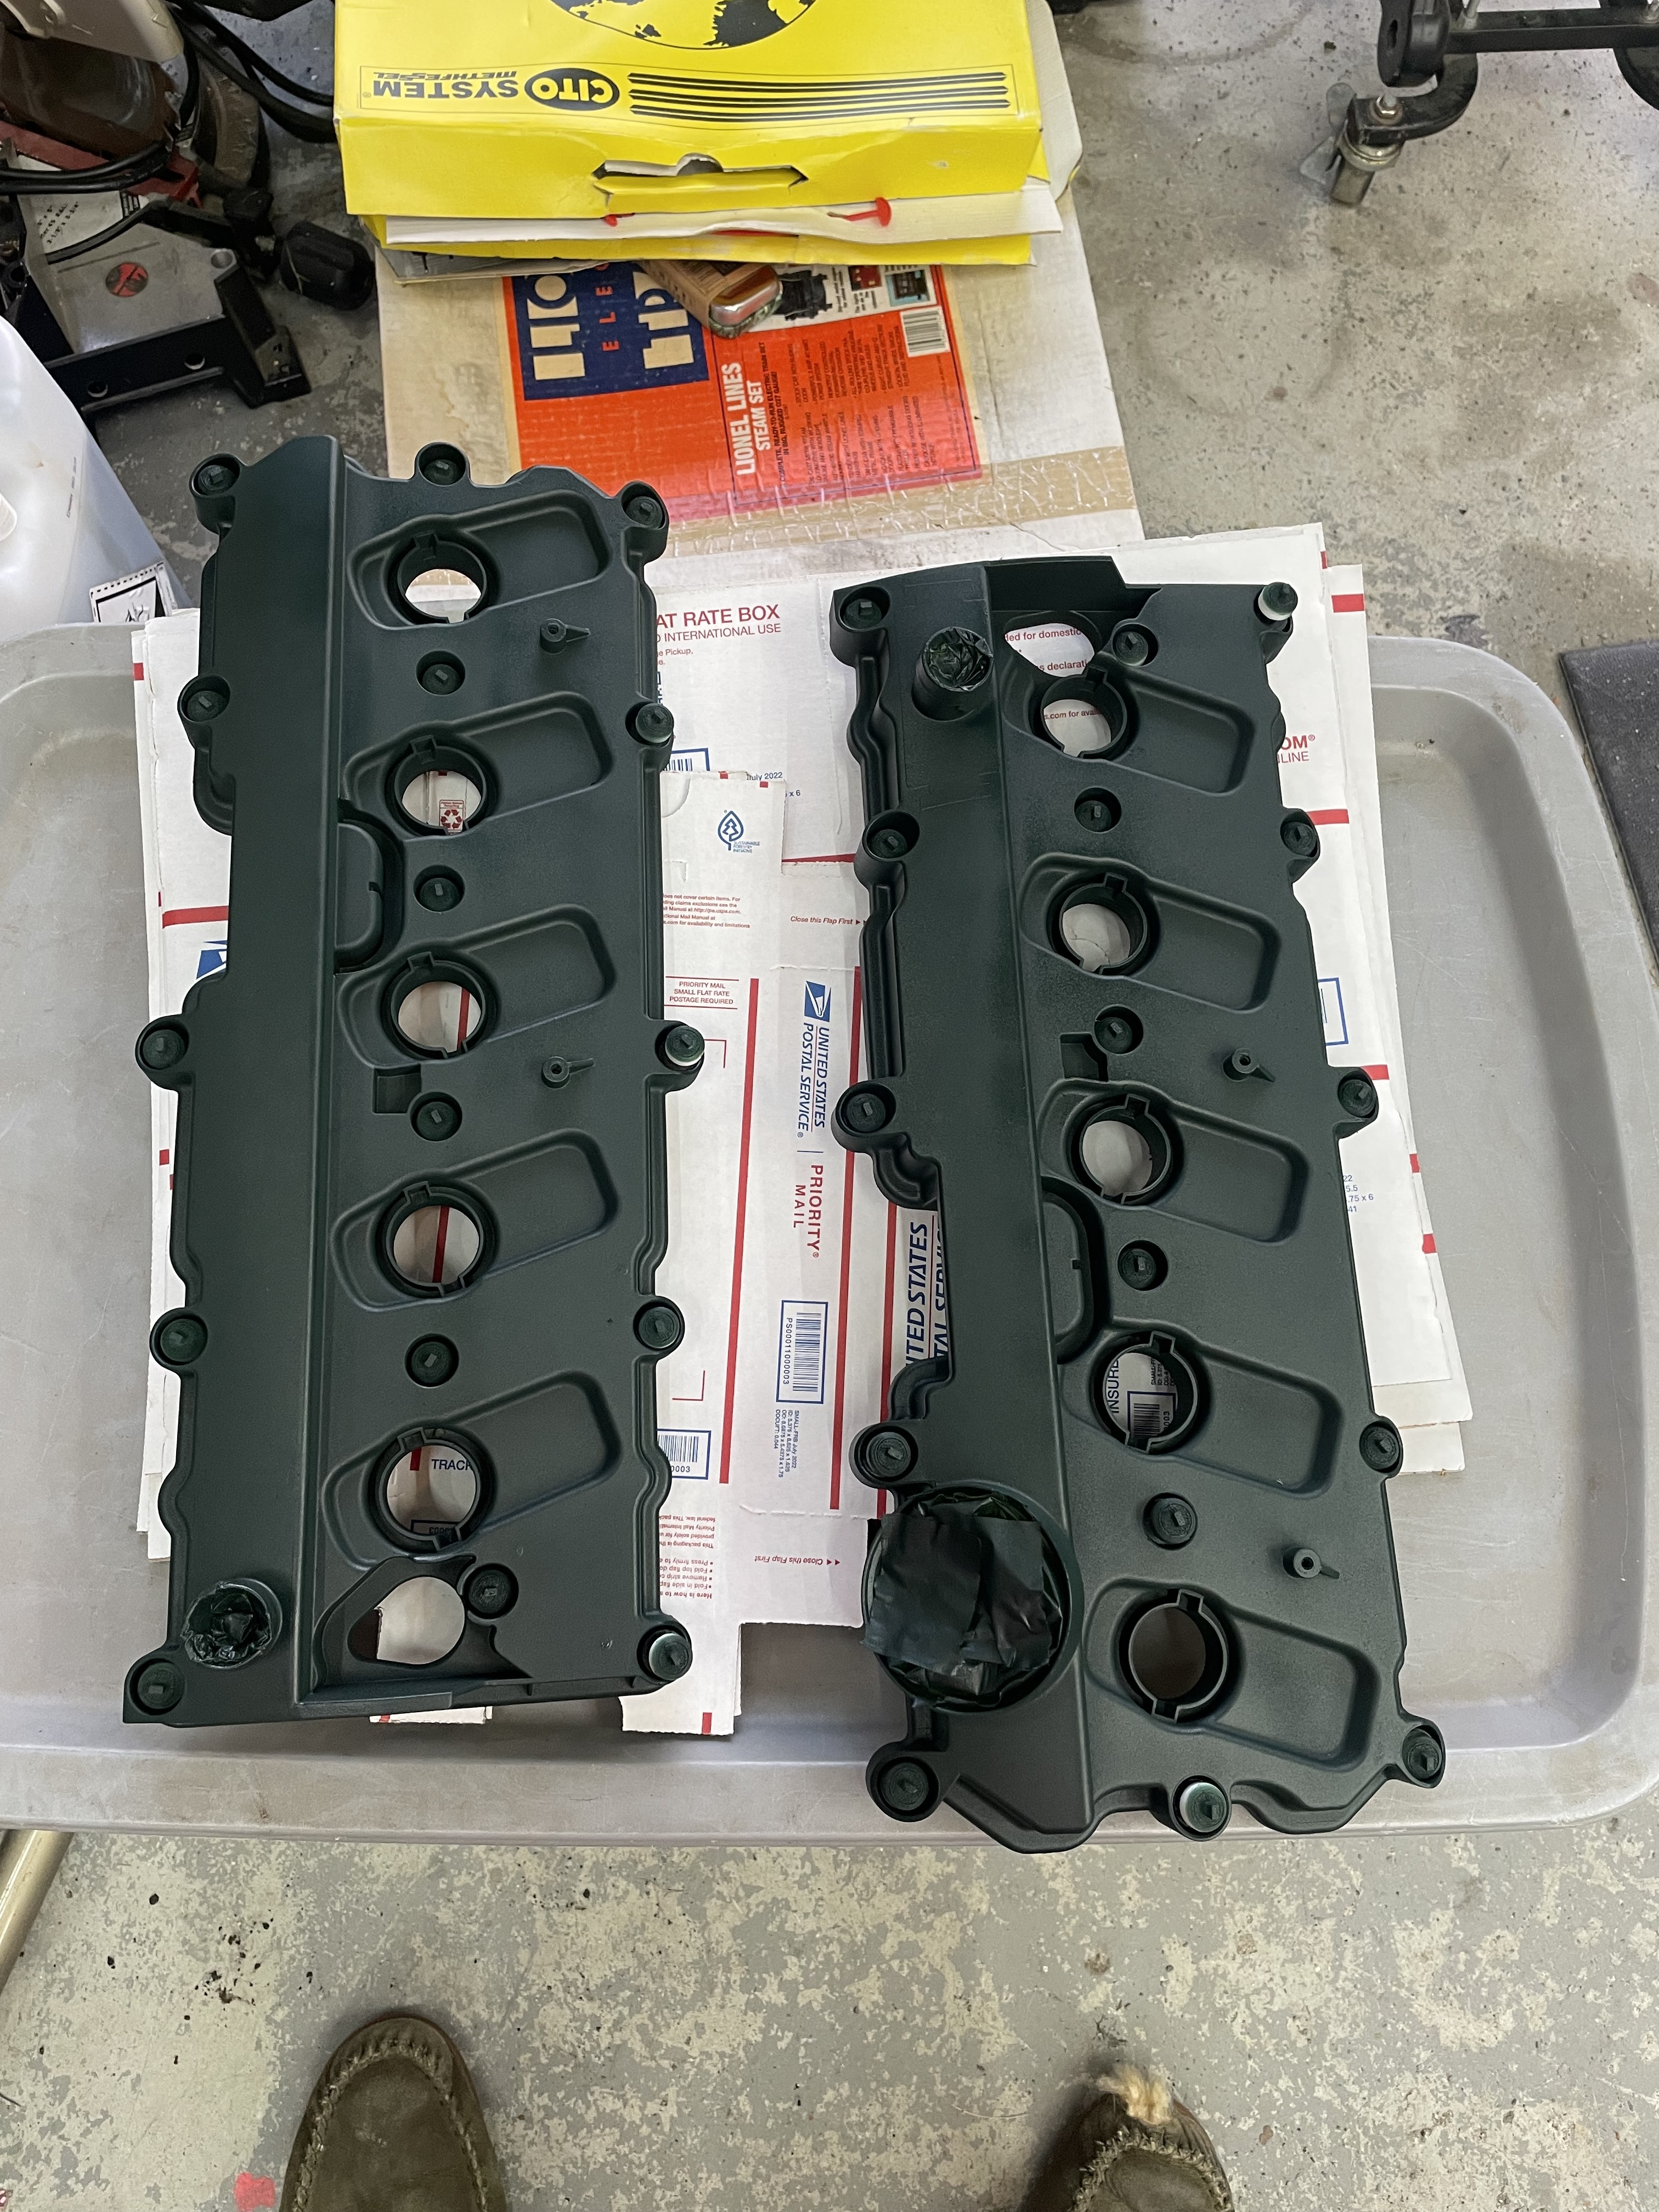
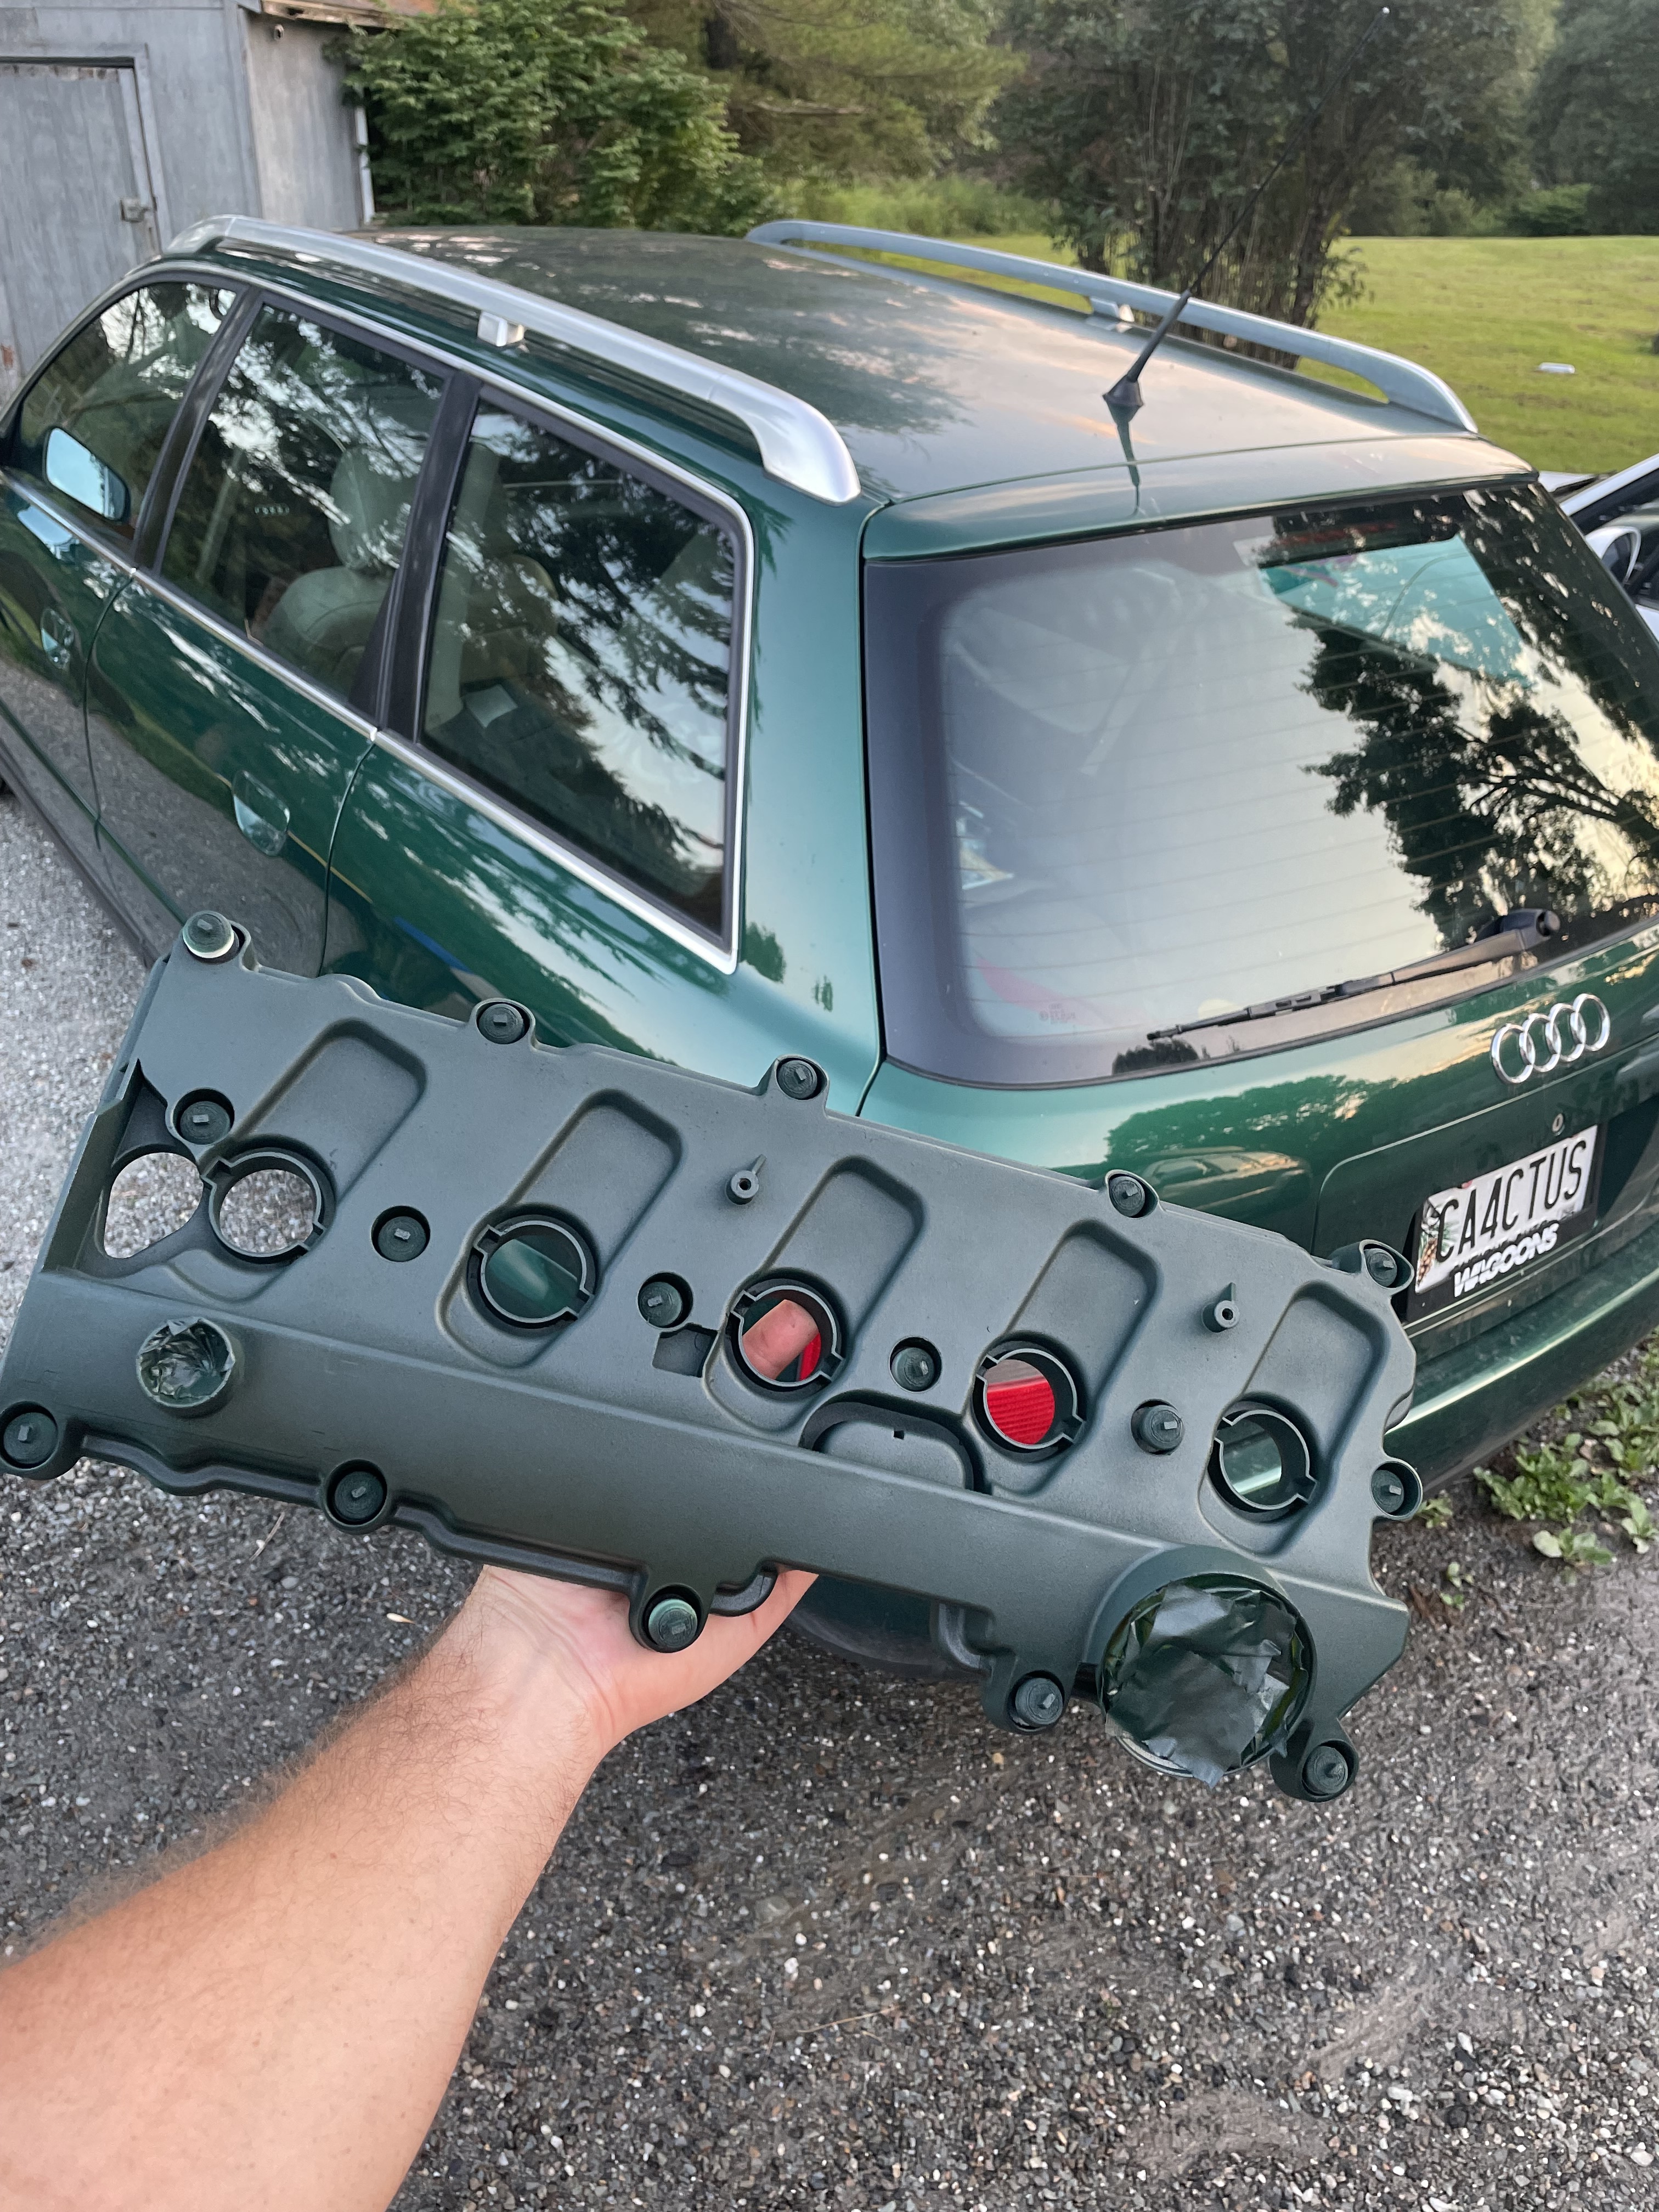
Painted the valve covers. I 3d Printed some caps for the torx bolt heads which saved me loads of time masking them off. This color is not at all what I was going for. Ugly but It’ll do through the build process. I’ll color match to the car when it actually runs.
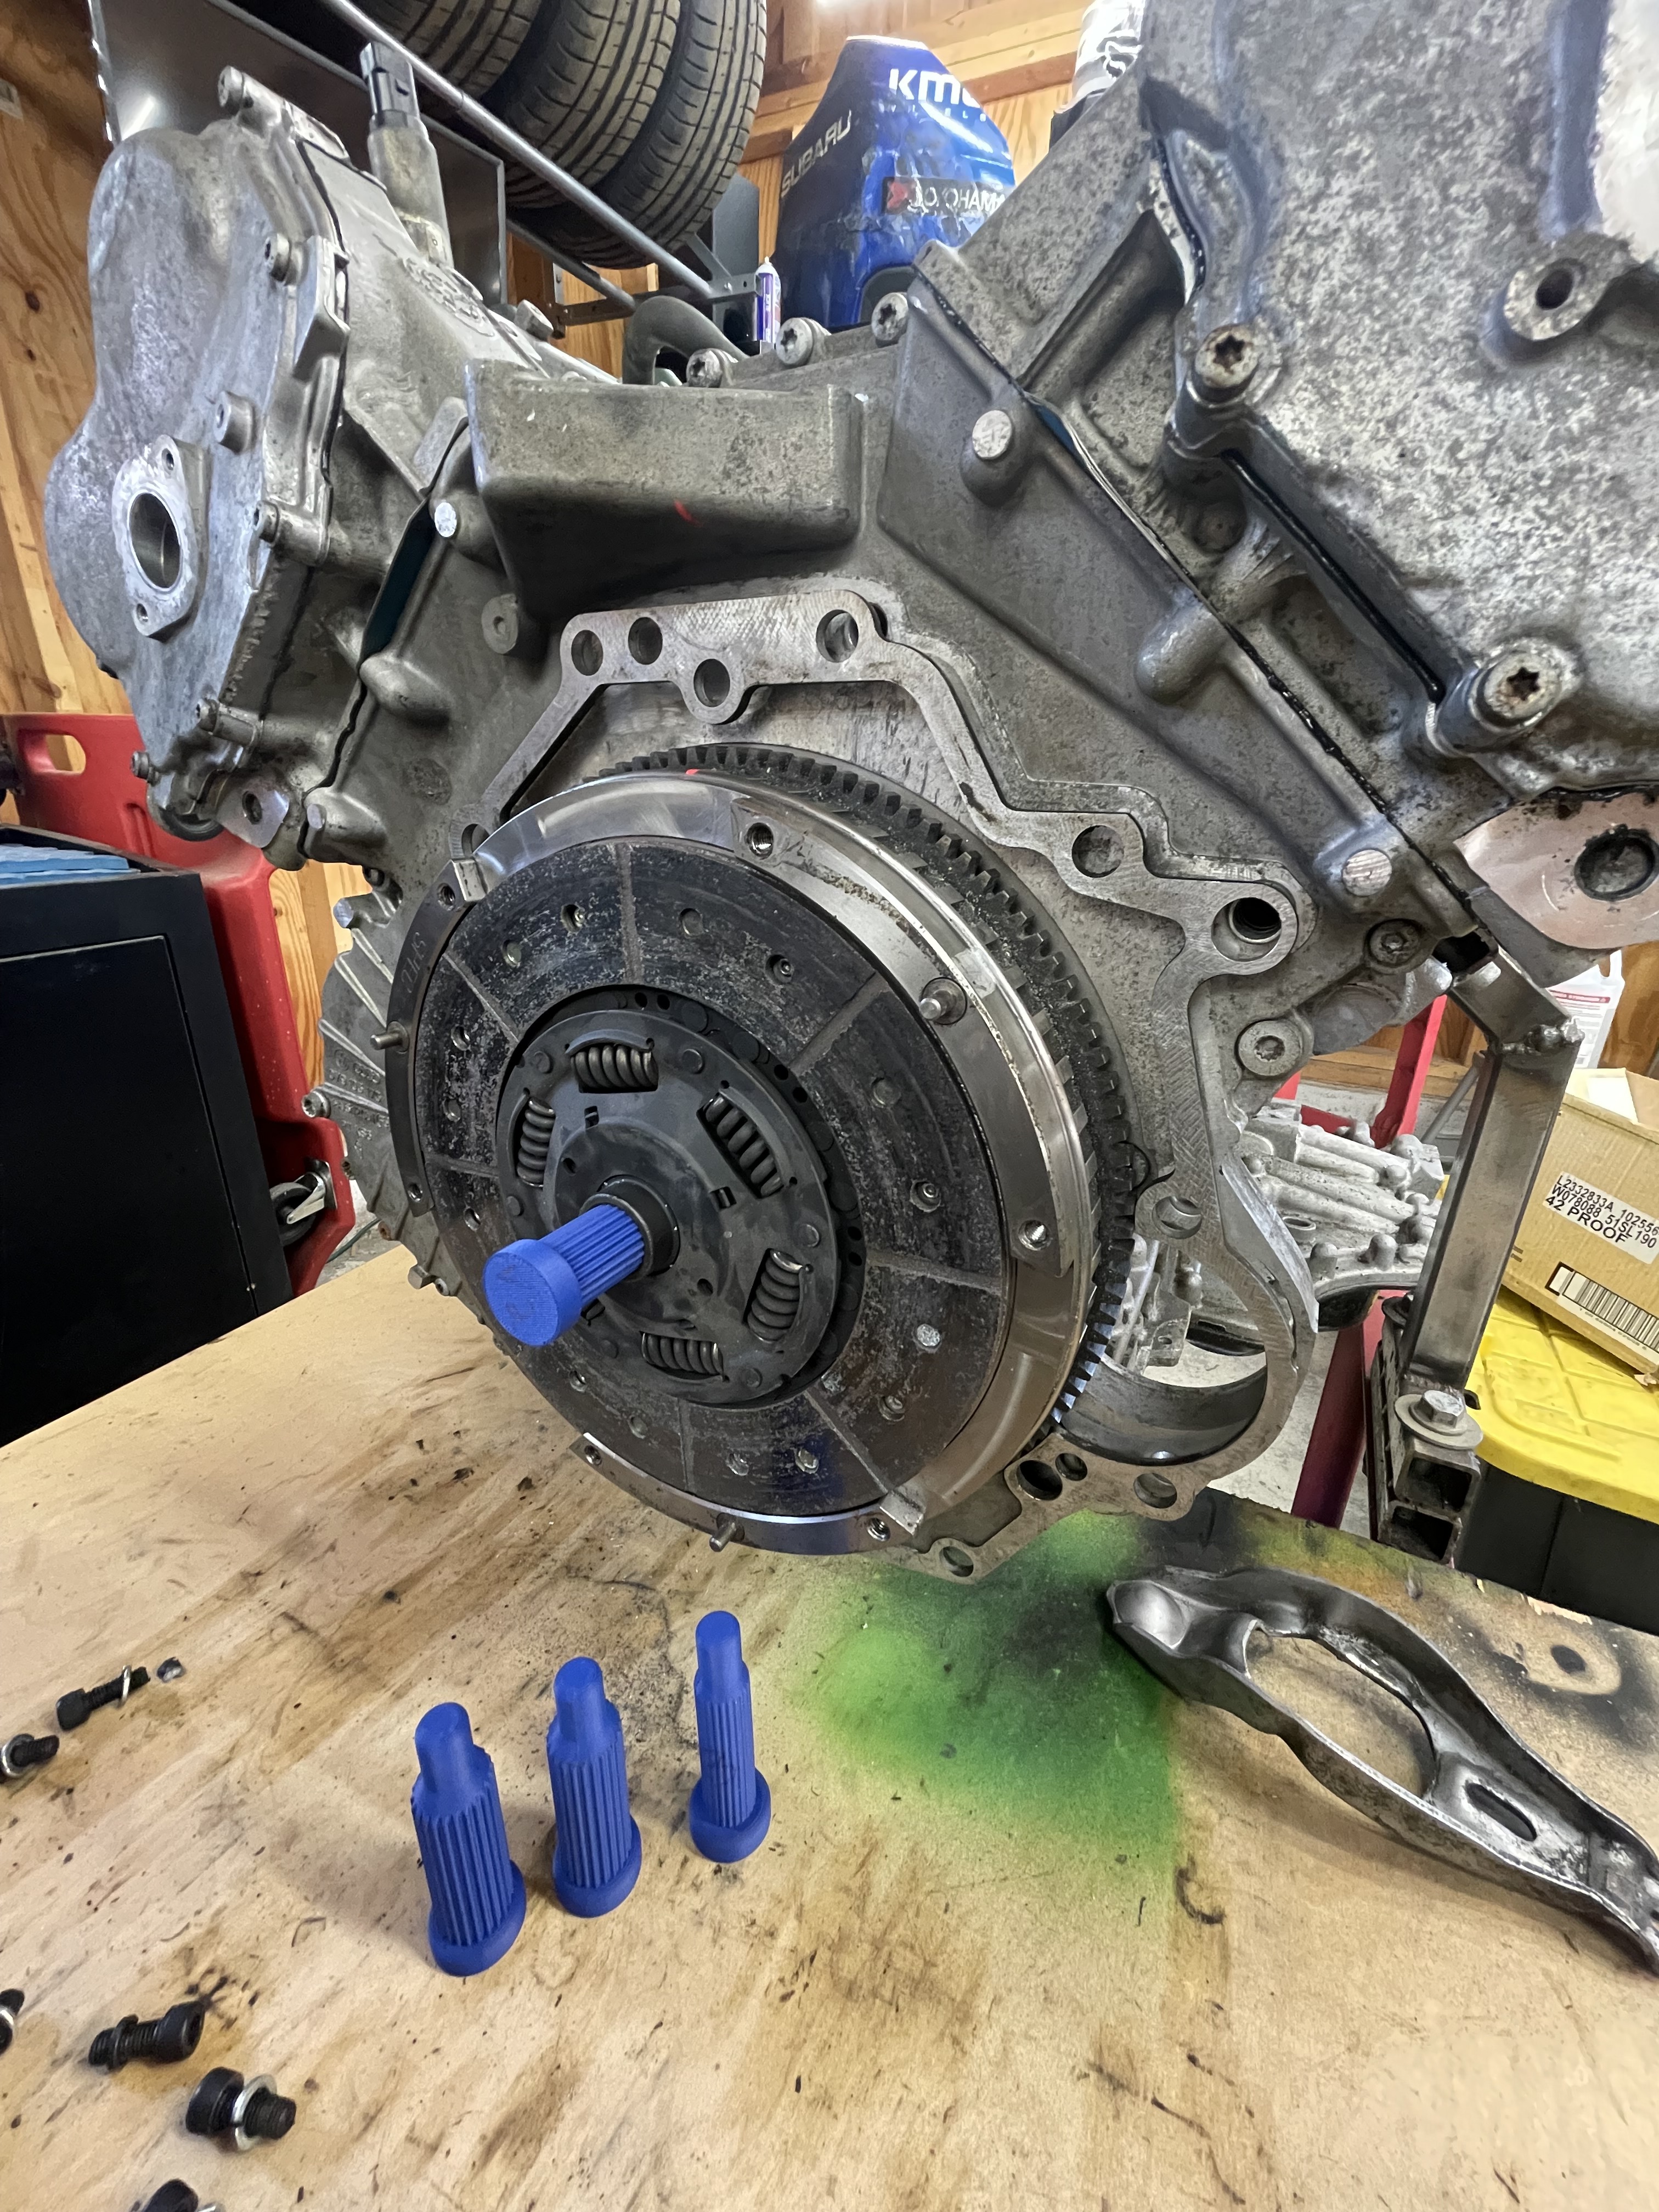
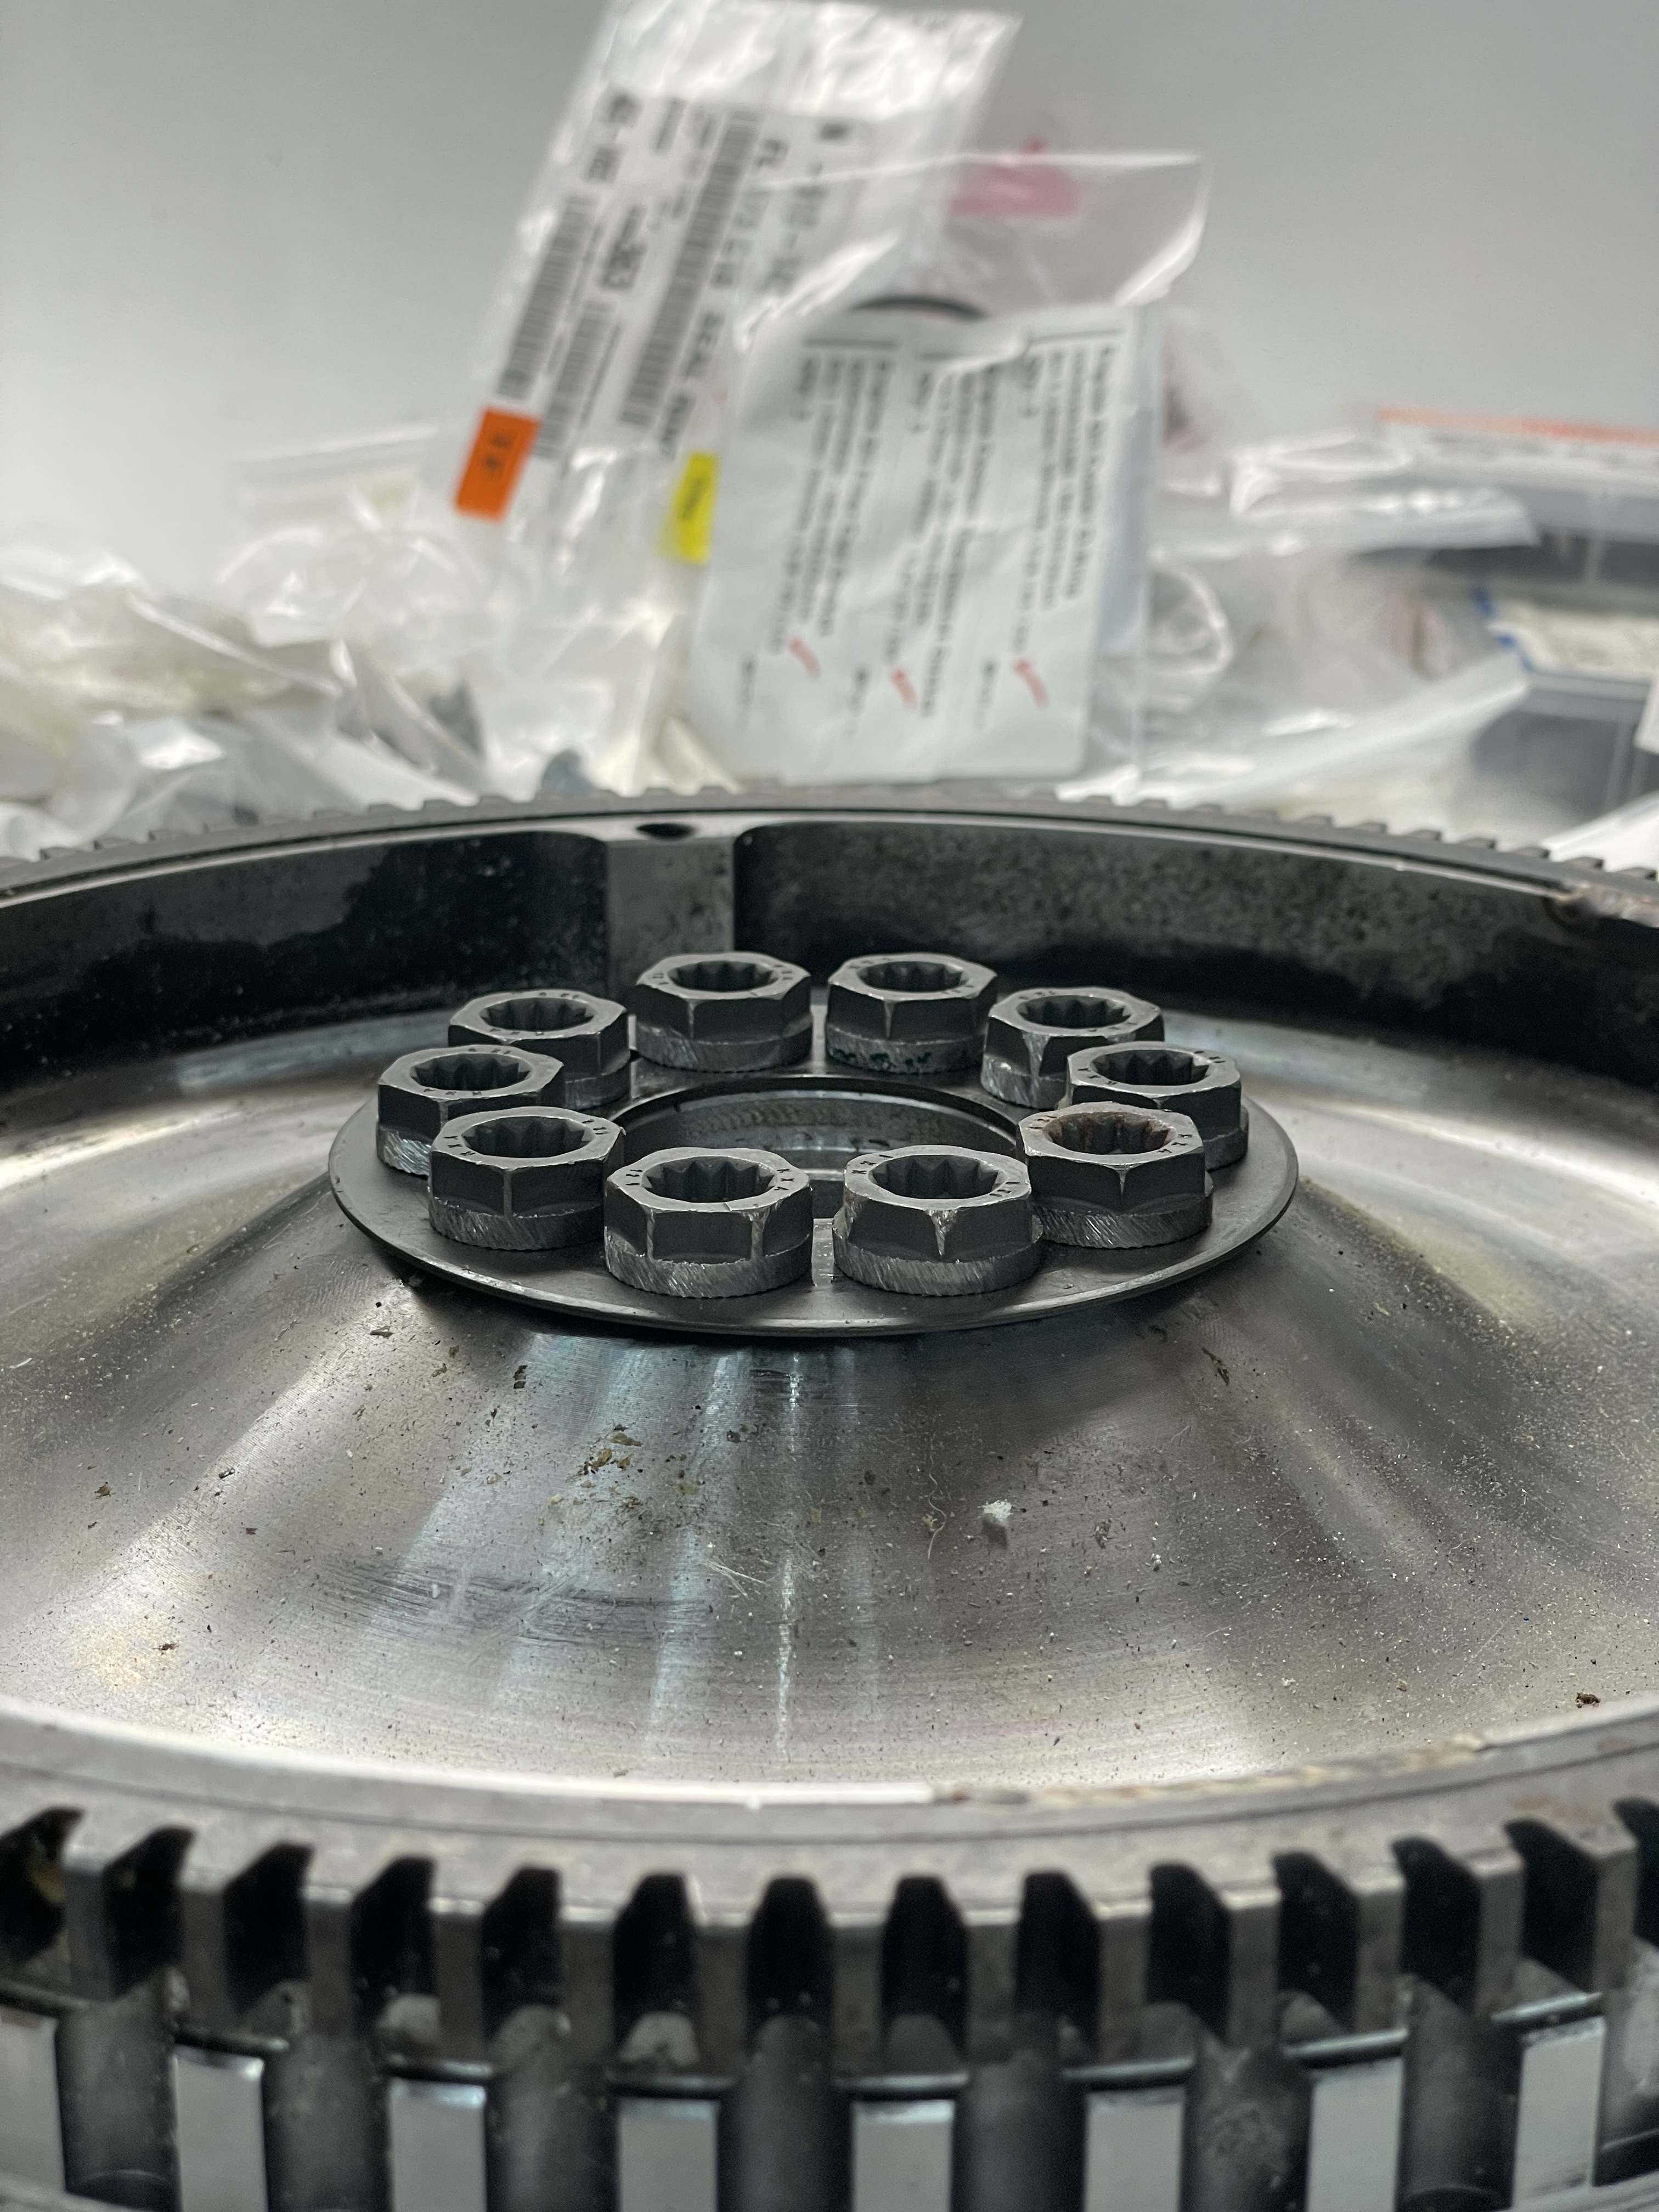
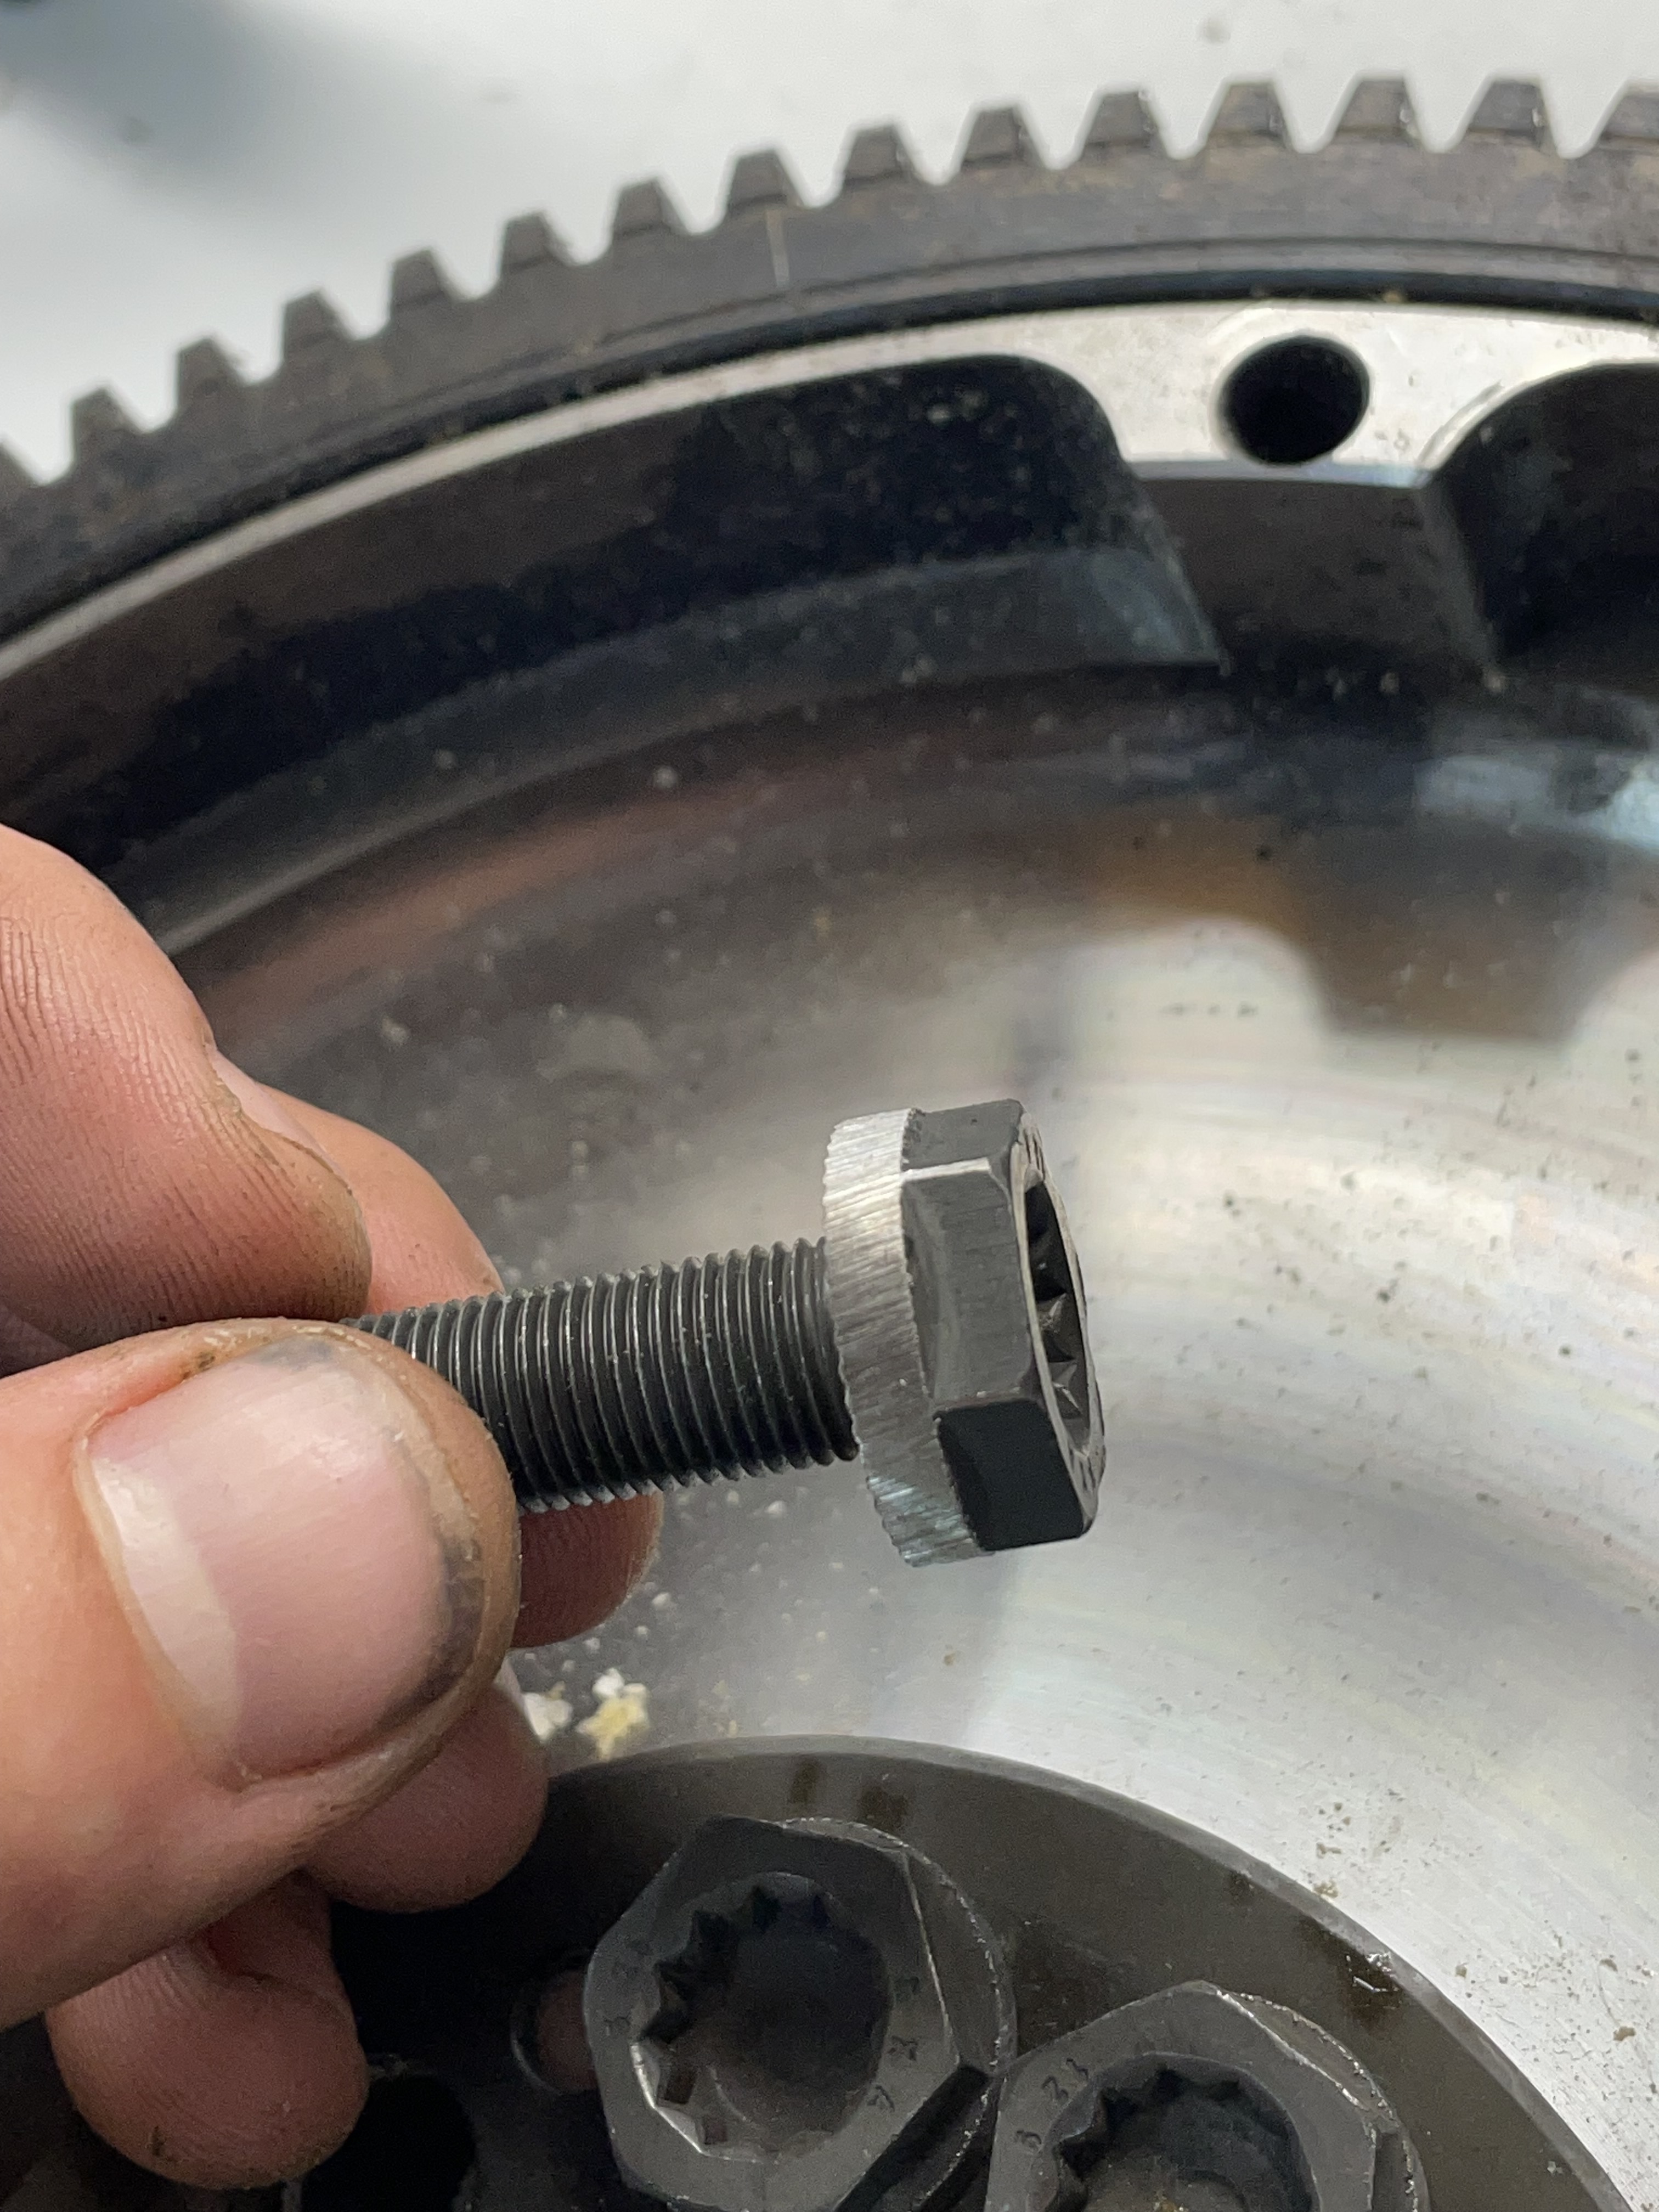
I picked up an RS4 stage2+ clutch and flywheel combo. ARP flywheel bolts I ordered were too short so I ended up sourcing some OEM 43mm long flywheel bolts. However the heads are too wide and intersect with the 10 bolt pattern. You can see in the pic below I have shaved a few down, and the overlapping ones are shown in the back. Im chucking the bolt up in a drill then angle grinding material off, trying to keep the heat low. These bolts are high grade so I don’t have concerns for their future (clutch dumps for days).
Had a major house flood so the garage has turned into a refugee area. Next update should include some transmission case welding, an 0A3 mated to a V10, and maybe a pulled 2.8
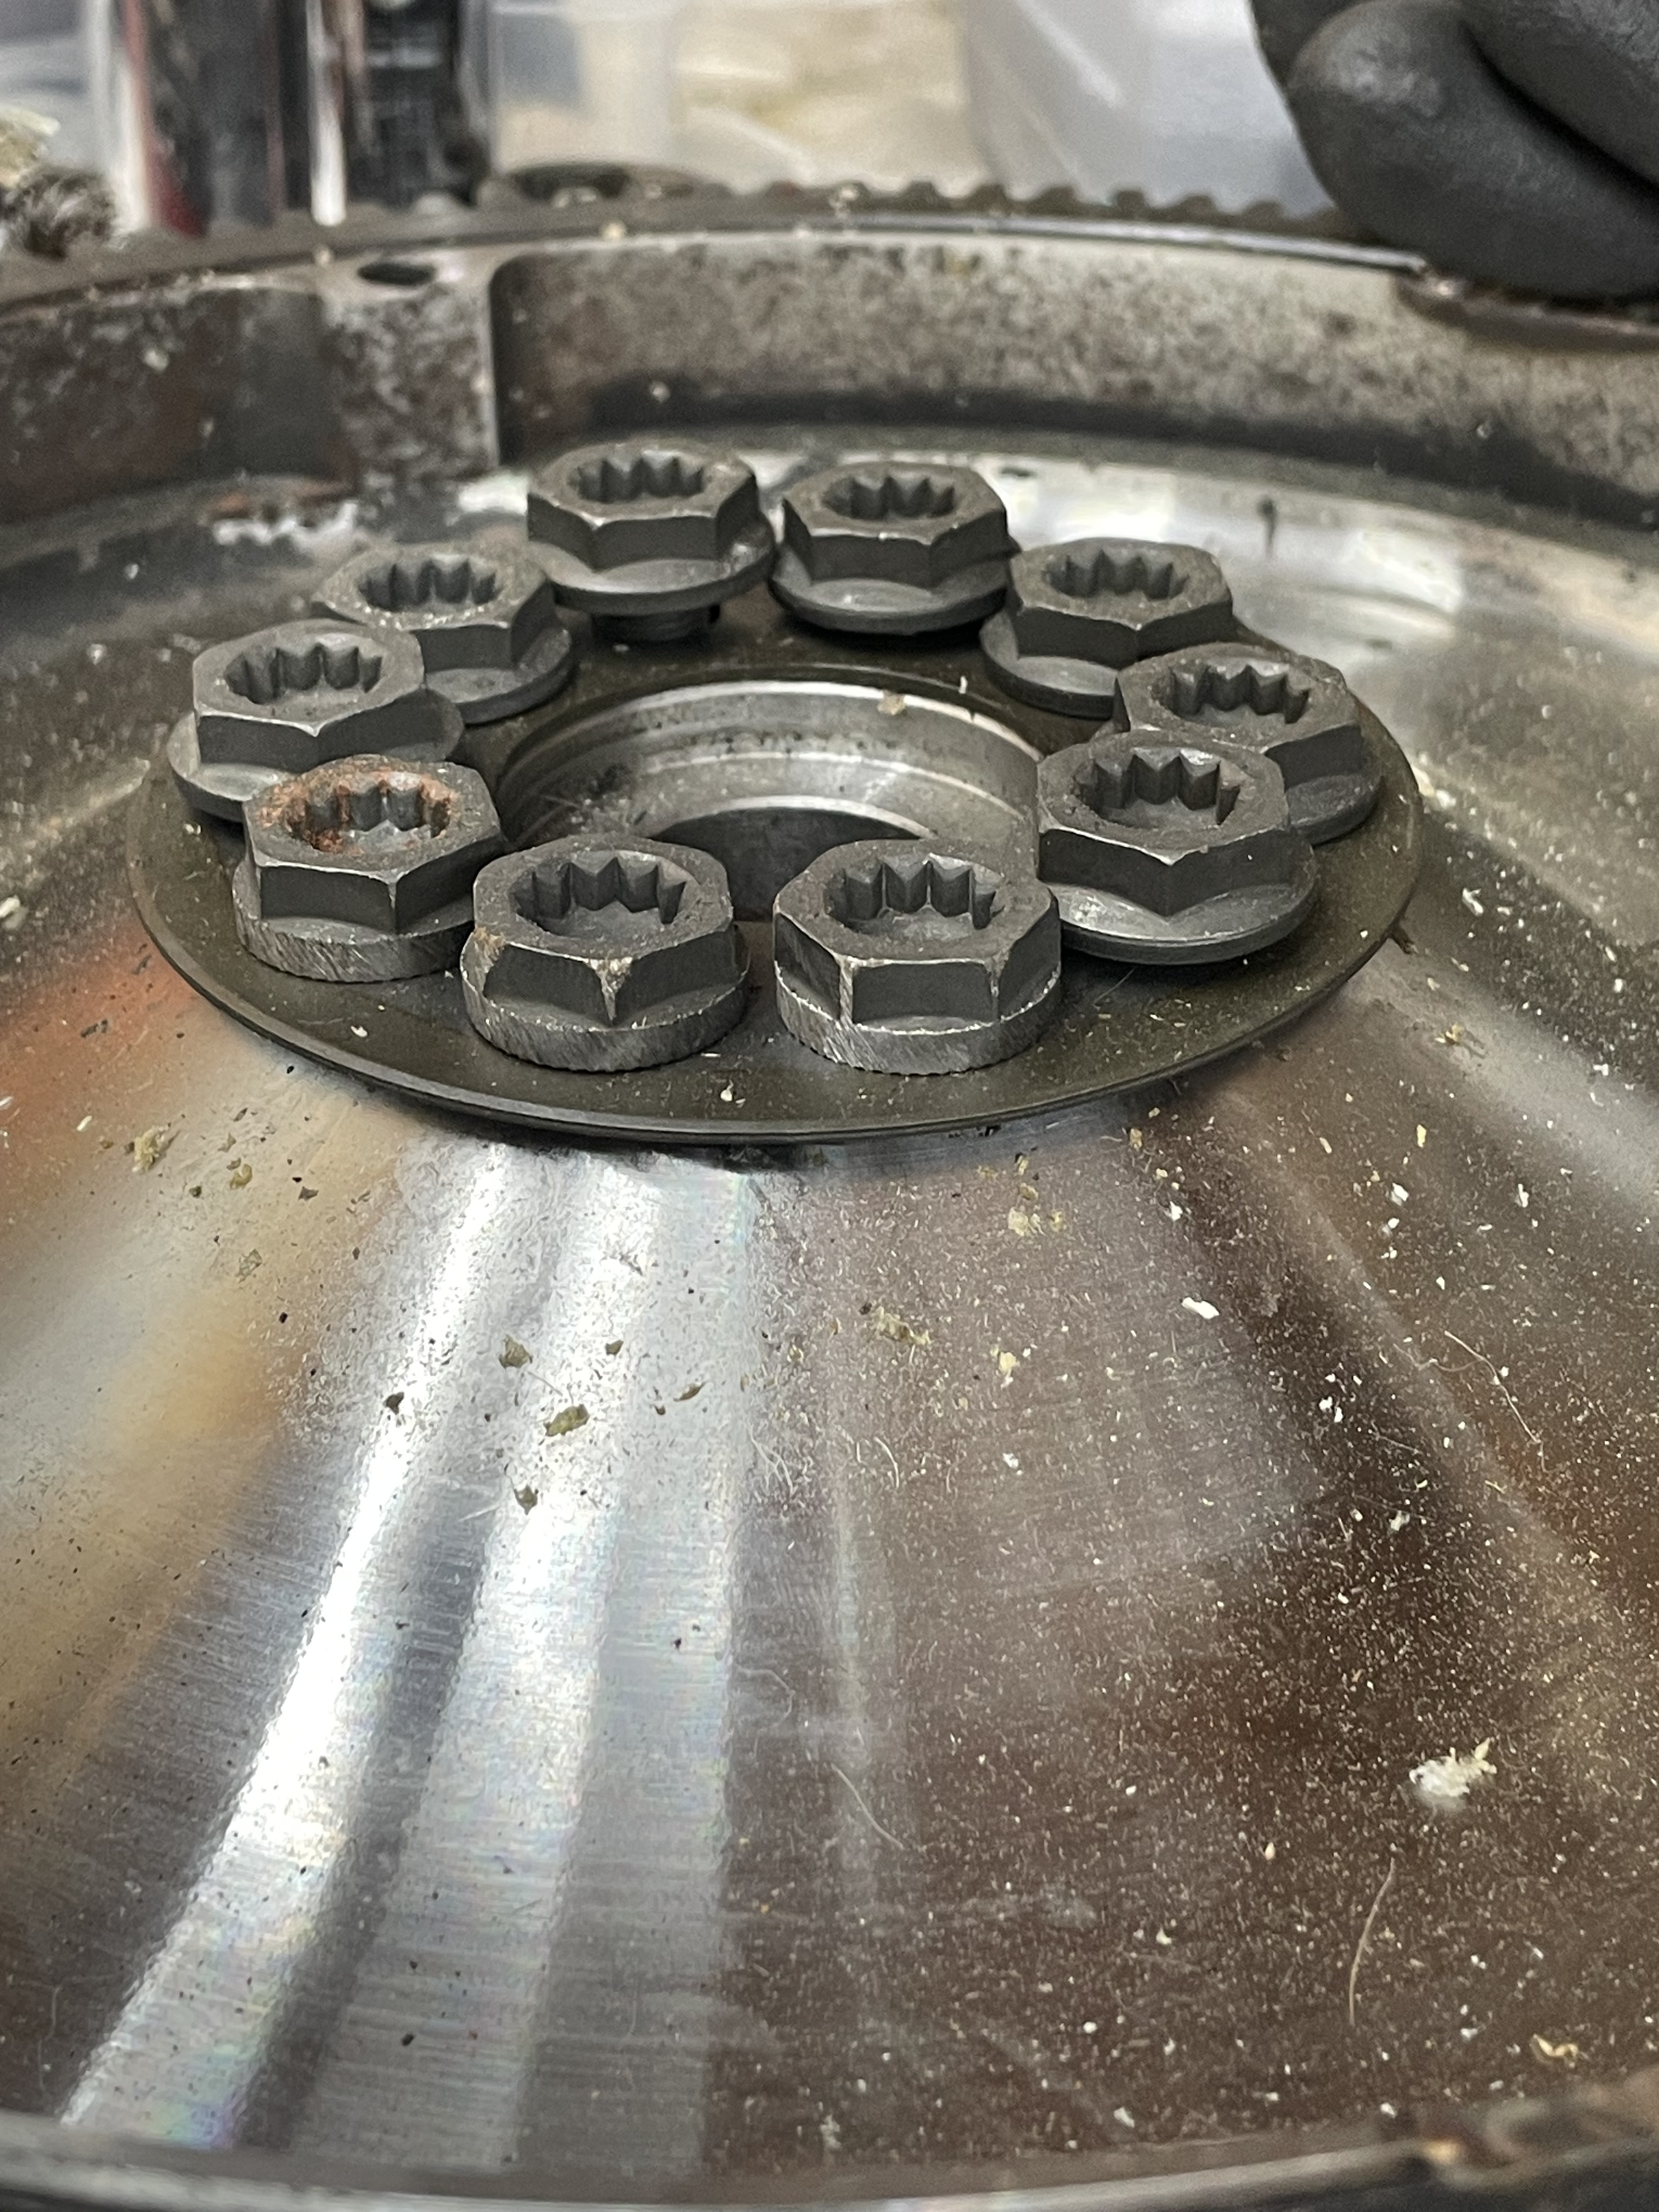
All 10 flywheel bolts are now flush!
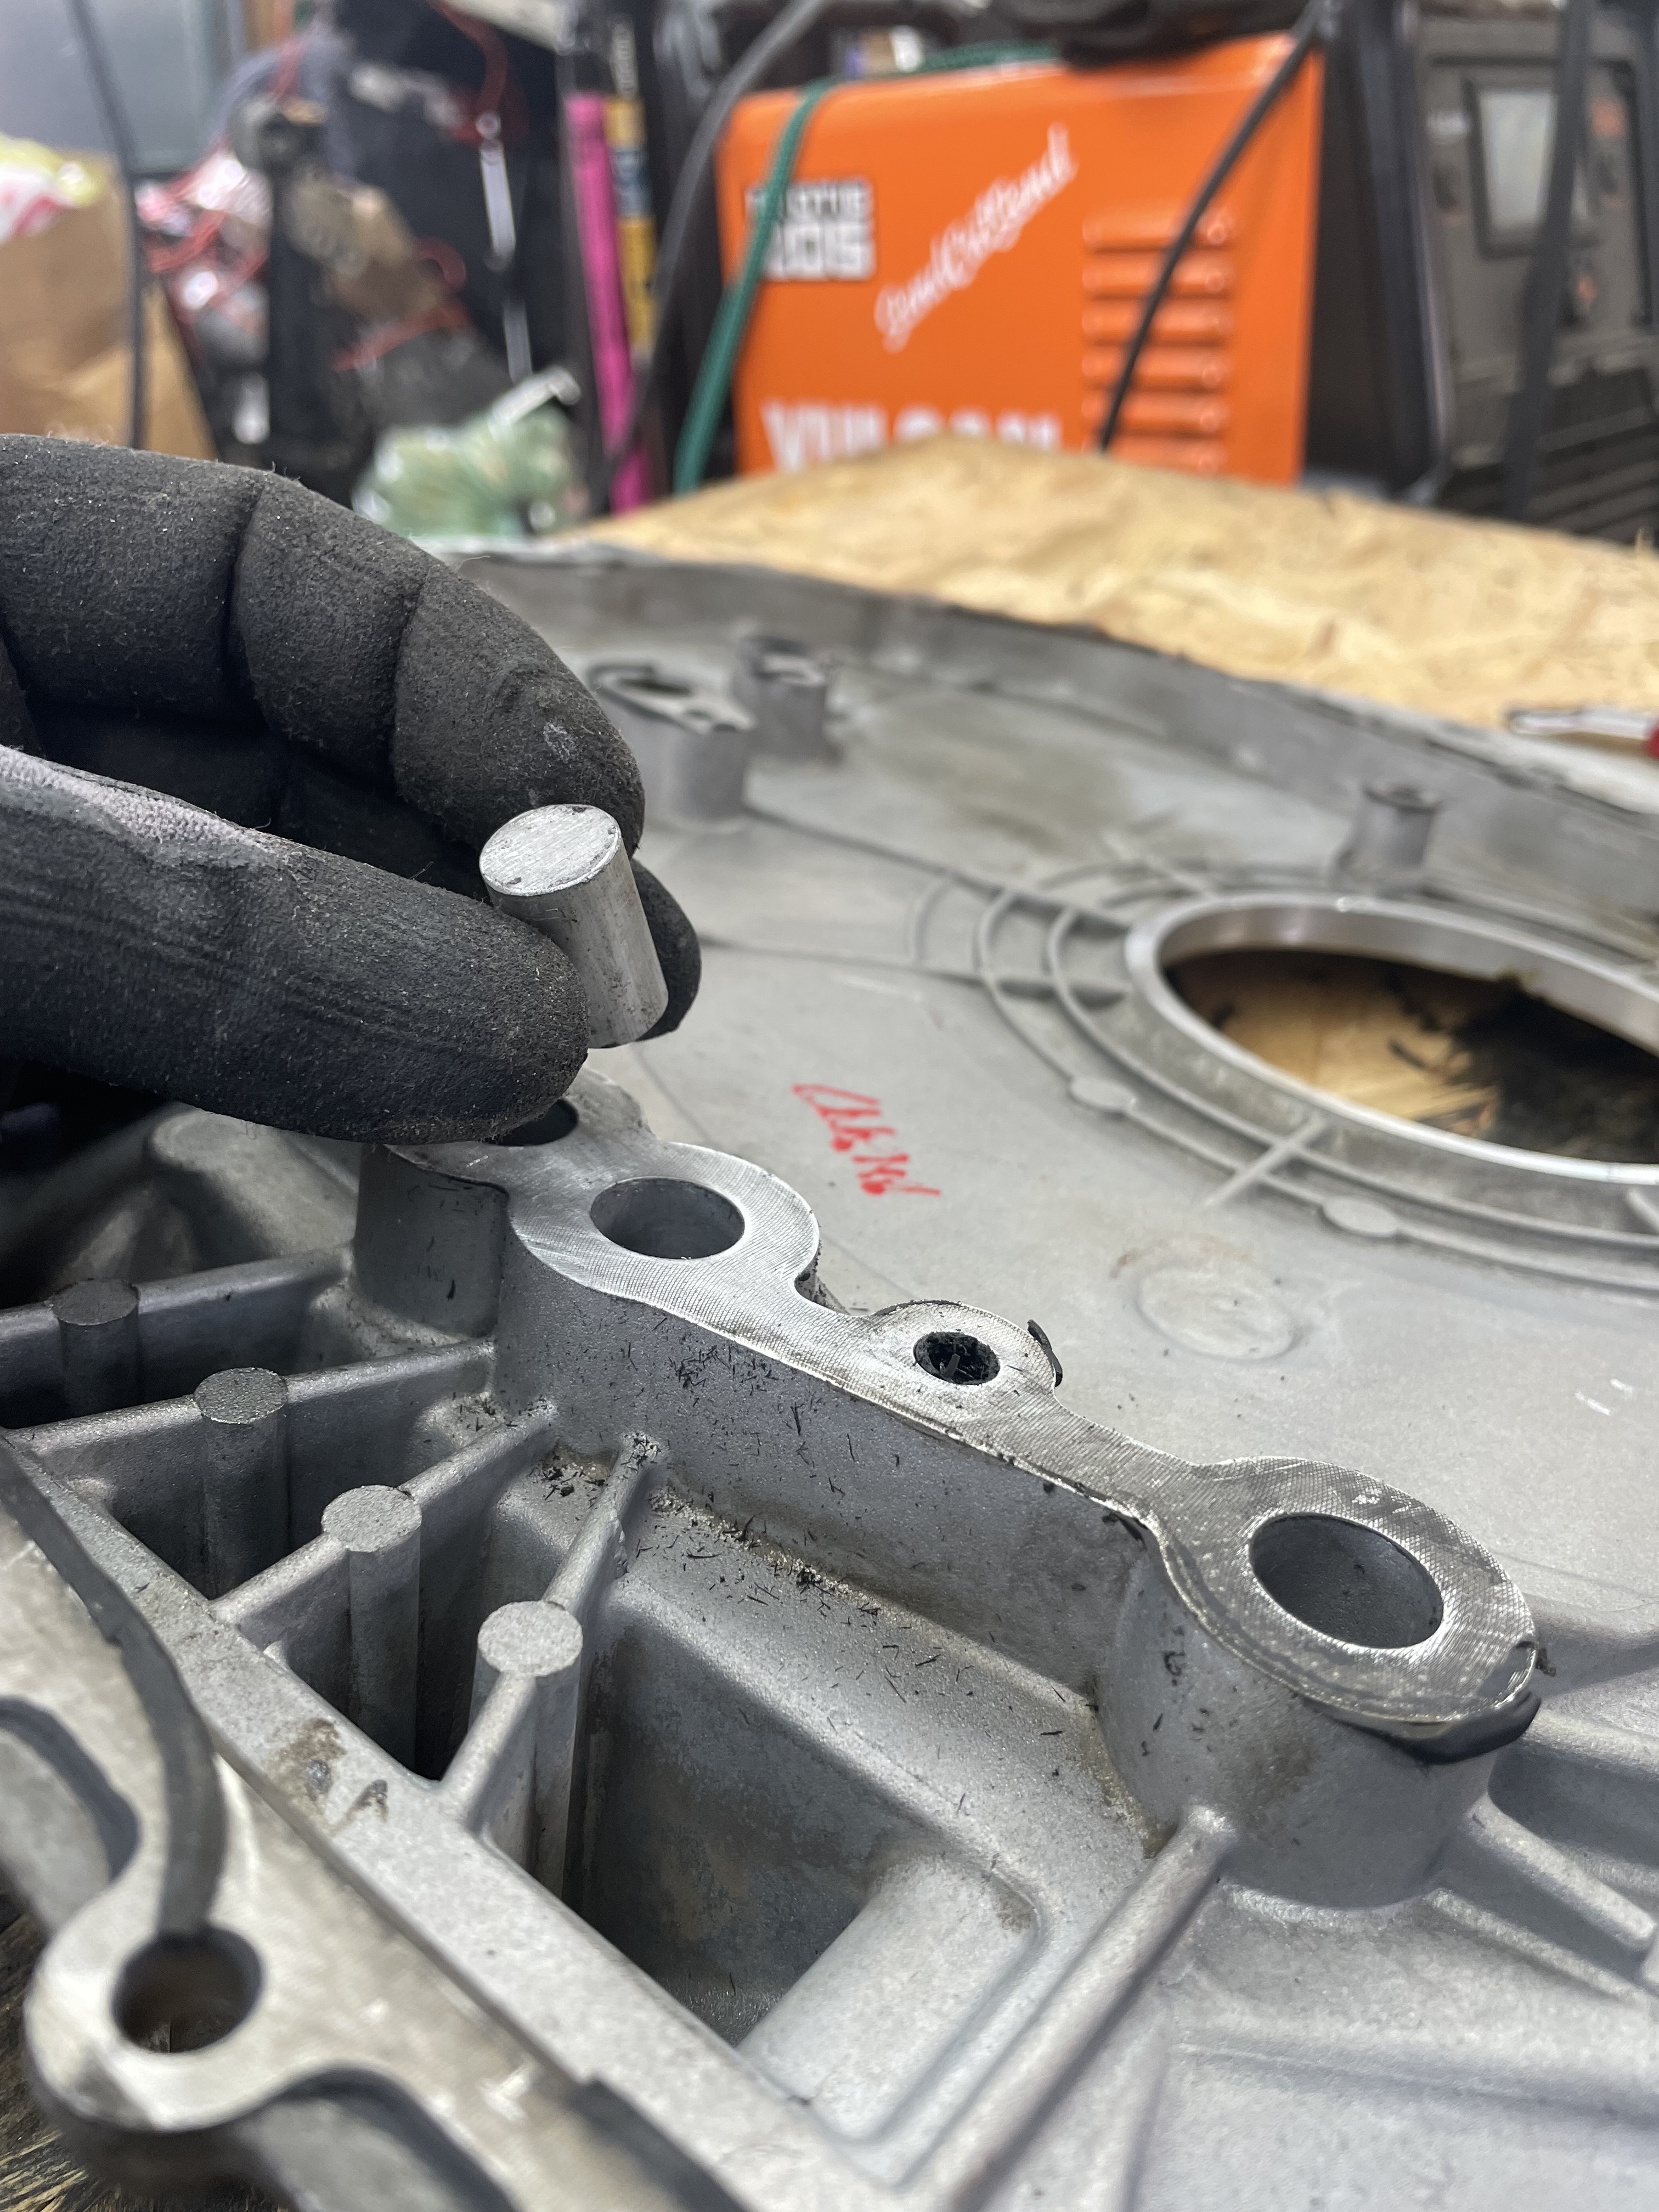
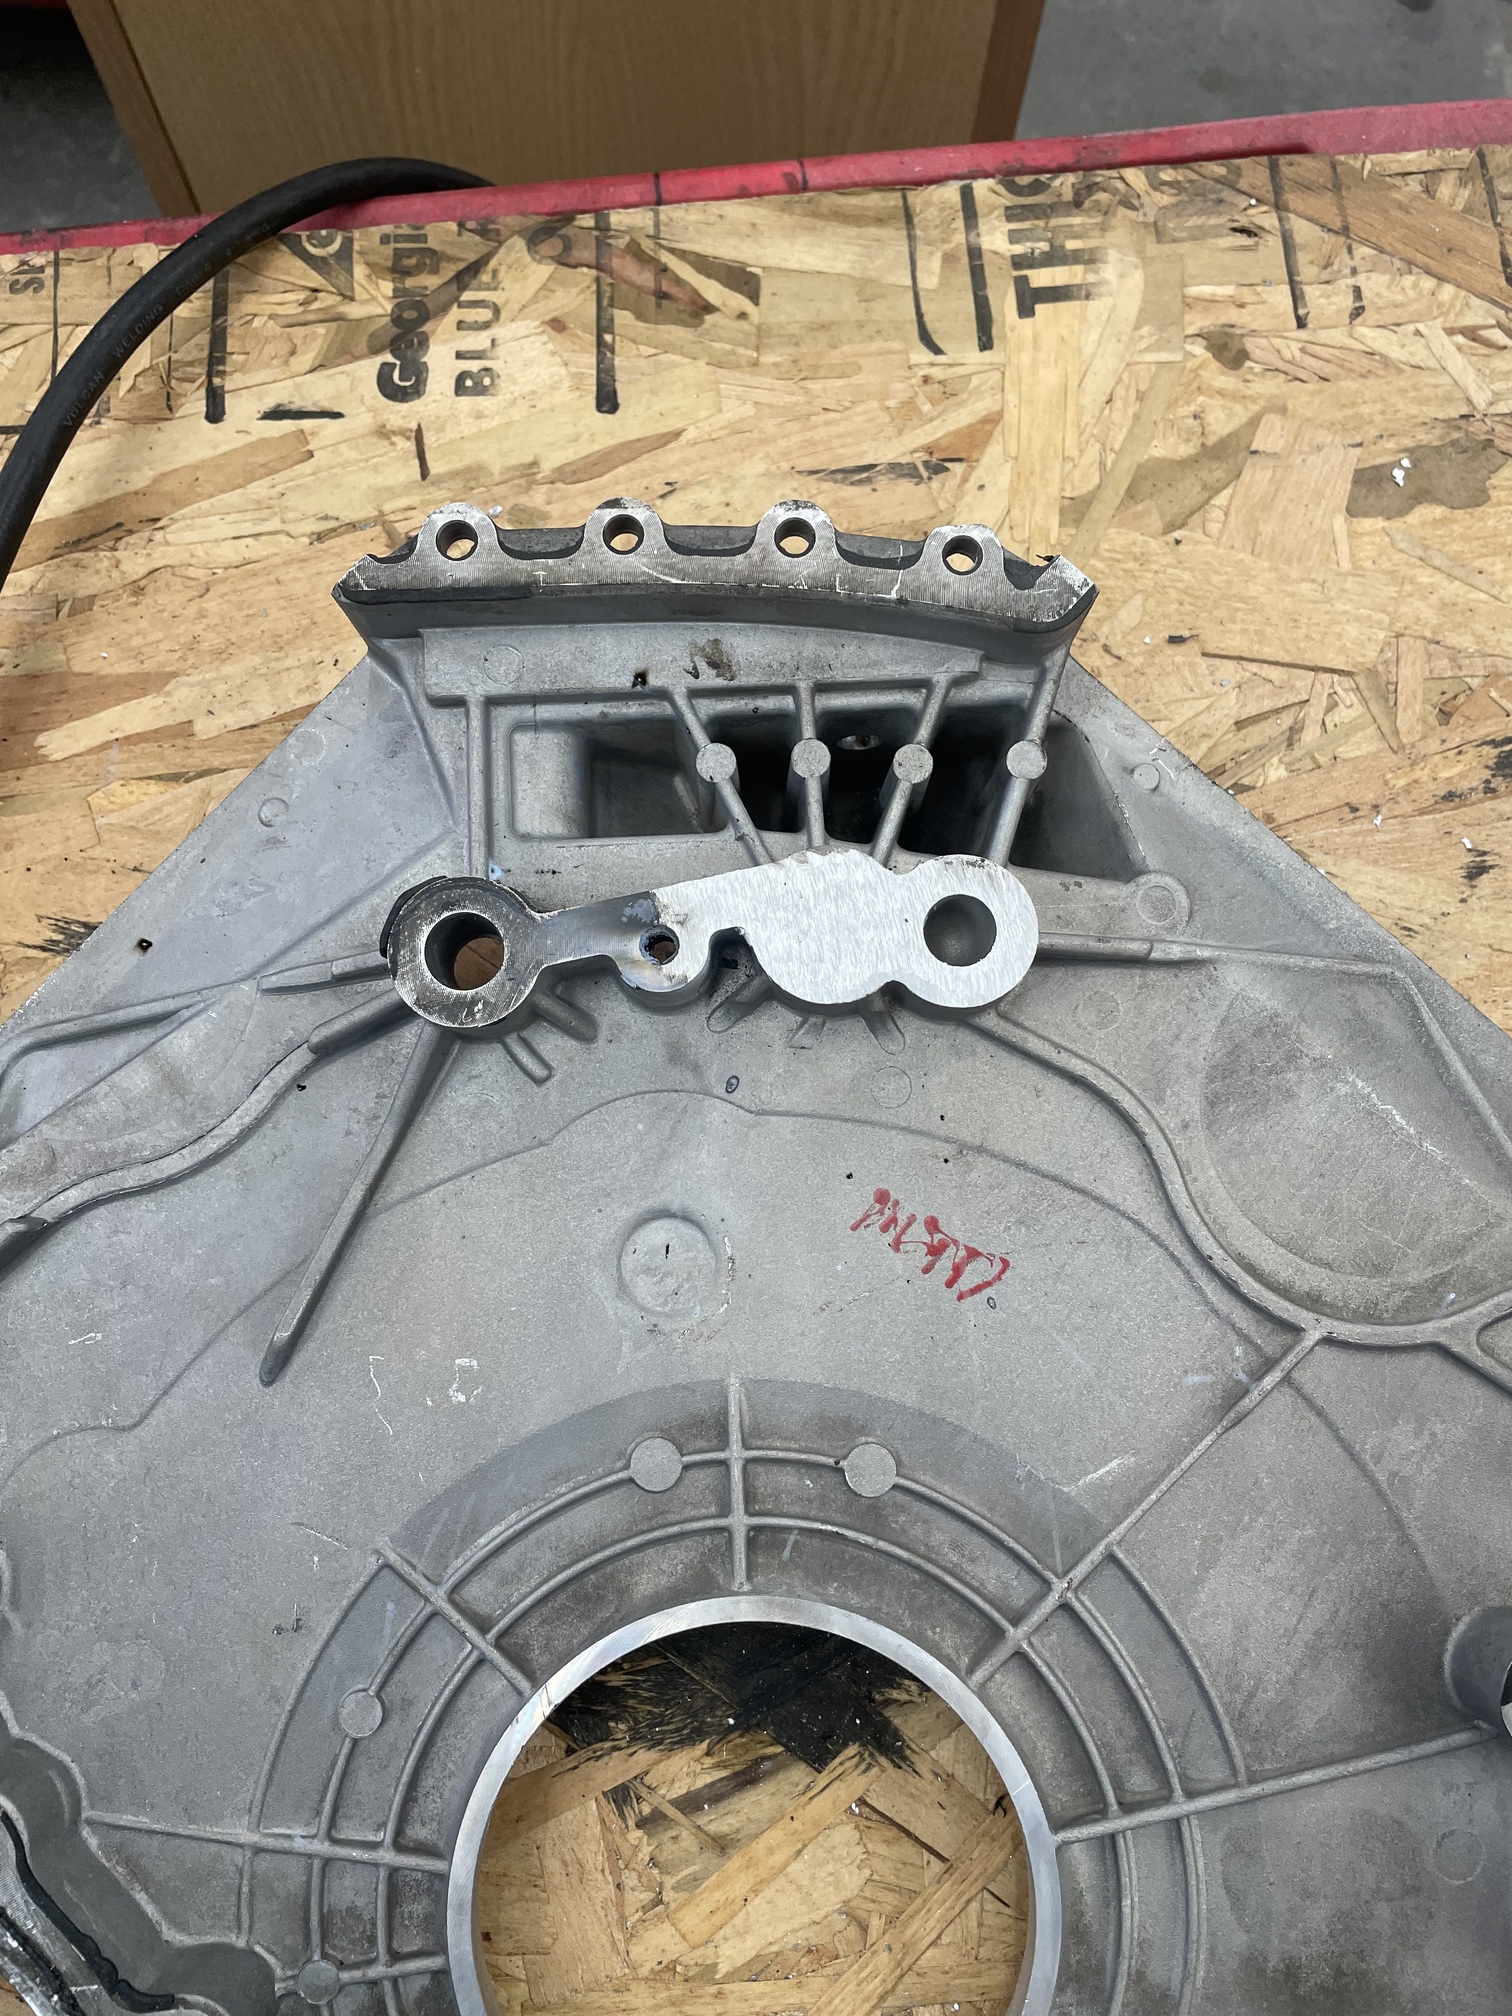
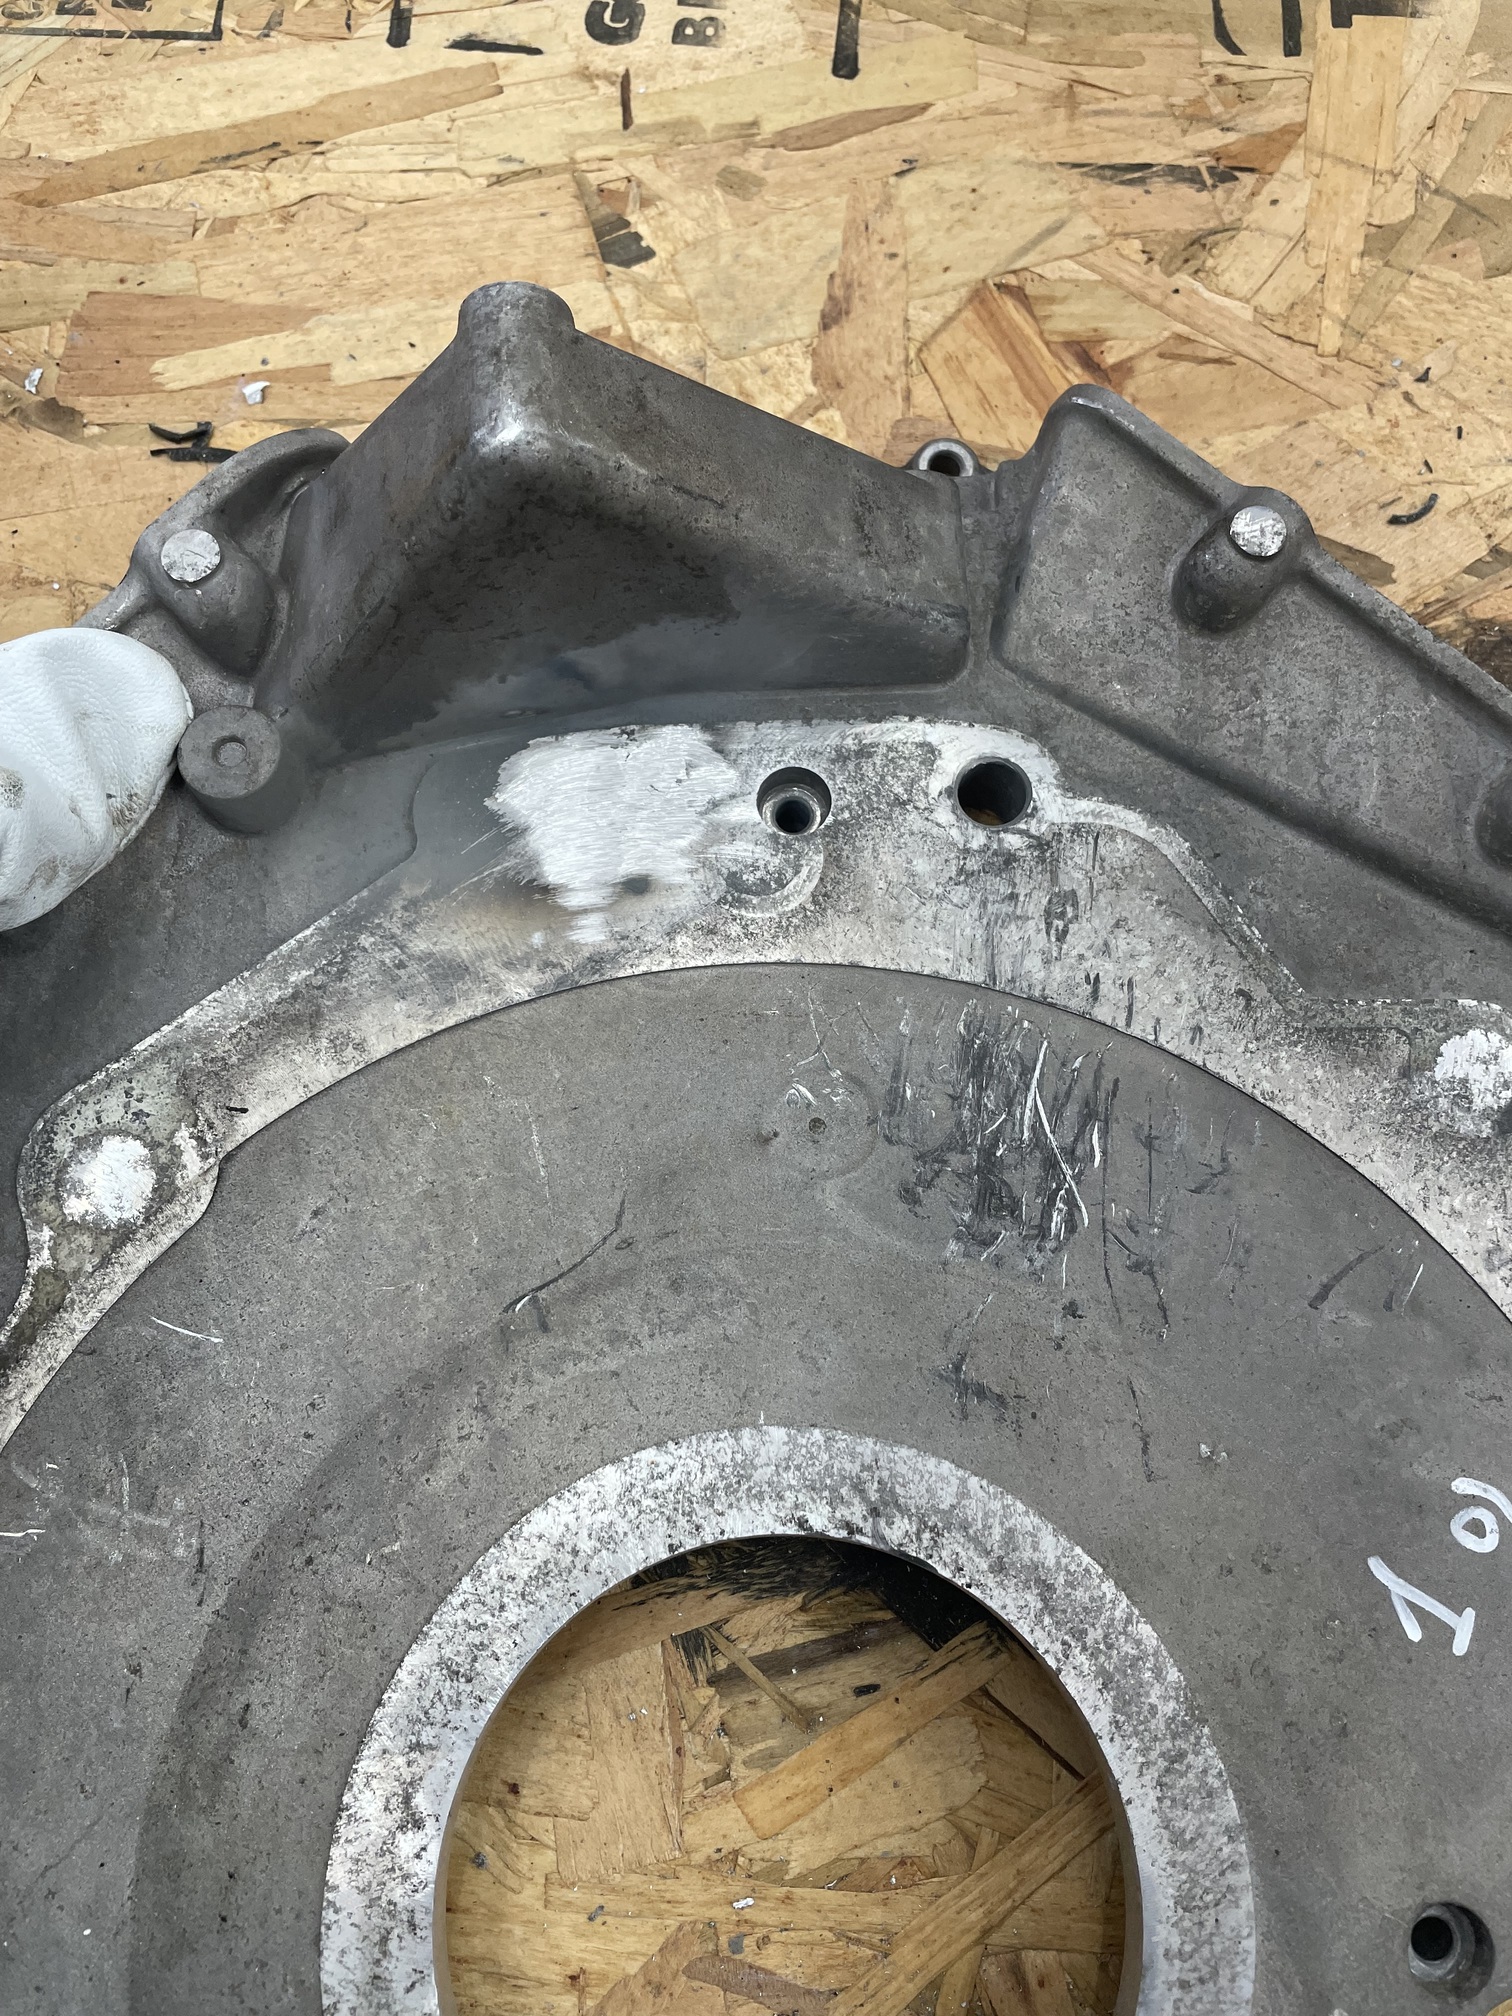
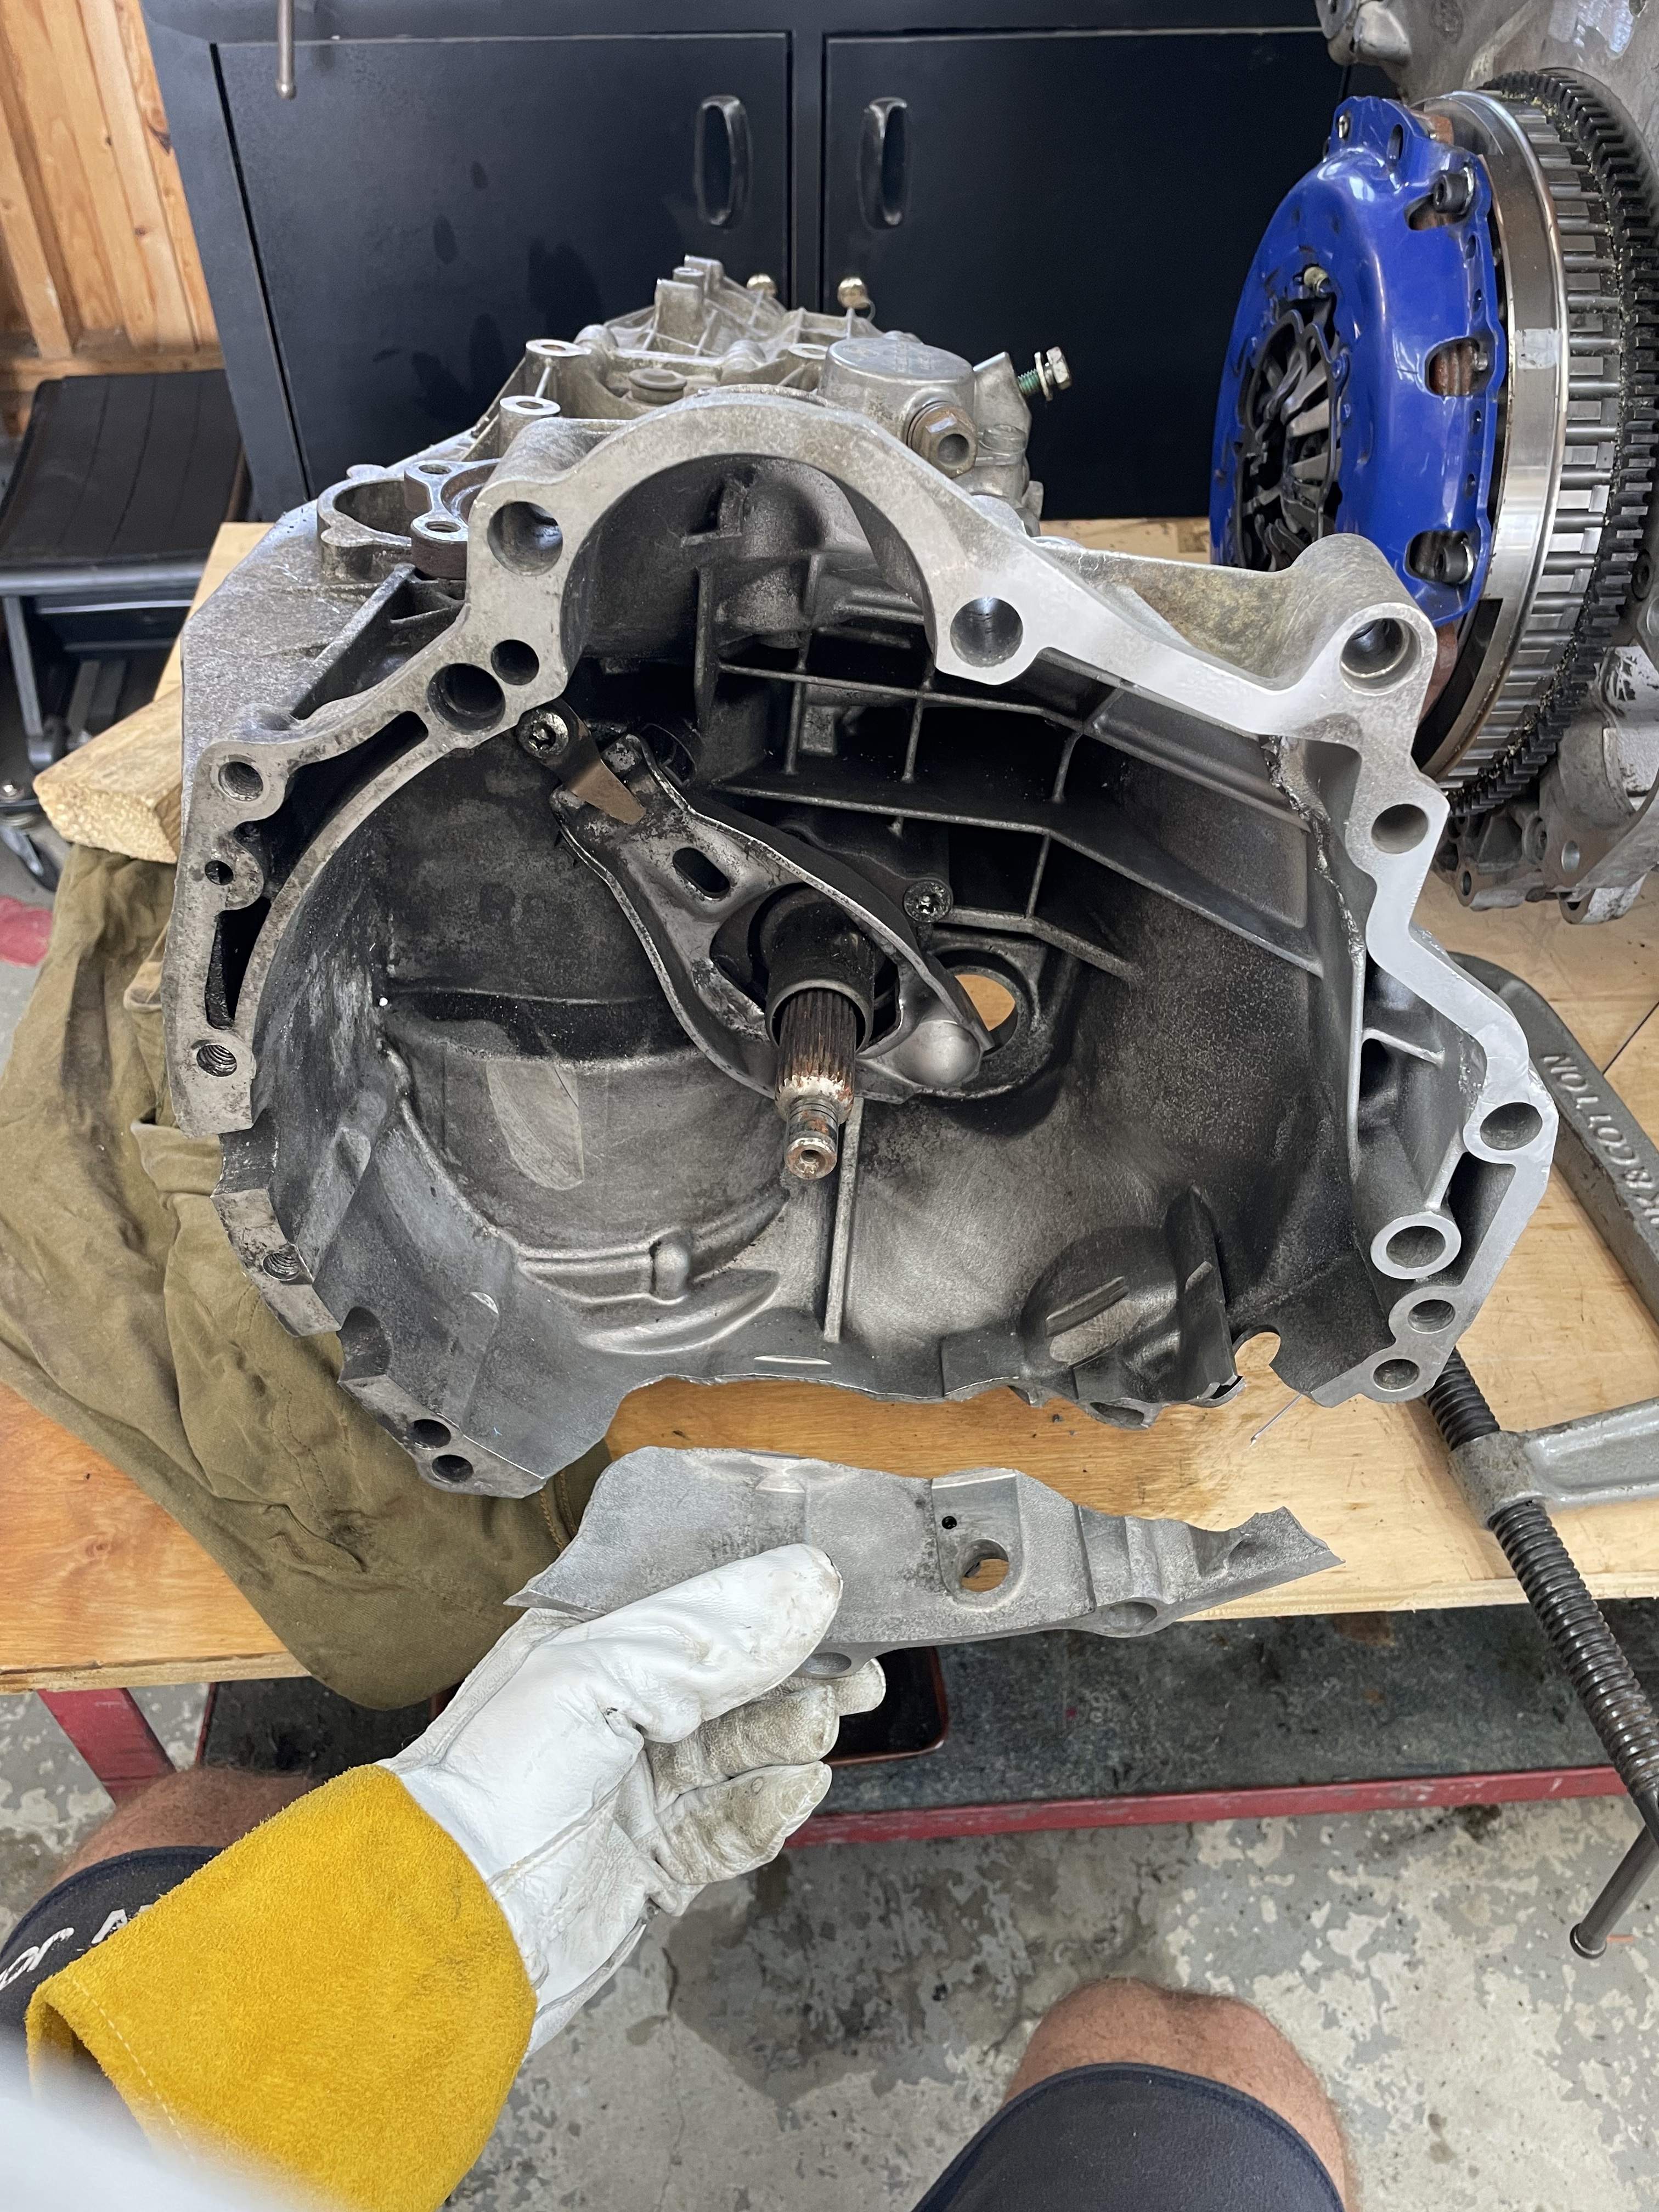
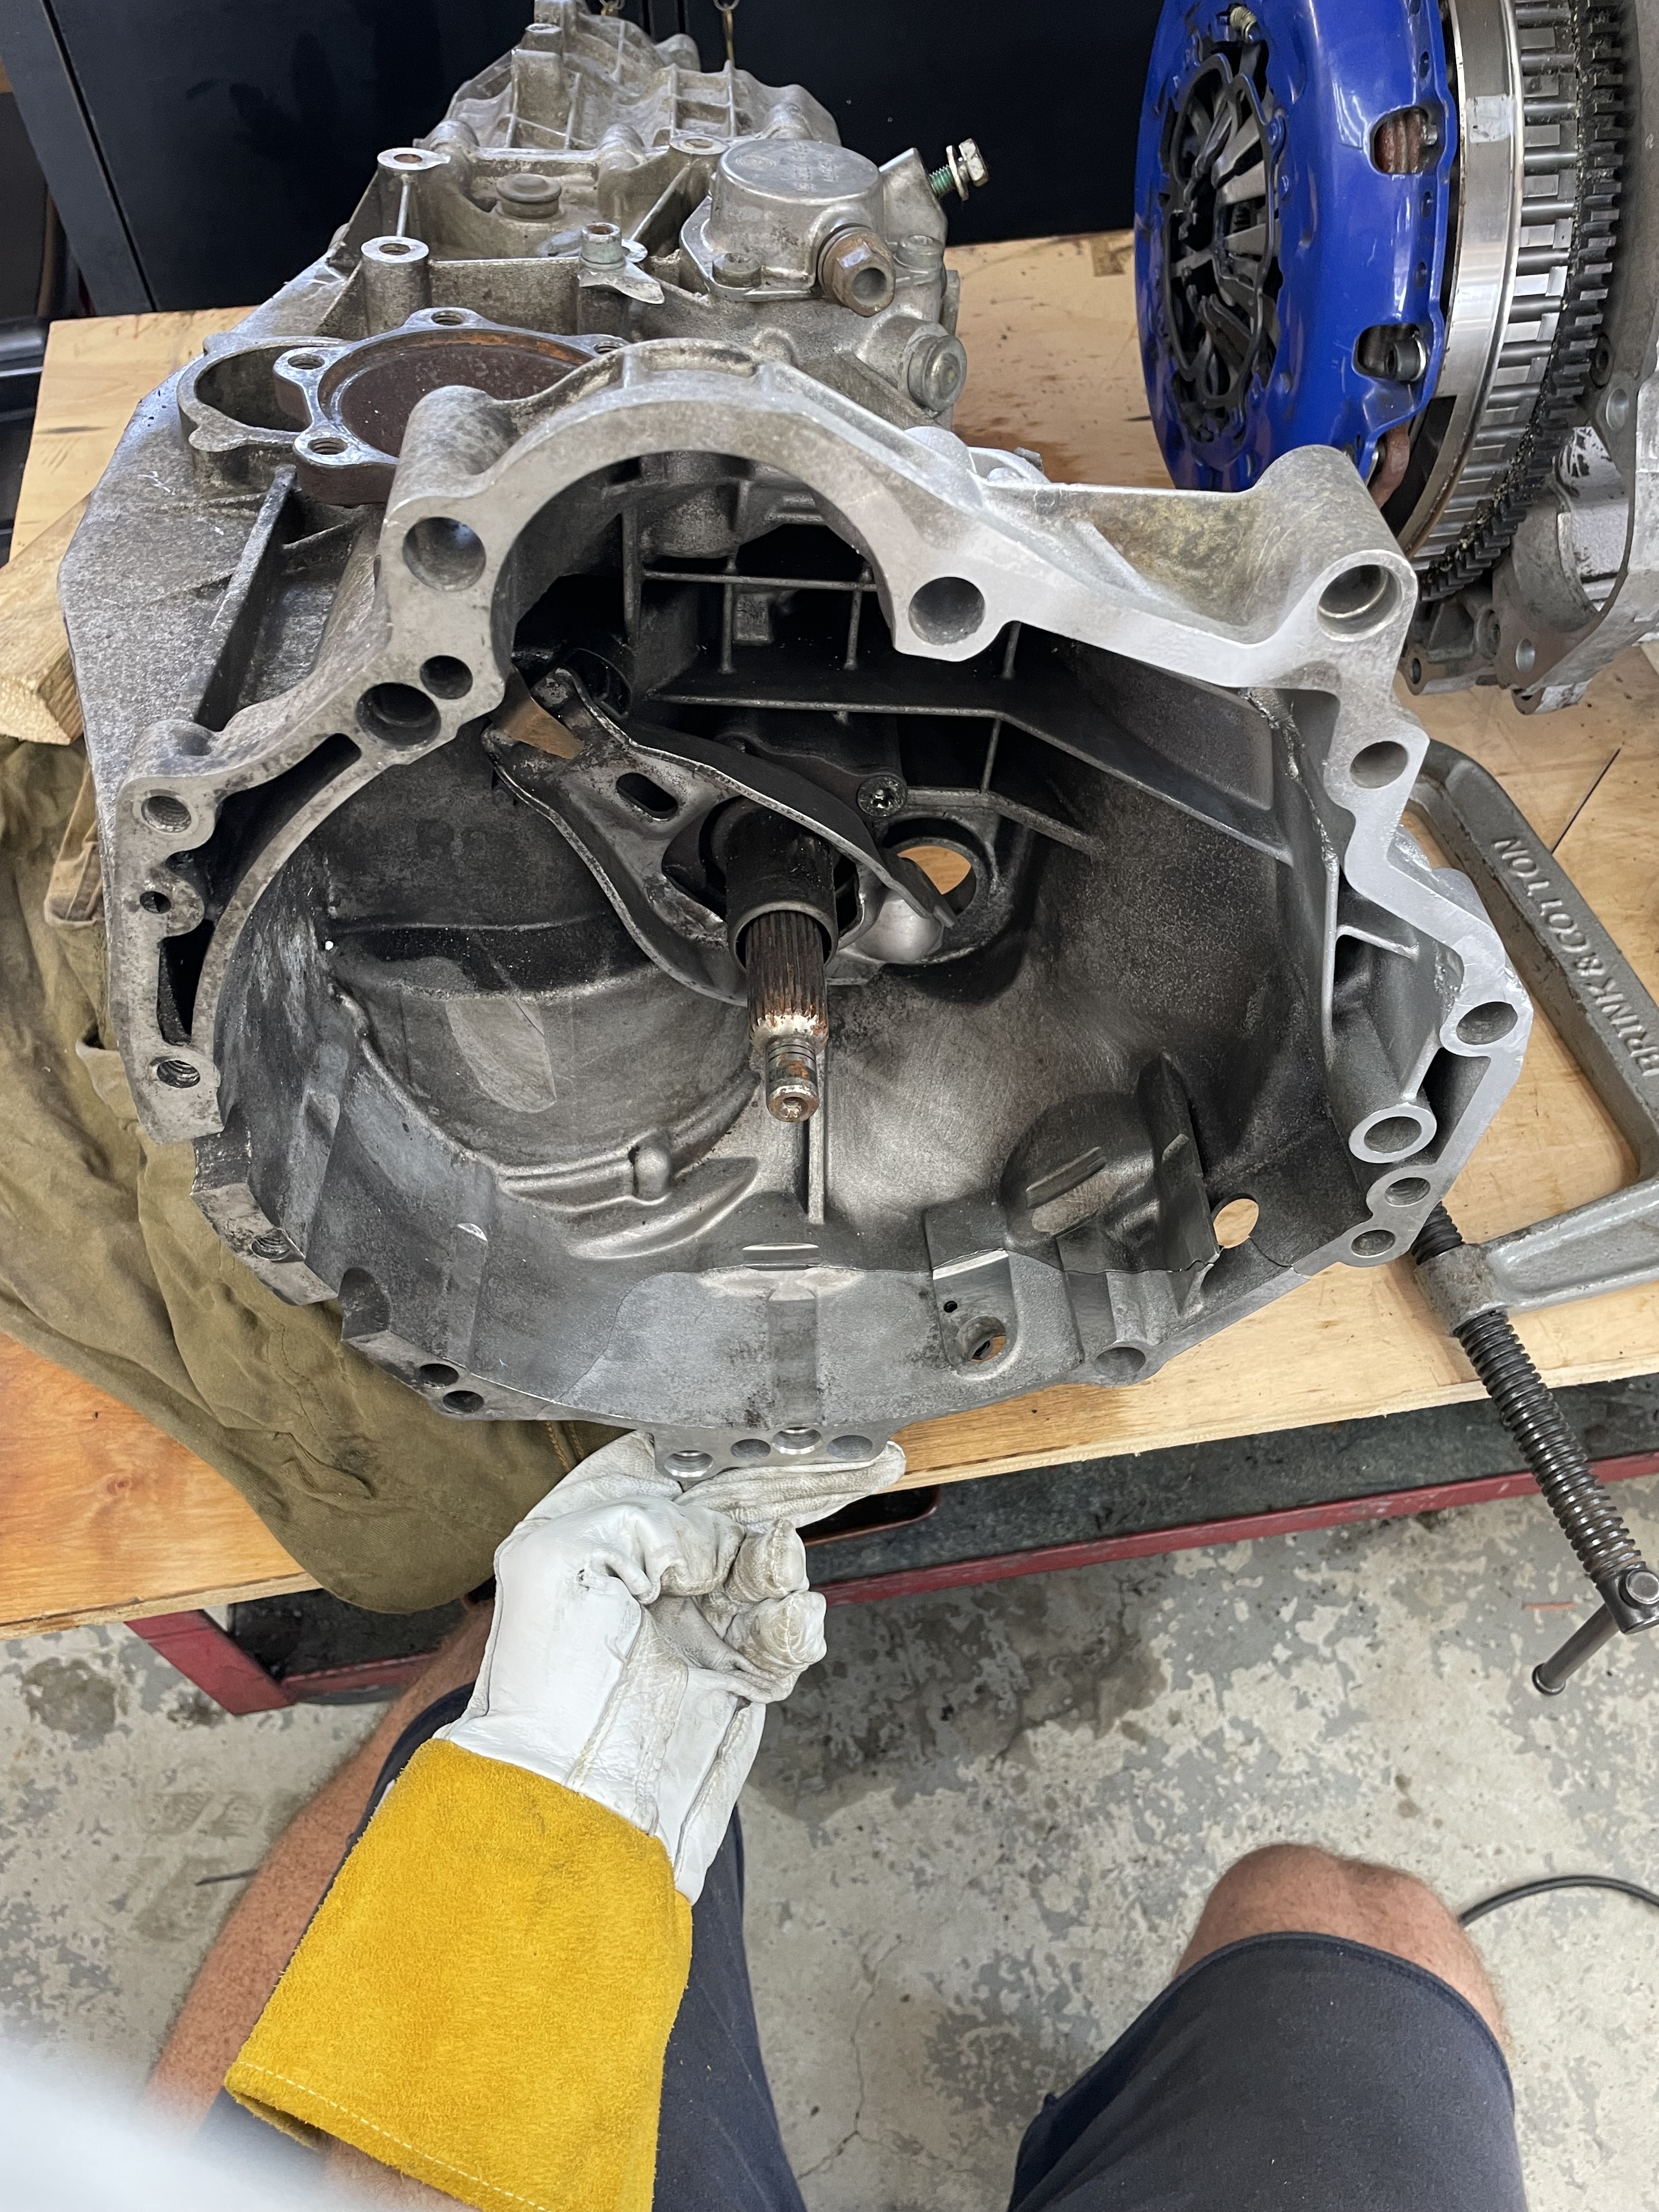
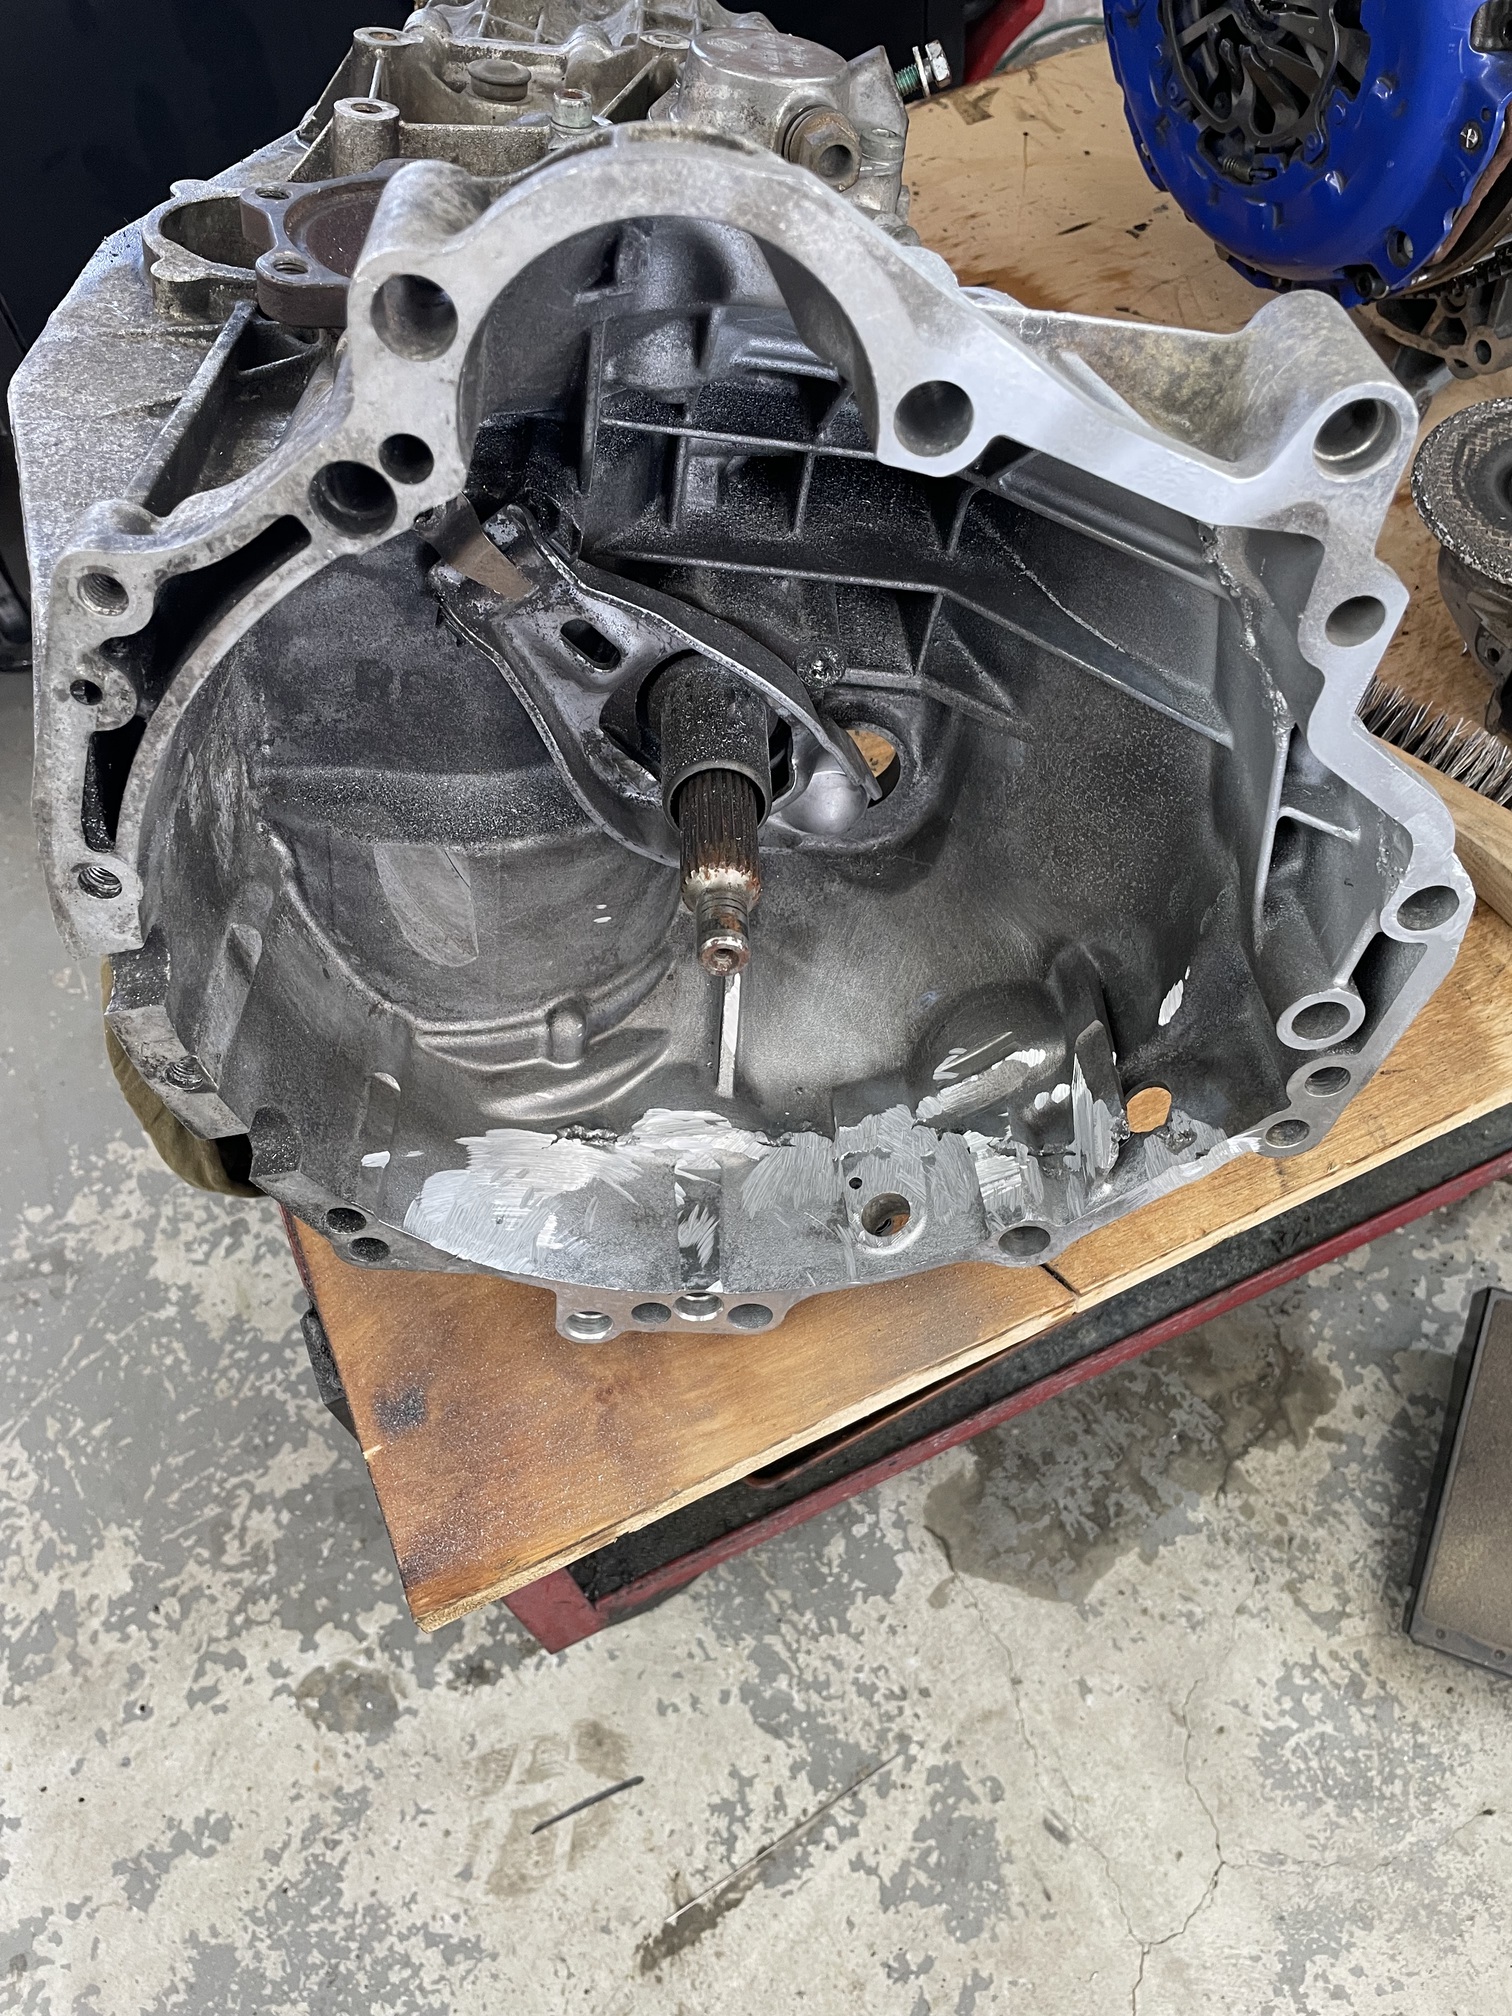
Took a shot at saving this 0A3’s life and welding the bell housing back together. This cast aluminum is nasty stuff to weld, did the best I could, should hold together just fine with the bolts to the engine block but some additional filler rod doesnt hurt.
Currently 3d printing a clutch alignment tool so my powertrain can become one!