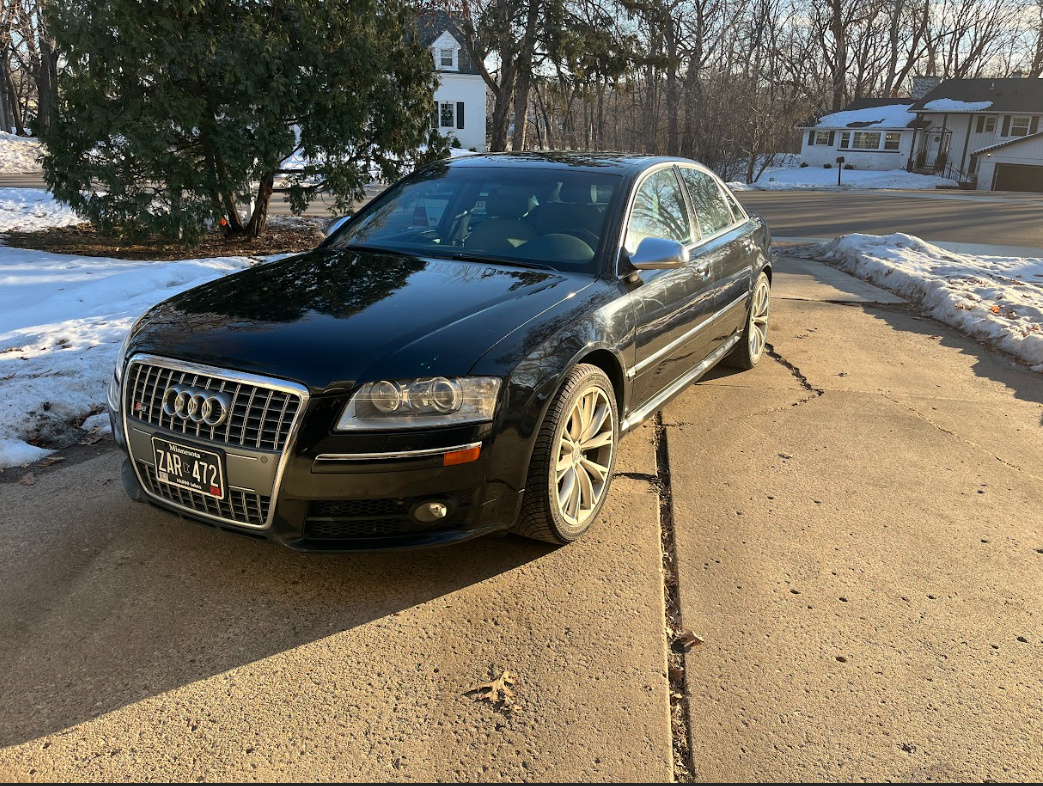
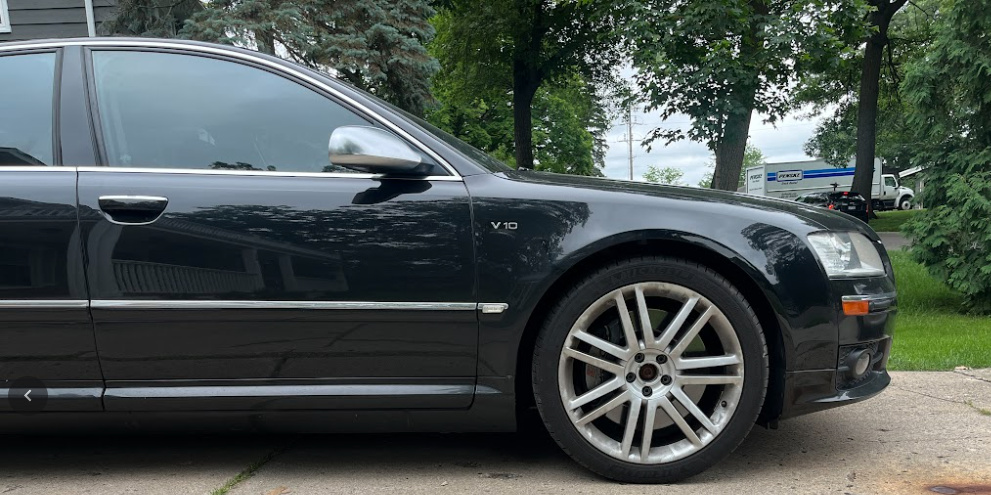
After all these years. That car still looks great.
If I didn’t have my Cayenne Turbo S I’d have a S8. Loved my wifes D3 A8 and the S8 is better overall of course. I know the later D3’s with the rear timing chains need the oil changed regularly to keep the chain guides clean and to reduce wear along with clean oil in the tensioners. Which version of the
Cayenne Turbo S is a great choice! It was on my radar as a candidate for my next vehicle when I decided to retire my B5 S4 to the weekends. It seems like many people go from B5 to the Cayenne Turbo S. Ultimately I found the 2007 D3 S8 and am so happy I did! I am unsure of the timeline for when Audi started implementing fixes/material improvements from the factory floor on the rear chain guides and tensioners. I know from firsthand experience of a 2008 3.2 A6 that had failed upper timing chain tensioners.
It would be interesting to crosscheck the part #'s between the B7 & B8 S4’s compared to the later D3 A8’s as the B8’s definitely had a better reliability with the timing chain & adjusters/guides. I know they say long interval oil changes and lower grade oils have a lot to do with it. You want clean oil and good lubricity to extend their lives.
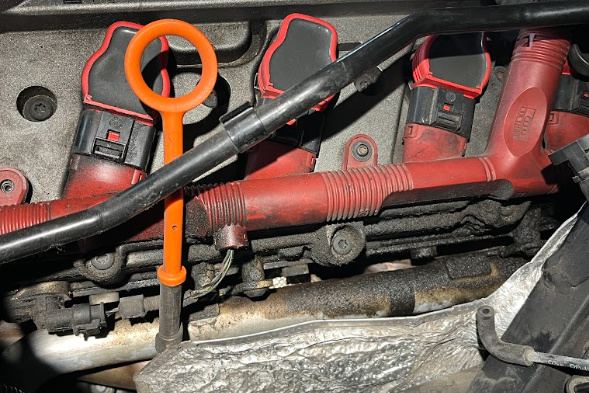
Did a little bit of maintenance on the S8. I have been putting off replacing my valve cover gaskets, but as I was coming up on an oil change I figured now would be a good time. They were starting to leak a bit more and drip onto the exhaust manifolds, which does not smell the best.
The old gaskets really needed to go - very brittle and no longer doing their job. I also used a little bit of LOCTITE Automotive RTV Silicone Gasket Maker Black 598 on the corners. Easy enough to do, especially if you have done this job on any other audi. As stated on other threads here, having a mini ratchet is very helpful for the rearmost corner bolts for the valve covers. Just take your time, clean up your mating surfaces, use a 1/4" drive torque wrench, and you will be good to go. I drove it up to temp after all the maintenance, and then changed the oil. Just a best practice after having brake cleaner around the open valve covers.
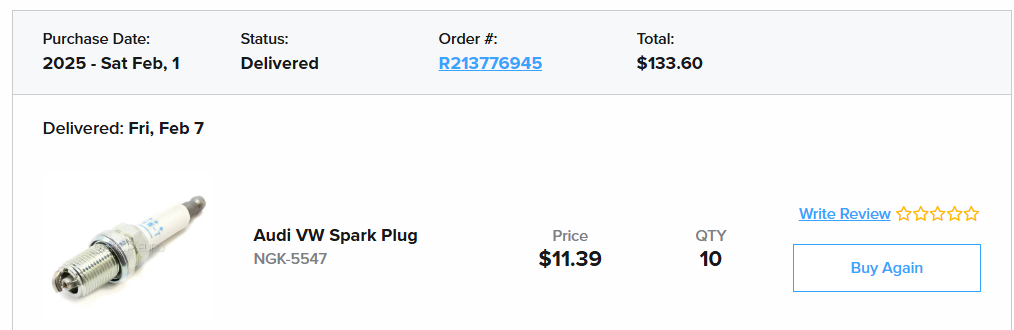
I put in new spark plugs (while I was in there sort of thing, and I am guessing never been done. They looked good but this was nice to do), BG44k fuel injector cleaner (before every oil change) new valve cover gaskets, oil change, and an engine dressing. Came out great and driving as good as ever!
If you ever thought to yourself, are my valve cover gaskets leaking? Just use your eyes  !
!
All better!

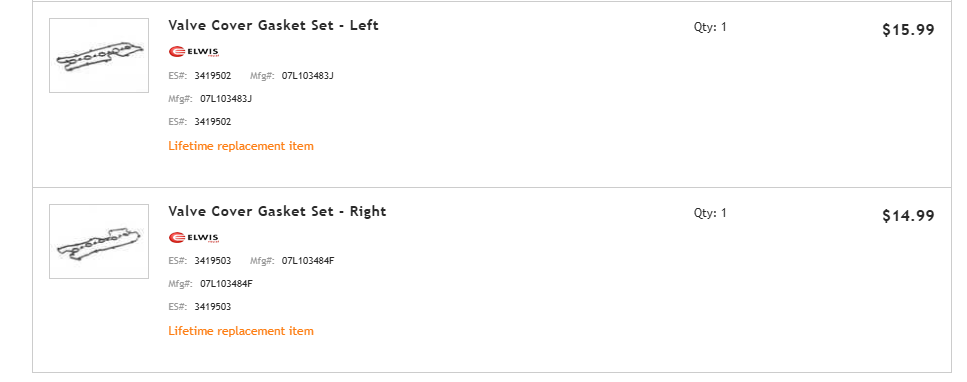
I used these gaskets from ECS:
I went with these NGK spark plugs from FCP Euro, which after doing some research I believe is the model number that came with our cars:
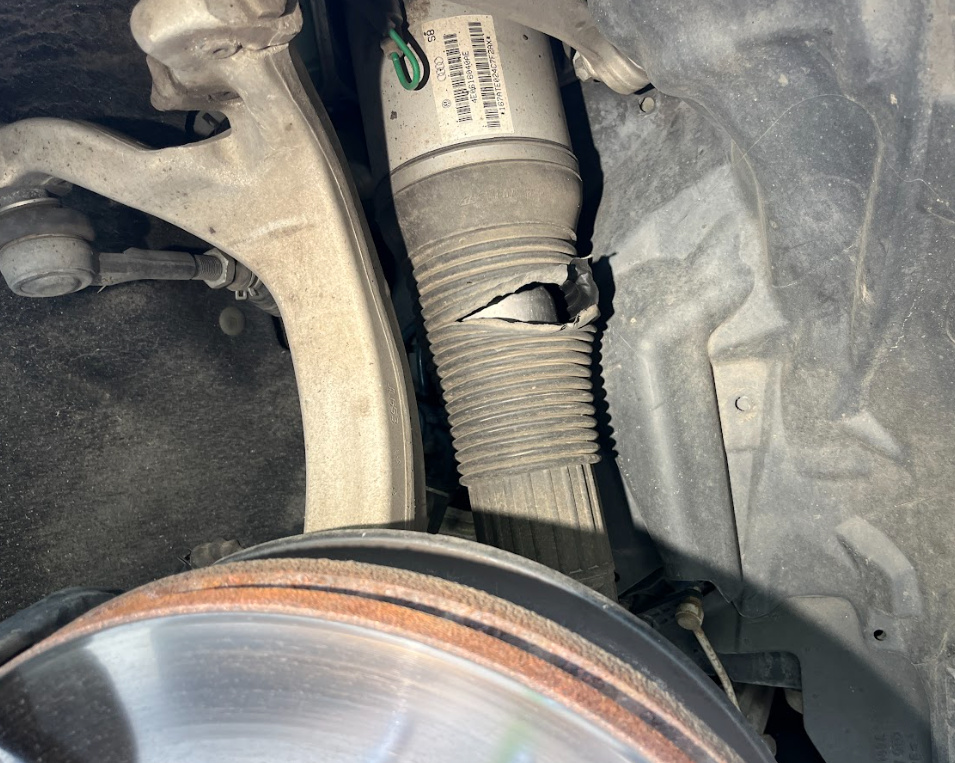
Front passenger air spring gave out today, causing the front end to dip down. Drove it home without any rubbing on the tires, but was a harsh ride. Ordered a new air spring and will service later this week when it arrives. While it is out I will take a look at the state of the upper control arm brushings I recently replaced, to see if the job needs to get done again due to driving a few miles with the front slammed. Out of curiosity I scanned with VCDS and found fault codes for implausible level sensor and safety cutoff to the compressor. I am guessing the bag was leaking without me noticing, and it gave out today as I was adjusting from lift to comfort. I was driving through a gravel road on “lift”, when I heard a large bang, kind of sounded like a large rock getting kicked up, which was strange for how slow I was going. I will keep this updated with the repair!
She is back in action!
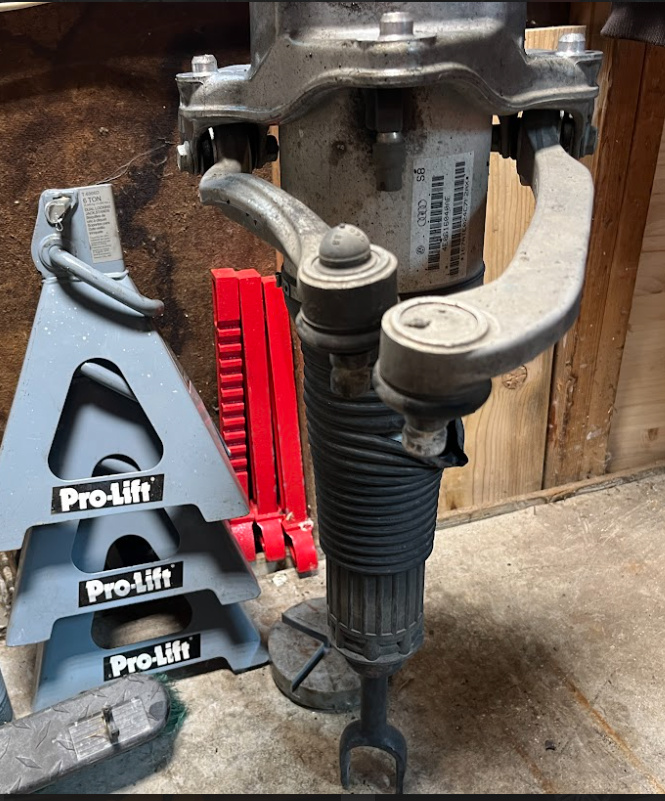
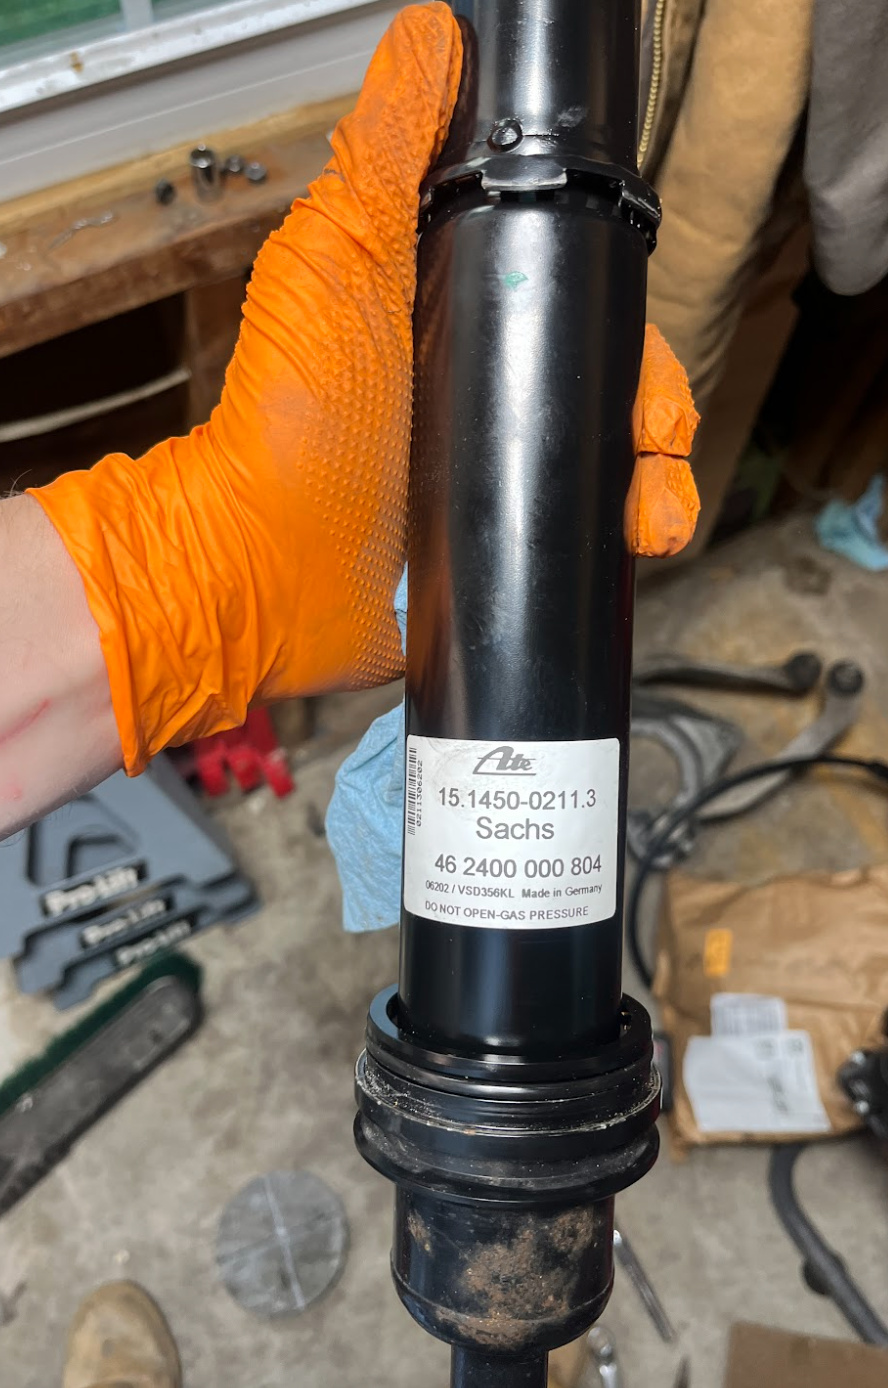
I opted to purchase a new air spring assembly, rather than the whole strut and spring. The only downside is the extra time and labor in rebuilding vs just swapping the whole strut.
The process is straightforward, getting the strut out is easy(especially if you are like me and recently replaced the upper control arm bushings, and already fought to get the pinch bolt out. I am really thanking myself for using antisize on all components when re-assembling that job). While I was in there, I inspected my recently replaced upper control arm bushings. Luckily they appeared fine and did not need servicing again. As an aside, when I did the upper control arm bushings, I did not remove the strut. I did have to lower it some, in order to get clearance to loosen the control arm bolts. If I were to do the job again in the future I would just take the whole strut out. You can see there is really easy access to those control arms, and it would be very easy to take measurements and replace accurately.
I referenced these two videos for a refresher on the strut, and for a tutorial on the air spring removal.
https://www.youtube.com/watch?v=SsVINl67-1g
https://www.youtube.com/watch?v=Zfhuv5gpWIw
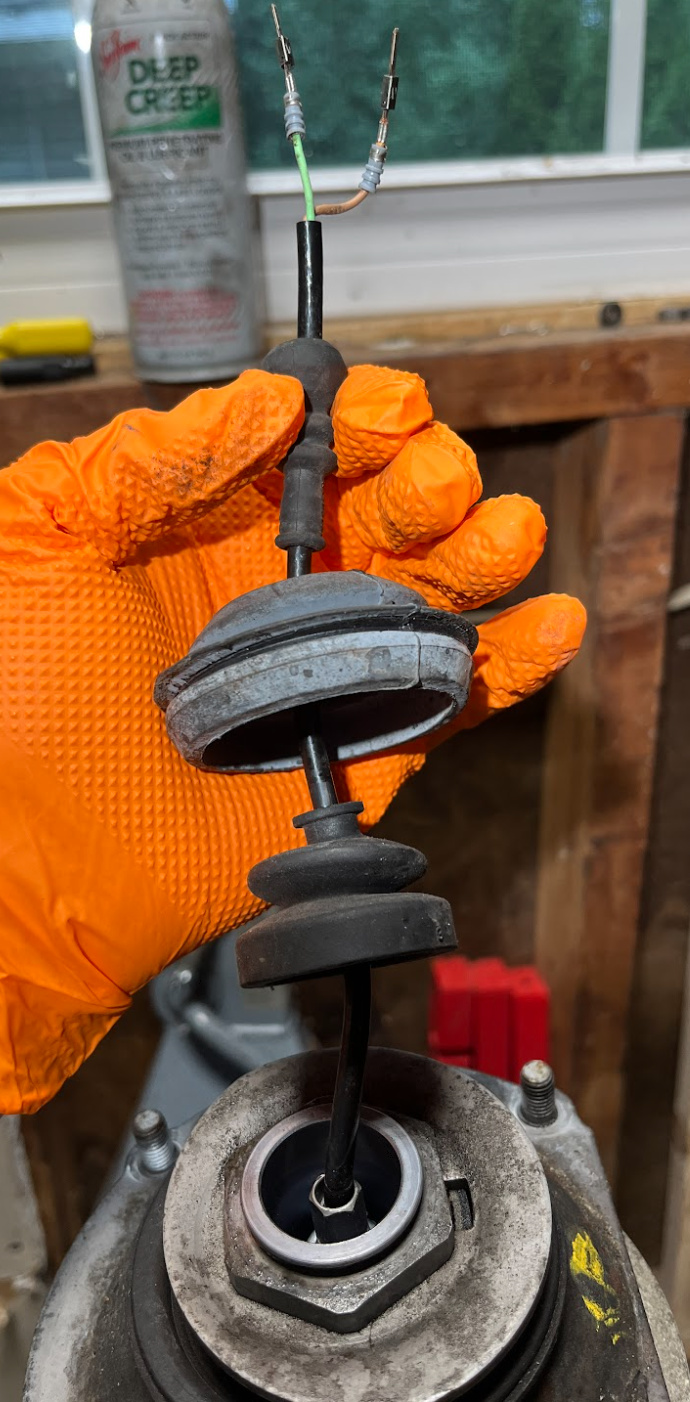
Note, in the video tutorial for replacing the air spring, he recommends cutting the wire to the sensor in order to separate the air housing from the shock. I did not want to do this, and opted to de-pin the sensor in order to provide the clearance necessary.
I would 100% recommend a simple de-pin. There are cheap tools you will need to push the pins out: https://www.amazon.com/dp/B0CBPJG3ZX?ref=ppx_yo2ov_dt_b_fed_asin_title
You will also need a steep offset box end wrench (18mm if I recall correctly): https://www.harborfreight.com/hand-tools/wrenches/combination-wrenches-wrench-sets/offset-box-sets/8-piece-metric-offset-box-wrench-set-32042.html
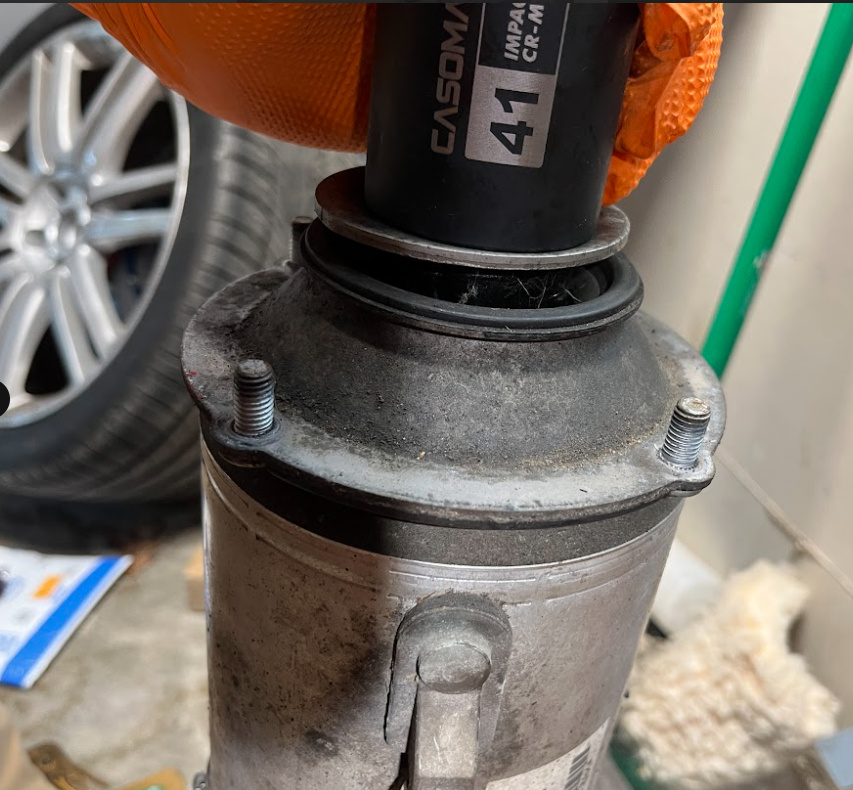
and a 41MM socket
https://www.amazon.com/dp/B0D2PXBWX8?ref=ppx_yo2ov_dt_b_fed_asin_title
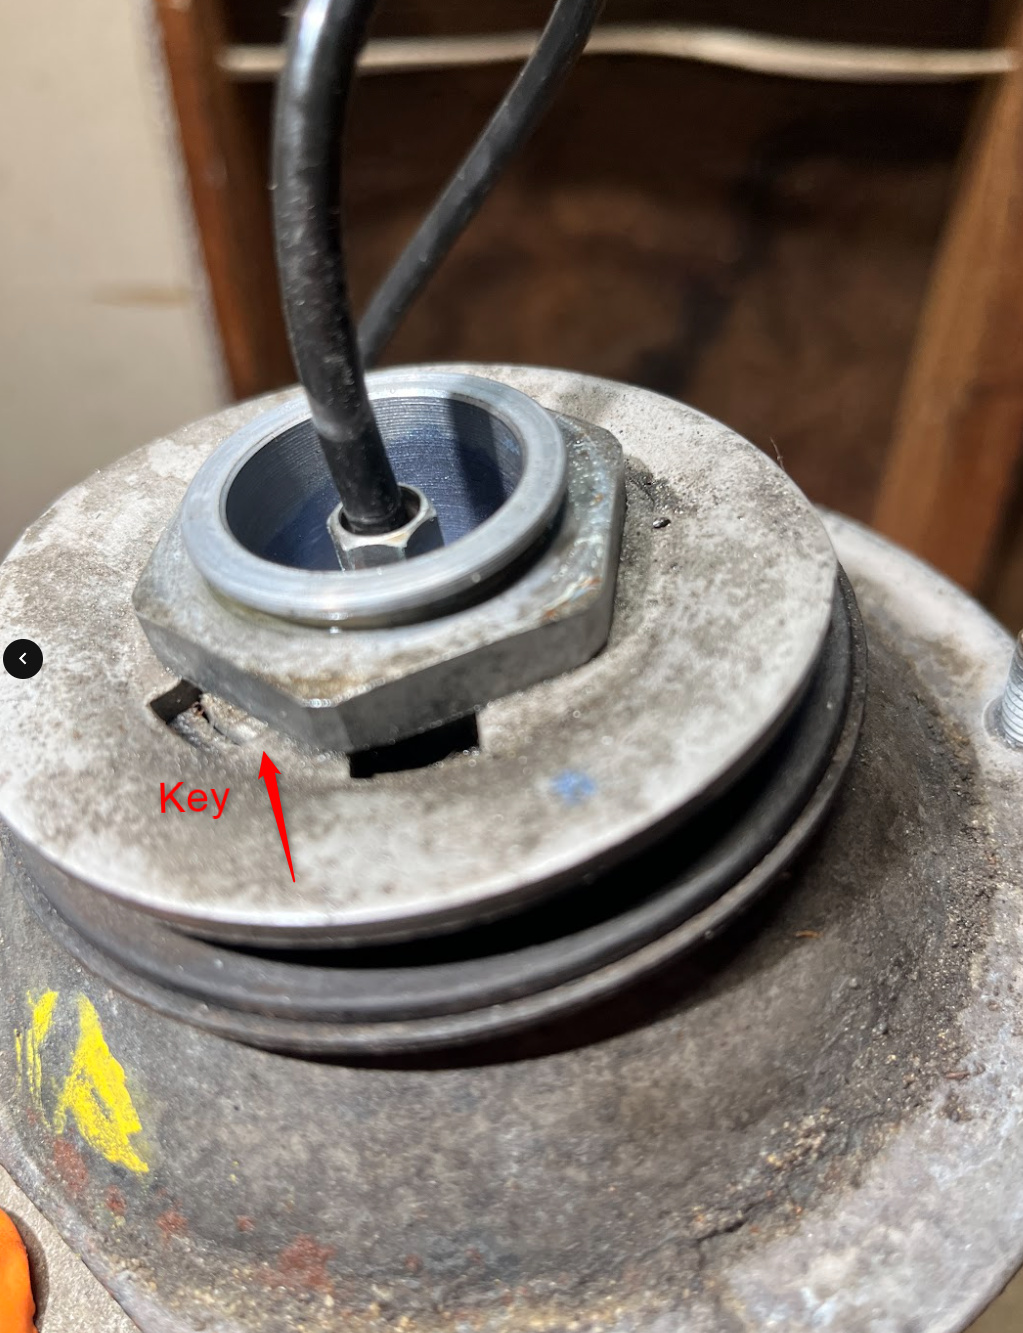
Once you de-pin the wire, tuck it into the socket and remove the nut. Make note of the orientation of the key on the nut.
From there use the box end wrench to remove the nut fastening the pressure sensor. Use a 9mm wrench to hold and protect the sensor in place.
Once you do that you can separate and replace the boot.
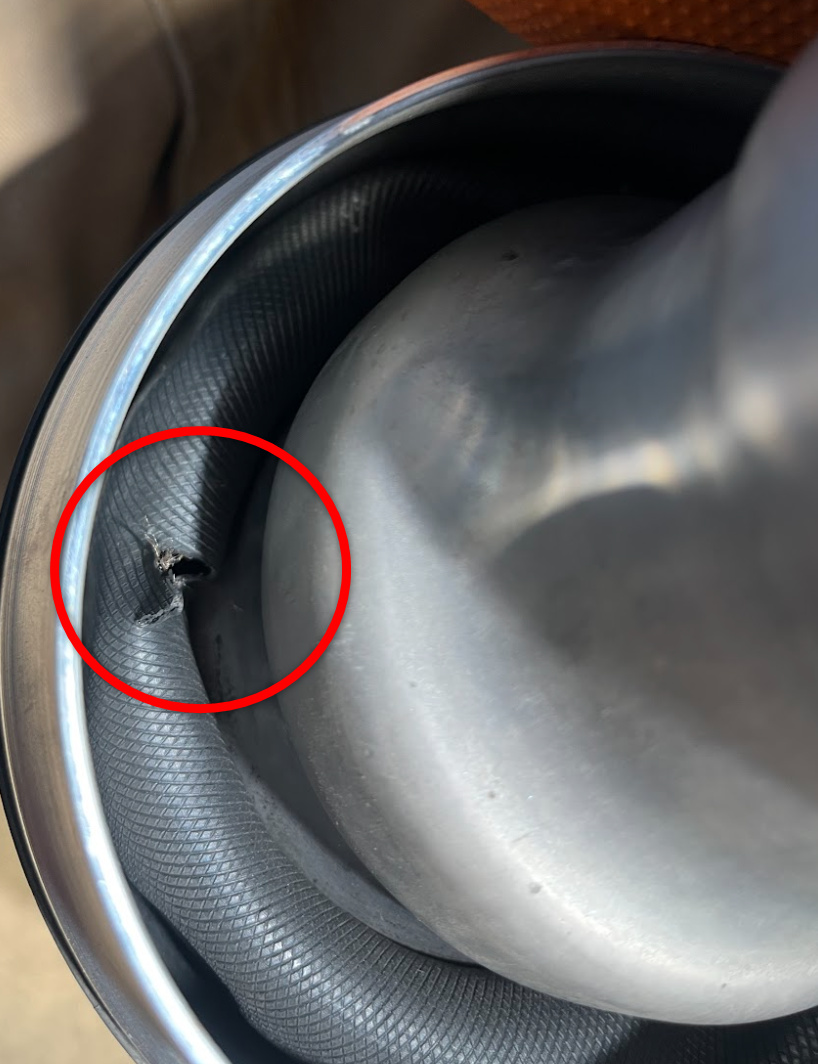
Here you can see where the actual failure occurred, within the air seal. This is located within the metal housing. This resulted in the dust boot getting blown open, and the front end to drop. I am glad they include a polymer bushing to act as a safeguard for this exact scenario!
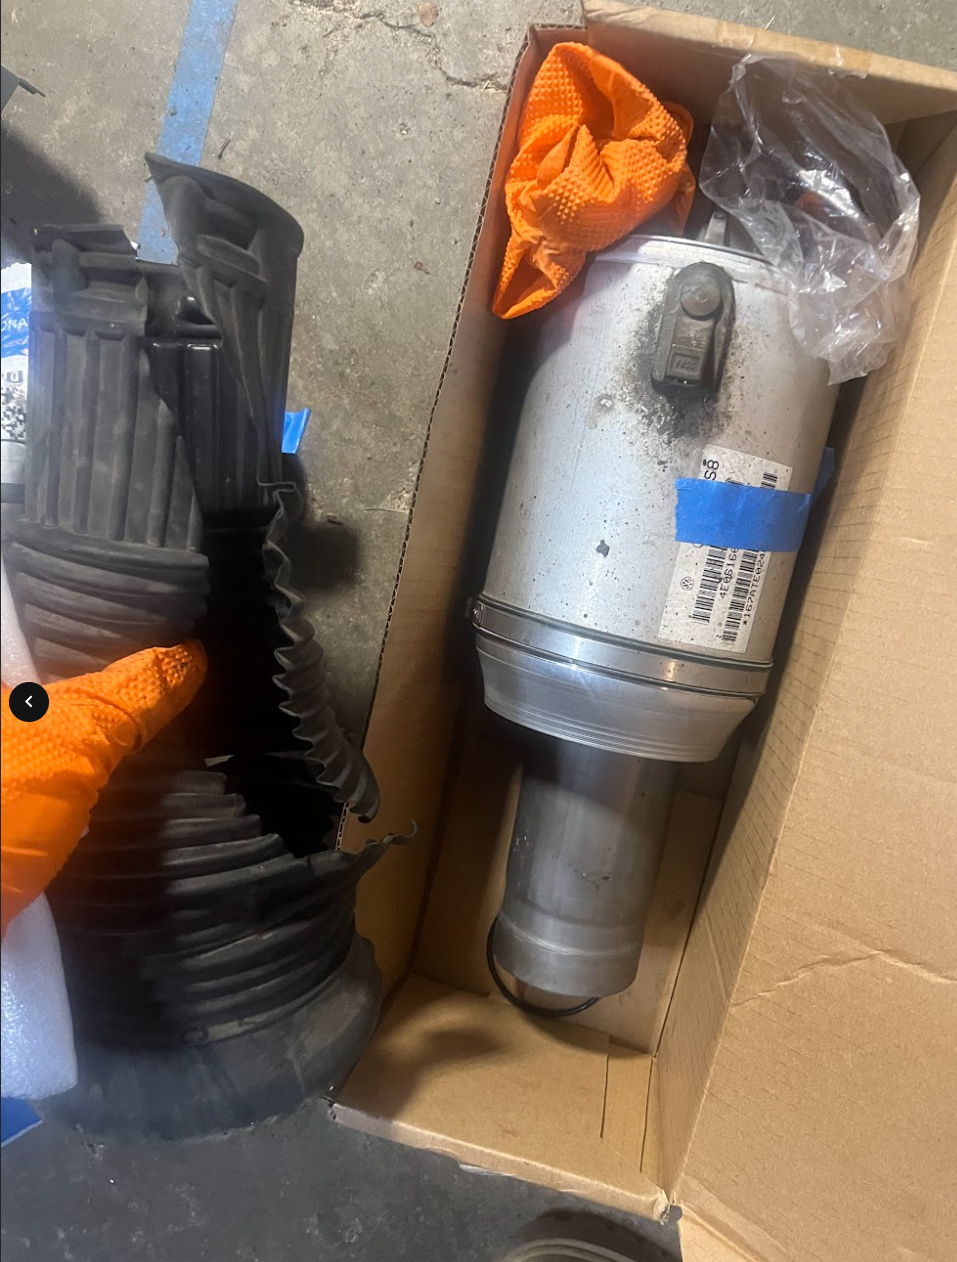
Old parts
Re-using the original shock:
New air spring installed:
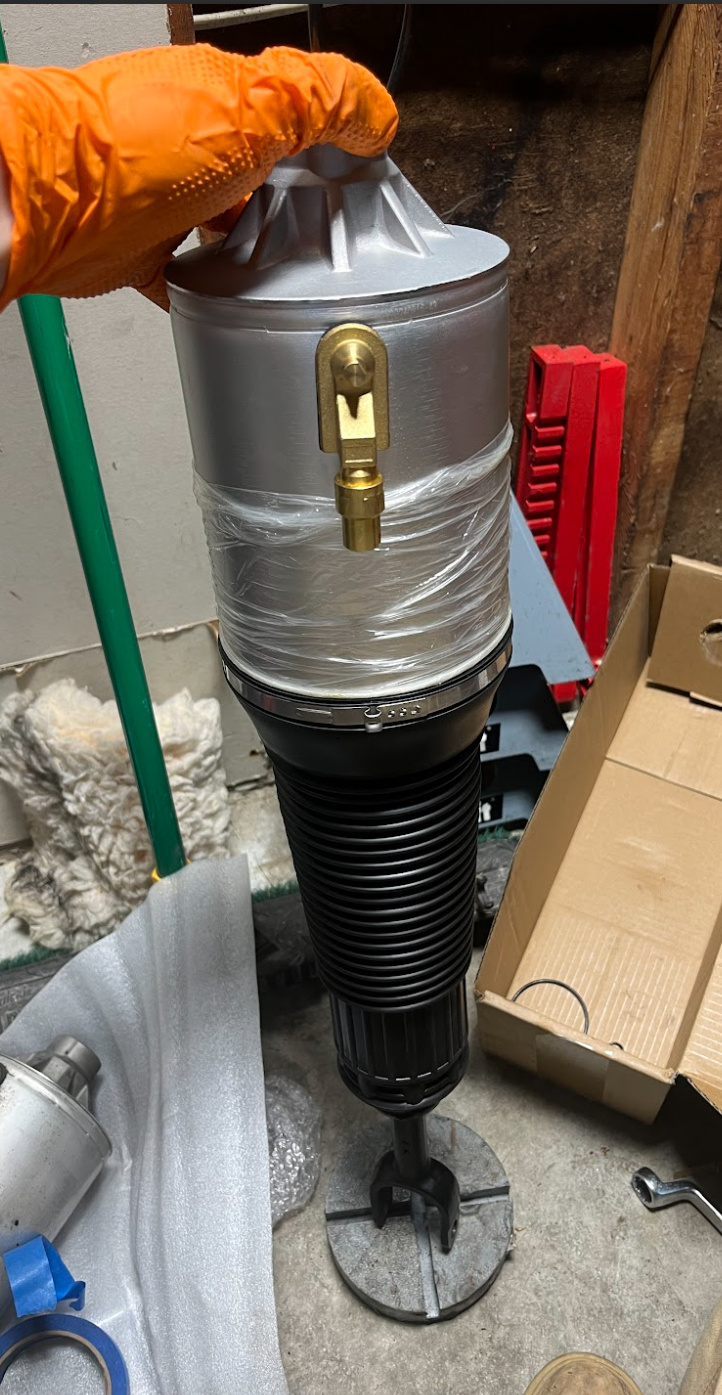
After re-assembly I had to let it level itself out on the ground. I originally wanted to let it air up with the support of the jack, but found that I had to let it do its thing self supported.
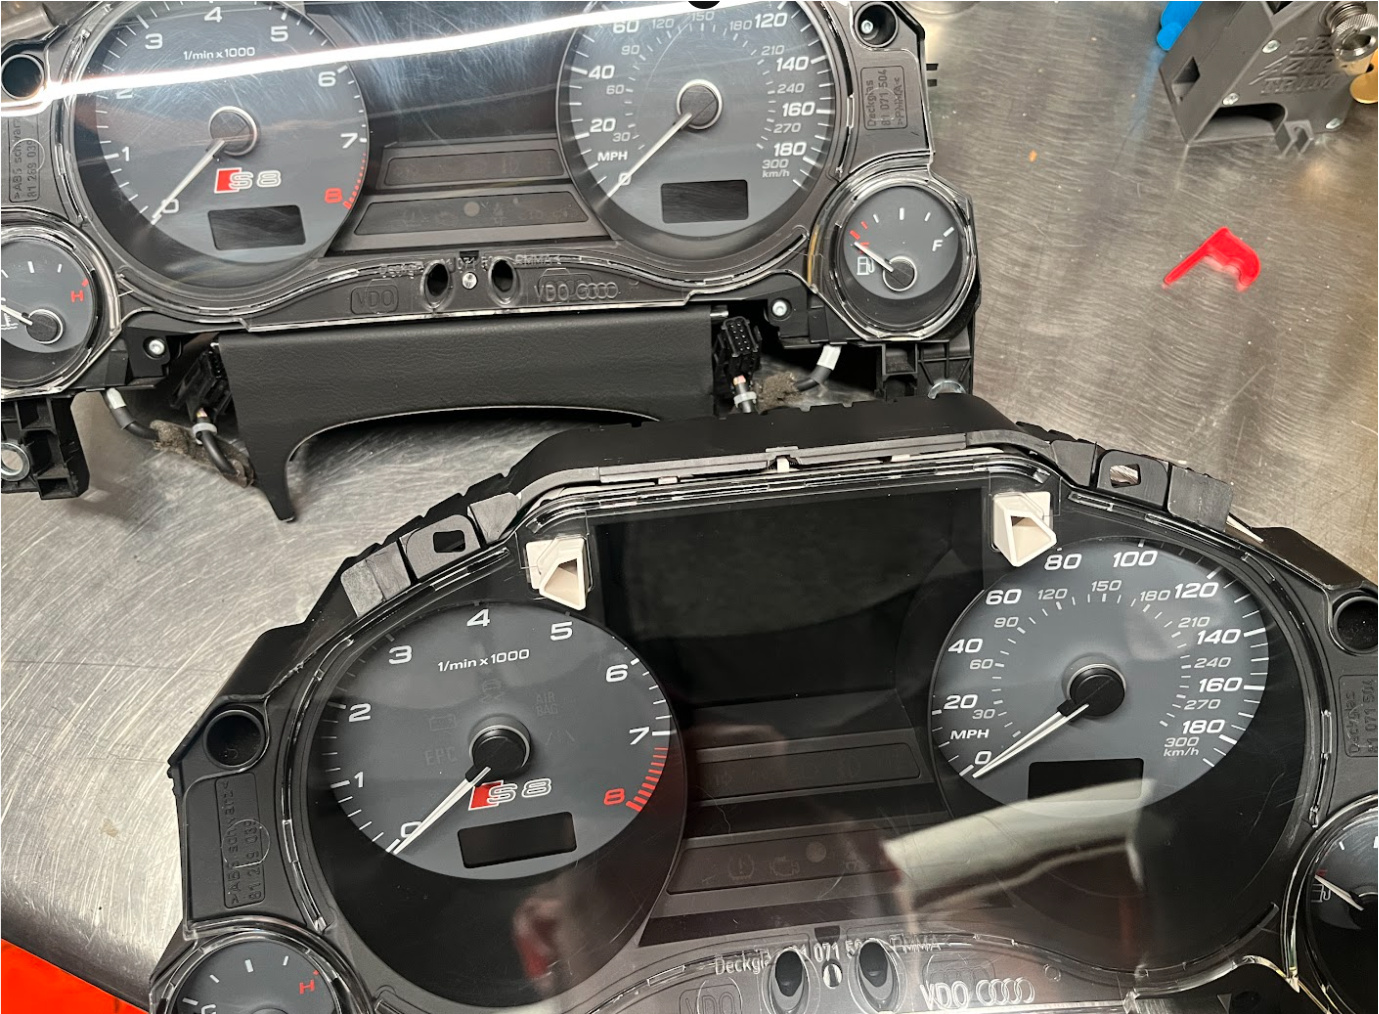
Another update: My speedometer had started sticking. It would lag on acceleration and not display the accurate speed until a few moments later. It ran the output test in VCDS just fine, and would perform the needle sweep. I figured it was either the instrument cluster or the vehicle speed sensor. Since the vehicle speed sensor requires the removal of the transmission pan (which requires removing some very hard to reach and easy to strip exhaust studs) I figured I would try a new cluster first. I installed a new used ebay 2007 s8 cluster, and the spedo works perfectly! Now I just need to get the dealership to code it to my car and mileage and I will be back in business. Note* the instrument cluster swap does not effect the immobilizer, it simply does not display any helpful information or correct mileage. The only thing that works with an uncoded cluster is the speedometer, but the car will run and drive to the dealership.
Right now I am crossing my fingers for a few trouble-free months
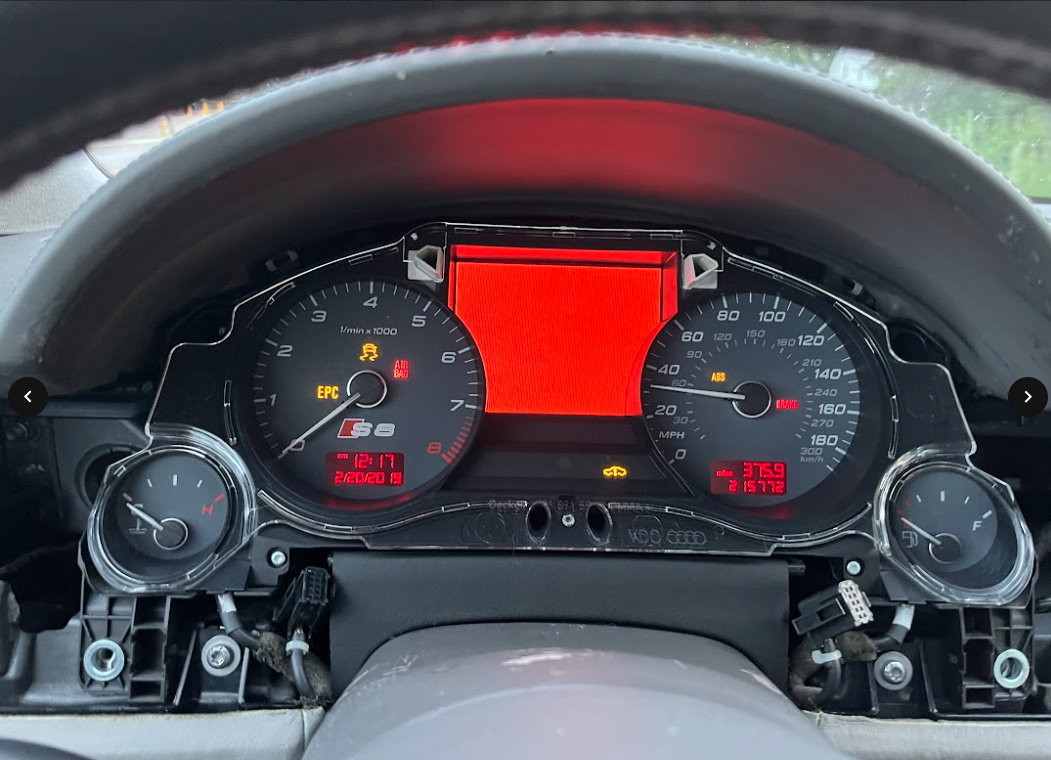
Just got done at the dealership, charged me a whopping $282.85 for 1 hour of labor. They were able to unlock the cluster, so everything works as normal. However, They were unable to code in the miles from my original cluster, so I am stuck with the doner cluster’s stated mileage. They said that these clusters are designed so that mileage cannot be changed at all, and you are stuck with what you have. At the time of the swap, the original cluster was at 111,763 and new donor is at 215,772. So to get true mileage I have to subtract 215,772 from the displayed mileage, and then add 111,763. A bit annoying to have to do the mental calculus do get the true mileage, but I am happy the spedo and cruise control are working again.
Dealer can set cluster mileage only when the miles are lower than 50. However some third party shops will totally be able to change the miles.
I lost power steering on my way home from work the other day. Thankfully it happened only a few miles from the house at the end of my commute. When I pulled into the garage I had fluid leaking all over the floor near the front left (US driver side) wheel.
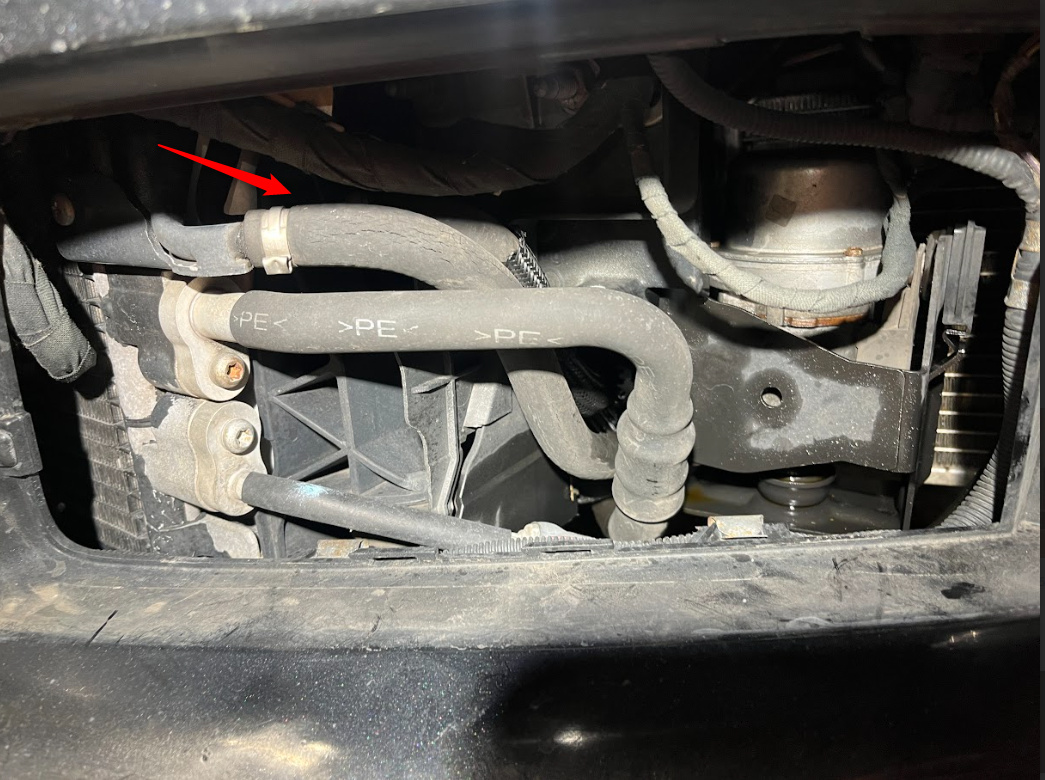
I pulled the airbox and the front fog light to get a better look and found the likely culprit: the low-pressure hose that runs from the steering rack to the power steering cooler. The hose was extremely weather-checked and brittle.
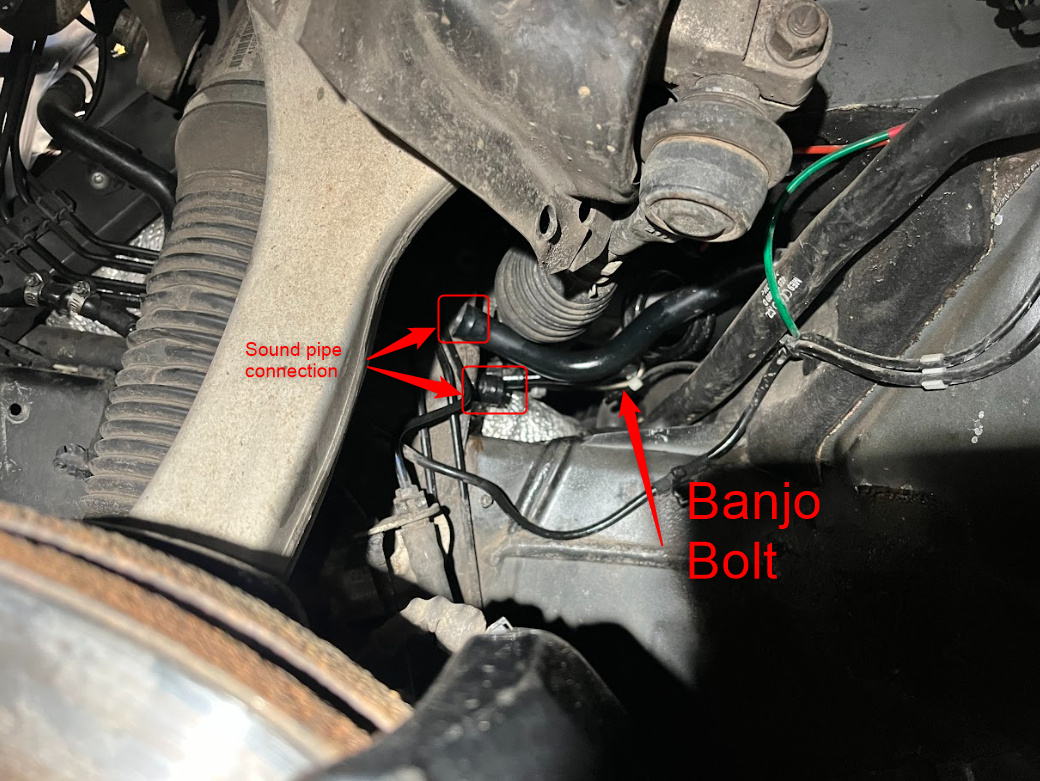
To remove it, I put the front corner on a jack stand, removed the wheel and wheel liner, and accessed the banjo bolt where the hose connects to the rack. Getting to the the banjo bolt is tight. You need to remove the plastic sound pipe that channels engine noise into the cabin, along with the wheel liners. Overall, not a difficult job — just incredibly inconvenient.
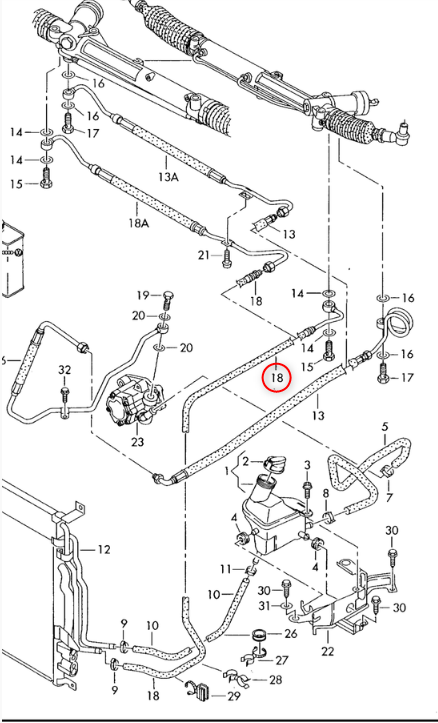
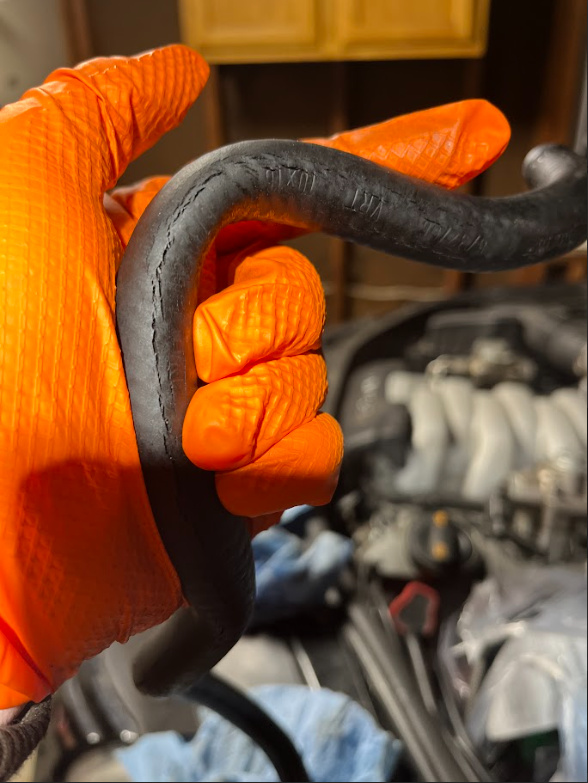
Once removed, I filled the hose with fluid to confirm — sure enough, it poured out of a large split about a foot into the end nearest the oil cooler. From some research, I guess this is a problem hose due to heat from engine and weather checking near fog light grill. For reference, it is item 18 in the photo
Since it’s the low-pressure return side and there was plenty of good hose further back into the chassis, I spliced into the good rubber with some 3/8” power steering hose and a stainless steel barb. I installed new aluminum crush washers at the banjo fitting, reinstalled everything, and topped off with Pentosin CHF 11S.
To bleed the system, I turned the wheel lock-to-lock about a dozen times with the engine off, topping up the reservoir as needed. Then I started and stopped the engine a few times (with the MAF plugged in but set aside), continuing to top up fluid. Make sure rags and tools are clear before doing this. The system took about 1/4 liter — a fully dry system takes closer to 1 liter — so there was still plenty of fluid in the rack and cooler. No pump whine at all.
Once fluid level stabilized, I let the car run with the front wheels off the ground and turned lock-to-lock again with the reservoir cap off. After that, it was good to go.
Hard to stay frustrated long once you’re back in the driver’s seat.