Dr Awesome's 2007 D3 S8 Ownership Log

I am making this thread to document the ownership of my new (to me) 2007 Audi S8!
I picked it up today and am looking forward to digging in with my new daily driver. My 2001 Stage 3 B5 S4 is now finally going to enjoy retirement as a weekend cruiser.

I am so enthusiastic and excited about this S8 - the driving characteristics are everything my S4 is not: quiet, smooth, comfortable, automatic, and cold (aka working AC :slight_smile:). I am looking forward to enjoying each car for what they were built for. My current goals for the S8 are very simple. I want to refresh and maintain a reliable long distance commuter / road trip machine.

When I went to take a look at it / purchase, I ran a scan with my VCDS. Everything came out clean with no engine related codes. Readiness monitors all passed (aka no indication codes were recently cleared).

First things to address:
It sounds to me like there is a slight exhaust leak under the drivers side, I will have to take a look under the car and see if I can isolate. I suspect a flex pipe? Only noticeable when blipping the throttle around 1800 RPM.

Scan for misfires in VCDS wile WOT to see if there are any misfires which are simply not triggering a CEL. (This is just out of curiosity, the “butt dyno” is not setting off any alarm bells). I test drove a C6 S6 a few years ago that was not sorted at all. The S6 felt like it was asleep compared to the S8.

Bleed the brakes (any recommendation for the preferred brake fluid?) Anything special about bleeding our brakes?

Carbon clean/spacers + Manifold Inspection
Last carbon clean was a decade ago :frowning: I am planning on getting the equipment to walnut blast it myself. While I am in there I would like to inspect the manifold flaps and install JHM Spacers.

After the carbon clean + spacers and having driven it around for a while / uncovered and fixed whatever rears its head, I would like to consider:
JHM ECU / TCU tune
SAI delete
Lightweight crank pulley - would love some feedback if this is a safe bolt on in the sense of retaining the smooth and comfortable luxury ride characteristics. The B5 S4 can have all the NVH in the world, but I am trying to play to the strengths of the S8. I read somewhere on here that one user reported the feel and smoothness of the ride was actually improved after installing the crank pulley. It seems like this is a win win in the HP and Comfort department, which is usually rare.

Final thoughts thinking out loud - I feel like my current goal of a smooth, comfortable, luxury daily driver will experience scope creep. What I mean by that is no doubt in some time I will want to have it all (quiet exhaust and a screaming V10). I know the proper exhaust setup and grail is headers and JHM catback, but I don’t see that in my future. Is it sacrilege to ask if members have used / had success with exhaust cutouts? Seems like an economical way to have it all (albeit no performance gains whatsoever).

Thanks for the read, I am excited to become inundated with the v10 and the D3 S8 platform as a whole!

First off, I got the S6, but as it’s the same engine and quite similar so I offer my opinions.

  1. Brake fluid, just get a decent quality one. As for bleeding, its pretty straight forward, nothing fancy. Just remember to avoid stripping the bleed nut;)

  2. Carbon clean, definitely do this 100%, if u want to save money you can use a strong oven/grill chemical cleaner, soak the intakes, and most gets dissolved, then vaccum is out. Use a low rpm drill or electric screwdriver with a bunch of zip ties jammed into it, basicly works as a brush, and doesnt scratch metal.

  3. Exhaust cutouts, S8 is a bit larger than S6, so you might have more options there, but on the S6 its so extremely tight areas and bends and such, its pretty much only one place for the cutouts, which also has to be custom to avoid losing ground clearange, and thats where the first resonator is, ish. Its tight tho, very close to the drive shaft, but it works. I would recommend vacuum driven valves over electric, because electric might die on you, and requires a completely new set/job/cuts/weld and all that. Vacuum is mechanical, so if the vacuum pump dies, u can simply replace that part alone, 1 min cheap job.

The sound is incredible, i absolute love it, almost straight piped. And the best part is, you can close them for longer cruising, neighbourhoods and police;);), and u can avoid being a cunt. If they were to be open 24/7 u would get a headache, its extremely loud. However, the downside here is that the exhaust is then basicly directly under the cabin, so low rpm high torque you get vibrations into the cabin and drone. (But its worth it).

I’d say looks like a good path.

The JHM LWCP is known to help with a bit more frisky throttle response from the motor and a smoother car over all. The OEM crank pulley is known to have the rubber ring go bad over time and to even have the crank pulley it self fail. So this is a good maintenance part if you ask me.

The JHM ECU/TCU tune are a good way to go for sure. It helps bring the power for the V10 out like you’ve never seen before. It turns the car into a 4 door R8 with S8 comfort and enjoyment.

But as I’m sure you’ve read… maintenance maintenance maintenance… Do the carbon clean. Look into new or cleaned injectors. Change the plugs and coil packs. Inspect the oil separator and PCV system really well. The JHM intake spacers are a big win as well for the cooling of the intake manifold and helping keep carbon at bay for a bit longer. Get all that sorted and you’ll have a smile worthy hotrod that you can enjoy for a LONG time

Thanks for the tips! I am encouraged by your experience with the cutouts kvn!

I will use the chemical method after your advice, as well as justincredible’s posts on the subject.
Paraphrasing Justincredible: use starter fluid to ID your closed valves, 30 min soak with oven cleaner, brush with oven cleaner still in the valve, suck it out, washer fluid + bright light for inspection + repeat as necessary, etc. sounds simple enough and a safe way to clean.

Justincredible: I have a smoke tester, I assume that is the best way to inspect the PCV system? Any advice on the best place to pump the smoke into the system?
Oil separator: just check for cracks?
I saw you also mentioned in another thread that you recommend the oil separator bypass kit from JHM. Should I consider this? I live in Minnesota and sometimes it gets extremely cold.

Planning on replacing the oil filter adapter gasket while I am in there as a precaution and will take stock of everything else I can see.

Thanks again for the feedback! I will update with pictures and progress when I get into it!

Quick update on progress so far:
I have the JHM spacers in my garage, just waiting for the right weekend to pull the IM off and carbon clean + install.

When I purchased the car the previous owner included a spare B&O speaker for the front passenger side, as the front driver side surround was torn and was crackling with bass. I installed the speaker the other weekend and it is sounding much better, although a slight crackle. I can live with it for now, but may replace with an aftermarket speaker I found mentioned on another post. If I go that route I will update with relevant info.

While the door card was off, I dug into my drivers side soft close feature. My car has this feature, but the driver side door was not activating. No motor engagement when the latch was 1/2 depressed, so I thought I had a bad switch. I ordered up a set of switches on Amazon for $6


I got the straight switch type but ended up bending it to get to engage with the lock more consistently. If I were to do it again, I would probably go with this type:

These soft close doors tend to fail due to this switch going bad, or the cable sizing. Unfortunately for me, mine had both issues. The good news is that I have the switch replaced and a used front door latch on the way from ebay that I picked up for $40. I am planning on just harvesting the cable since I know my switch will be good for a while. All in all, not a very difficult project to correct, but a bit of effort to get the features the car came with back online. Fingers crossed the new cable sorts it out the rest of the way.

I installed new headlight bulbs, and used the osram xenarc night breakers: https://a.co/d/864Af8f
I also upgraded the turn assist lights (the side Halogens that turn on when you turn your steering wheel under 40 mph, or use your turn signal while stopped) with these LED ones. Cheap and a huge improvement. No issues / codes / flickering. Highly recommend: https://a.co/d/1H8QdJvhttps://a.co/d/1H8QdJv

Installed a Bluetooth adapter for the MMI system, sounds great and pairs with my phone flawlessly. CD’s are great to let the B&O system shine, but to my ear the Bluetooth sounds absolutely fantastic and puts a smile on my face. https://a.co/d/aCmg7a6

Hardwired a Valentine 1 Gen 2 as well as a VIOFO A119 V3 dashcam - they each installed extremely cleanly and I am really, really happy with how it all sits tucked on either side of the mirror. I tapped into the drivers side dash fuse for the V1 and the passenger side for the VIOFO.

So far have been really loving the S8 and just taking on some of the easier and fun projects getting it back up to par. The previous owner had the fuel injectors cleaned, so for now I am just planning on carbon clean and spacer install, but would entertain an additional cleaning as a future maintenance item down the road.

Some future projects still to come:
Carbon Clean
Spacer Install
Fix an oil leak that is causing oil to drip down the front of the engine (most likely the figure 8 gasket for the oil filter housing)
Upper control arm bushings are cracked, and should be replaced (any recommendations?)
bleed the brakes
balance the wheels (slight vibration noticed 60-75 mph)
replace the TPMS modules (getting a TPMS error akin to a dead TPMS battery)
Window tint? I don’t want the “drug dealer look” but value the privacy + sun protection tinting affords. Is 50% too subtle? I want to keep the lines and elegance of the car. Interested to hear what others think! Thanks for the read

Welcome to the club… Great cars.

The JHM intake spacers are such a great help in so many areas. My self and other S8 guys also went in for the JHM ECU/TCU. It makes the S8 more like an R8. Fun stuff ahead for you it looks like.

Thanks CounttVohn! Your posts have been a huge help thus far!
Somehow as I was writing my post last night I forgot to include the JHM ECU/TCU in my list of future plans! I have heard nothing but great things and can’t wait to go down that route in due time!

So my A8 door latch came in and I am swapping out the cable. It looks like the cable attaches in a different manner to the latch mechanism from the A8 to the S8, so if I were to do it again, I would try to source a specifically S8 door latch w/ soft close cable. They can be found on ebay for around $30 -$40 at the time of my writing. I will give the install a shot nontheless!

As an aside, upon opening my door back up to get at the latch, I was able to inspect the newly replaced driver side 5.25" door speaker. I commented earlier that I still had some crackling when I replaced the speaker with a used one with intact surround. For reasons unknown to me, the crackling has gotten a lot better in the last week, and now I don’t hear it at all, even when the bass comes on. However. When repairing my soft close latch, I inspected the surround on the newly installed (but old and used) speaker, and it has already torn! The rubber on these old surrounds must be getting old! I guess there is a type of glue you can buy for cheap that might help retain the strength of aged surrounds. If you get your hands on an old but intact door speaker, I would suggest using this protectant: https://www.youtube.com/watch?v=jYni5-Oi4ys&ab_channel=SimplySpeakers

In my case, I am going to order some 5.25" foam surrounds and attempt to reinstall and repair the speaker. If that fails, I will find another speaker that matches the specs. It makes me wonder what condition the other door is in, so I may take that on down the road!

Here are the parts I ordered:


This is the third time I have had my door panel off in the past week, and I noticed it is easier to take off (experience + weakening clips). I would suggest if you take your door panel off more than a few times to just buy some new door clips. Mine are intact, but new clips will make a better and more secure connection. Probably overkill but they are pretty cheap and I am going to put new ones in there once I am wrapped up.

Long overdue update - finally got around to doing the carbon cleaning + JHM intake manifold spacer installation over some time off for the holidays. Great success and worth taking the time to do. On the first test drive yesterday, everything went great. Throttle feels slightly more responsive and the exhaust note sounds “throatier”. Most importantly, is the peace of mind in doing the service. When you do it yourself, you can be as meticulous as you want. There was also a ton of carbon on the valves, and I am confident that this was a good use of time and effort. The car has 96,000 miles on the clock I am the third owner. Unsure of the carbon cleaning history with the original owner, but I confirmed with the prior owner that he did not do carbon cleaning.

Big thank you to all of the info posted by CountVohn and Justincredible from all the other forum posts - following those directions I was able to take care of all the small details and it really set me up for success.

While removing everything to get to the valves, I observed my pcv oil separator that leads to the intake was covered in oil - must have cracked somewhere. I replaced with a new one.

I broke the big breather hose that connects the valve covers to the oil separator when taking it off. I was gentle, but that plastic is brittle! I replaced/rebuilt with oil/fuel rated hose.

I also had oil dripping down the front since ownership, not a lot but enough to make me suspect the oil filter housing figure 8 o ring. I replaced this and was glad I did - lots of oil in the valley and the o ring was as hard and brittle as a rock. The old one was longer providing a good seal, but it is now taken care of.

For the cleaning itself:
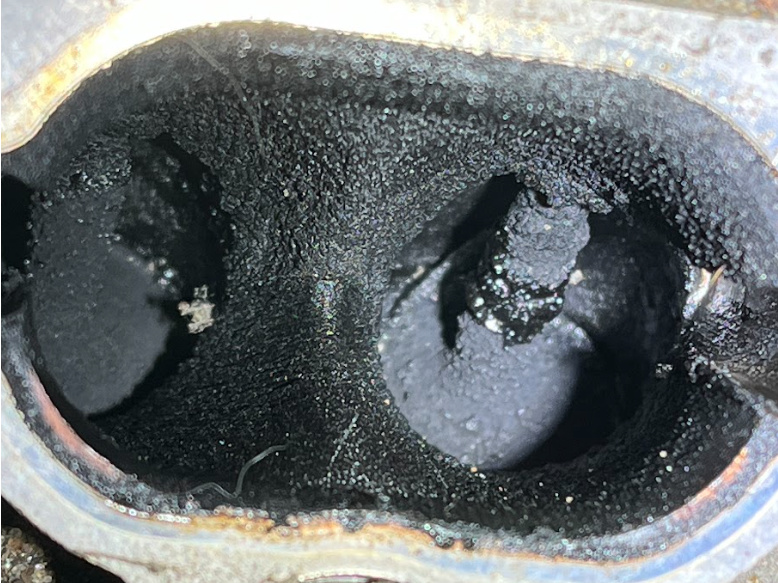
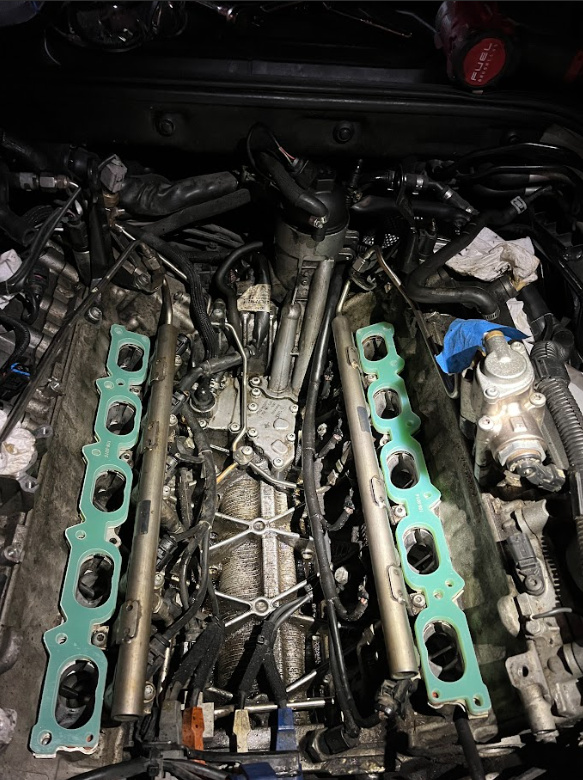
I did a chemical clean with oven cleaner. As suggested, I pulled the coils/plugs and filled the valves I thought were closed with starter fluid. After 10 minutes or so and no drop in fluid, I masked off the other valves and got to work. I would start by picking out the big carbon bits and using the shop vac, then proceeded with soaking, brushing, scraping, vacuuming, compressed air, repeat. I was not a big fan of the zip tie in the drill, was very messy and the zip ties did not last long. I mostly used the metal picks, brush, and of course oven cleaner. I also made sure to mask off the fuel injector lines where exposed, spark plug wells, etc. No mater what you do you will make a mess, so try to protect areas of entry. When I was done I flushed each valve with windshield washer fluid. I also did not reinstall the port divider plates - left those out of the car.

During the cleaning I was literally shoveling out carbon behind the valve stems, not sure how a walnut blast would get up in there. I did the actual cleaning over the course of 3 days - I was not in a rush and took my time, and my garage was pretty cold her in MN. It took quite a few cleanings per valve to get them to where I was happy, but overall this is a great process for the DIY’er.

After doing all the valves, I ran the starter to purge out anything that could have somehow ended up in the cylinders. To do this I of course had the spark plugs removed, but I disconnected the fuel pump relay in the trunk (passenger side near the battery). Relay number is: 614
(I had removed this relay before I started to disconnect the fuel lines just to make sure that opening the door would not spray fuel all over the engine bay over the course of my cleaning).

The money shots:

image

Other notes:
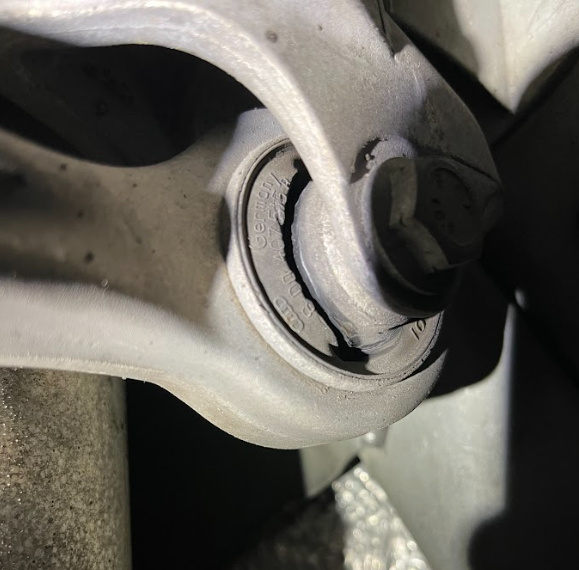
My intake manifold flaps all work and are in great condition! I feel very fortunate.

When pulling the spark plugs I had quite a few on the passenger side that had oil on the spark plugs, and a few on the drivers side. I am thinking at some point in my future I will be doing valve cover gasket replacements.

Installed the JHM intake spacers and everything went in smoothly. I feel confident that I am setting myself up for less issues down the road by using these. I installed the gaskets above and below the spacers, but for the sake of the picture here I left the top gasket off to show off the cool looking spacers.

I did not do the JHM heater hose bypass as I live in MN. This winter has been mild, but some years it gets very, very cold. Question here: would it still be worth doing the hose bypass, or leave it stock? What do others in very cold climates recommend? It seems counter intuitive to heat up the blowby gasses with the coolant, while trying to keep these gases colder with the spacers, so I am really leaning towards bypass, but really need cold weather reliability. Along the same vein - what is recommended regarding the SAI in cold weather climates? Leave stock or delete?

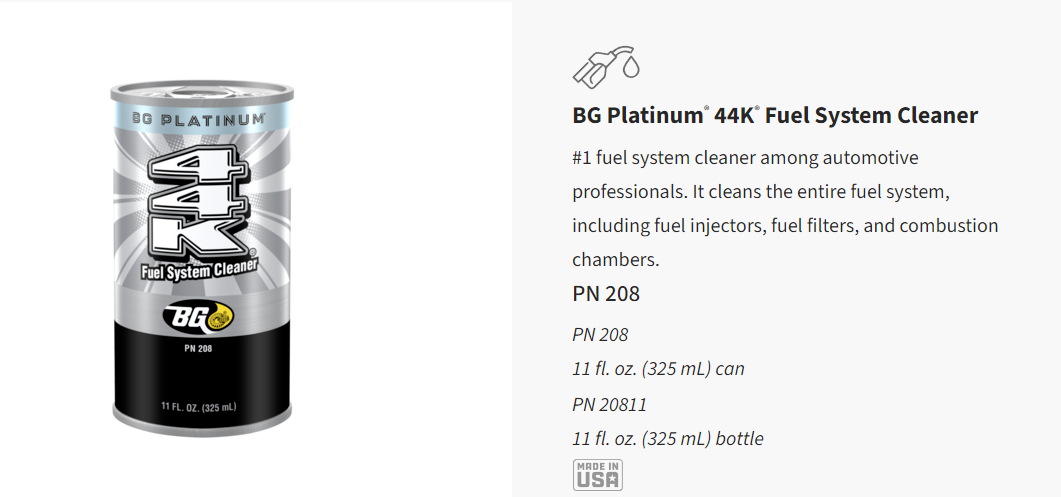
Next items: Previous owner had the fuel injectors pulled and cleaned, I want to keep them that way. I plan on using BG Platinum 44k fuel injector cleaner in the next week or so, and then an oil change. Has anybody used this cleaner? I have read that it is recommended to do an oil change after using it.

I have read good things about it and plan to do it before every oil change.

For every / every other fill up at the pump, what are your favorite “normal” fuel injector cleaners to use?

What oil / filters is everybody using?
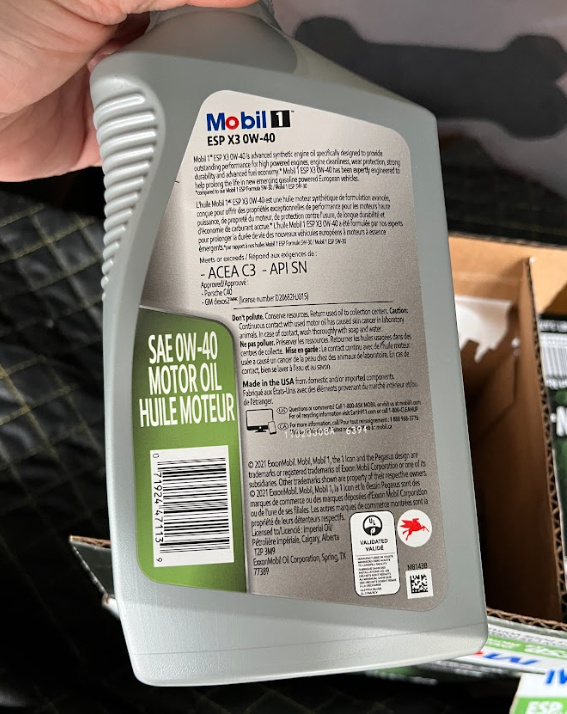
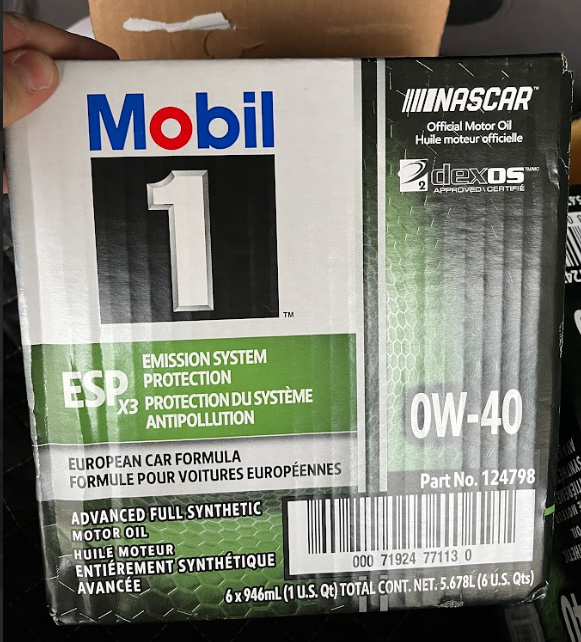
I have used mobile 1 0w40 for my 2001 B5 S4, and was leaning towards their 5w40 Europeans formula for the S8. What is everybody else here using? Any recommendations for MN climate?
Do you all prefer servicing the oil by draining, or by extracting from the top. I have done both on other audi’s and honestly prefer the top. I may have to get a bigger extractor to account for all the oil in the v10!

Other updates:
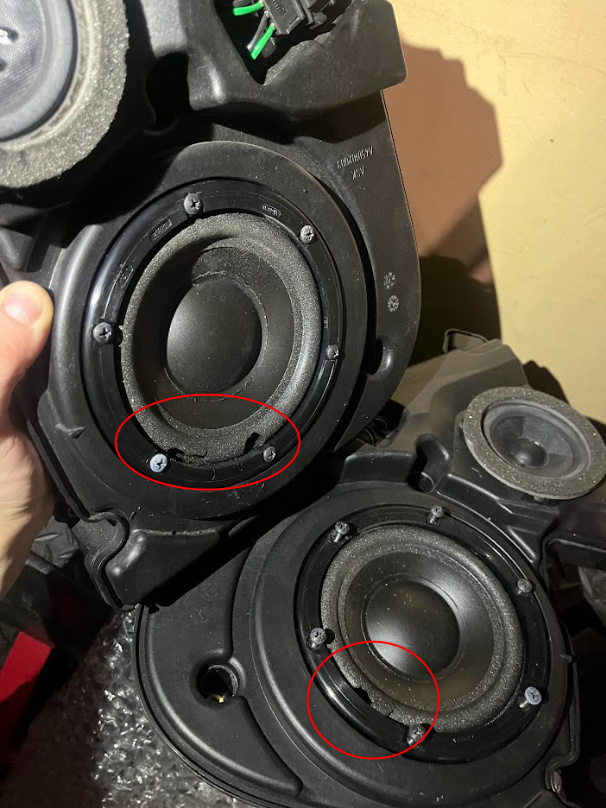
The speaker repair was a big success, no more crackling and beautiful sounds coming from the speakers. I would highly recommend replacing the surrounds if you have this issue.

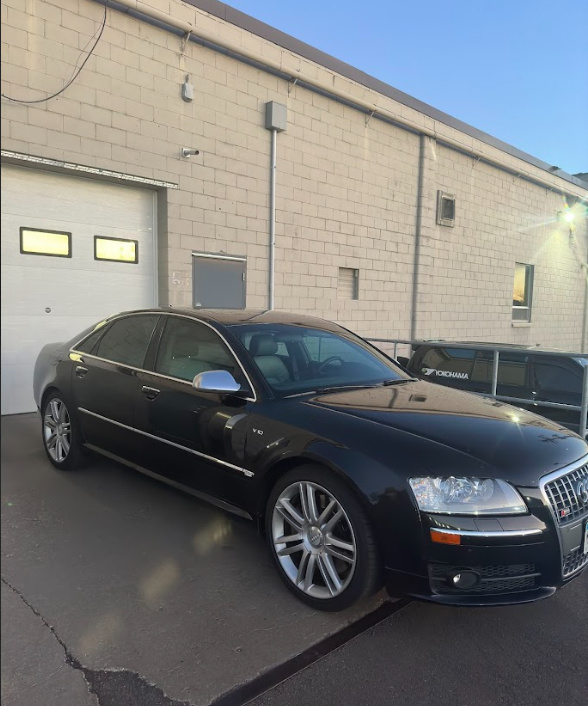
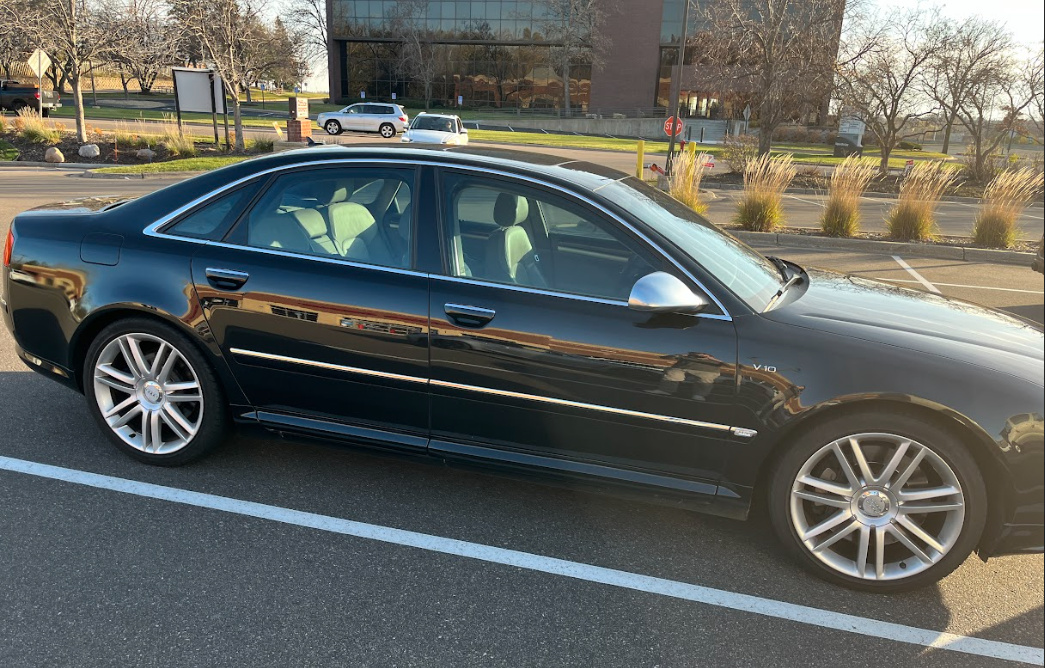
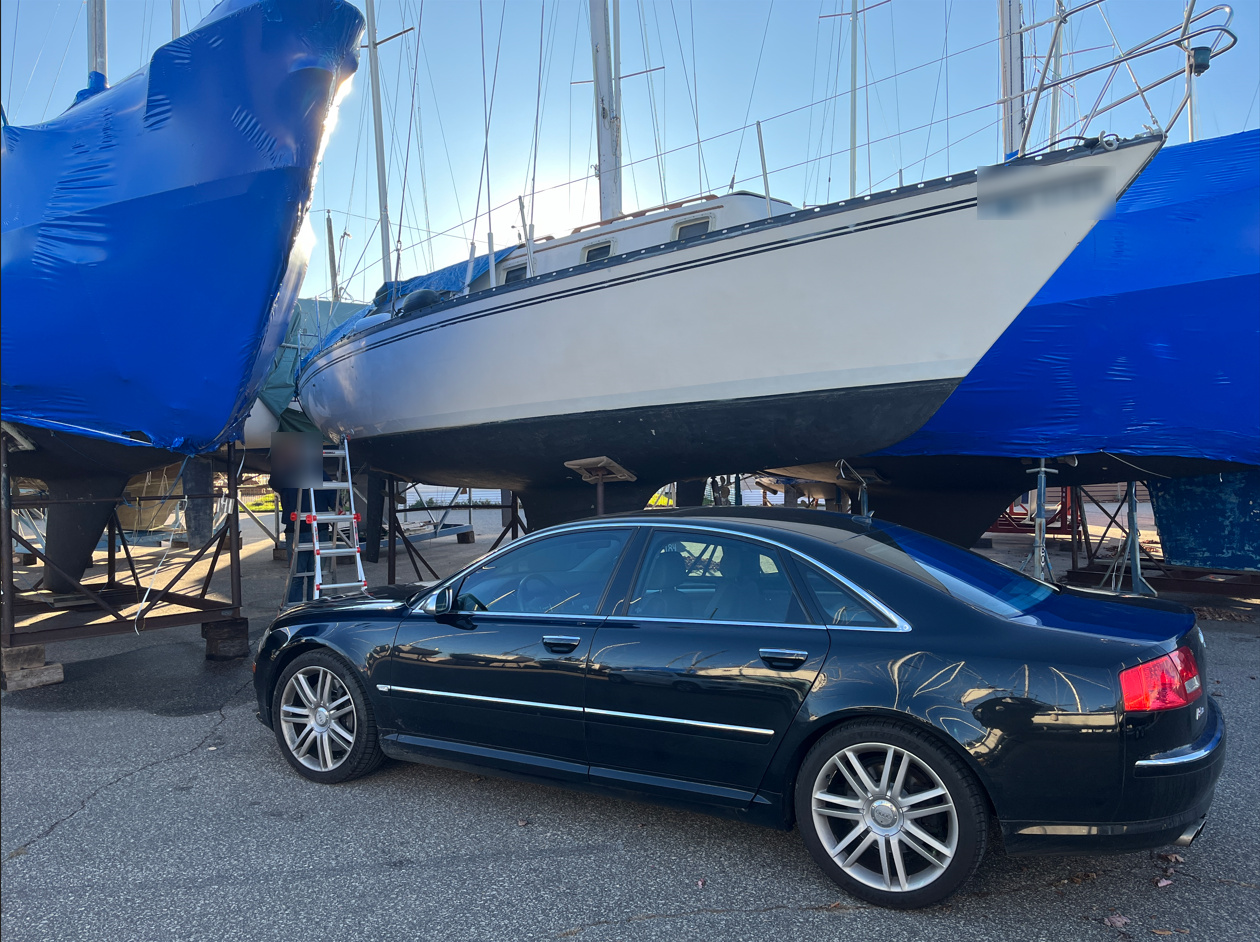
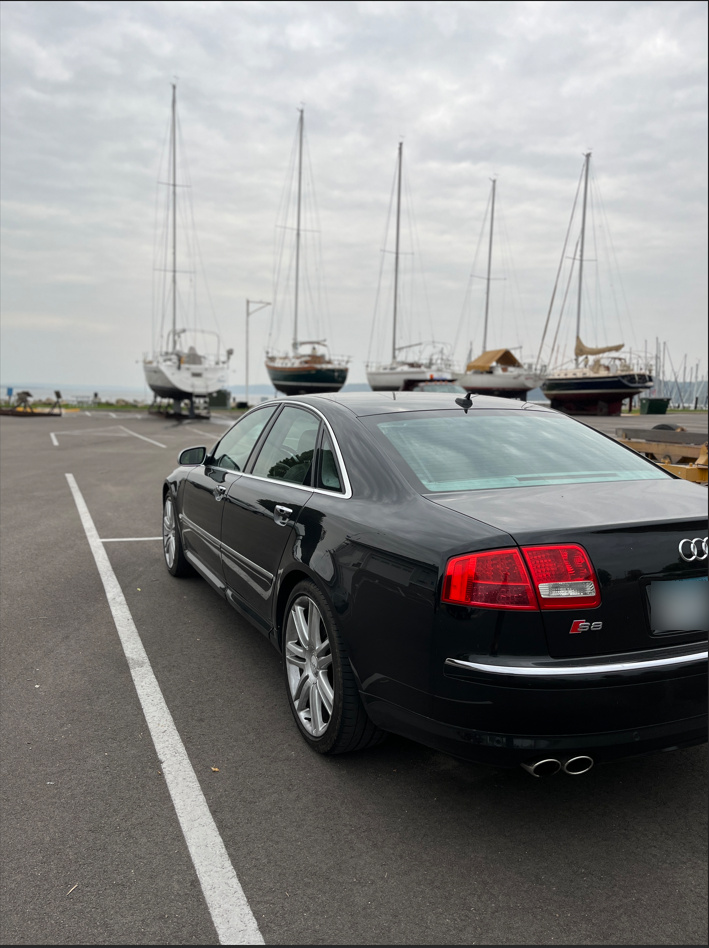
I recently had the windows tinted with xpel 50% to keep it MN legal. I like the subtle smoky tint and the OEM+ look. It also keeps all the UV and heat out which is awesome for comfort and no UV damage to skin. Here are some pictures in the same parking lot on different days. Some in the sun, one with our gloomy winter weather. The winter picture is sporting some OEM Audi takeoff wheels and new Nokian R5 winter tires. I plastidipped the wheels and used an aluminum metalizer to hide some rash and keep them looking fresh without a full refurb.

All three pictures are with the tint:

Not sure what the future holds, perhaps at some point ECU/TCU tune…for now I am going to keep enjoying the car as is!

Thanks for reading, and thank you for all of the advice that has been offered on these boards!

Nice update and solid progress! I don’t consider myself an expert in the ranks of others on this forum, but let me share my cold weather V10 experiences up in Maine.

I did not run this on my '07 S6, but planned on doing so. I will be on the motor from my '10 S6. Reason 1 is I believe the coolant runs through the IM purely so the car heats up quicker and meets emission specs. The JHM website says “They heat the oil separator up to warm up everything quicker for meeting stricter emissions requirements.” Much like our exhaust manifolds, the #1 priority of the design was meet emissions. Reason 2, even on the coldest days I could open up the hood after a 5 mile drive and fry an egg in there. Heat soak is the enemy, adding additional heat constantly year round makes no sense.

This stuff comes with high recommendations. Used for carbon cleaning by many too. I personally use lucas oil fuel injector cleaner because its in stock at most any auto store, and theyre an Indiana company. I am from Indiana so partial to them.

I just grab a bottle every 2-3 months and drop it in the tank.

I’m not everybody, but I use MAHLE oil filters, probably most common answer here. For oil, Liqui Moly is great, but too expensive for me. Call me cheap but I use Valvoline 5w-40 European formula year round. It can be bought almost anywhere and I’ve had no issues, just check and change consistently. I go drain plug underneath because I don’t have an extractor, and don’t mind getting under my car and routinely checking bushings/bolts etc.

Thank you so much for the tips! I appreciate your comments on the fuel conditioner + oil, its very helpful! After reading what you had to say, I am leaning into ordering the bypass kit. It is reversable if I feel the need to go back.

On the bypass it’s not like the coolant is warm when you start the car cold. So that’s something to take into considering.

Also SAI seems to just make the car run like $h!t. While it’s supposed to help with warming up the cats it’s better to just make sure to NOT let your car idle when cold.

I’d add injector cleaner to the list as they’re one of the main issues with these motors. On carbon cleaning you have to be careful flushing the carbon by the valves as the carbon will then just glog up the cats. So something to think about.

Great update.

Thank you for checking out the update justincredible! I will look into the SAI delete as well. I am going to order in the bypass from JHM. When you put it like that (coolant will be cold) it seems like a no-brainer.

What motor oil do you prefer to use?

I 100% agree that manual removal of carbon on the valves is a must. There is so much that accumulates, you really want to physically remove it.

The BG44k is a fuel injector cleaner, which you add to your gas tank not the IM. I think it is quite concentrated (hence the recommendation to do an oil change after use). I am also looking for a product to use frequently (or semi frequently) for maintenance, such as the Lucas as 10Banger suggested. What is your preferred fuel injector additive?

I swung by the local Audi dealership and was asking about their 511.00 spec 0W40. They usually carry an audi branded one (sourced from Mobile 1 and another mfg, cannot remember off the top of my head). They had the mobile 1 name brand in stock and I went home with 12 quarts. Not cheap but I figure if I can find it, may as well use it! As I understand, this is the latest and greatest. Not sure if it will reduce carbon buildup any more than simply frequently changing your oil and not letting your car idle on a cold day, but what the heck - worth a shot.

Time for another update! I just completed a full suspension refresh. Control arm bushings, sway bar end links, and sway bar bushings. I also had my summer wheels straightened / rebalanced. They are the OEM 20" wheels with 16" years of potholes on them. 2/4 were out of round and got re-straightened + fresh hypersilver powdercoating.

As noted above, I suspected my upper control arm bushings were worn and due for a replacement. For the upper control arm bushings, I went with Lemforder OEM bushings.

I did my research from the following threads, which helped with parts selection:

The symptoms I was getting were vibration ~60 mph + a plastic crunch noise when going over bumps in cold weather (~32 and below).

This has been a midwestern car, and as such I fought with the pinch bolt and releasing the ball joints from the knuckle. I did not use a torch, as I wanted to preserve the integrity of the ball joints. I ended up cutting out the bolt head and tightening the nut + using spacers to get the pinch bolt out. I had already bought replacement bolts for this exact reason (when you reinstall everything, don’t forget to use antisieze lubricant on the pinch bolt!) For the ball joints, they did not want to come out, even with a punch. I ended up using a ball joint press and found I still had to spread out the slot in the knuckle under the ball joint. I very, VERY carefully spread out the split on the knuckle with a screwdriver. You don’t want to get too enthusiastic and shear off your knuckle… Here is an image of the tool I used, I picked it up from advanded auto:
image

That tool is really for the lower control arm ball joints, but I was able to make it work for my needs. I had to grind the ears to make them wider to fit, as well as use a small socket to press up on the ball joint stud. Remember your PPE and eye protection if you do this, as that socket is under a lot of pressure and likes to explode when you free the ball joint…

Once they were out, I removed the fender liners, took out the three 16 MM bolts from each strut tower (unbolted from the top of the engine bay), removed the sway bar end links and sway bar.

Note* I only removed the sway bar because I was replacing my sway bar bushings, you don’t need to do this if you are only doing upper control arm bushings.

With all that out of the way, I was able to remove all of my upper control arm bolts with the help of a pry bar on the upper shock tower. I then used my amazon special 12 ton press to press out the old bushings and press in the new ones. All four bushings were shot and had cracks in them. Once the new bushings were pressed in, I bolted everything back together. I tightened the bushings after preloading each strut tower to the appropriate ride height (measured prior to disassembly) to ensure the bushings are not under stress at normal driving conditions.

My sway bar bushings were also shot, they each fell apart. They looked fine from under the car, but upon removing the sway bar they each let themselves go. I cleaned up the sway bar with a wire wheel, removed the old bushings from the mounting brackets, hit it with a fresh coat of underbody paint and was off to the races.

My vibration at speed is gone, car is quiet over bumps, and steering feels more responsive. A huge win in my book. No slight shaking in my seat or the steering wheel at speed anymore. I will probably get an alignment in the near future, but she drives straight as an arrow and smooth as silk. I am very pleased with the results. Like all projects if you plan ahead and take your time it should go smoothly and be worth your efforts!

Some pictures for your enjoyment:

Bad upper control arm bushings:

Crusty ball joint (all the ball joints were fine and had no play, they were just fused to the knuckle…)

Old sway bar bushings look okay on the car…maybe a crack…

Yep, cracked all right. Fell right apart when the sway bar was removed:
image

Paint job:

Fresh hardware:

New control arm bushings pressed in, looking sharp!

Thanks for reading!