Has anyone done anything like this? What are your thoughts?
https://www.jxbperformance.com/products/c6-driveshaft-center-support-bearing-carrier-upgrade

Has anyone done anything like this? What are your thoughts?
https://www.jxbperformance.com/products/c6-driveshaft-center-support-bearing-carrier-upgrade
I’ll be getting one whenever I get my car back. I just want to be able to feel the before/after difference. It comes pretty recommended by owners of S4s, etc.
I’ve developed a subtle drive train vibration and am wondering if this may be the cause. Might be a bearing or CV, need to get under the car and do some checking. Ive got 132K on the clock.
Same and was thinking the similar things. I did have front bearings replaced but I know cv and control arms are likely on their way out. I’m thinking this bearing carrier upgrade could only provide benefit though. I’m also thinking I’ll do a trans flush with the carrier upgrade since I’ll be under there and have to drop the exhaust anyways.
Pls let me know how you drop the exhaust w engine in for trans flush. Pics and a step by step would be great.
Well I tend not to be very good when it comes to documenting this stuff mostly because I’m so caught up in making sure I’m doing things correctly (most of this stuff this procedure included I’m doing for the first time) however I had managed to stash this pdf some time awhile back. I have no idea where it came from and I take no credit for the documentation but this is what I intended to follow:
Audi C6 S6 V10 Transmission Fluid Change
This will document my experience changing the ATF Fluid in an ’08 Audi S6. You will need a variety of
tools, but I have not documented them here since there was much to move and several different
drivers/sockets needed. Suffice it to say you will need a decent set of tools to get this done including
extensions, torx bits and sockets. I suggest getting new exhaust hardware that you remove. Additionally,
you will need some type of pump to move the fluid from the containers to the transmission. I used a
POS Harbor Freight deal, but there are better ones available. You will need something like the VAG-COM VCDS from Ross-Tech to read the TCU and check the temperature of the transmission when adding fluid. There is a very specific procedure for making sure all of the fluid has been added to the transmission, so this is a non-negotiable part of the work. If you don’t have access to something like this, do not attempt this procedure.
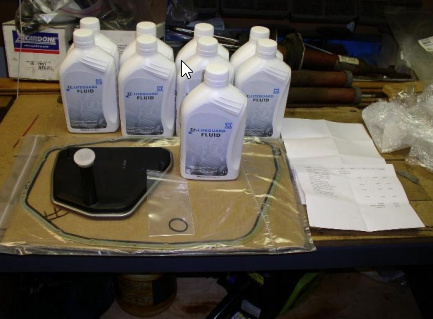
First the kit I purchased

Now the procedure:
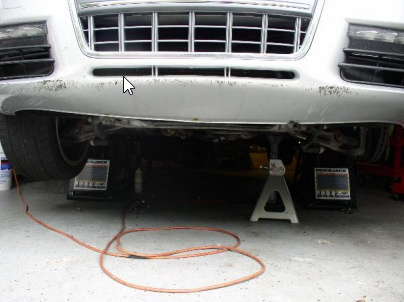
Jack the car up (in my case I used my new Quickjack – man I like this thing) You can talk to my
wife about the bumper scrapes/damage. The key here is to get the pan level. You can use a
small level on the bottom of the pan to confirm this. This assures the new fluid will fill properly.
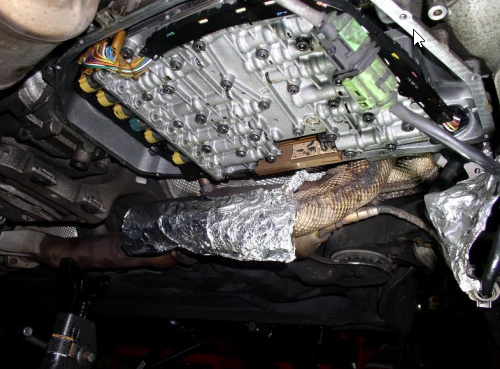
Remove the belly pans:
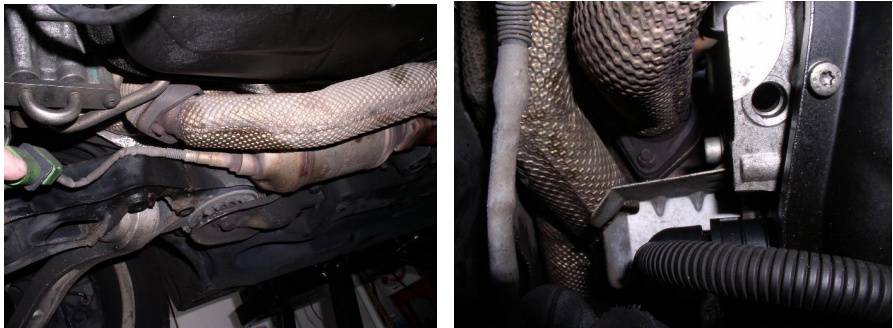
First thing you will see is the exhaust is in the way (I took the center sections apart, but did not
have to). The passenger side was easier to deal with than the driver side (the bolts were up out
of the way and required some extensions and u-joints):
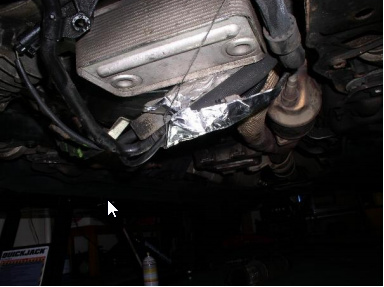
Exhaust in the way:

Passenger/Driver Exhaust connection to the down pipes When refitting the driver side, I used
some tape on the u-joint to stabilize it just enough to guide the bolt back on the stud. It worked
pretty well:
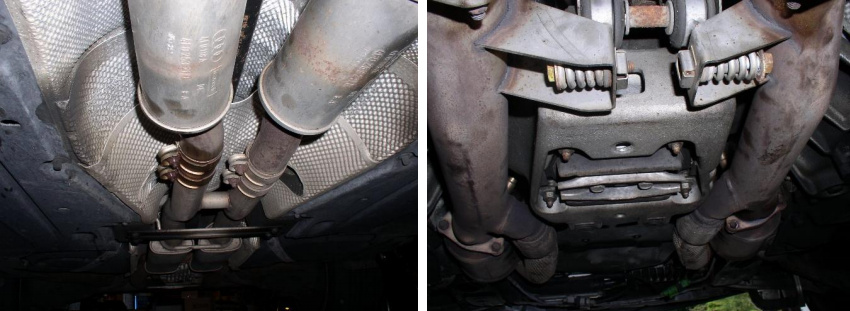
Remove these connections toward the rear as well as the support brackets in the center
Once the front bolts, the rear couplers and the center supports have been removed the exhaust
will be free. The passenger side can be lowered to the ground, but for the driver side, since I did
not want to disconnect the 02 sensors, I used jack stands to support the exhaust sections that I
disconnected. Driver side supported and passenger side removed:
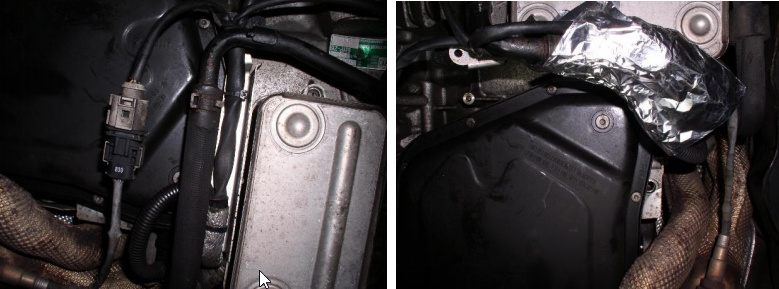
I also pulled the hoses back and tied them off to the front of the car:
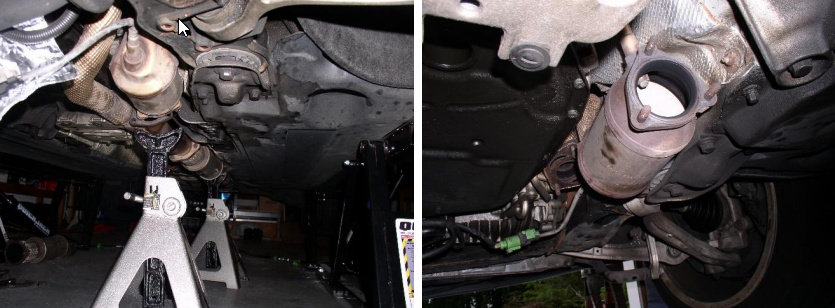
Once I cleared the way (test remove the filler plug – if you can’t remove it, STOP). If you can,
then remove the drain plug and drain the oil from the transmission:
Remove the pan bolts, I alternated and left opposite sides connected until I was ready to deal
with the remaining fluid once I dropped the pan. At the end, I left a few in and allowed the pan
to tilt toward the drain hole, allowing as much of the fluid to drain as possible, minimizing the
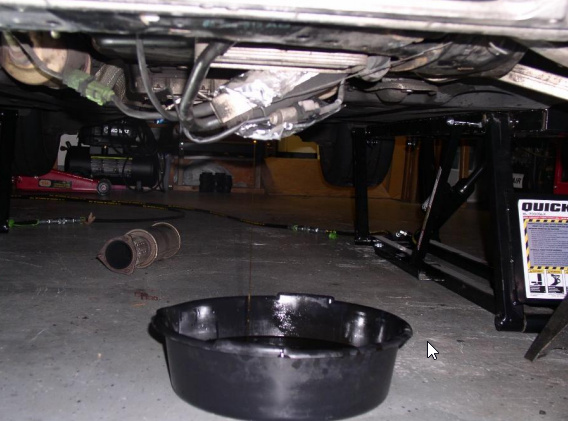
amount that will exit the transmission once the pan is out. Be ready with a large pan under the
transmission to catch the rest of the fluid and allow some time for it to drain. I then cleaned the
inside of the pan, including the magnets (remove them, clean them and put them back where
they were). I was happily surprised there wasn’t much metal sludge adhering to the magnets.
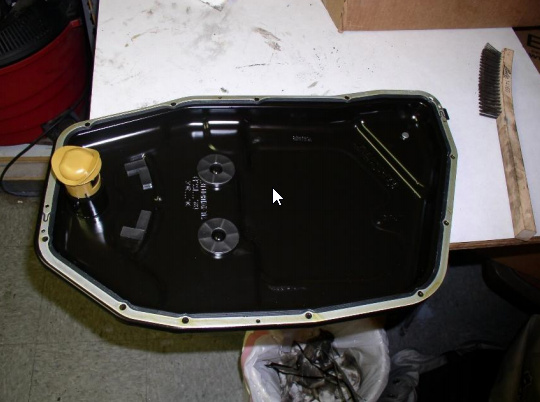
Remove the filter (not my filter, forgot to take a shot of it in place). There are no fasteners, just
the seal holds it in place. Let the rest of the fluid drain out:

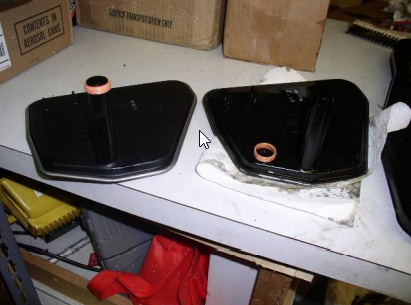
Old filter (right) and new (note the seal at the top of the new filter, this is all that holds it in place):
Transmission without the cover and the filter removed (some foil over the driver side exhaust):
Remove the gasket, clean the surface and install the new filter and the new gasket. You can
secure the gasket with a small drop of RTV at a few places along the pan to keep it in place, but I
just used the two pan bolts I started with as I replaced the pan. Replace the pan. The torque on
the pan bolts is only 7nm, so do not overtighten. Replace the drain plug, using a new seal. At this
point I stopped taking pictures, so what you will see are from things I cobbled together, but they
will give you a good idea of what to do.
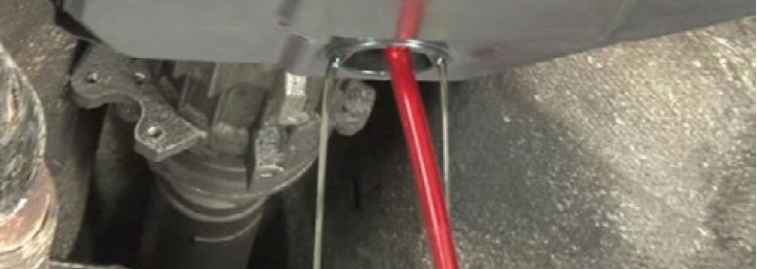
Now the fun part. Your fill tube will have to make it up and over in the fill guide that is
positioned above the fill hole:
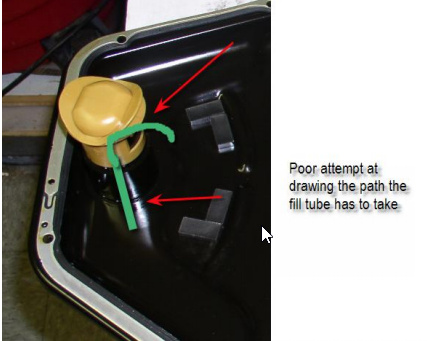
Place the other end of the tube in one of the bottles and start pumping. Do this bottle after
bottle until you seem some draining out of the fill hole. I think I pit about 4-5 bottles in for this
step (not a picture of the V10):
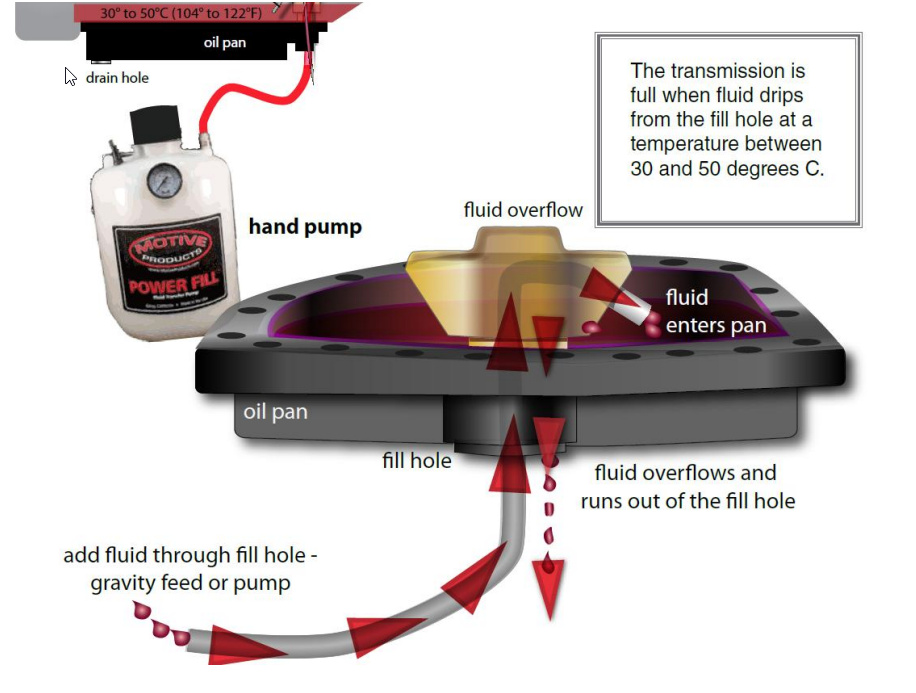
Start the car, shift from park to reverse, from reverse to drive, pausing 3-5 seconds in each gear
allowing the fluid to pump through the transmission. Put the transmission back into park. Go
back under the car and pump more fluid in. Use your scan tool to monitor the transmission
temperature. DO NOT ALLOW IT TO GO OVER 500
c. If it does, replace the fill plug (if you don’t
when you shut off the engine fluid will flow out of the fill hole), shut down, wait for it to cool
and then continue. The transmission is full when the temperature is between 300c and 500c and
fluid is dripping out of the fill hole. I had to do the shutdown - fill cycle a couple of times to assure myself the transmission was full.
This is a nice graphic of the overview of this project:
As they say, installation Is the reverse of removal. Get the coolant/electrical bracket back in
place. Replace both exhausts and install the belly pans.
EXCELLENT!!
Got a friend that works at ZF, and he told me loosening the valve body allows additional fluid to drain out from the torque converter. I’ll give that a try too.
Point of clarification: exhaust would be in prior to final fill procedure I think.
I’ve got the JXB with the street (Softer) version inserts on my S5. I’ve put about 2k miles on it and can’t really tell a difference from stock. I bought it a few years ago when he first came out with it and it was cheaper and just had it sitting on the shelf. My RS6 has developed a drivetraing vibration/noise so I thought I’d try out the JXB on my S5 and see how it went before I invested in one for my RS6.
So on the RS6 I’m going to buy a JXB center support bearing insert as well as replace the cv joint on the shaft and see if it solves my problem. I would give the JXB a thumbs up for a recommendation, and install is much easier than trying to replace the OEM bearing.