New Carbon Steering Wheel, electrical help needed

I took a chance and purchased a new steering wheel in carbon, perforated leather and Alcantara, featuring a start/stop button and a drive select button on the steering wheel. I managed to get everything installed including the new Alcantara air bag cover (no small task!) on night one and managed to keep everything intact and not break any components.

I rate the entire steering wheel swap, with airbag cover, at about a 7 out of 10 in difficulty as there’s just not a lot of clear information out there, especially with the air bag cover swap.

Unfortunately, the electronics did not work and I’m trying to figure out why. The wheel comes pre-wired for the buttons on either side and it replaces the brownish gray portion of the original harness which runs from the right steering wheel button cluster to the main airbag harness. That particular portion of the wiring harness is a three-wire harness.

The new, pre-wired harness is a four wire and it connects both buttons as well as duplicating the OE harness that runs from the right button cluster to the main harness. It plugs right in to the right button cluster and the main airbag harness, no spicing needed. But again it’s a four wire plug, same as the OE harness but the OE harness only uses three wires.

I plugged everything in with the new harness and went for a drive. The buttons nor the paddles worked. Plugging the OE harness back in, everything worked again.

There’s also a stray red wire which was just sort of tucked in there. I think it just goes unused but waiting to hear back from the manufacturer. Communication is ok but not great.

Once you get everything plugged in on the wheel side, there’s an additional harness and module for the start button. I’m not sure if the module is a can-bus module or a bluetooth relay. I ran power to it from the fuse box and it did light up/blink momentarily. There were no instructions other than I needed to connect the red to power, black to ground and blue and white need to go to the two signal wires on the start/stop button’s wiring harness.

One wire, when the button is pushed, will drop in voltage. I tested with a multimeter and at least two of them do this. One is constant and the brown wire, according to Audi schematics, is ground.

I thought maybe, just maybe, everything had to be hooked up in order for the system to work but I still believe the steering wheel buttons and paddles should work unless the module is a can-bus module and its programmed with new wire routing or something of that nature.

I have the RS5’s wiring diagrams but I’ll admit, I’m not well versed in electronics or reading the diagram. I am studying the Audi guide but it doesn’t appear the diagram tells me what each wire does.

This is a quick photo of the schematic for the start/stop button, colors align with my wires so it has to be the correct one. E408 is the button.

Here’s the wiring going to the button. Starting at the right, that’s terminal 1, next is 2, 3 and then 4 on the left.

I’m going to keep adding and adjusting this thread as I take more photos and have more time to test things out.

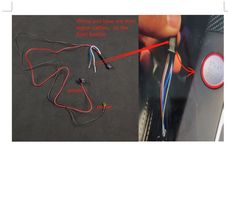
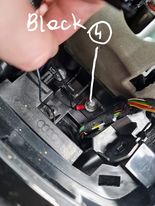
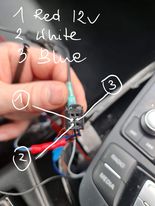
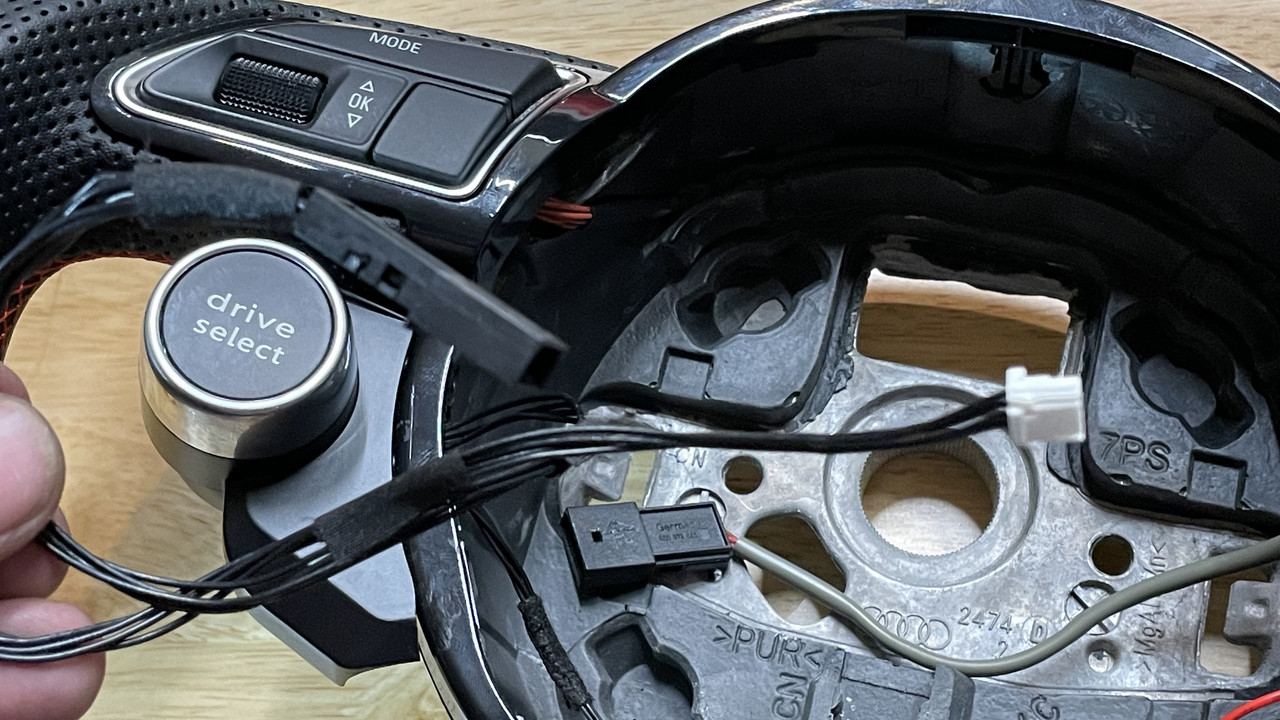
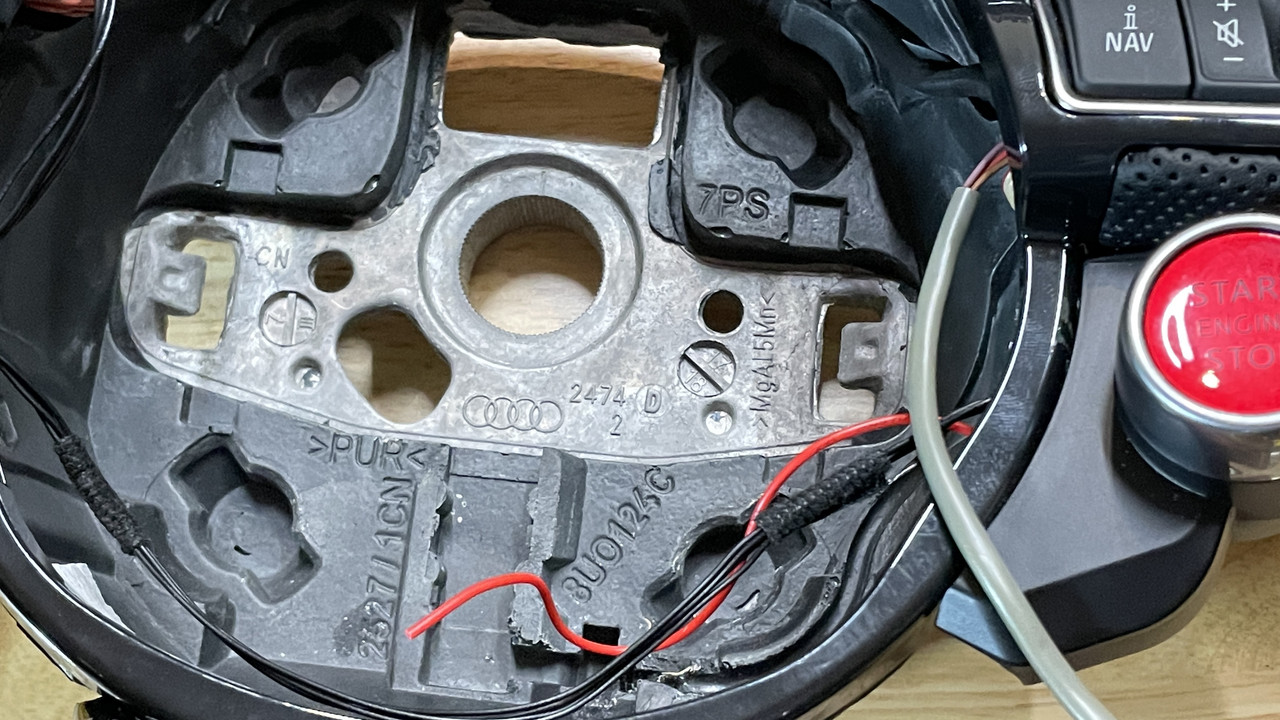
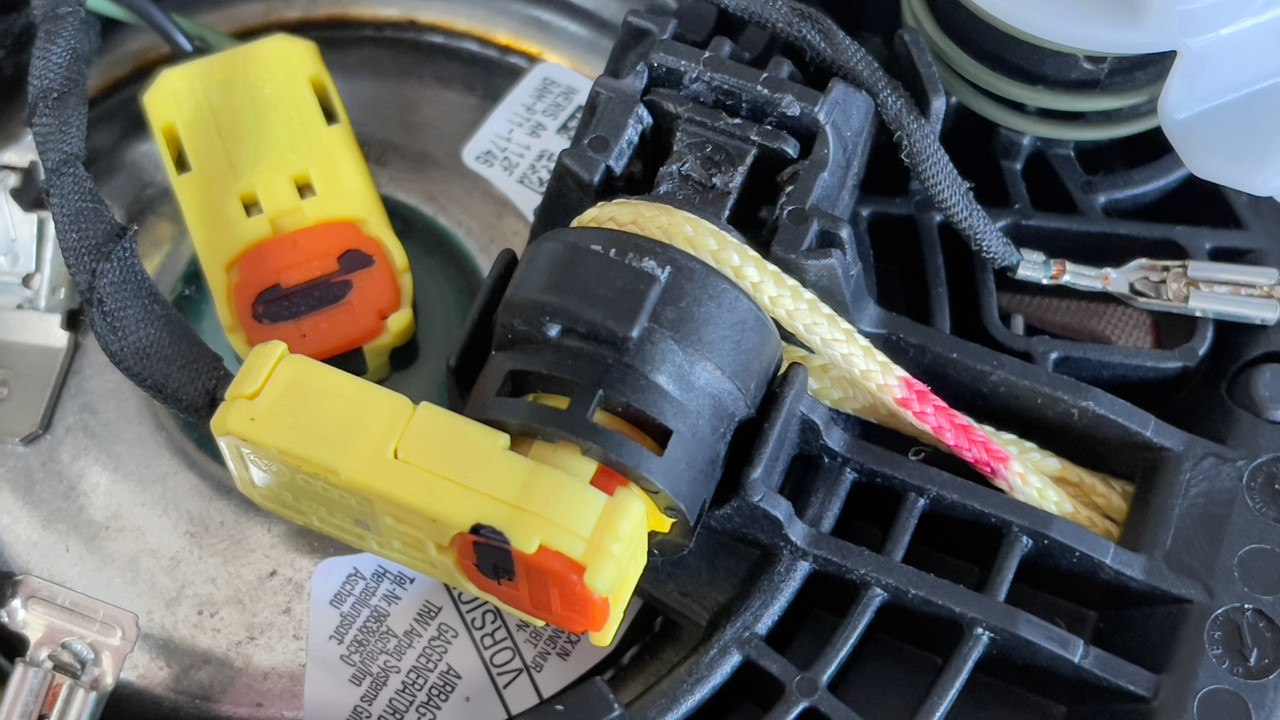
Ok…so we’ve pretty much determined it is a Bluetooth connection. The red wire coming off the steering wheel start/stop button is actually an antenna. I’m assuming there’s a matching one tucked in on the other side for the drive select switch.

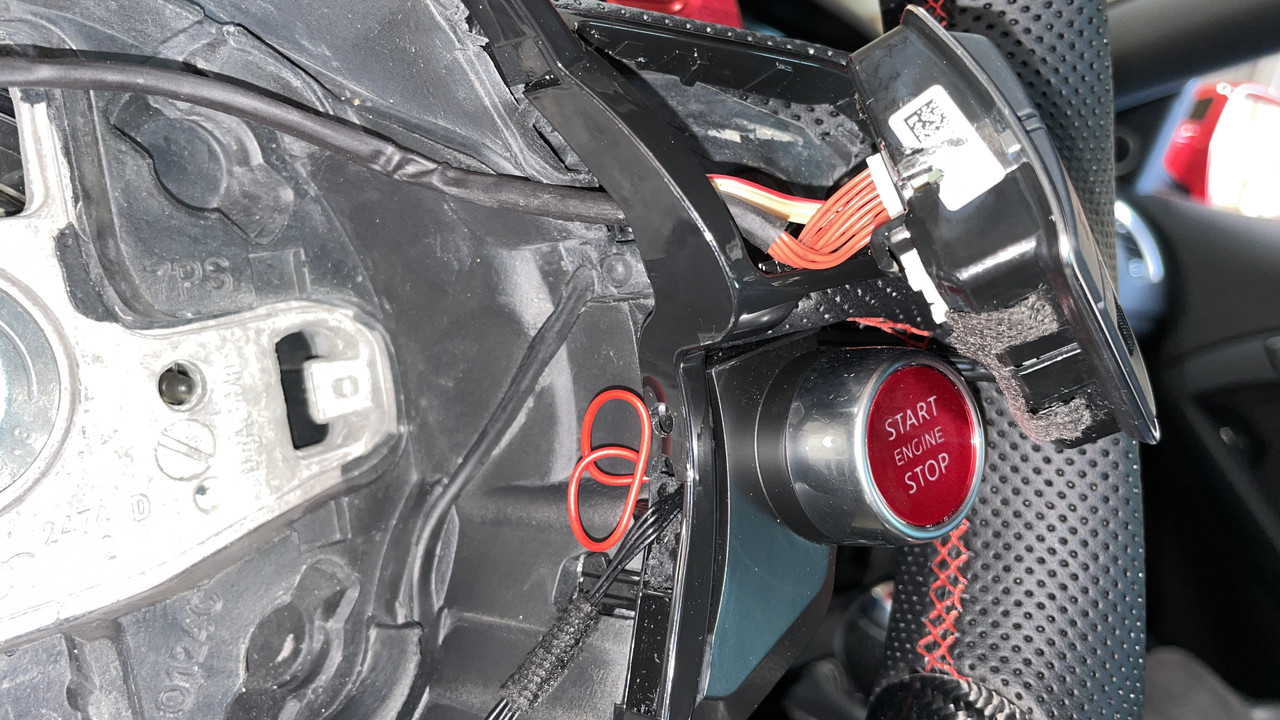
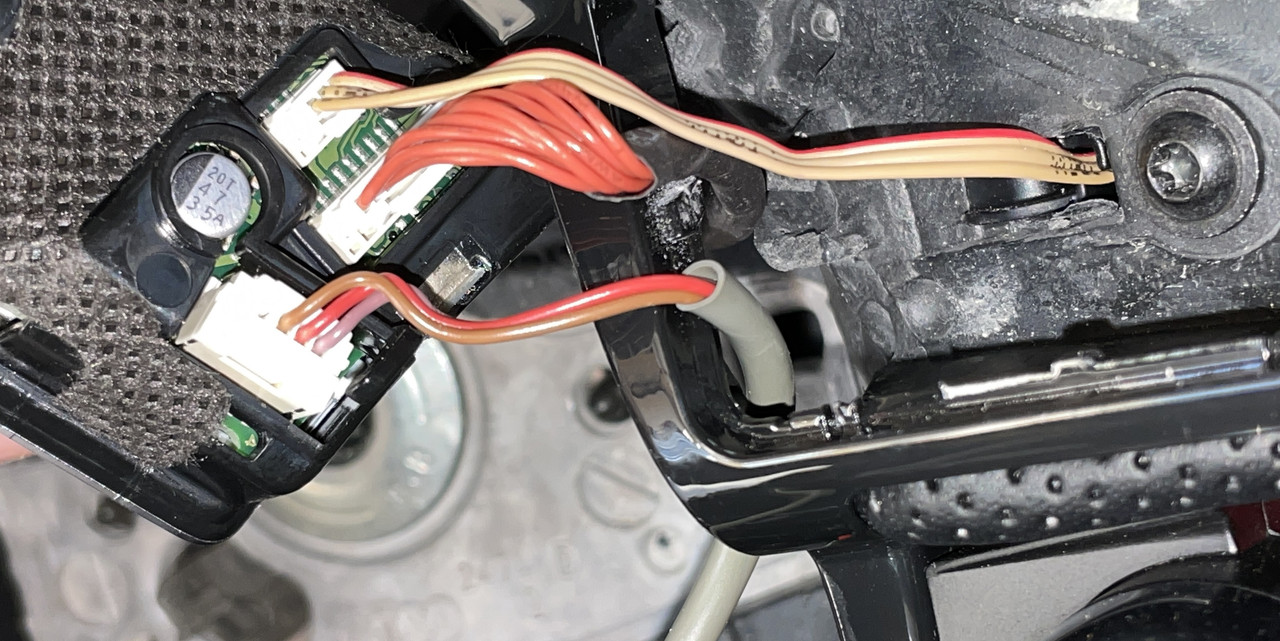
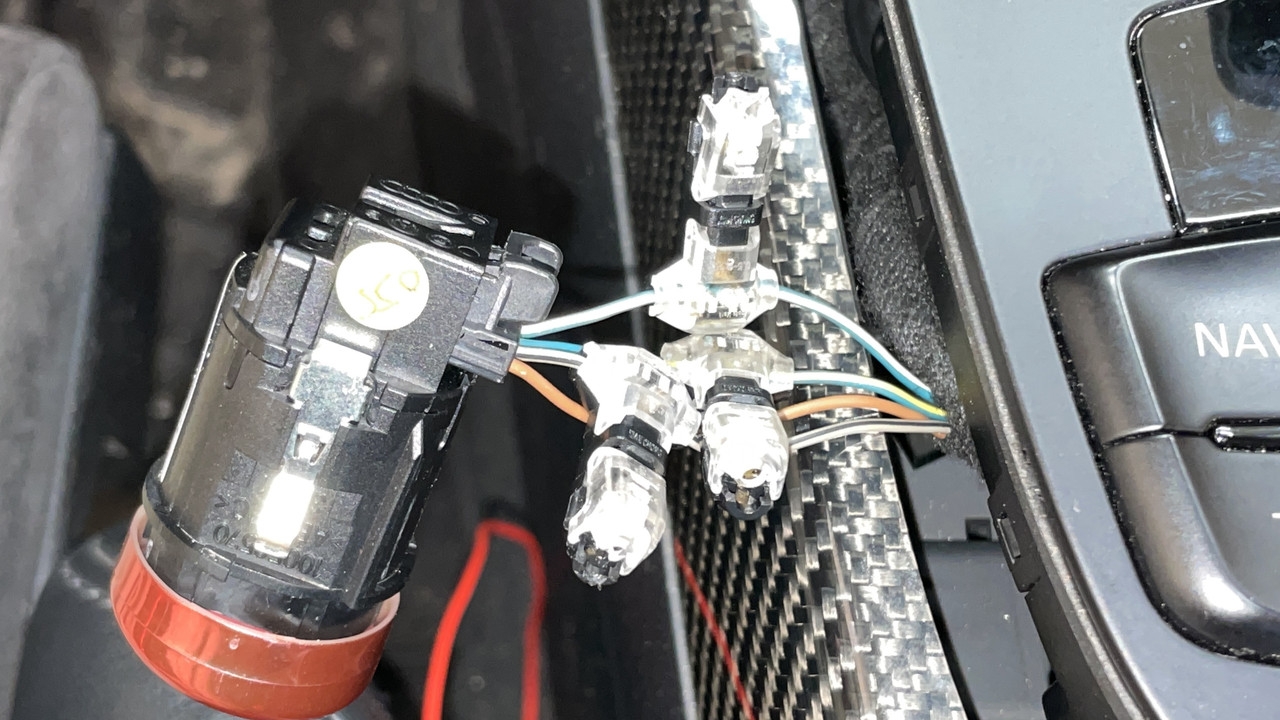
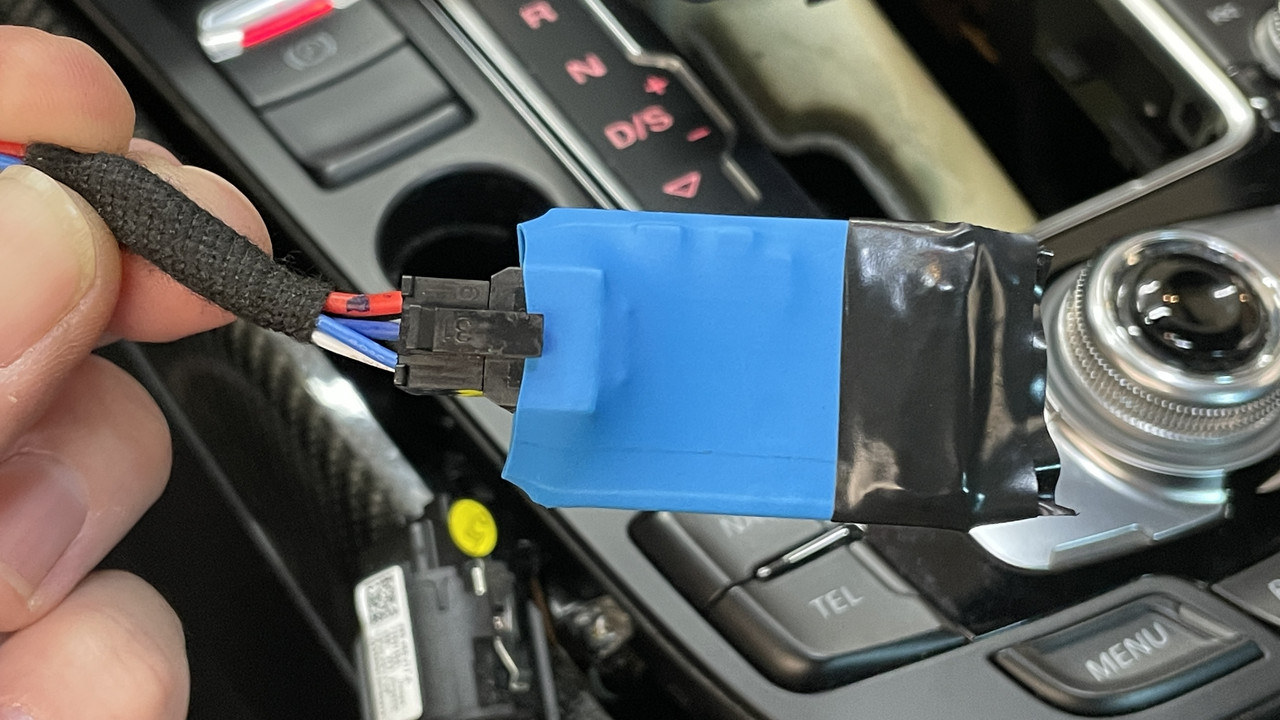
The receiver on the other end plugs into the harness which interfaces with the center console start/stop button wiring harness. It’s the blue dongle. Under the heat shrink wrapping is a circuit board with the bluetooth module/receiver.

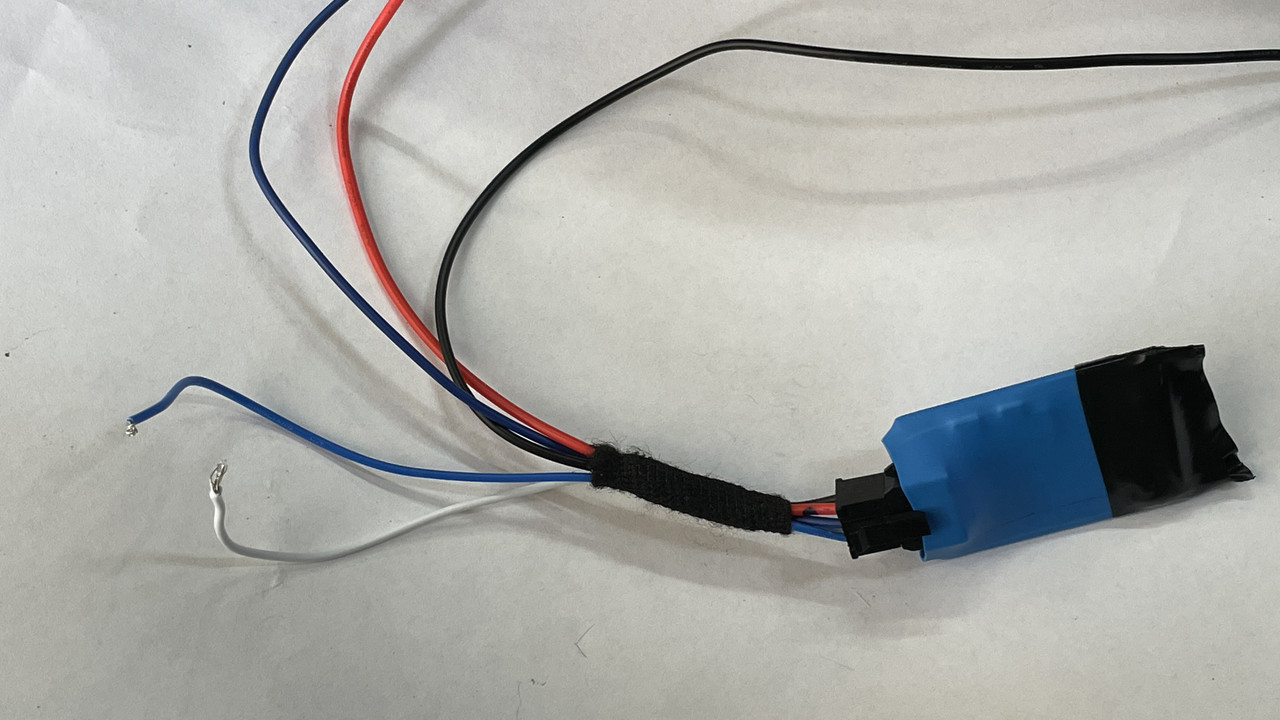
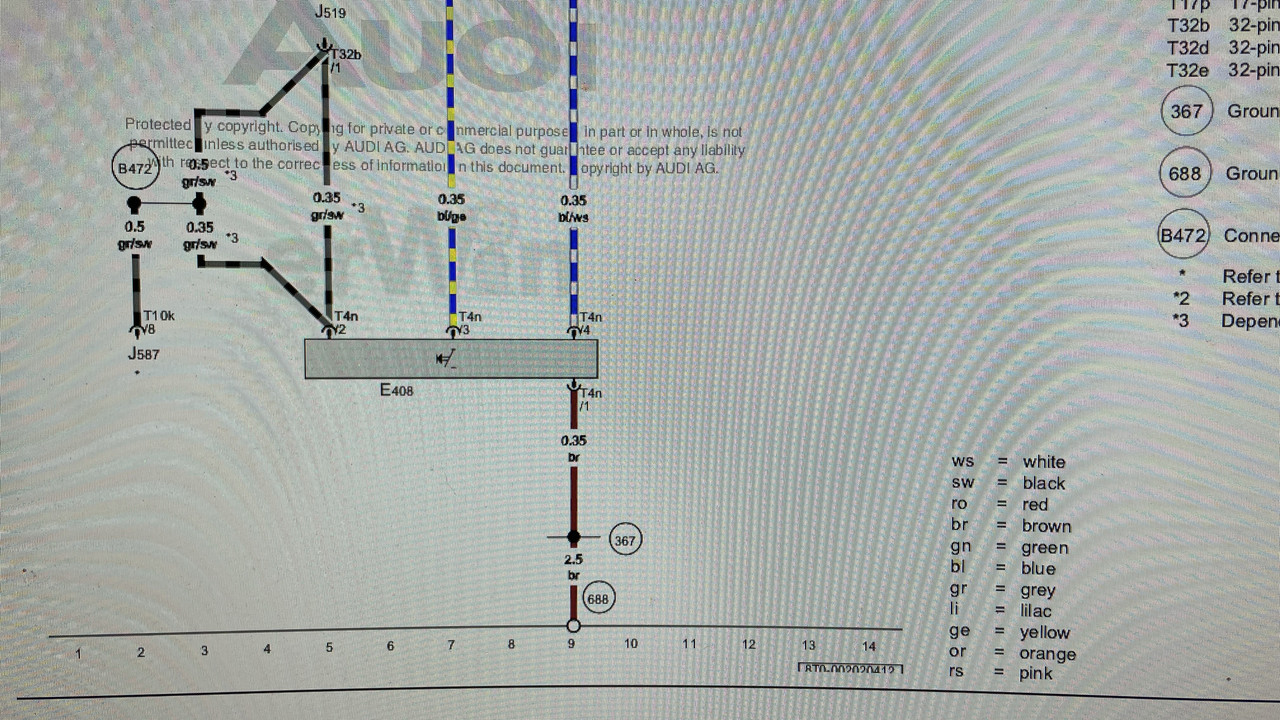
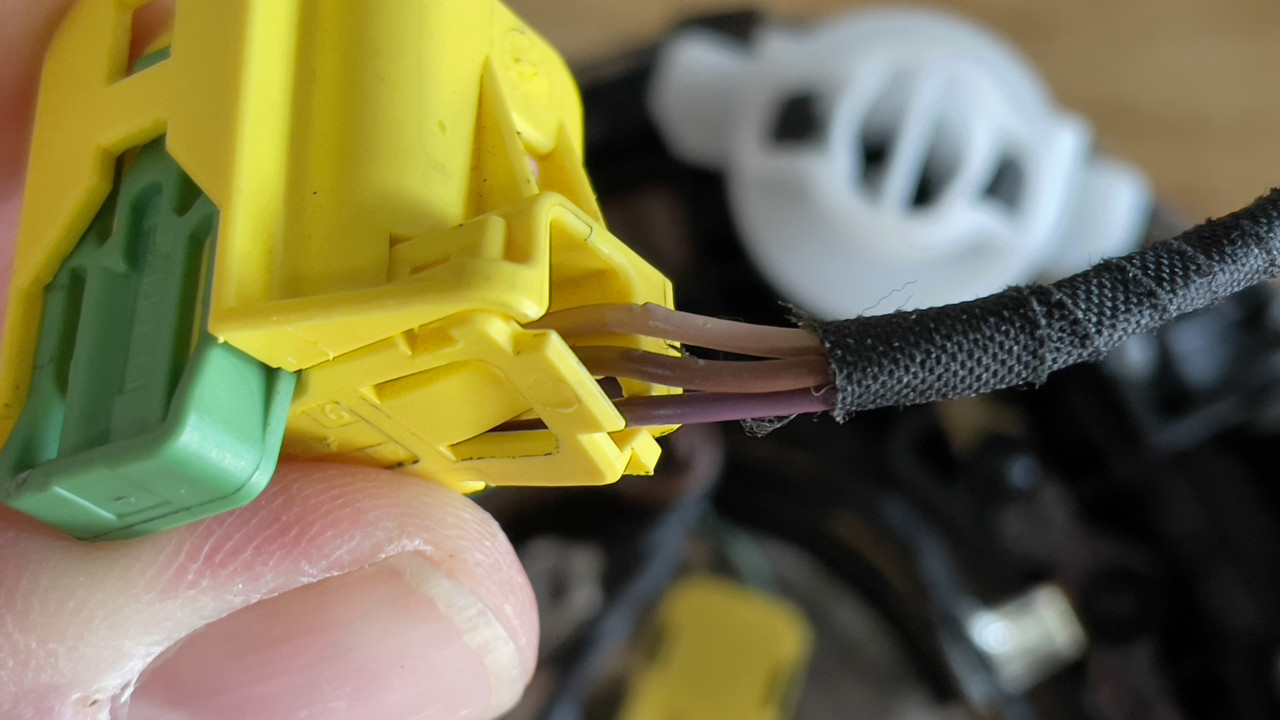
The harness which plugs into the module has a black ground, a red +12V power, a mystery blue and white wire and a slightly purple wire which I believe is the antenna.

The original, full harness contained an extra plug and three extra wires which didn’t seem to have any use in this application so I clipped it off.

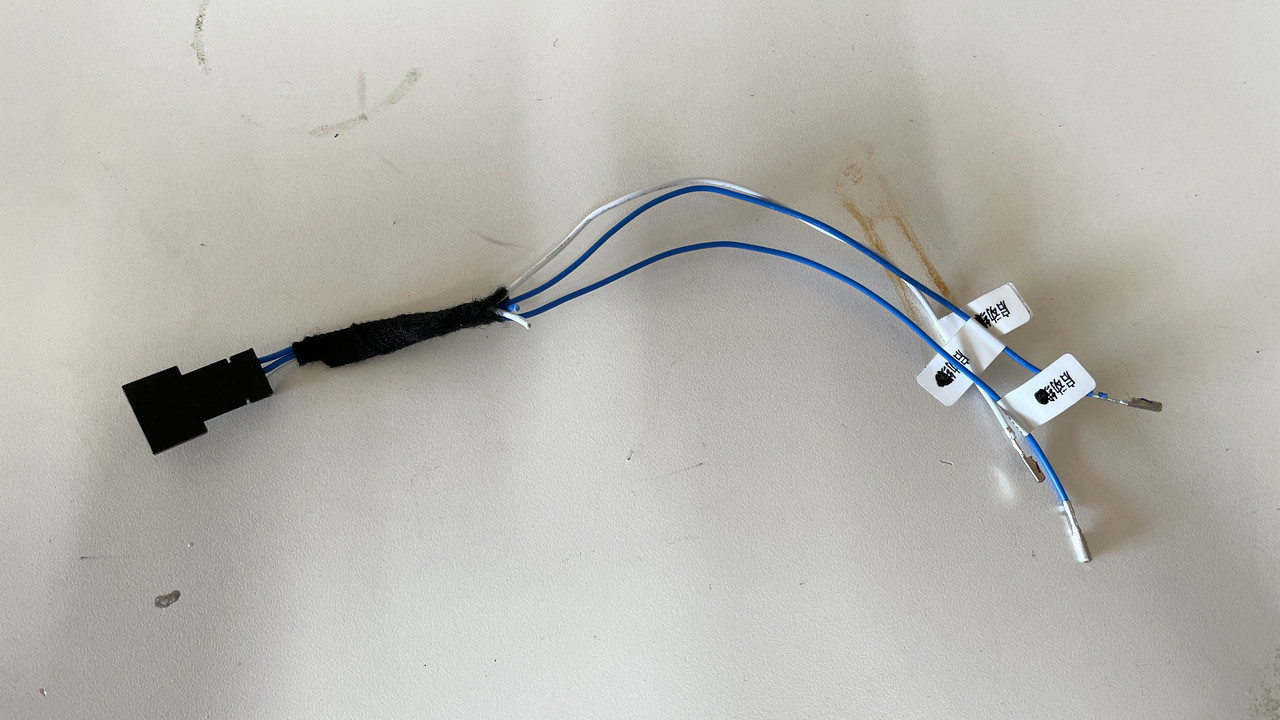
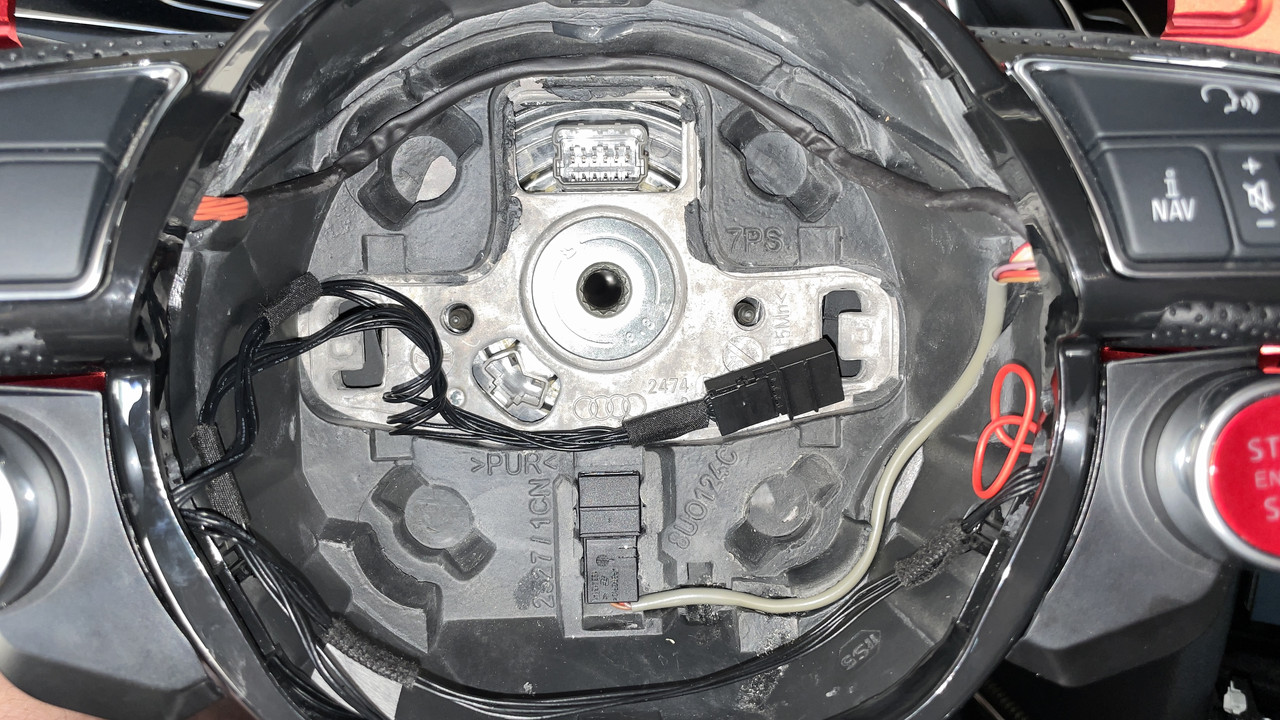
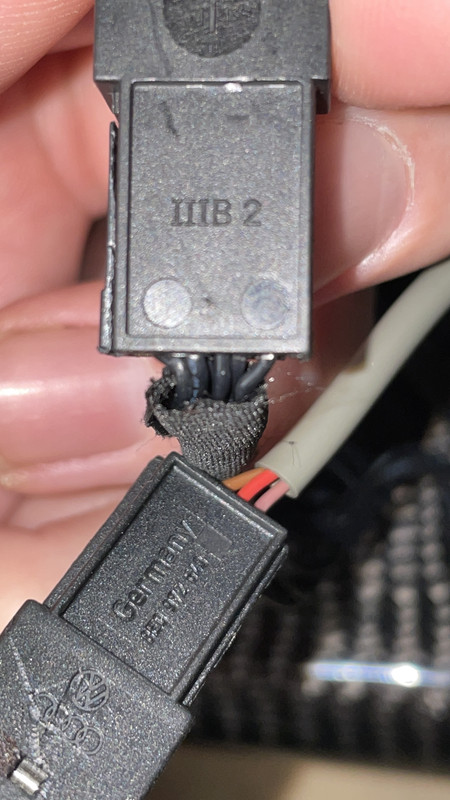
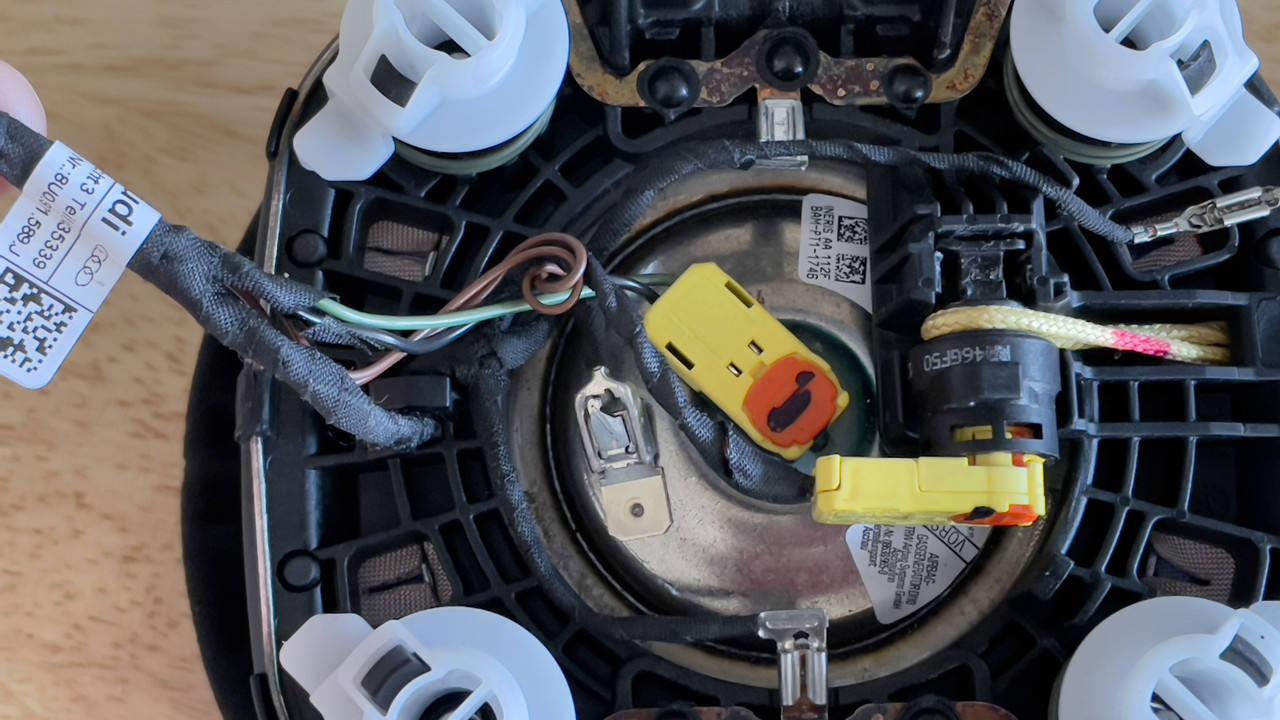
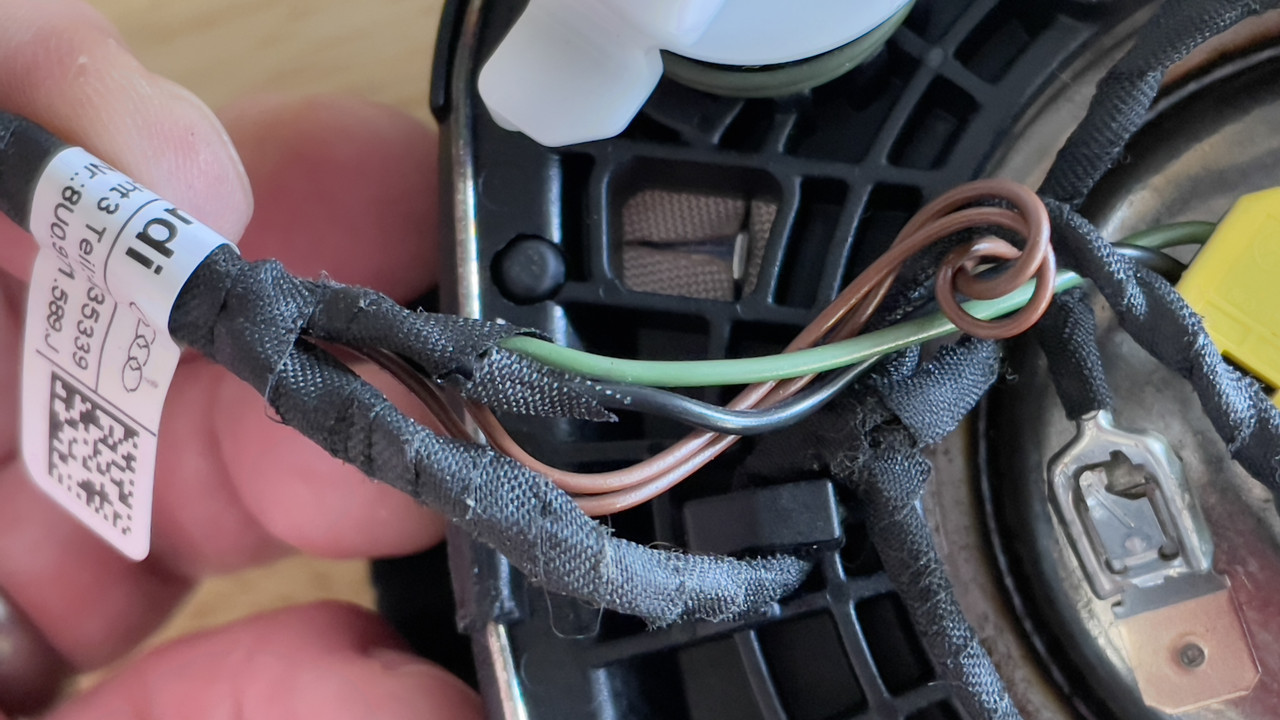
This is the OE portion of the harness which plugs into the airbag’s main wiring harness as well as into the right side pod on the steering wheel. It gets completely replaced with the harness that comes with the new steering wheel.

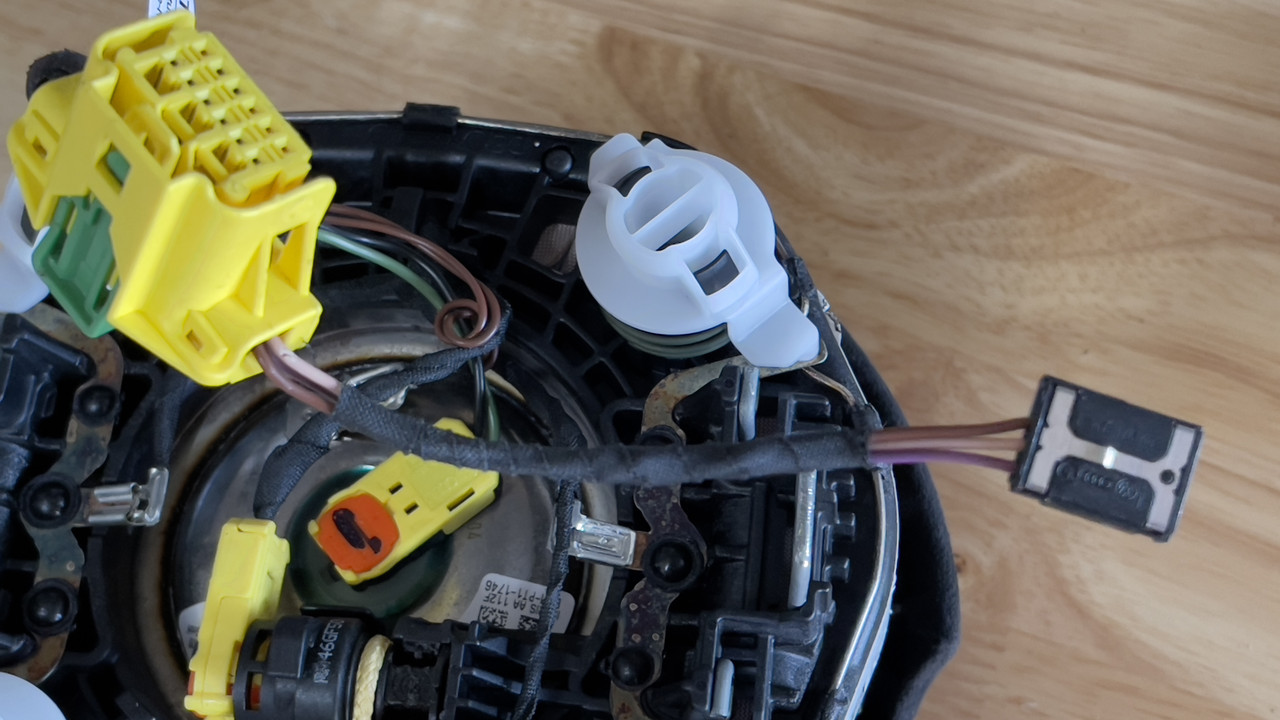
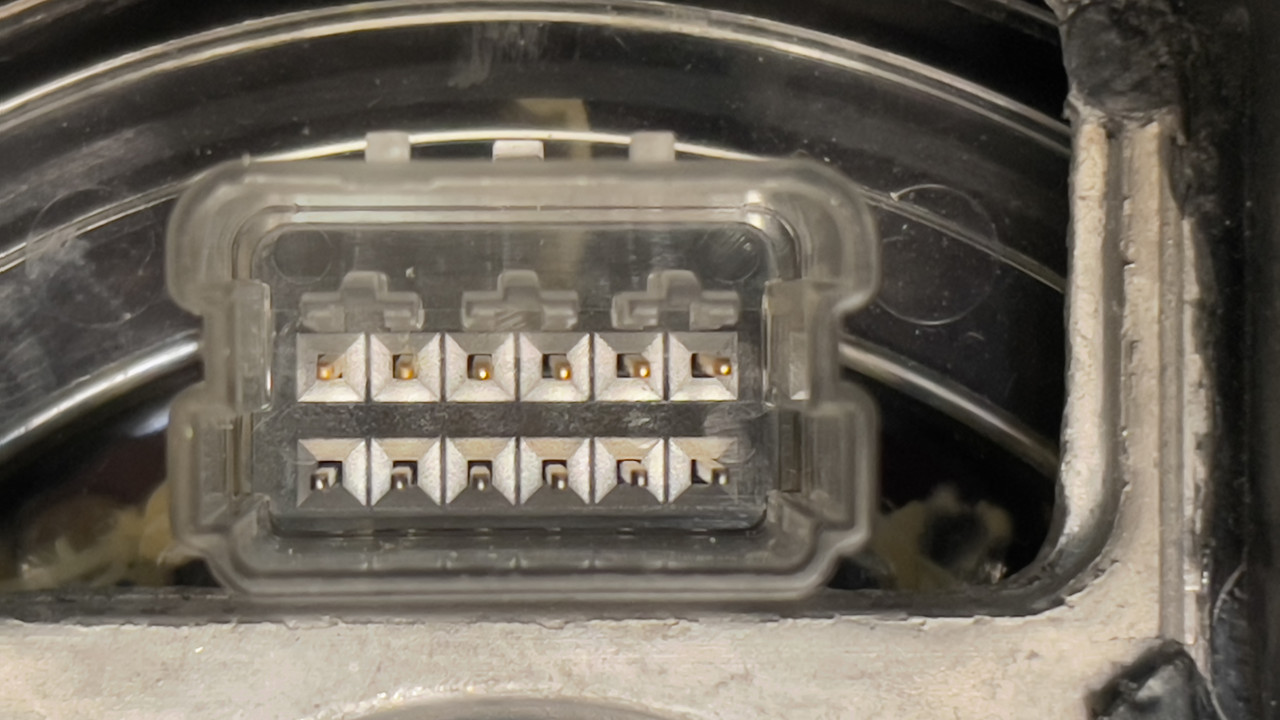
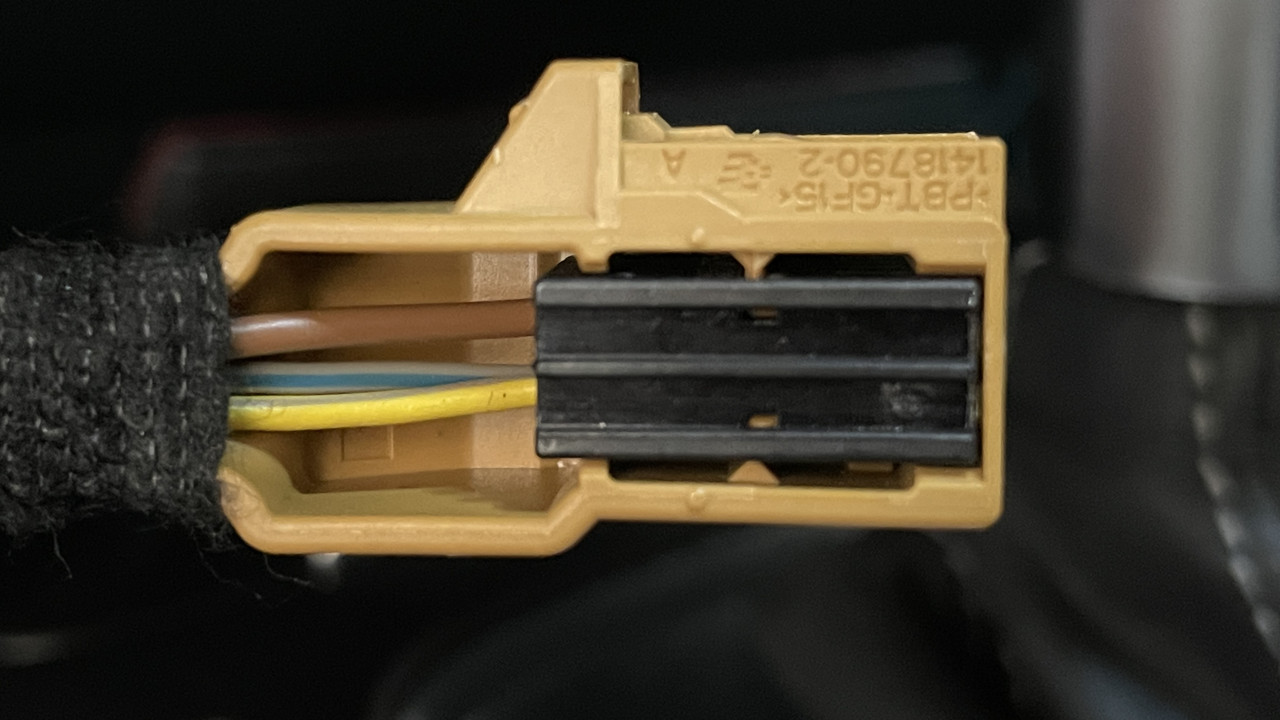
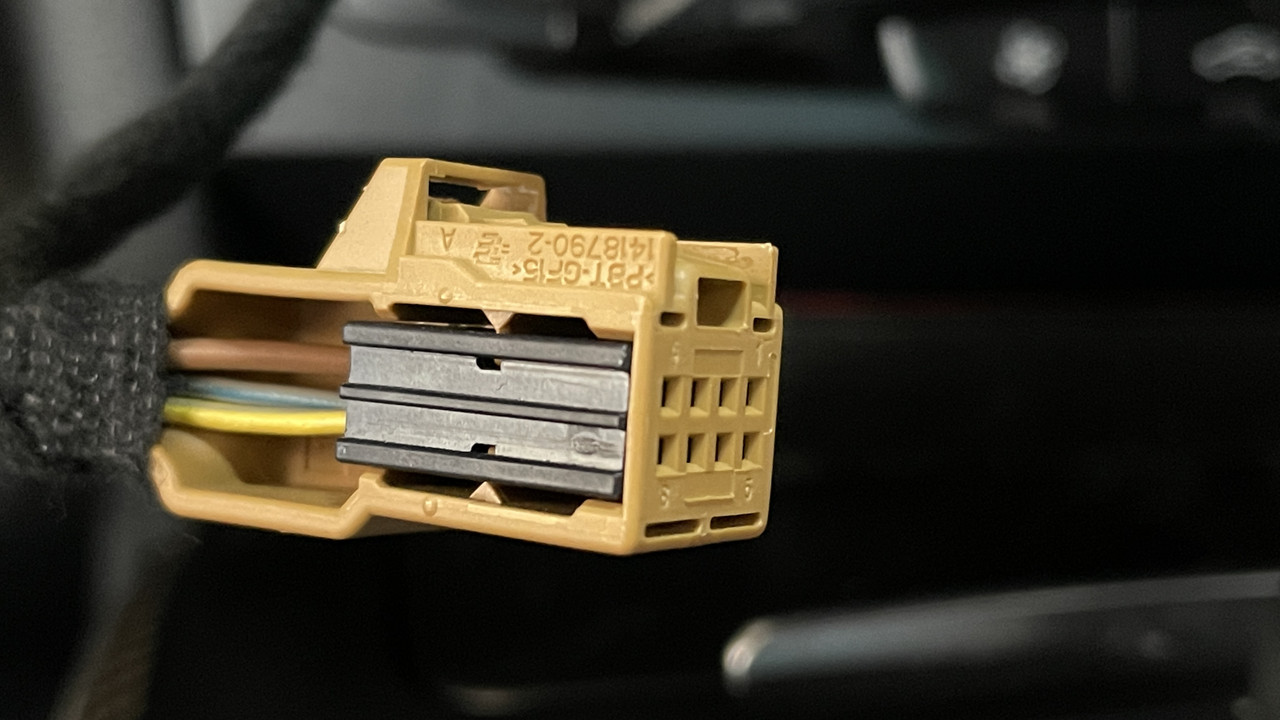
Flipping the pod over, the stock OE harness plugs into the socket on the bottom left of the photo. You’ll remove the stock harness and plug in the steering wheel’s harness.

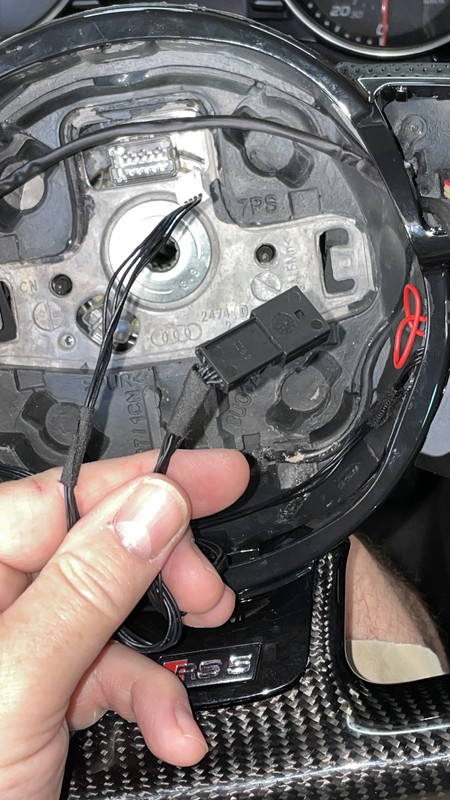
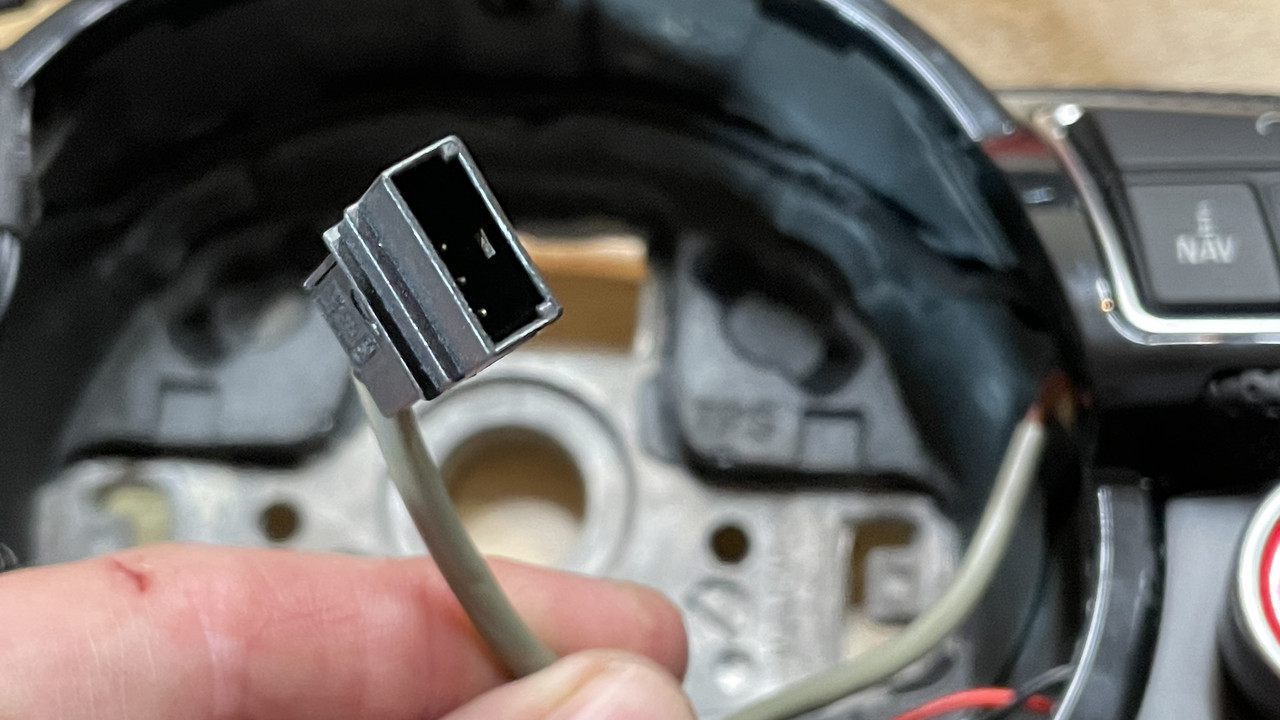
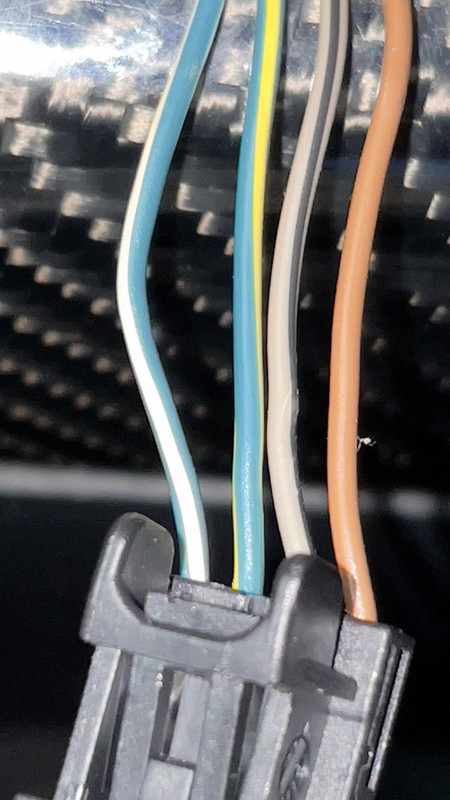
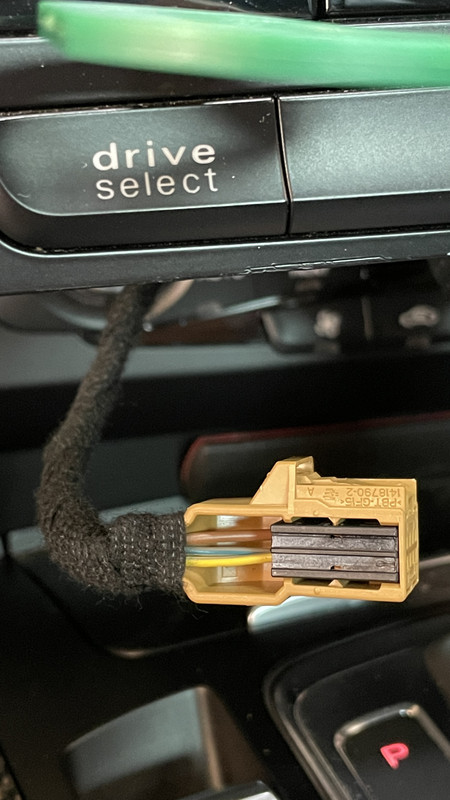
Now here’s where the main problem lies (one of several). The OE steering wheel harness is three wires with the fourth spot in the plug being a blank.

The new harness has four wires which are also spliced together with wires from both buttons so there’s no way to really remove them and being all black, no idea which one runs where. I have a feeling I’ll need to jump one of the terminals but I’m not 100% sure.


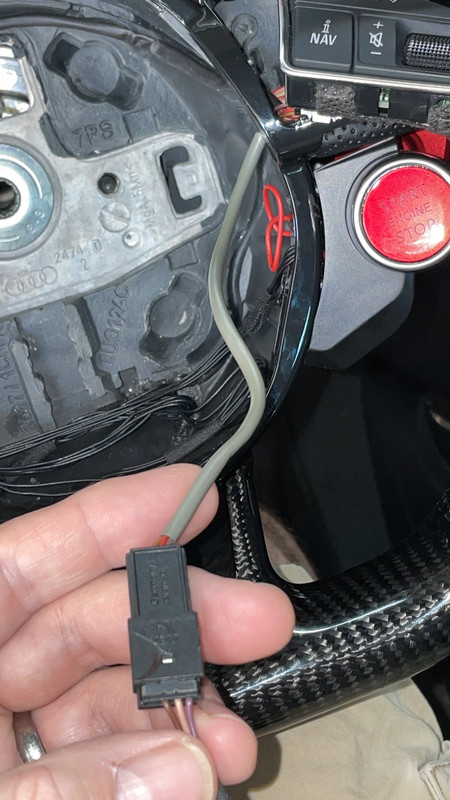
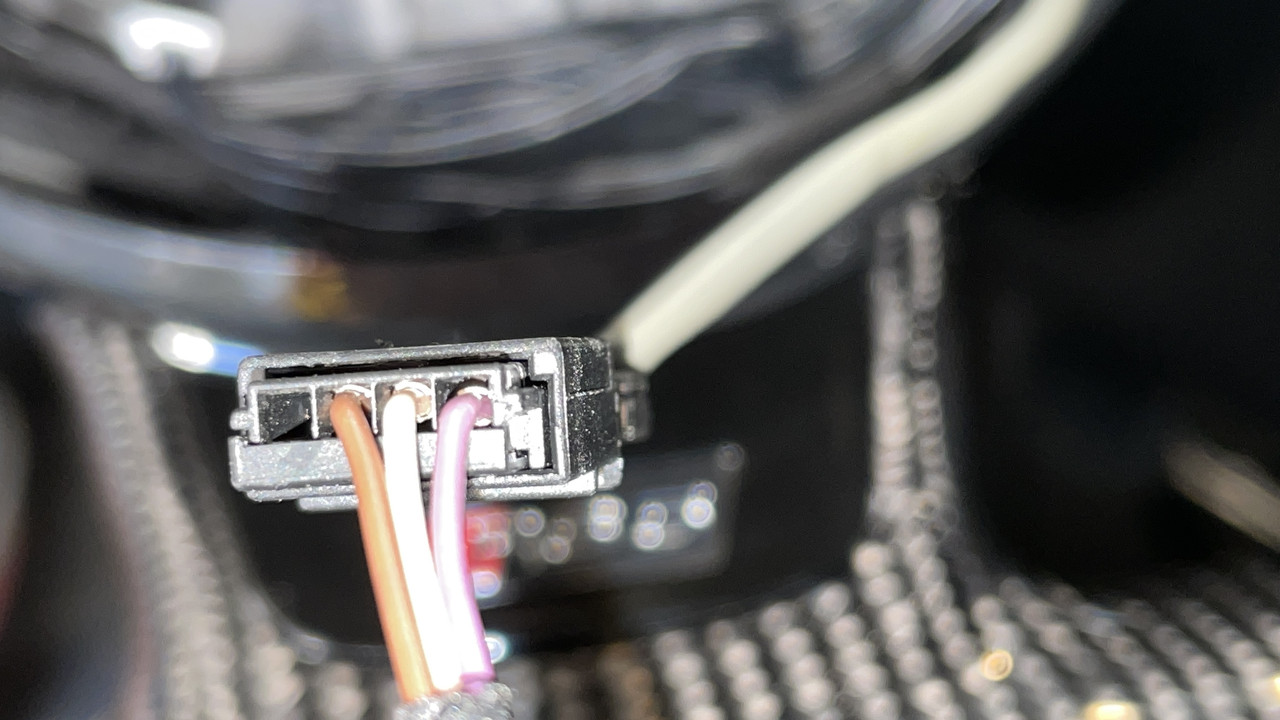
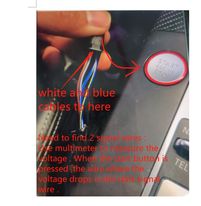
Moving to the center console start/stop button, I’ve used taps for three of the wires to make testing easier.

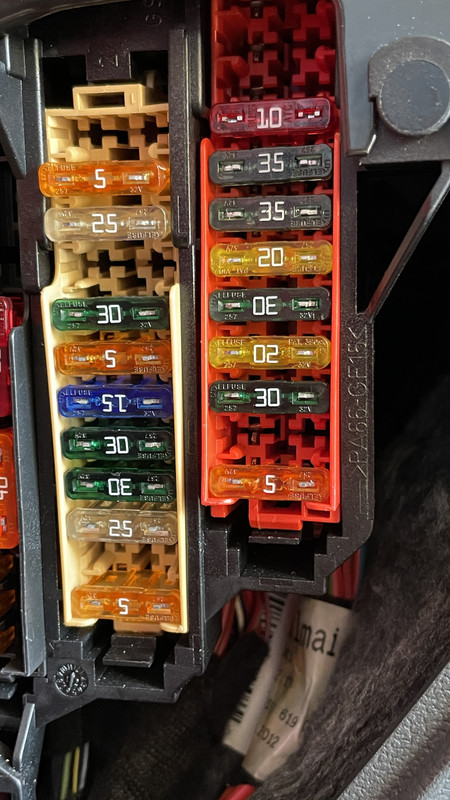
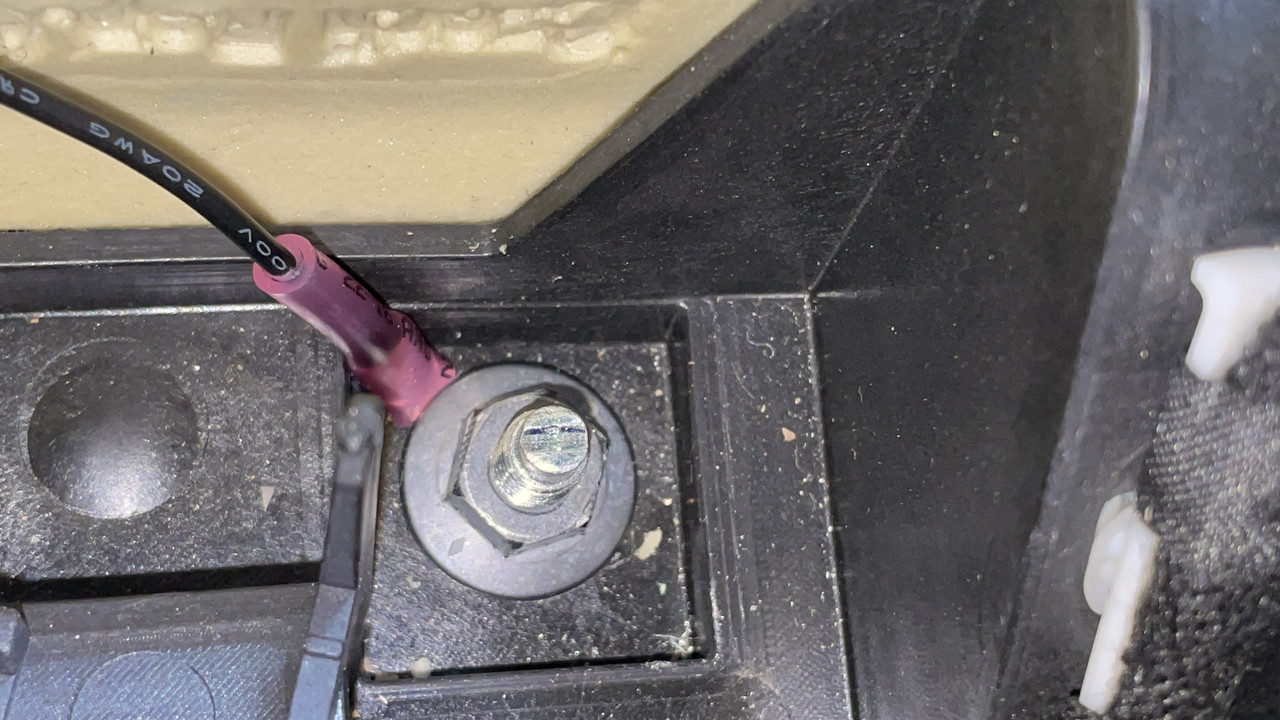
Power for the module comes from a 12V+ which you can take from the fuse box on the driver’s side. I’m using the right terminal, in between the 30A and 5A. The negative can be attached to one of the two studs in the center console.

When I apply power to the module, it’ll flash momentarily so I know it’s receiving power.

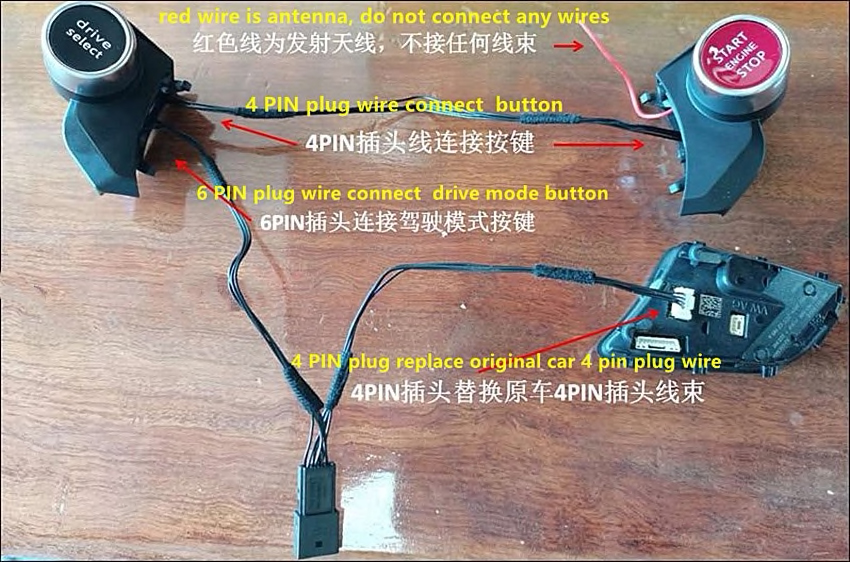
Here’s where it gets interesting. The following four photos are the “installation instructions”. Doesn’t really help, only invites more questions.


A fellow RS5 enthusiast came across what are essentially the same switches, sold separately from the wheel, which has a bit more in terms of actual installation instruction but again, it’s a four wire setup.
This is copied/pasted verbatim.
How to install?

R8 button installation instructions

The appearance and functions of the dual buttons on the QD-88X series steering wheel are described as follows:

This product is designed from the dual buttons of the R8 steering wheel. The buttons are divided into left and right sides. There are two logos. Red represents POWER, which means “one-button start” function, and is installed on the right side of the steering wheel; black represents SELECT, which means “driving mode selection” ”Function, installed on the left side of the steering wheel;

“One-key start” uses a silicone double-button detection mechanism, so when operating, you need to press the silicone switch to detect and then press the physical button for feedback to prevent misoperation during driving and play a double protective role; and The “driving mode selection” button is to directly press the physical button to give feedback, which provides a better user experience.

Another: working parameters and features of this product:

Rated working voltage: DC 12V;

Standby current: <3MA

Transmission method: 433Mhz

Original car wiring harness socket docking, wireless version, free of hairspring, free of welding wire, free of broken original car wiring harness

installation steps:

  1. Key installation steps:

  2. Loosen the airbag: start the car, turn the steering wheel 90 degrees to the left, insert a screwdriver into the small hole behind the steering wheel to pry the internal buckle of the airbag, then turn the steering wheel 90 degrees to the right, and use one from the other hole behind the steering wheel. Insert a screwdriver into the other internal buckle of the air bag, release the air bag, and pull out the connecting wire between the air bag and the multi-function button.

  3. Remove the rubber frame between the bottom of the steering wheel and the airbag, use the fixed gasket in the product accessory to mark the button installation position, use an electric drill to drill the fixing screw hole and the threading hole, insert the wiring harness, and use the screw in the accessory package to connect the button and Lock the rubber frame, arrange the wiring harness between the two buttons, and install it on the bottom support of the steering wheel.

  4. Restore the rubber frame with the buttons and the bottom support of the steering wheel to the car, connect the wiring harness between the airbag and the multi-function buttons, and then press the airbag back to its original position after checking. The steering wheel buttons are installed.

  5. Installation steps of wireless receiving board:

  6. First find the one-key start position of the original car, and disassemble the components surrounding the original one-key start-up. The purpose is to remove the original one-key start-up wiring harness.

  7. Disassemble the gear handle, unscrew the screw and pull out the gear handle. Unscrew the decorative parts covering the surrounding area (the specific driving model is different); please confirm whether the screws are all loosened before disassembly.

  8. Disassemble to the original car with one key to start the rear wiring harness, find the pin on the definition: 3&6, and connect the blue and white wiring harnesses on the wireless receiving board to each of them. 3&6 are not defined.

  9. Connect the wire harness with the fuse to the power supply B+ (long power) fuse box, and connect the black branched wire harness to the ground wire (ground).

Note: The wireless module will flash slowly within 10 seconds after the power is connected, indicating that the power is connected!

After the above two steps are completed, the installation is basically completed, and you can perform test verification. The indicator light on the wireless board will flash back after receiving the button message!

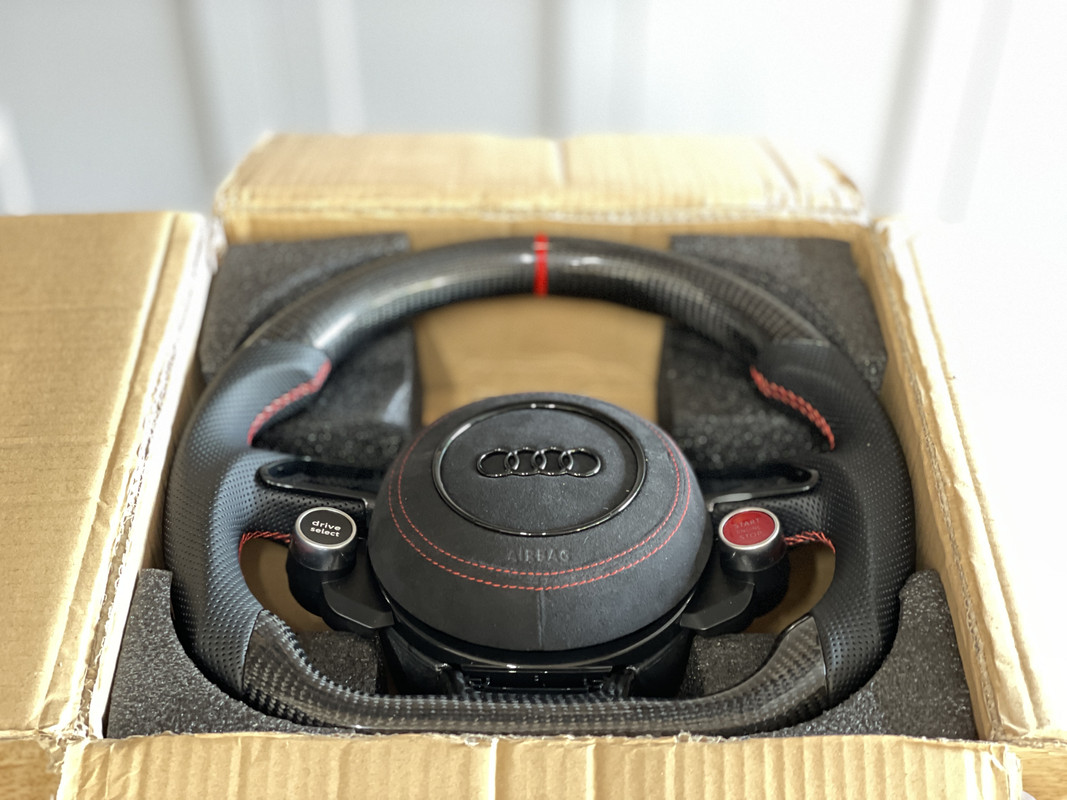
Please note: Our R8 button is the easieat button to be installed. You only need to remove your airbag and install it directly to the steering wheel within minutes.

Only 2 plugs.One is to the airbag connector ,the other is to the multifuction steering wheel button connector.

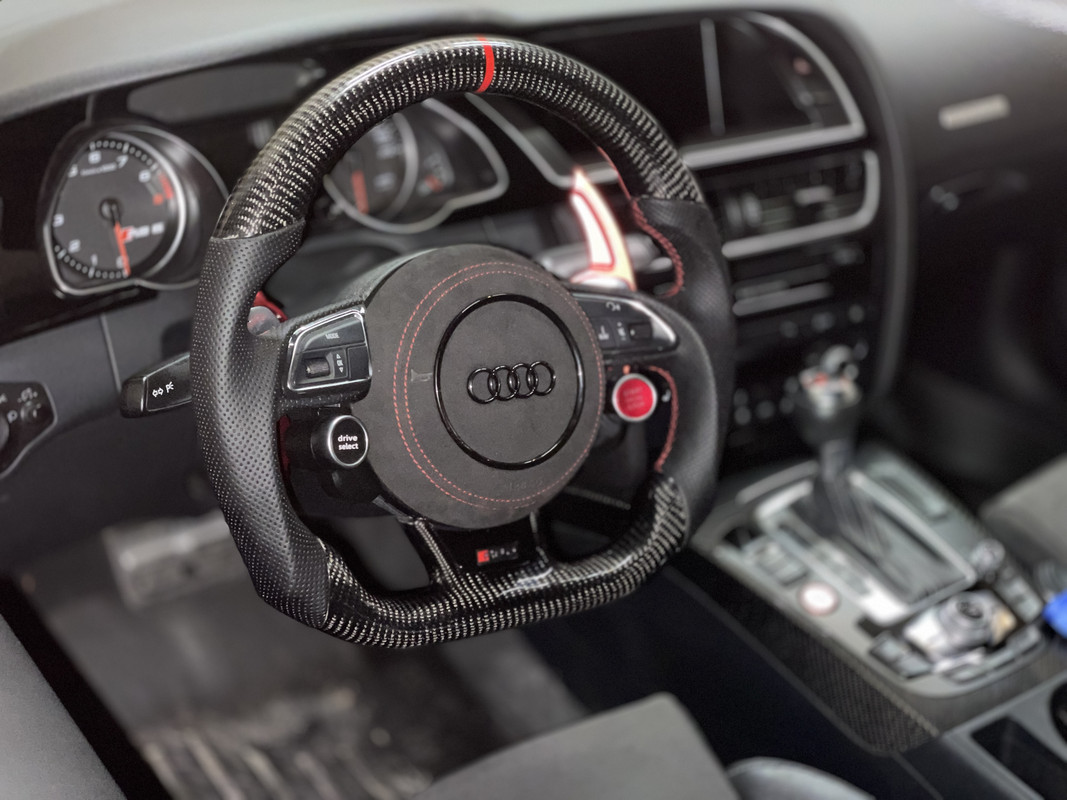
Note: This is not original Audi VW parts. This wiring is simple. Just connect the switch signal wires. No need to replace the airbag. Safe and convenient. Suitable for car installation with start button and driving mode. If your car does not have a start button and a driving mode switch. This switch cannot be used.

Hope this works :crossed_fingers: see this thought it might be helpful

1 Like

I’ve watched that one half a dozen times but he never actually mentions what wire goes where.

Also, the setup inside the steering wheel is completely different. I have nothing but black wires, no module and just a different plug setup altogether. The only module goes with the starter button wiring and I believe each switch has its own built-in module as the red wire poking out of the right side of the steering wheel is an antenna.

I thought you might have seen it but thought I’d put it on just in case.
I was looking a few months back at this so searched my history and dug it out just in case it was any use to you wasn’t sure if it would be ! Worth a try.

Ok a few more photos per request.

Let’s start off with the back of the airbag. It basically takes the main plug, the big yellow one, center right, and splits it into the harness which controls the buttons on the wheel and then controls the horn and airbag on the other end.

Closer shot, everything is three wire with the airbag having four grounds.

The plug, bottom right, with the yellow “string” looping around it, is perhaps the most difficult plug to disconnect that I’ve come across. It took me an hour just to figure out how to separate it from the rest of the airbag module so you can change the airbag cover.

The three wire plug which plugs into the steering wheel harness.


The main yellow plug on the airbag plugs into this receptacle which is part of the clock spring assembly and pokes through the back of the steering wheel when you install it.

Moving back to the center console, here’s the plug on the back of the drive select switch.

It too is a three wire arrangement.

The plug itself is an 8 pole but only uses three positions (wires).

So how did you remove the plug with the yellow string around it ?

Also can you explain how to change the airbag cover as I have just got a carbon steering wheel for mine and am thinking of getting the air bag cover either in carbon or Alcantara !

Thanks in advance dude :+1:

That was THE hardest part of the whole endeavor. You basically have to figure out how to pop it out without breaking it. Not easy but I have some detailed shots so you know what your’e dealing with. I will hopefully have a video done by Monday on just the airbag cover alone.

Just understand the whole process can blow up in your face, literally, as it’s an explosive device. I don’t know how hard it is to set one off that doesn’t have electricity running to it and I don’t want to find out! But just be warned, you could injure yourself, severely, messing with an airbag. I play with gunpowder all the time (reloading) so I know the risks, LOL.

:joy::joy: Sounds fun lol
That would be great if you can have pics and a video nice one :+1:

I read in your first post that it was a pain to do that’s why I asked as I can then hopefully not lose anymore limbs :joy::joy:

Thanks buddy

Steve, yes, that would be my preference too! :rofl:

1 Like

Have you definitely got a good ground on that stud? Difficult to see from the picture but it looks like it’s mounted in plastic?
Check the continuity between the stud and the chassis or negative terminal on the battery to ensure it’s good.

That part of the harness works fine from a power standpoint, I plug everything in and you can see the bluetooth module flash/blink signaling it has power. It’s just the steering wheel side. No power or so it seems as either button does not light up and none of the steering wheel controls work. Almost all of the aftermarket add-on buttons I see mate to cars with a four wire .

Sounds like it’s not receiving power from the airbag, you know or can easily find which pin the power comes in on, and should be able to trace that along the harness to make sure each button is receiving power. I use a thin piece of safety wire attached to the positive probe of my meter, you can push the wire into the back side of the electrical connectors where the wires are inserted until it makes contact with the metal termination. Chase the 12V to each button module when the harness is fully connected and make sure it’s going in on what would be the positive wire of the module (looking for mis-pinned cross connections). Make sure the other meter lead is on a good ground.
Chasing the ground would have to be a continuity (ohms) reading BUT you absolutely must disconnect the airbag if you do this, the meter injects a voltage to get the ohms reading and injecting voltages to airbags = party time!

The fact none of the steering wheel controls are working would suggest a cross connection or mis-pinned connector. Also, I’ve seen terminations crimped onto the insulation of the wire instead of the metal conductors, this would show if you do the voltage checks above through the back of the connector.

That’s helpful James and was going to be my next step. I actually did strip some thin wire to wrap around the probe to find the center console signal wires.

And I’m with you, the pinout on the new harness is not in the right place to power everything or there’s a bad connection. Luckily I solder up guitar wiring harnesses in my spare time and even came up with my own solder-less connectors for quick pickup swaps. :slight_smile: But beyond pots, caps, resistors and simple circuits, I get a bit lost.

Beast (Amar) over on Audizine also sent me a few diagrams that’ll hopefully help me get all this working correctly as he sells this stuff. I’ll be sure to post the solution once I get it all done.

Also do a quick tug test on the wires going into the terminations/connectors to ensure they are securely located or locked in position and not being pushed back when connected to the receiving connector, seen that many times which is confusing as you will see the correct voltage at the termination but it isn’t making through to the other side.

The wiring diagrams from Amar will really help make this an easier process, give me a shout if I can assist in any way, I’ll hold the flashlight while you make the smoke happen.

Michel, how did you go ? Get the buttons working ?

Not yet, it’s a pretty invasive process involving pulling part of the MMI and control buttons and soldering in some new wires. I’ll also likely have to rewire the steering wheel itself to bring it back to a 3-wire setup. So for now, the buttons just sit there and look good, LOL.

2 Likes

Hey Ape. Ever get this figured out? The wheel I just received had the same exact issue. :frowning:

Nope. I really hate wiring and trying to figure out stuff like that so I’ve just left it. Wasn’t helped by an entire spring/summer of 100 degree plus days either. I did almost nothing to my car as a result. If I have time this fall, I may give it another go.

Ugh. Just received the same kit with my wheel :frowning: 3 days we’ve been trying to figure out what we did wrong. Luckily I came across your thread. messaged the seller already. They sent me the same instructions you have as well. The 2 pictures. lol