RS5 carbon clean DIY

Starting this thread to hopefully have a central location for a carbon clean DIY for the RS5. Once I get everything together and accomplish the task (with photos/video), we can move it over to the DIY section or I can clean up this thread and repost there. Right now it’s just informational to see if I’m not thinking of something or leaving something out.

I’m trying to gather all the necessary information and parts to accomplish this task in my garage. The local Indy shop does it for $800 which isn’t bad by any means (he also does a full S-tronic and rear diff change for $400!) but it looks as though it’ll run me less than $250 in parts to accomplish this. And quite frankly, I enjoy working on the car.

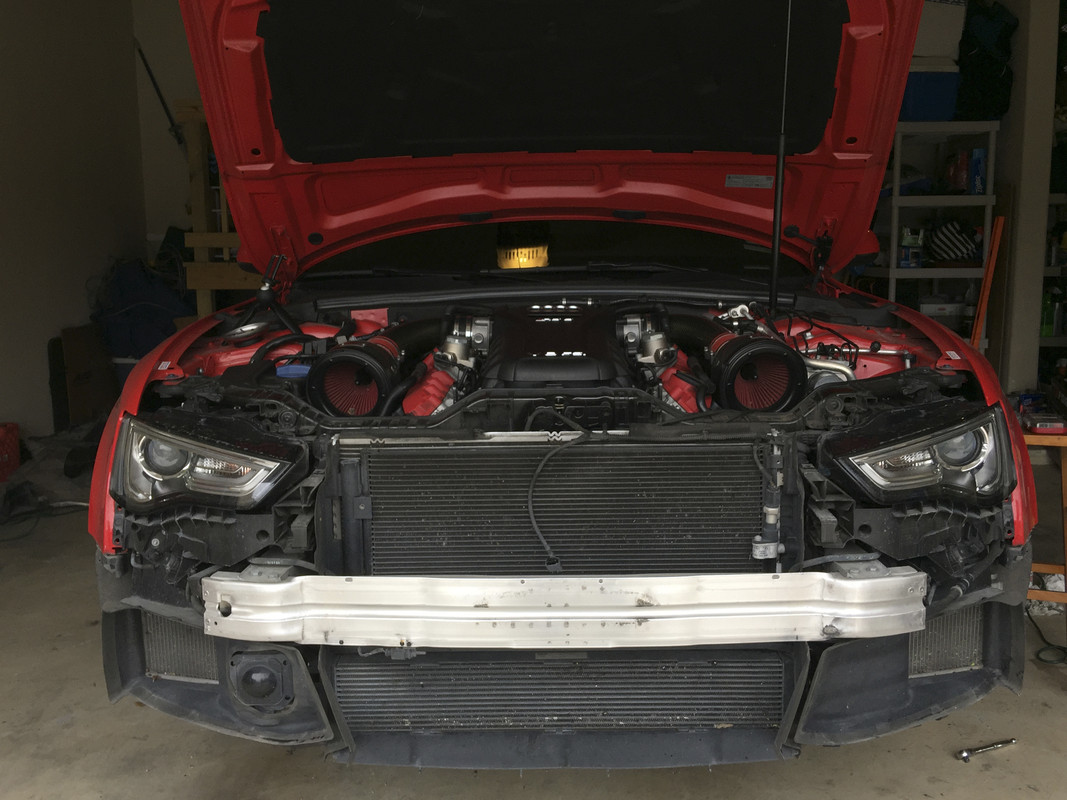
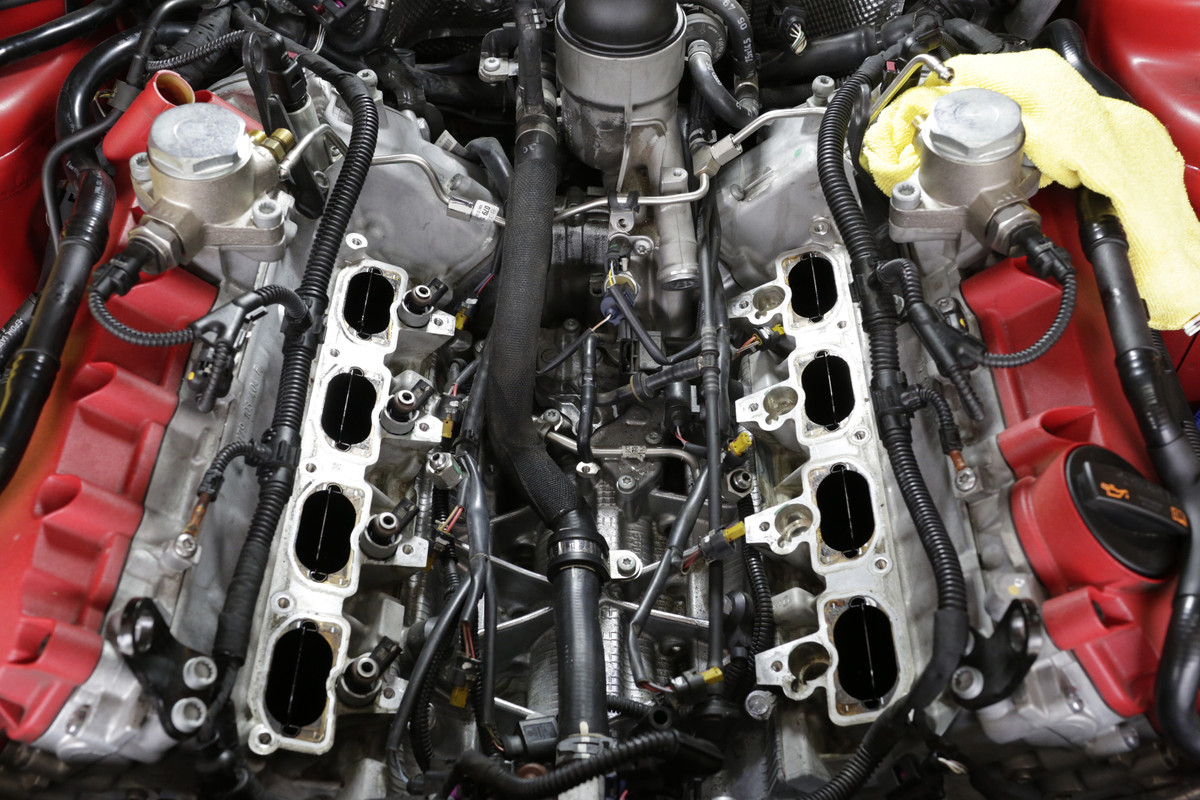
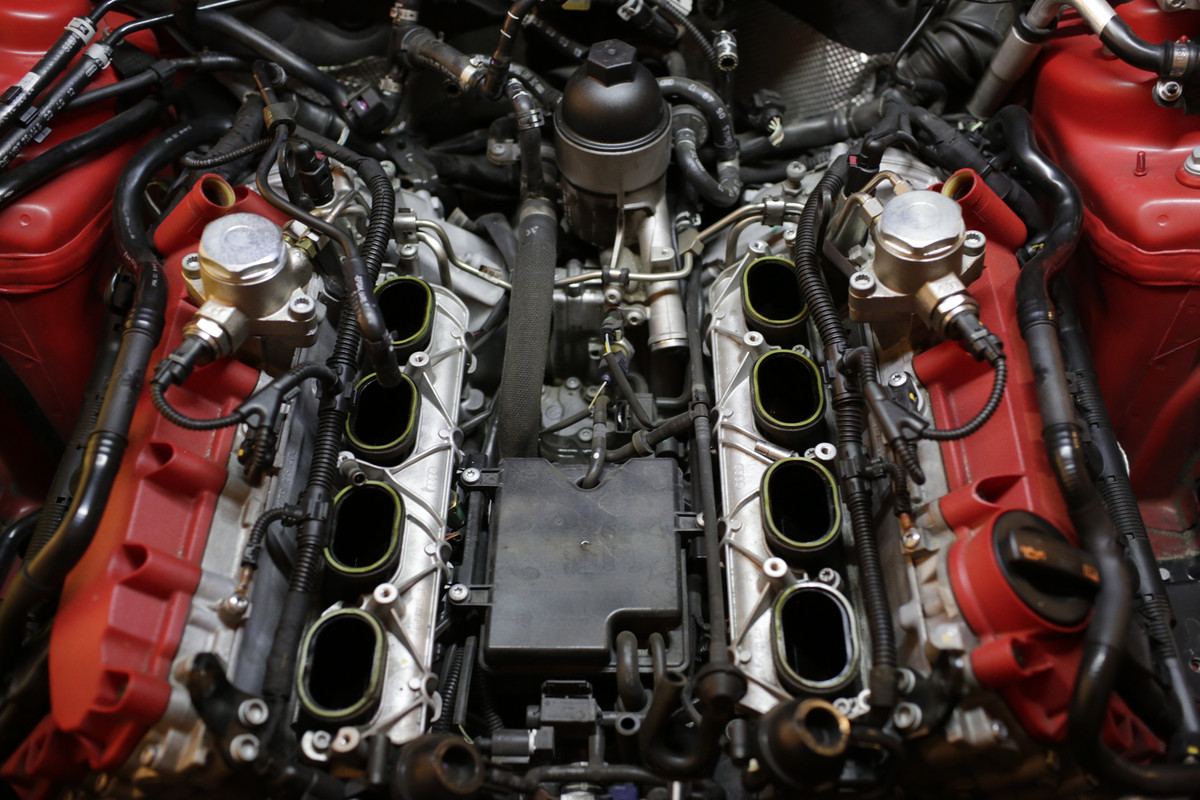
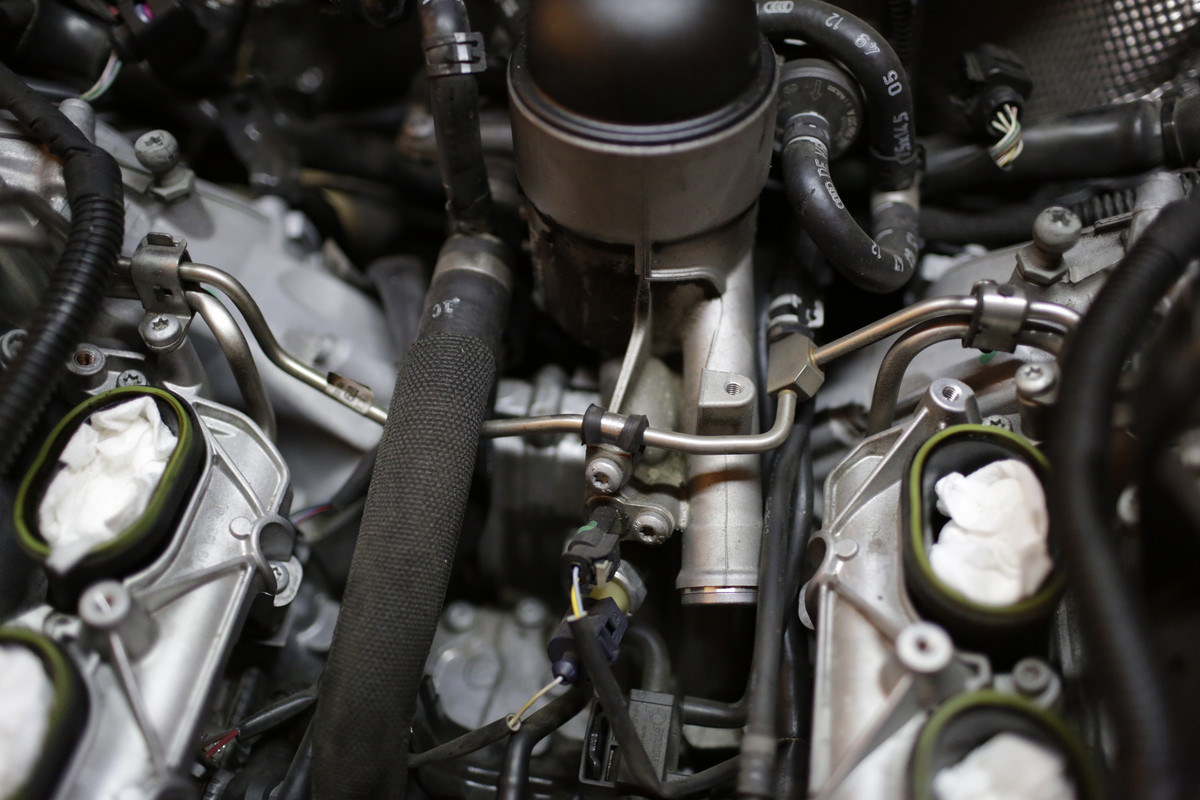
Looking at the RS5 engine bay, it’s pretty intimidating from a space/service standpoint. Luckily, the A5 line has a service position as Audi calls it, where the entire radiator and bumper assembly can get pulled forward to give you access to the front of the engine. You’ll need this to access the crank and be able to rotate the intake valves for each cylinder to the closed position. I also plan to take the time to inspect all the coolant lines on the front of the engine as there have been a few reports of leaks on RS5’s, especially in hot climates (I’m in one).
Here’s a video that has footage of an S4 front being moved into the service position. Intimidating!

You’ll obviously need a range of tools from a torque wrench to sockets to specialty bits like torx, triple square, etc…

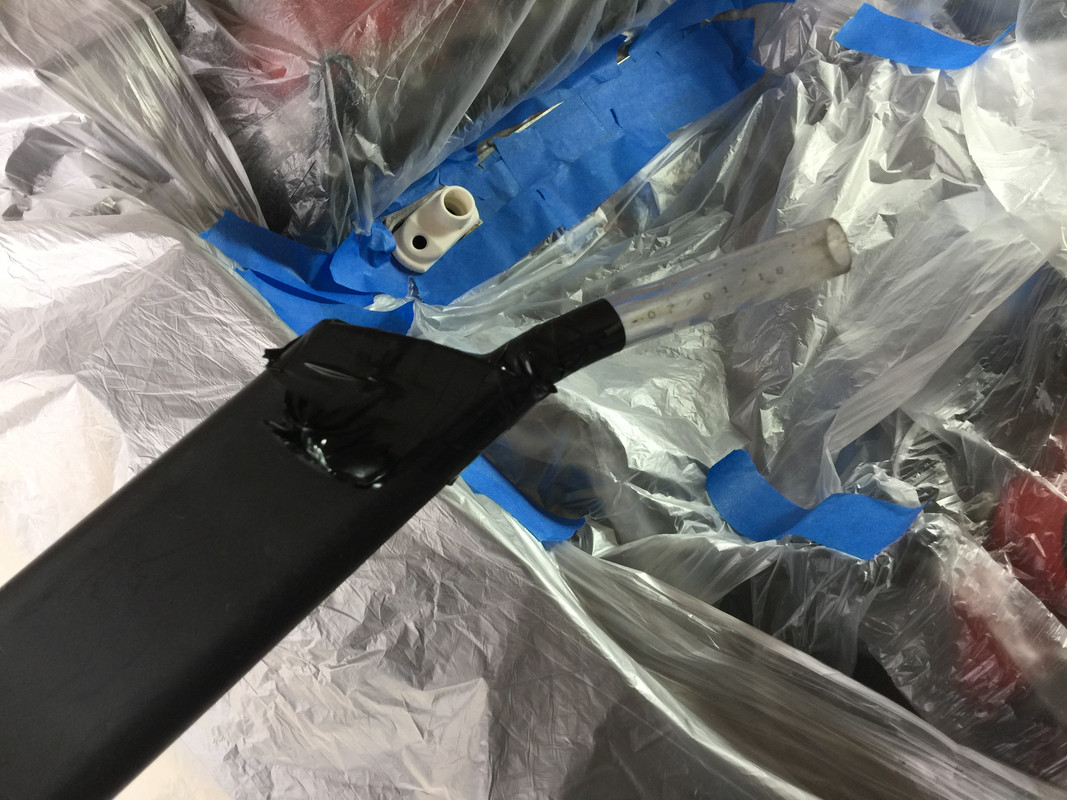
Thanks to a member on another Audi board, there’s an adapter that allows the clean use of walnut shells, creating a loop between the media blaster, the intake port and a shop vac. This reduces the mess to almost zero if you don’t have any mishaps. This is far easier and faster than doing the brush/pick method. JHM also sells an inexpensive kit that utilizes your drill which may speed things up over the “by hand” method.

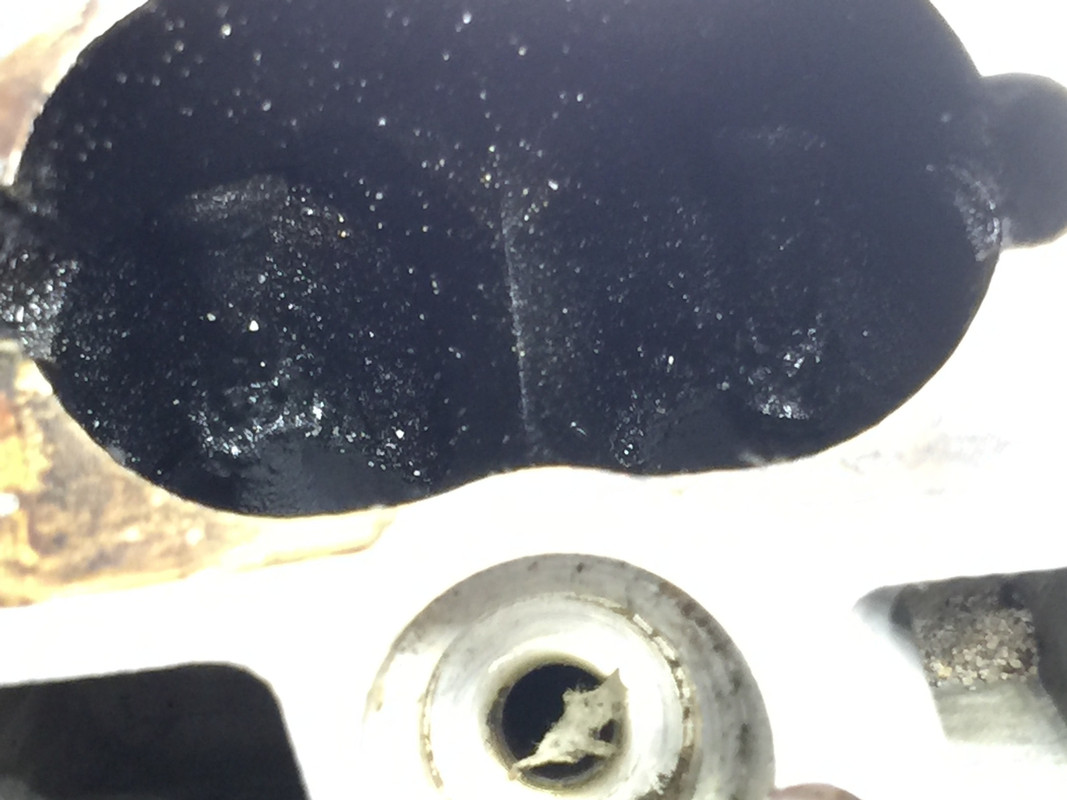
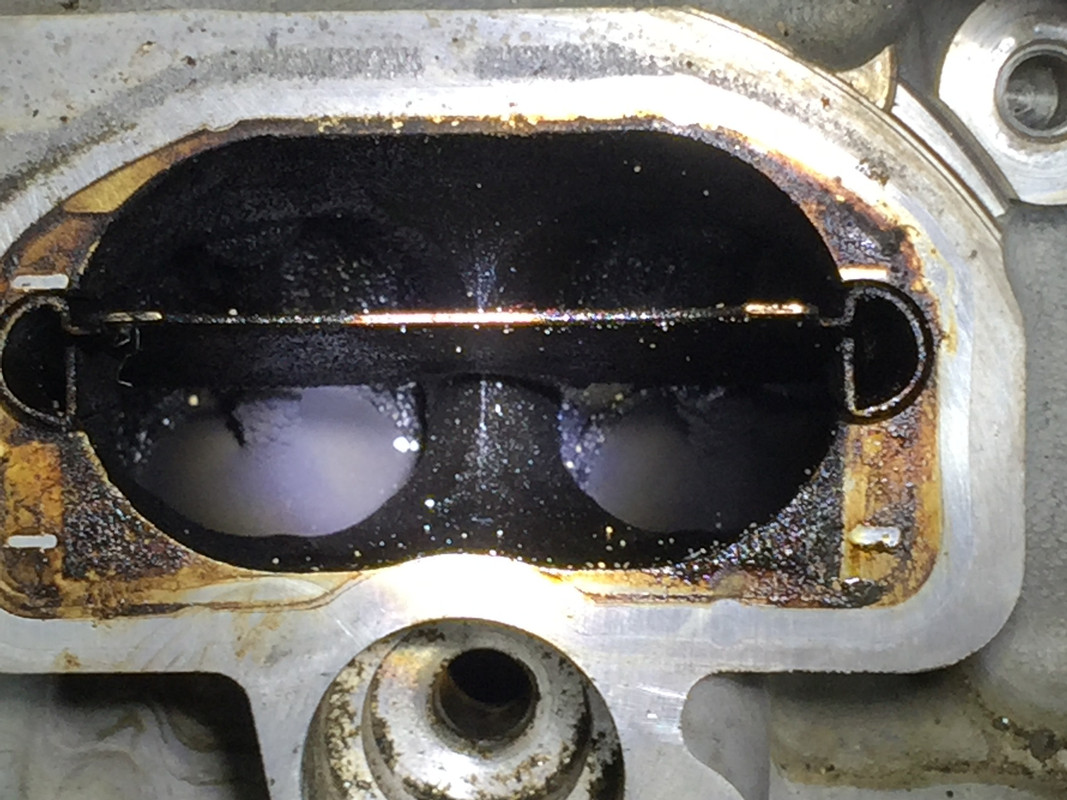
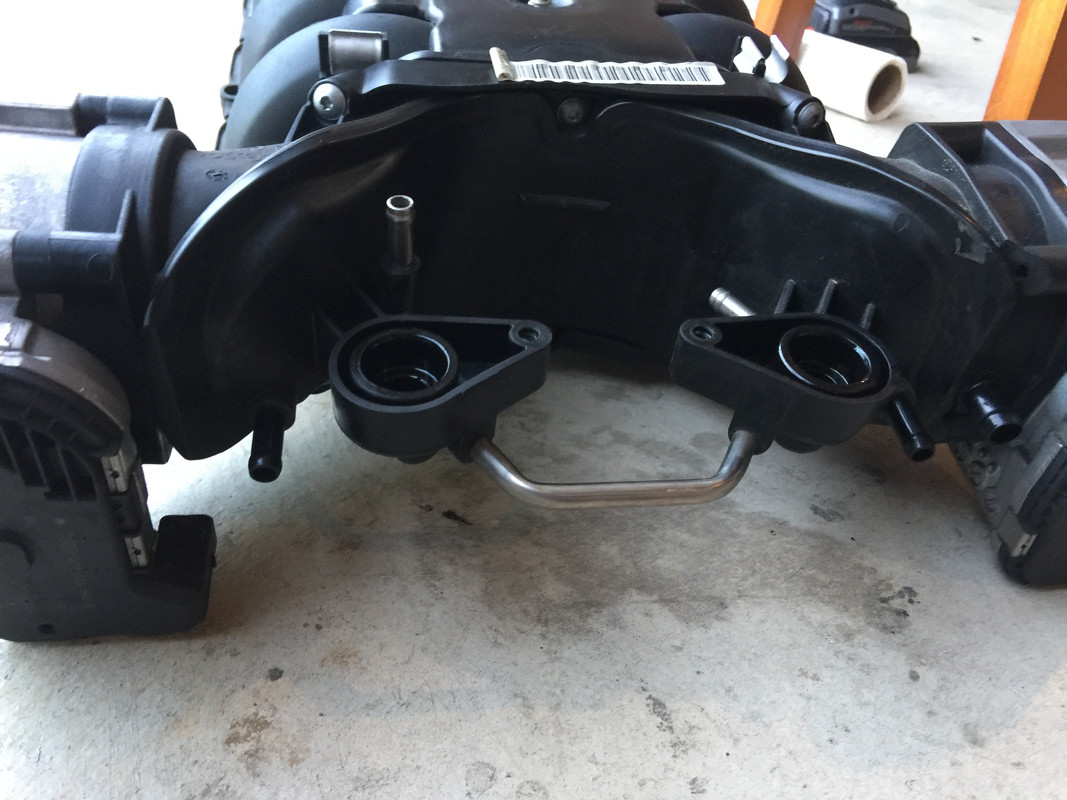
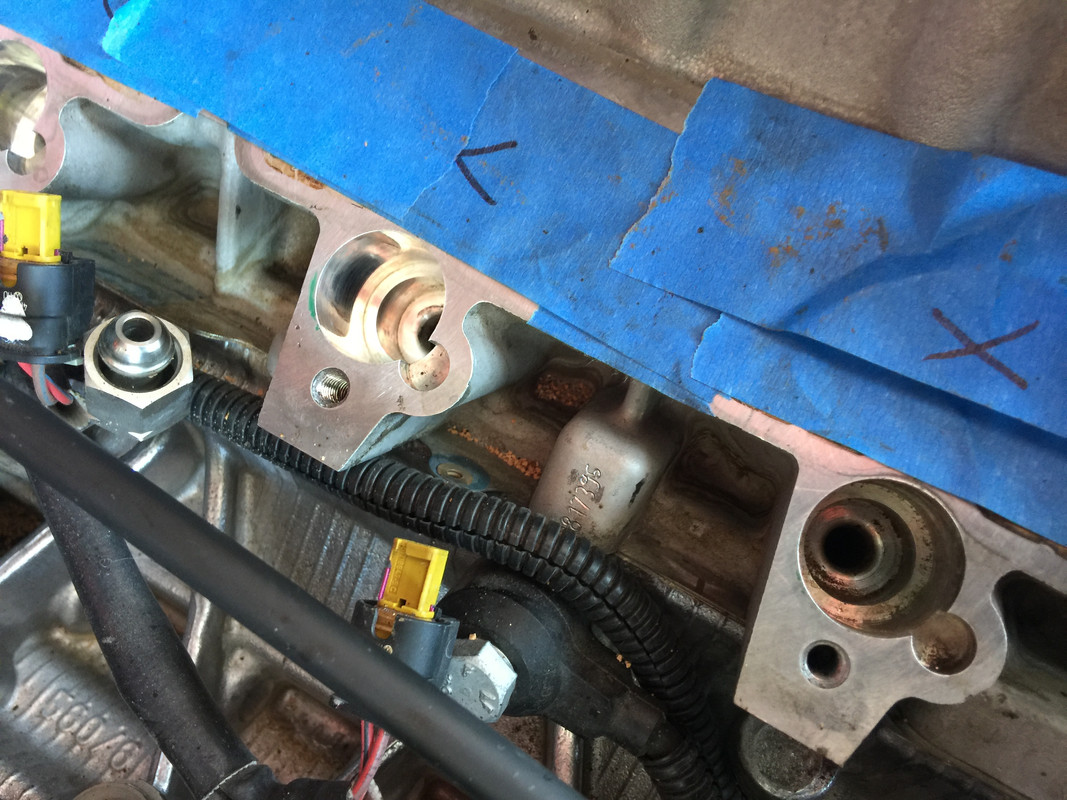
Here’s a photo of the port adapter:

https://s20.postimg.org/uozix78rx/1EBCC846-8FF9-4C04-A167-80856DCF0BE9.jpg

https://s20.postimg.org/68hd2qfr1/B0D8B234-AF2A-49A1-94B8-CB8765B7E193.jpg

The large hole is for the shop vac and the small is for the media blaster nozzle.

I do not own an air compressor so I’ll be hitting up Harbor Freight for one as well as for the media blaster and walnut shells.

Harbor Freight Media Blaster- https://www.harborfreight.com/portable-abrasive-blaster-kit-37025.html

Walnut shells, coarse grit (do not get the fine grit)- https://www.harborfreight.com/25-lbs-coarse-grade-walnut-shell-blast-media-92150.html

Service Position locator pins: Audi P/N T10093 ECS tuning has them, https://www.ecstuning.com/b-genuine-volkswagen-audi-parts/lock-carrier-tool-set/t10093~oev/

Crankshaft turning socket: Audi P/N T40058 You can get these less expensively, by a good amount, off of Amazon.

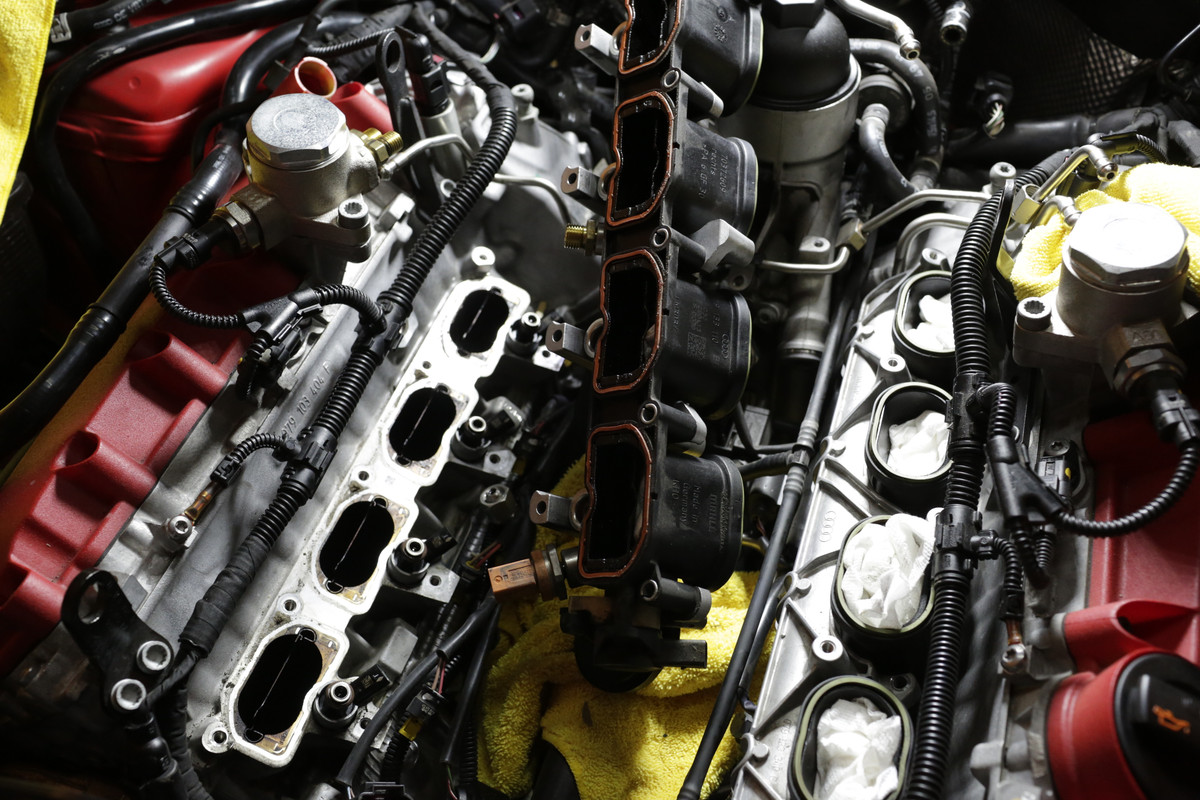
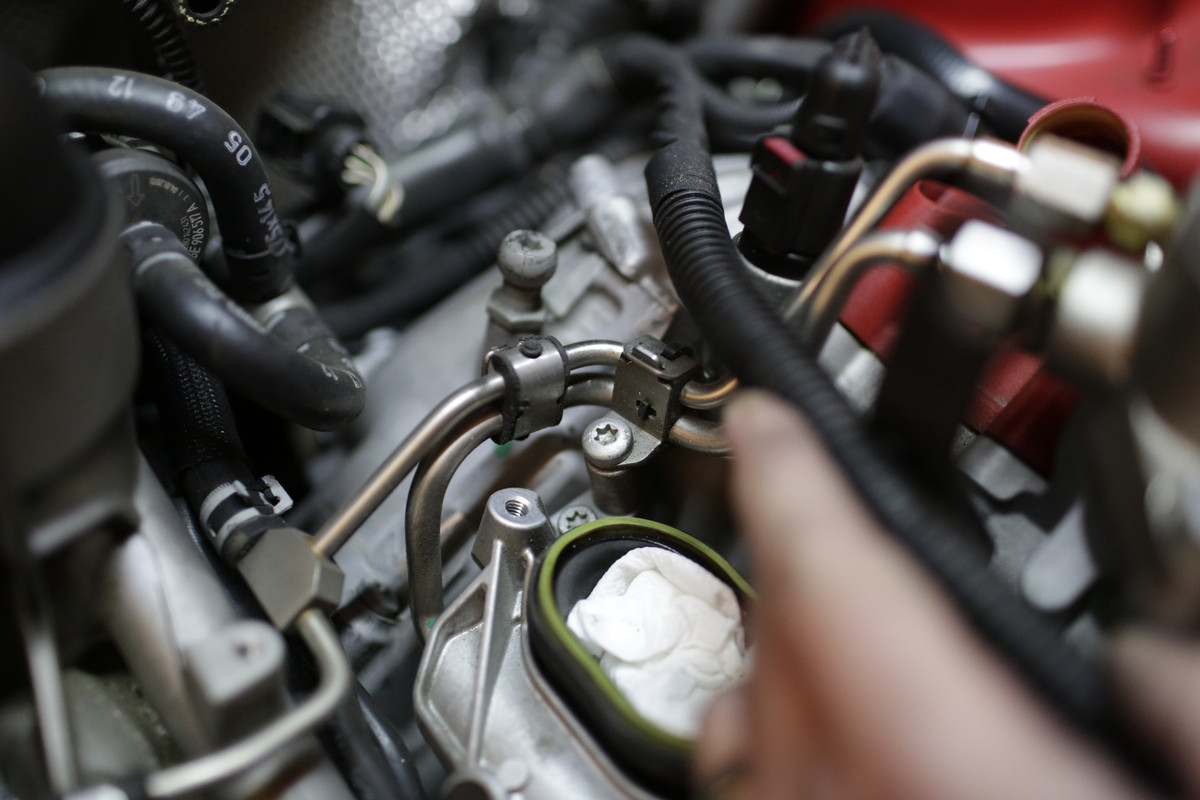
I do have a few questions. For the lower intake manifold removal, the manual specifies removal of some high pressure fuel lines towards the firewall side (rear) of the manifold. I’d prefer not to have to bleed down the system and remove these lines. Anyone know if it’s a necessity?

Also, is everyone using a hand vacuum pump to reinstall the lower intake manifold (LIM) while ensuring the secondary diversion valves are in the proper position or is there a slightly more tedious shade tree method? Otherwise I’ll be adding a hand vacuum pump to my parts list.

Will update as I find out and accomplish more.

Great to see this done.

A few tips. Using the blast method can cause debits to get in the cylinder. Its a good idea to spray a little starting fluid into each cylinder to make sure they are fully shut. Doing so will allow you to see if any fluid was leaking into the cylinder.

When your done make sure to pull your spark plugs and do a dry spin of the motor if no fuel. This will push out any cylinder debits

The cylinder tool you can get a BMW tool for cheap to do the same thing.

Carbon clean is happening this weekend. I’d planned on tackling this spring but time got in the way. Followed by summer and 105 degree temperatures. Weather should be perfect this weekend so I’m going for it. I have everything ready to go.

So I thought I had everything but I forgot to order the service position locator pins, PN T40116. The local Audi dealer does not sell tools. So I believe you can use an M10, 150mm bolt. Problem is, I don’t know the correct thread pitch. It could be an M10x1.25 or an M10x1.5. No one stocks either in a 150mm length but I did pick up two M10x1.5 100mm bolts that I’m hoping will work. Anyone know for sure what the correct thread pitch is on those bolts?

I can confirm the bolt is a M10x1.5 and a 100mm length is more than enough for the RS5.

Nice update. I was going to say I’m quite sure its a M10. Great looking pic. Any reason your not just pulling the entire front core support… Its actually not that hard at the point your at now.

looking forward to more updates.

Just a teaser photo. The bumper is fairly easy to remove. I’ve already put it in service position and pulled the core forward (not pictured as they say). I ended up pulling a lot of connectors apart that I really didn’t need to. Even with a 100mm length bolt, pulling the core out doesn’t use up the full length of the bolt. The mass of hoses pretty much keep it from extending further out. It springs back a bit if that makes sense.

But I have enough room to get a ratchet on the crank which is all I need. And I think I have enough room to change the accessory belt while I’m in there.

I do not plan on removing the entire core mostly because I don’t want to fully drain the radiator and have to deal with refilling it. I did empty about 2L just so I could pull a few coolant hoses off up top as they’re fragile and didn’t want to put any stress on them when pulling the lock carrier forward.

How was the carbon clean? Built up or not so much? How many miles are you at?

STILL going at it, two ports left. Carbon was pretty bad, 50k miles.

Yeah. looks like it could use a good clean. Its not super bad but it needs cleaning. Good work.

Finished up tonight. That was one of the better intake ports. A few were much worse. Definitely needed cleaning. Sorry the photo is upside down.

I finished up today and got the engine buttoned up. Took a few cranks to get the fuel pressure back up but she fired right to life and no leaks. There are more than a few gotchas when tearing down and putting together an RS5s induction system. Will have more details later when I have time but figure in the cost of a full injector repair kit. There’s no way to keep the injectors in their bores when lifting the lower intake manifold up. That caused a major delay as I had to fed ex eight kits in from Fort Worth via Audi.

For 50k miles those look good! Nothing to chunky or gum’ed up.

What fuel do you use?

I had a cc done around 25k miles only because manifold was already off and I got “sold” on it.

That’s the good cylinder, LOL. I use Costco fuel which is top tier gas. The gas has zero effect on carbon buildup though as the valves never see it except for a bit of reversion during overlap and then it’s mostly burned fuel. Not enough to clean the valves.

Here’s a few more, some are far worse and there were big chunks and gum over everything.

I managed to open her up a few times on the way to work and I feel like the midrange is nicely improved with a definite top end zing. I’d be interested in knowing when the flaps open as there’s more a noticeable step in power I think around 5K rpm. Along with the tune, it feels properly fast now.

Just going to post some photo porn and will organize and update the thread as I have more time.

Intake port with divider installed

A big chunk of carbon

If you look at where the valve meets the cylinder wall, you can see gummed up carbon there. That has to be cleaned with a pick. It also collects around the base of the valve guide, particularly on the back side where airflow is a bit more stagnant.

The engine valley and ports fully exposed. If that shot gives you the willies then carbon cleaning is not for you!

One LIM removed, one to go. They’re a total b*tch to get off especially when you’re trying NOT to pull out the injectors. Just go with it. Pull and plan on replacing the seals on all the injectors. No way around it. Poor design Audi.

Take lots of detail shots so you know how everything goes back together. That one torx screw holding down the fuel line separator? I managed to bolt it down to the boss just to the left. And that’s for the LIM (lower intake manifold). I couldn’t figure out why that last bolt wouldn’t go in!

Back side of the UIM (upper intake manifold). There’s one plug, for the driver’s throttle body which is extremely difficult to remove and back on. It’s on the same side as the passenger’s instead of designing a new one with the plug on the outside. Thanks Audi.

UIM underbelly.

Clean fuel injector bores, runner dividers and ports.

Clean bore left, dirty right. Use a gun cleaning kit or order some twisted wire brushes online.

Correct part number for the RS5 injector rebuild kit. It’s three pieces and includes the combustion chamber seal. Not sold separately. A full set ran me about $120 with my Audi Club discount. If you think ahead, you can save about $10 through ECS for a full set (8). https://www.ecstuning.com/b-genuine-volkswagen-audi-parts/fuel-injector-repair-kit-priced-each/06e998907c/

Injector with the old seals removed.

That’s the business end of a shop vac in the foreground with a small piece of clear plastic tubing strapped to it using electrical tape. I could see when the walnut shells were flowing this way. I completely sealed off the rest of the car but found it unnecessary with the port adapter and removed it all. If your’e fairly careful, it’s easy to keep the walnut shells contained.

Clean port dividers!

Helluva job. Nice diy. Enjoy the regained power!

Is this officially on Audi’s maint schedule now ><

Audi will never mention carbon cleaning on their official maintenance. That would put them in loosing litigation territory.

One tell tale sign the carbon buildup was having an effect was on cold startup. Prior, I’d get little pops and muffled bangs which I assumed was fuel hitting the cats as they heated up and igniting. They were misfires. Strange thing is, logging with the VCDS, there were no misfire codes.

Post carbon-cleaning, startup is still loud and obnoxious but it’s buttery smooth too. There are no percussive additions to the engine’s soundtrack.

I’m pretty sure my gas mileage is going to plummet. I’ve now increased VE and on top of that, I’m getting on the gas more often to feel the difference in torque and power.

Strangely, in my dreams last night i received not one but TWO tickets within a 40 minute period. Omens.

Here’s a short teaser video of me cleaning one intake port. I’m about halfway done with a full writeup and I still have to edit all the video and post that as well. It’s as much work as the carbon clean itself, LOL.
https://youtu.be/zrbkQCK1EZc

That is a lot of work but always work that plays a good roll in helping others. Thanks for the time. I watched the video you posted. Not bad. I’m not a fan of walnut shells I like the chemical approach better myself.

something to do after you walnut shell blast. Pull out the spark plugs and blast the cylinder heads with air and dry crank the motor with the spark plugs out. You will get bits of walnut shells coming out the spark plug holes.

I tried it both ways actually…the walnut shells were ultimately less messy and it was a quicker process. I would end up wiping down and cleaning out any residue at the end of the process with carb cleaner which worked really, really well. Also, the fuel injectors were all out so I didn’t pull the plugs. I made sure every last bit was out of the intake port by using a pick and compressed air.

I also didn’t want to reconnect the battery as I have ACC on my car and I did not want it throwing a code and necessitating a visit to the dealer to recalibrate it, LOL. I marked all my lock carrier bolts and somehow managed to get it back in place spot on to where it was before. No codes and it works without any issues. I supposed I could have just cleared everything with the VCDS afterwards but I did not want to take any chances. And this is strange as I’m not really a big fan of the ACC system.

What I didn’t show in the short video is that i do also blow everything out with an air nozzle. I’d just switch back and forth between the two. I’d clean with the walnut shells, blast out with air, pick at the areas where carbon would be hiding, blow that out, blast again, etc…it was a tedious process. I could probably do it in half the time now. I also recommend a larger compressor than what I had along with an inline water vapor filter to keep the media from clogging. That would have sped things up tremendously. But…I was shooting a lot of photos, video and taking notes so that really slowed things down.

I’ll be posting the whole blow by blow here. Not done yet. I left off with the basics of the carbon cleaning process and the video. Much more to add concerning injector seal R&R, cleaning other components and reassembly. It’s a lot of work and honestly, if all you’ve ever done is change oil on your car, it’s a bridge too far. I would not tackle this without lots of previous mechanical experience.

Nice, looks really clean !

I wonder how mine look after 40k miles since clean and supercharger. Eurocode promised me that if I agree to their clean then I will never need a clean again, somehow I doubted it but I figured I may potentially get more hp’ees so I agreed.

Costco top tier fuel!?? seriously? since when? I know I put a few gallons in about 8 years ago and my engine misfired left and right; hated it.

I use only shell, occasionally chevron if I cant to a shell station