The Red Mist, An RS5 Tale and introduction

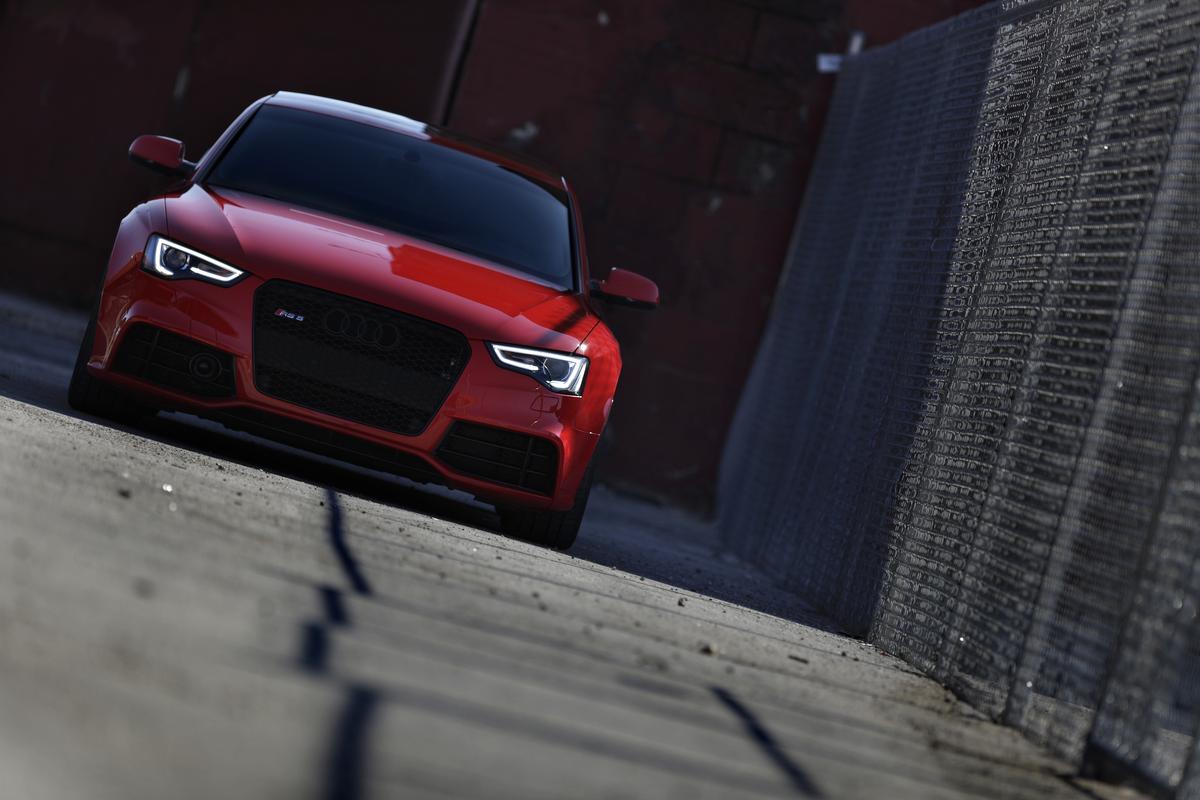
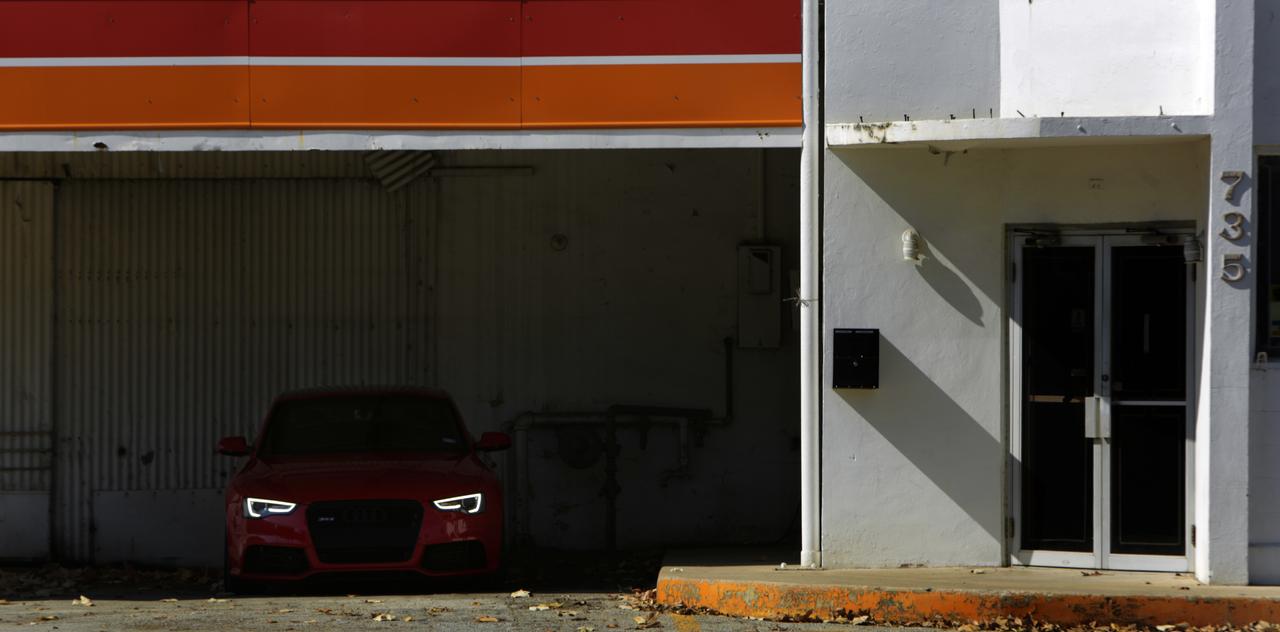
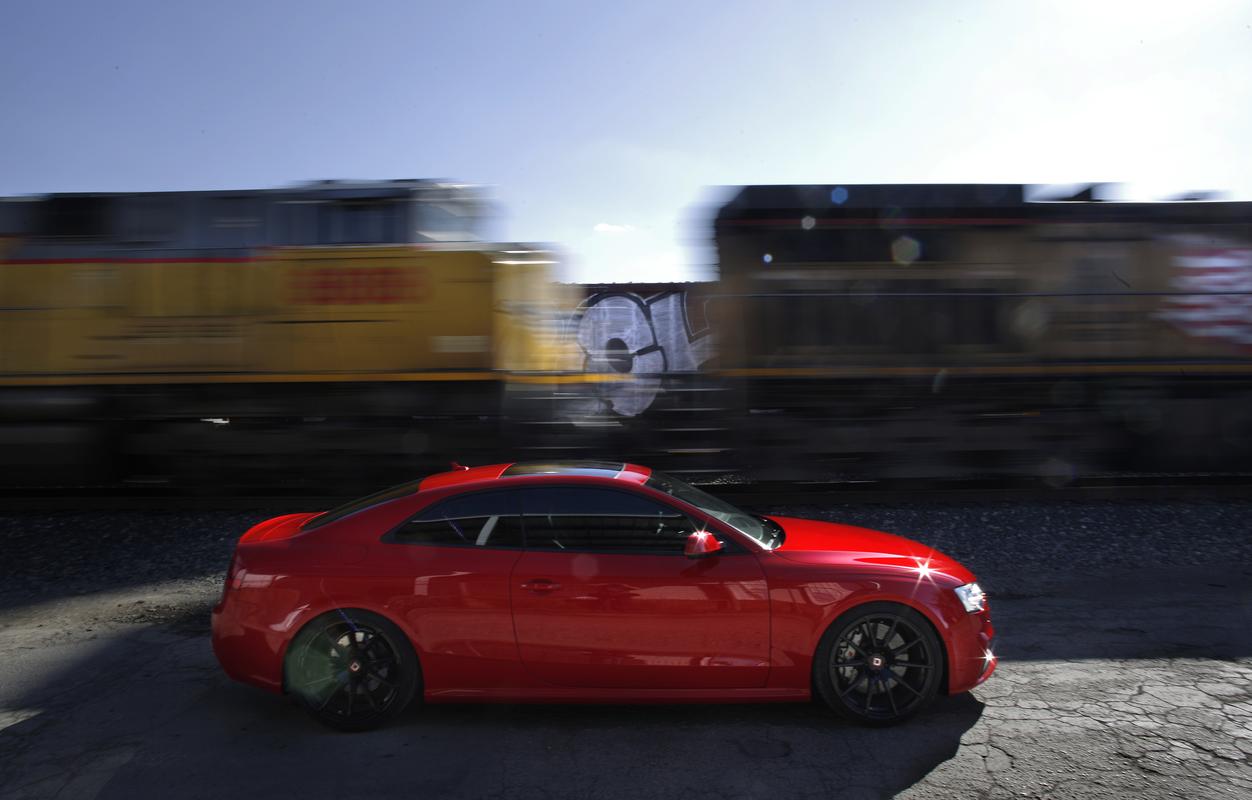
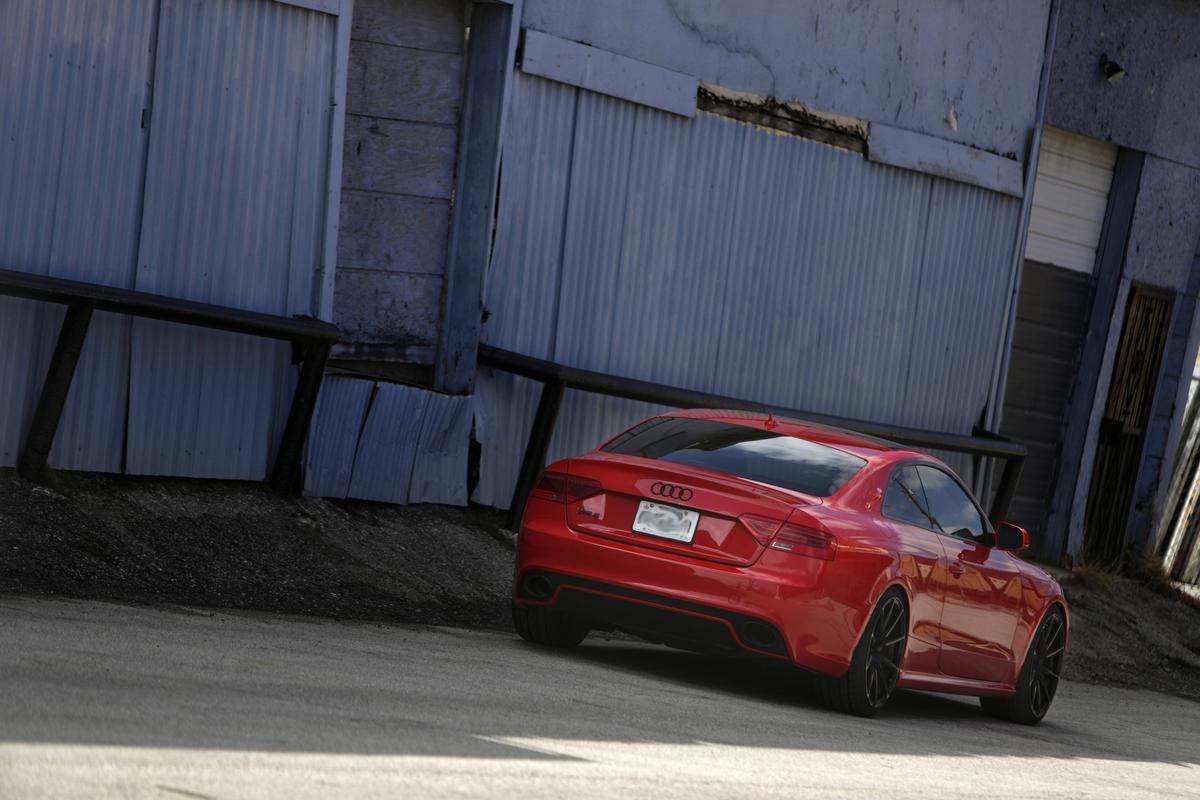
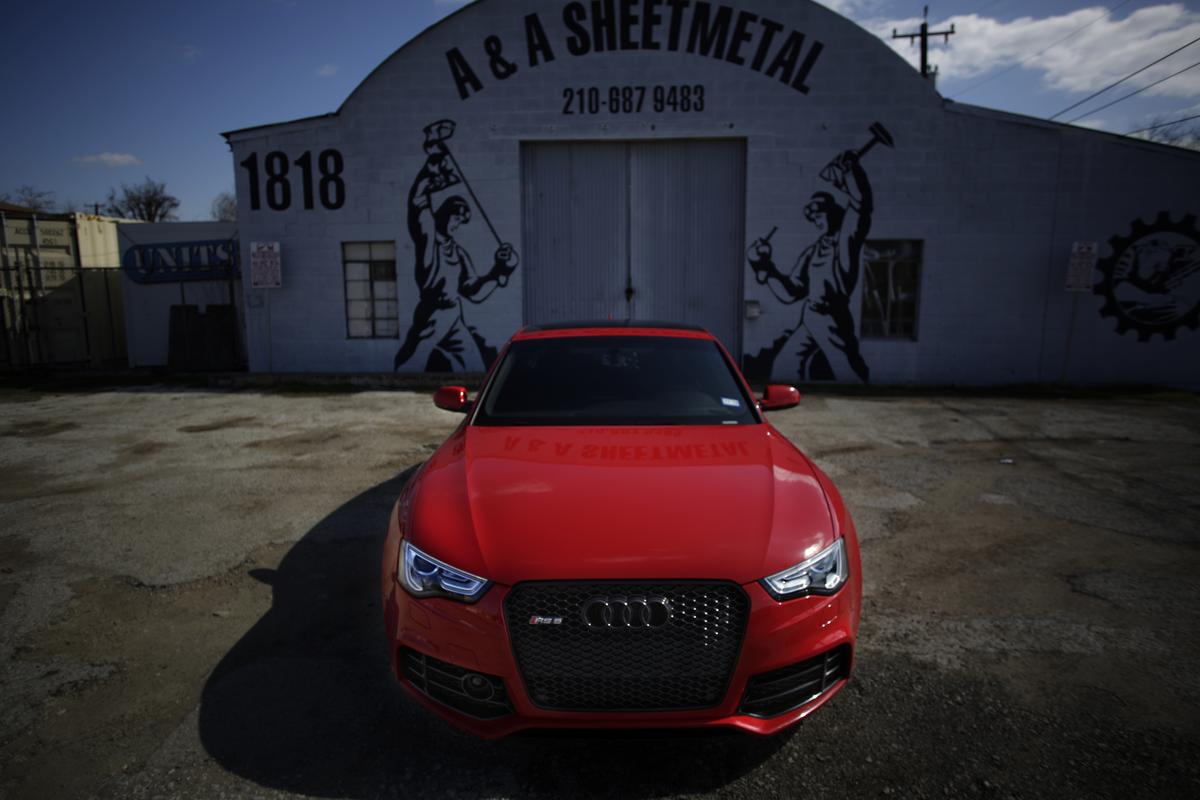
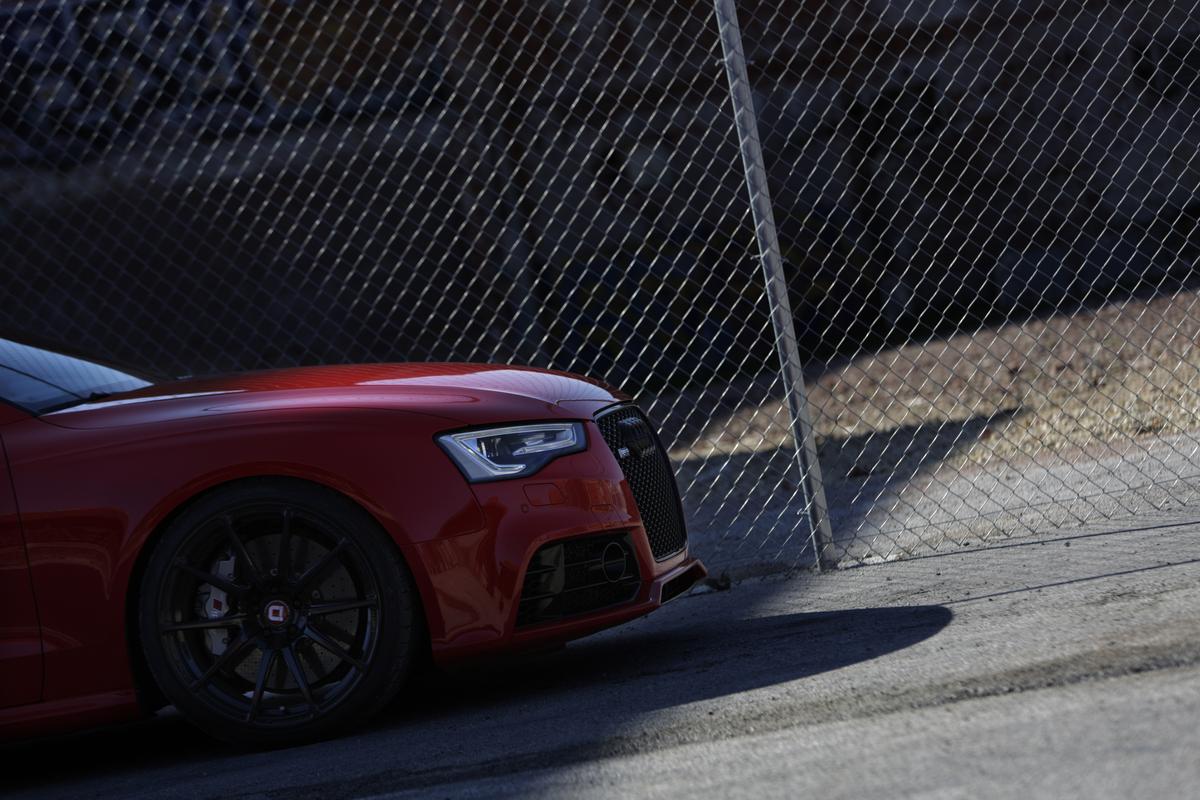
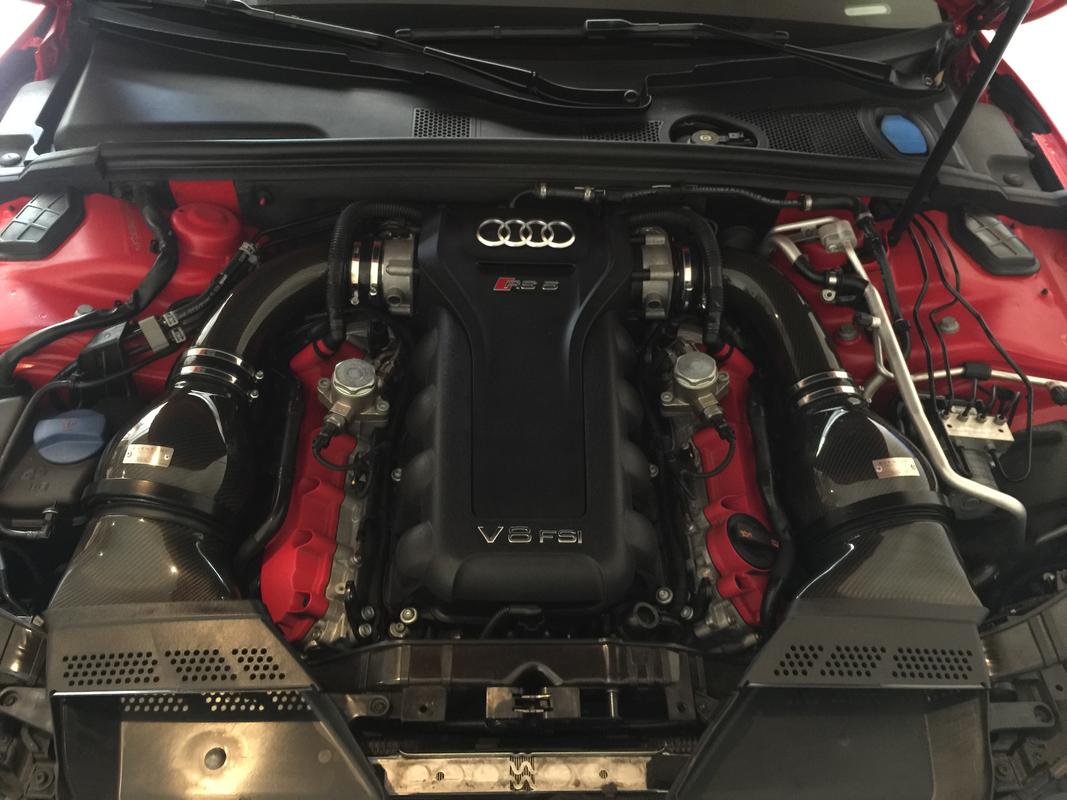
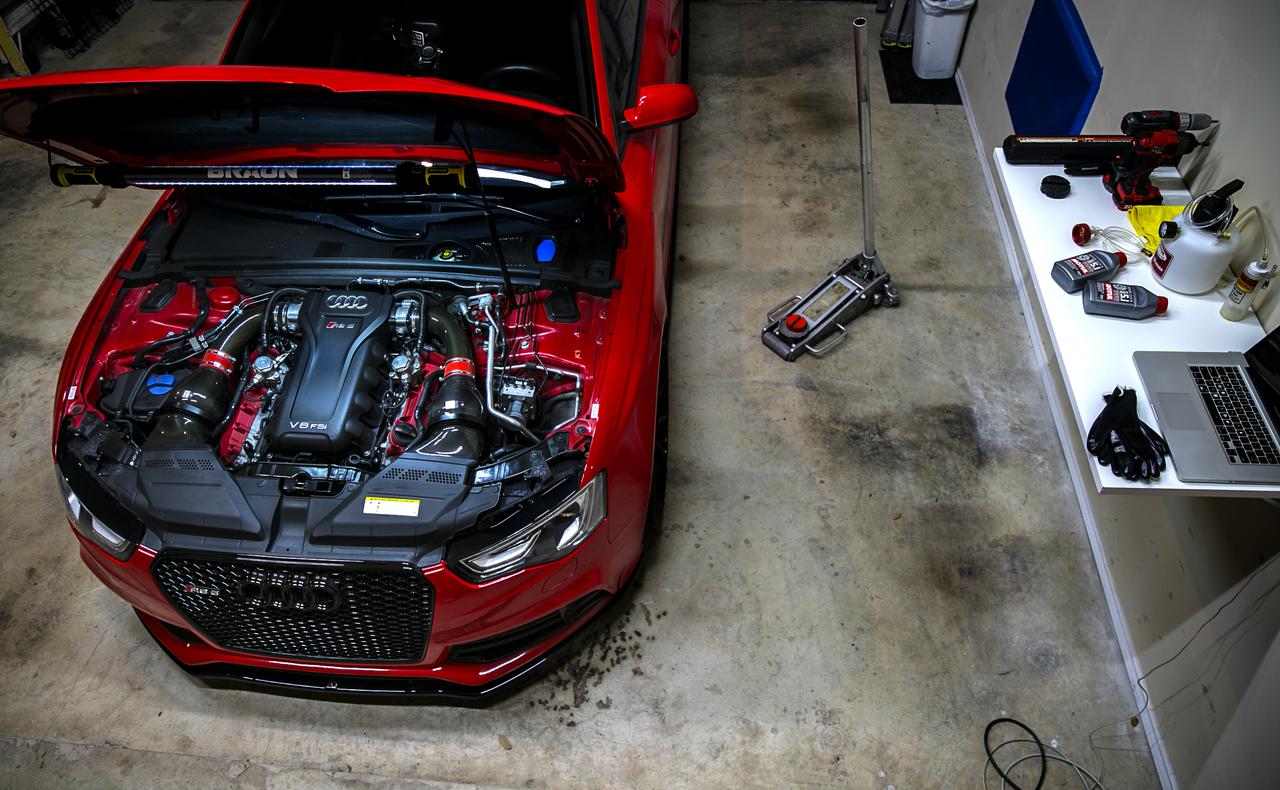
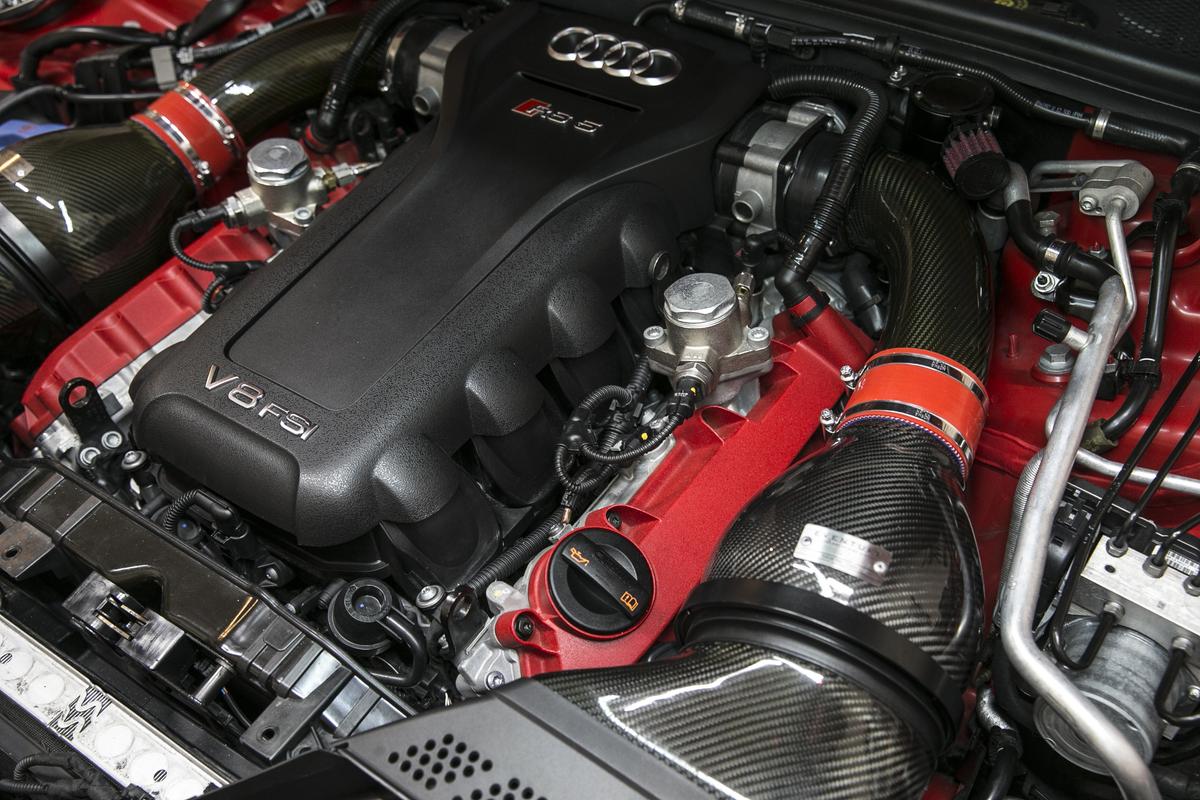
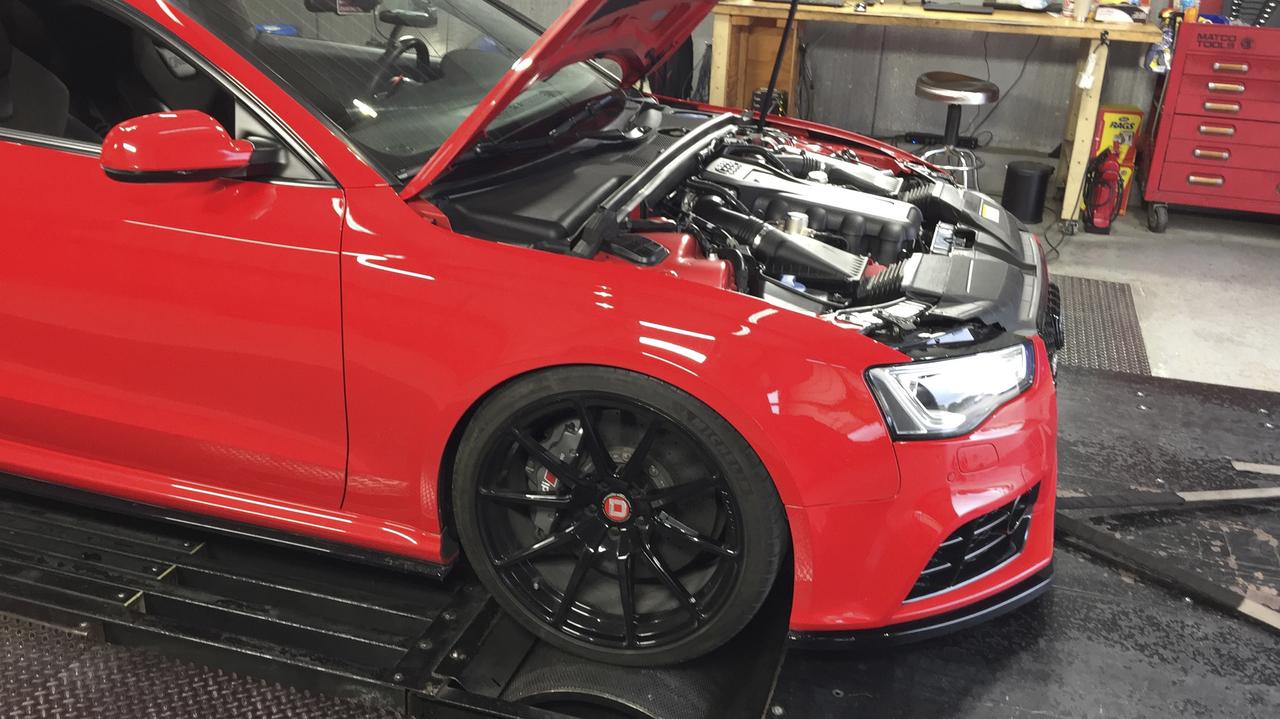
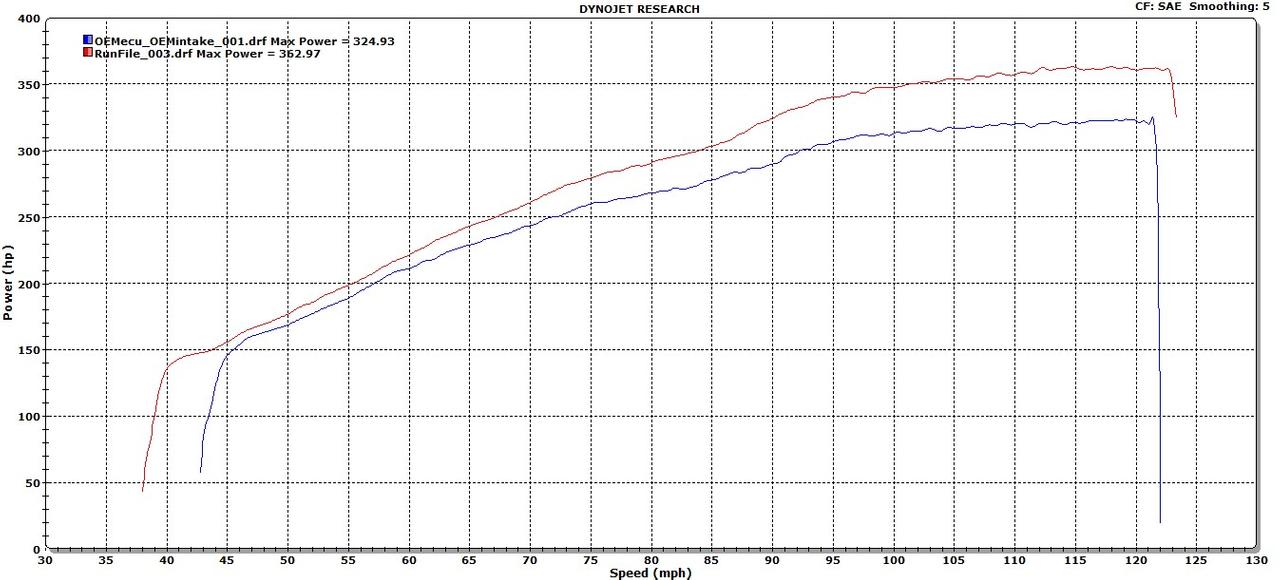
So today was the official “tone down the RS5 day”. A big hat’s off to AWE who produced a set of resonated downpipes and got them to me two weeks earlier than expected. Exceptional customer service.

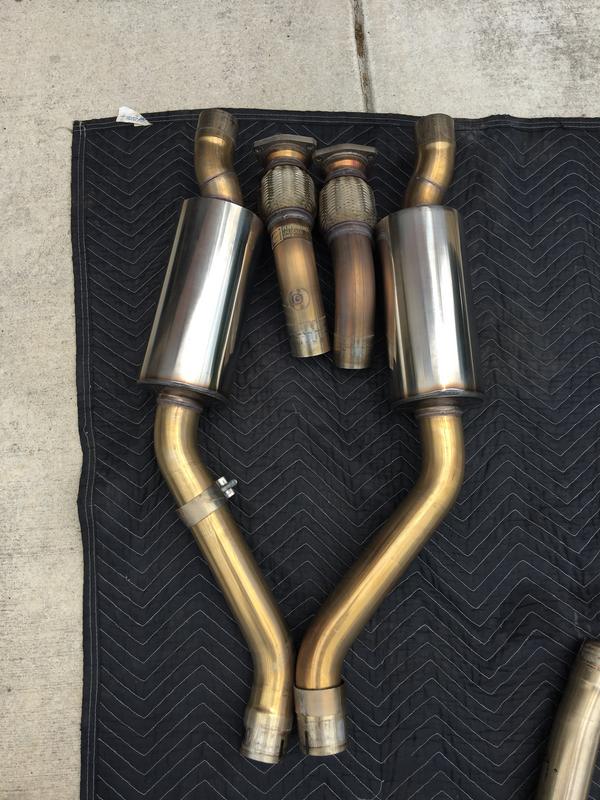
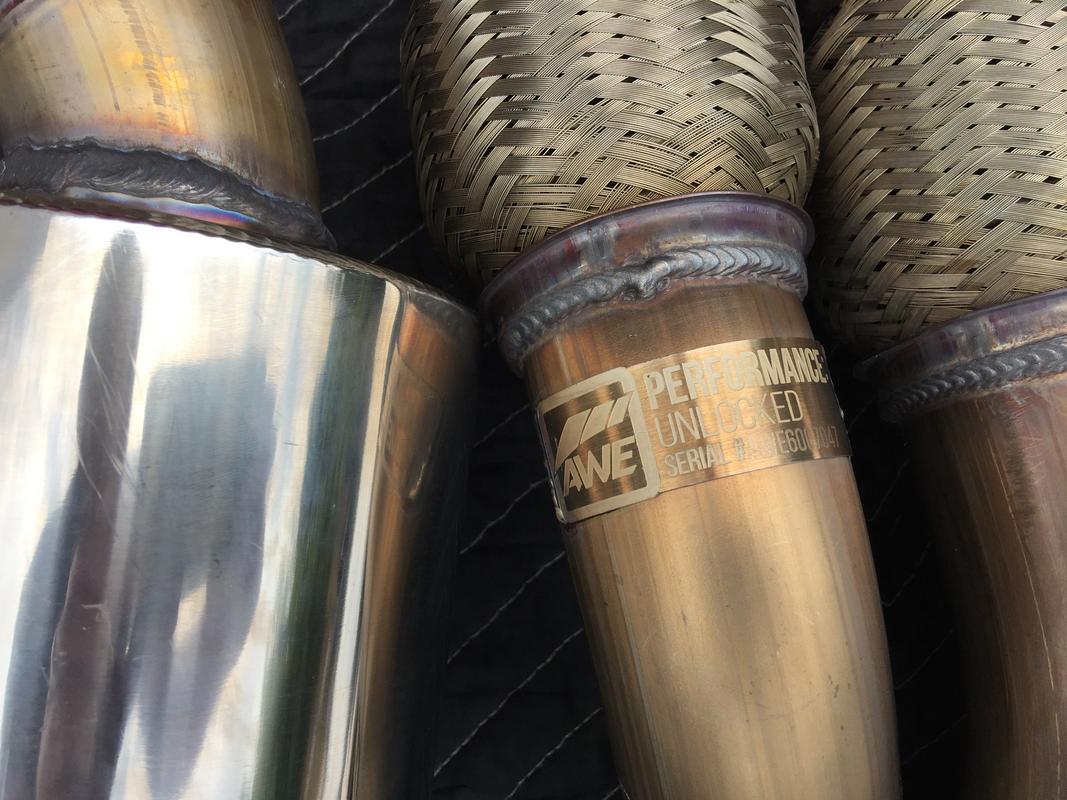
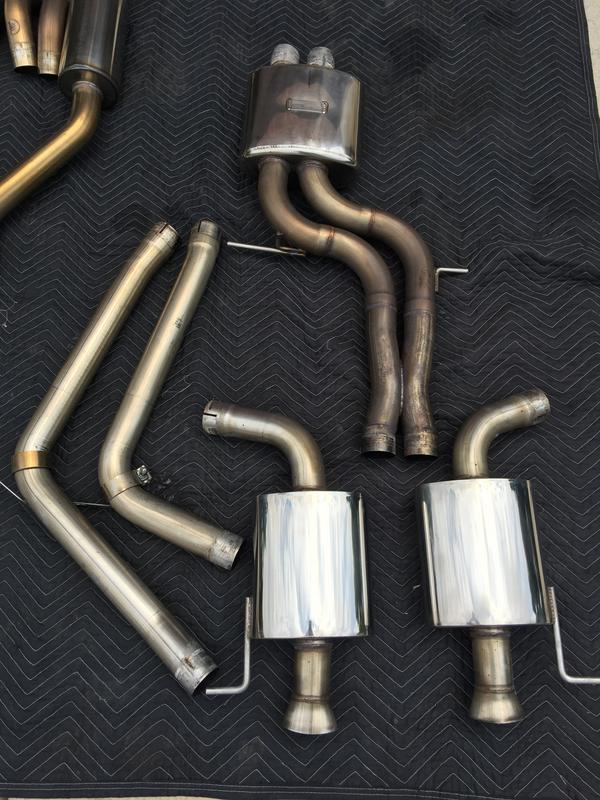
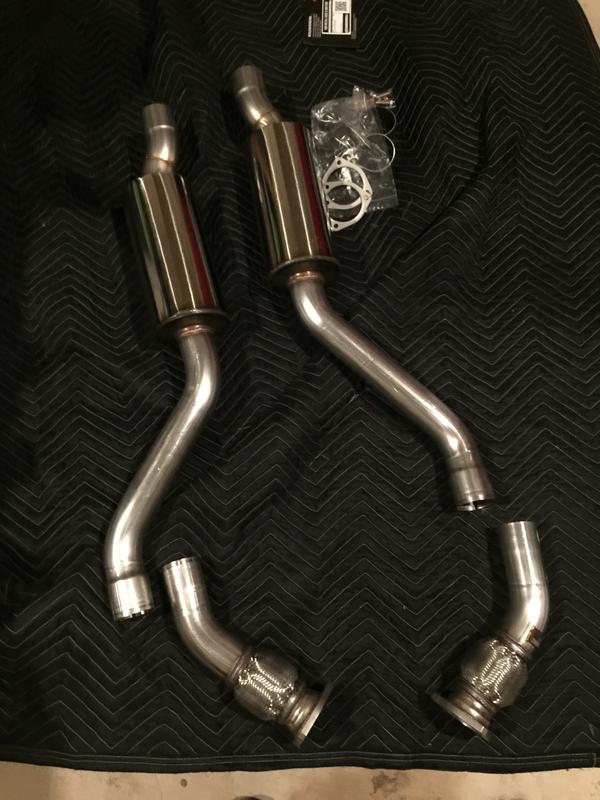
I unpacked their resonated downpipes and was pretty surprised at how large the “resonators” were. Hell, these are mufflers. Light though, they really don’t add noticeable weight over the non-res.

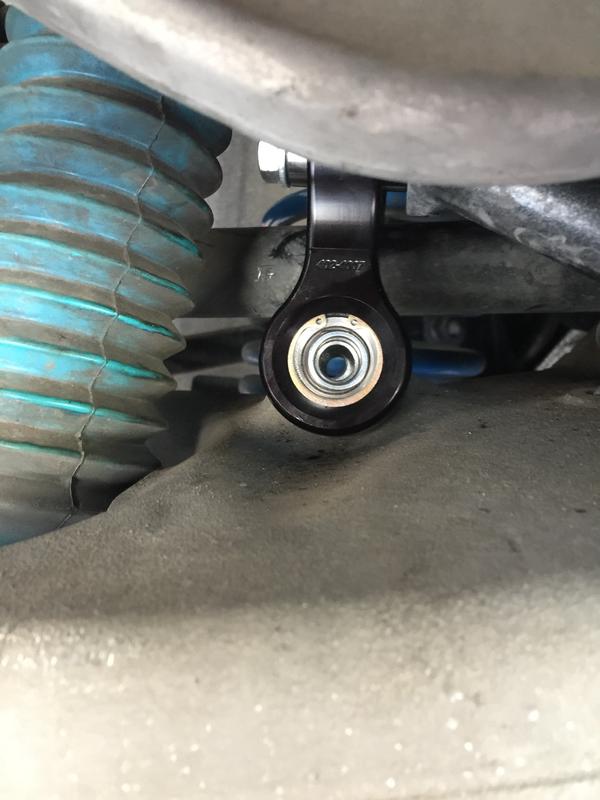
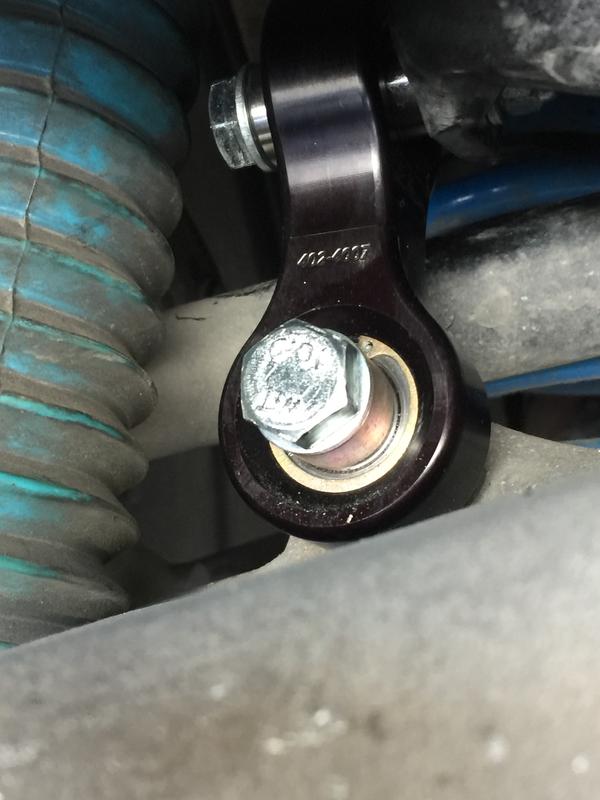
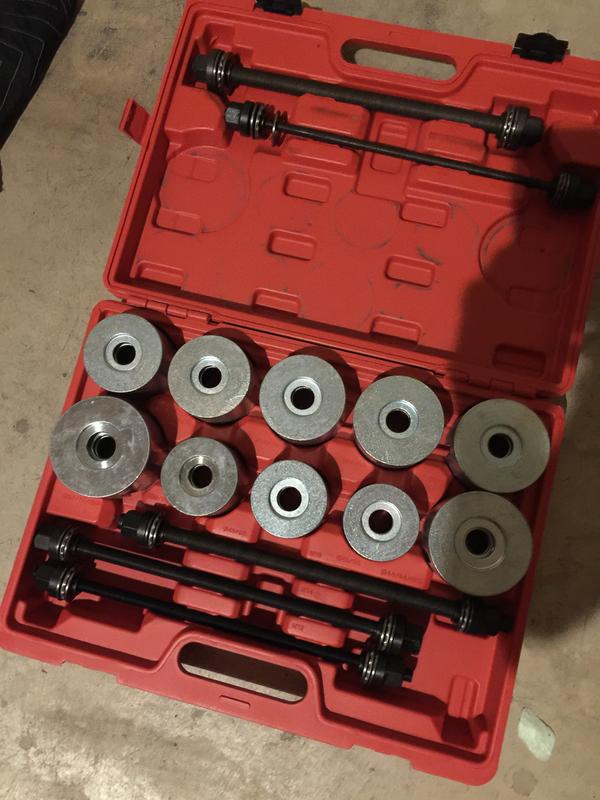
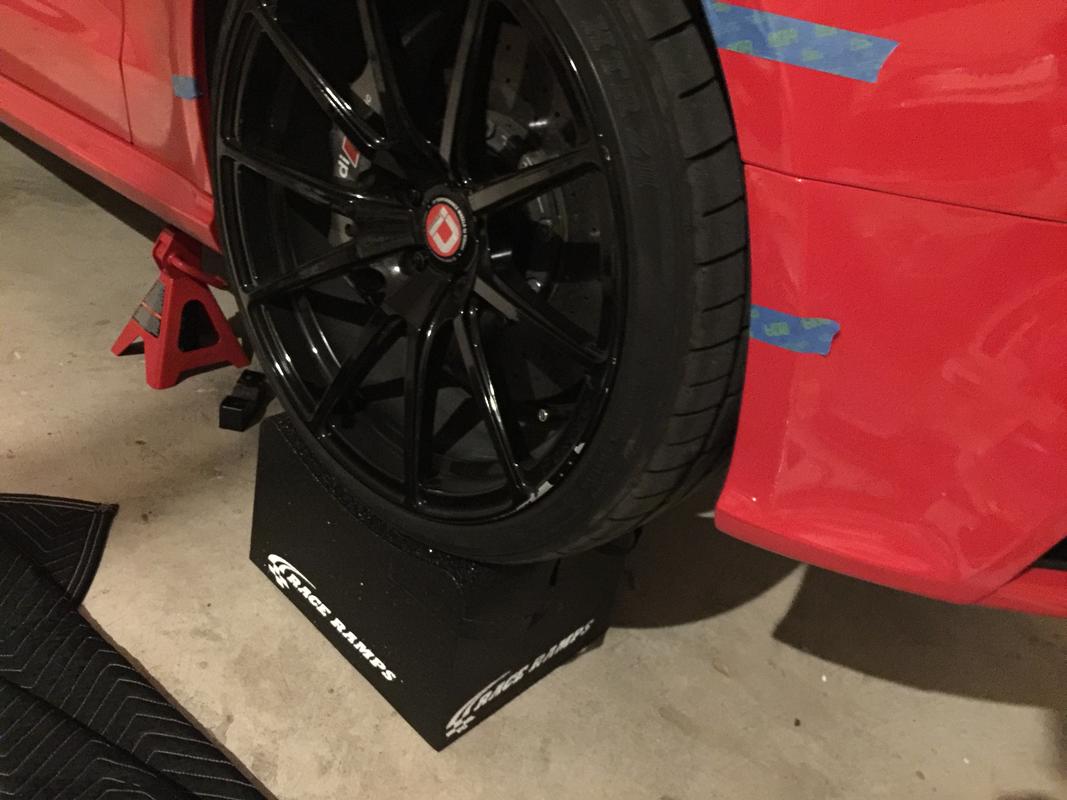
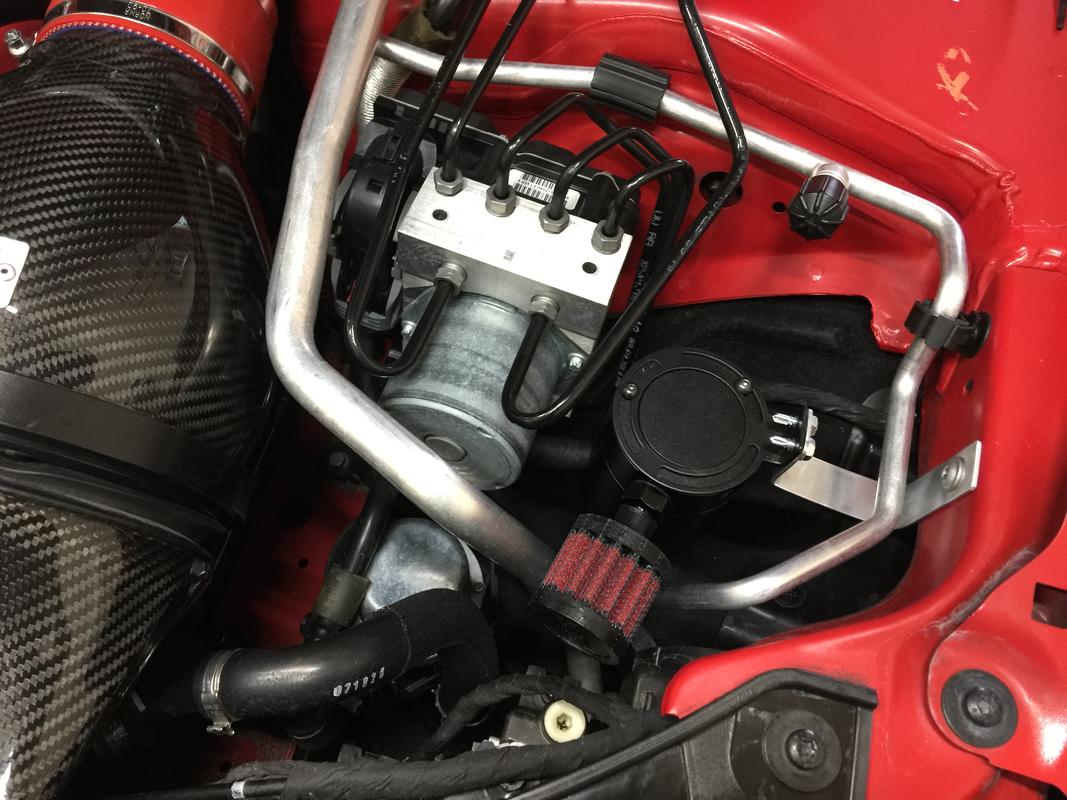
Took me a few hours to install due to distractions but I eventually got them in. Not a fun project when on jack stands but doable. I will say the AWE instructions are not very good from an explanatory standpoint. It would have been nice to know clearances for the resonator section and how far up to rotate them. I rotated them what I thought was fairly high up (but not too close to the driveshaft) and I didn’t make a good judgement of the ground clearance. As such, I managed to scrape my first time backing out of the garage. I’ll have to hoist it up again tomorrow and rotate them even higher.

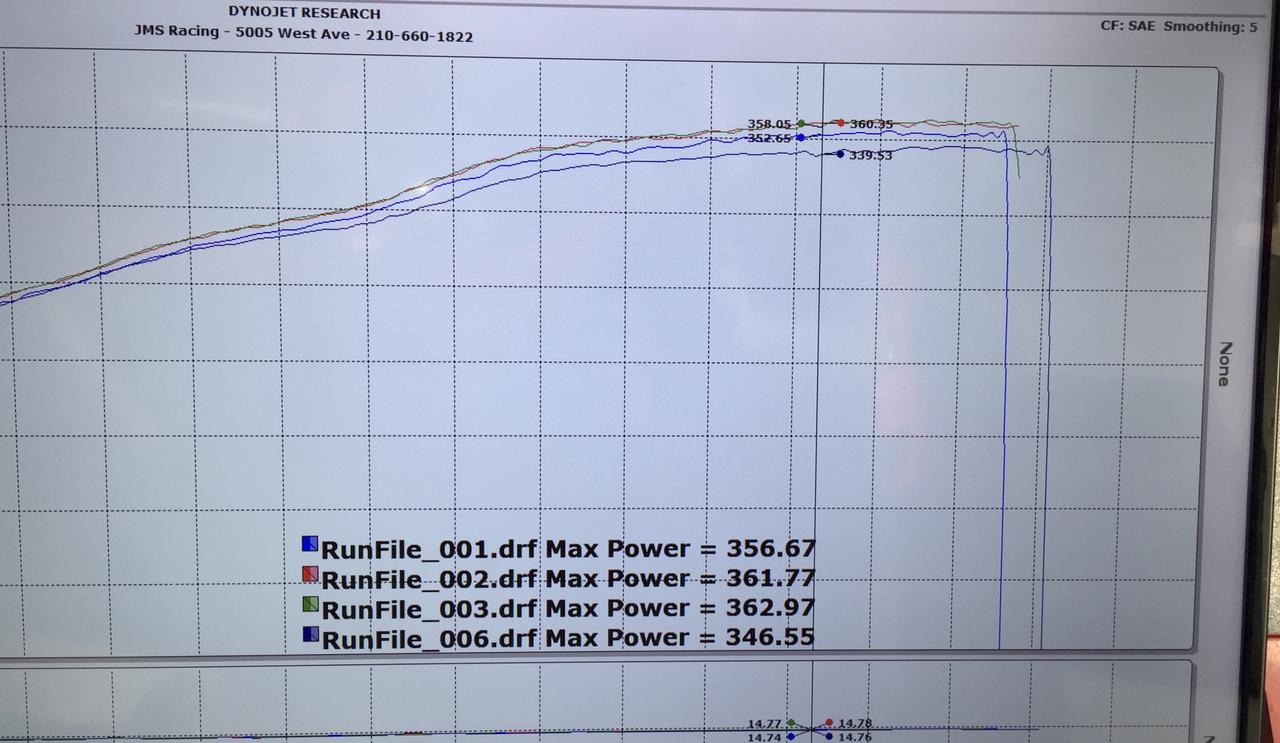
On the noise front, all cabin drone is GONE. You do hear the exhaust out the back but that’s it. I’d say it reduces the overall sound output by two thirds. You can hear the exhaust in steady state cruising but it’s non-intrusive. Wide open throttle still sounds exceptional but the overall volume is greatly reduced and it’s a bit smoother in sound. It’ll still get you noticed at WOT. Definitely not as aggressive and bad-ass sounding as the non-res downpipes. At first I really thought it was too quiet. After a second jaunt, I think it’s going to be perfect, just what I was looking for. Cold start is also much quieter and I don’t feel like I’ll need to keep the garage door closed when starting the car up in the morning.

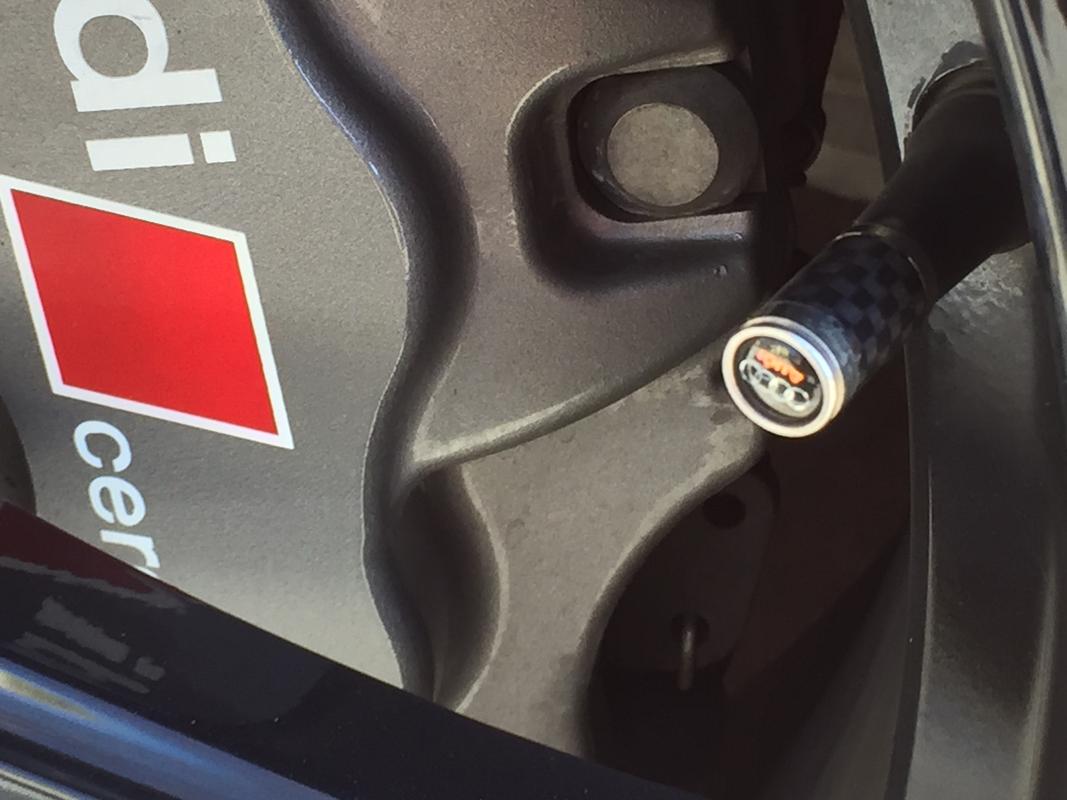
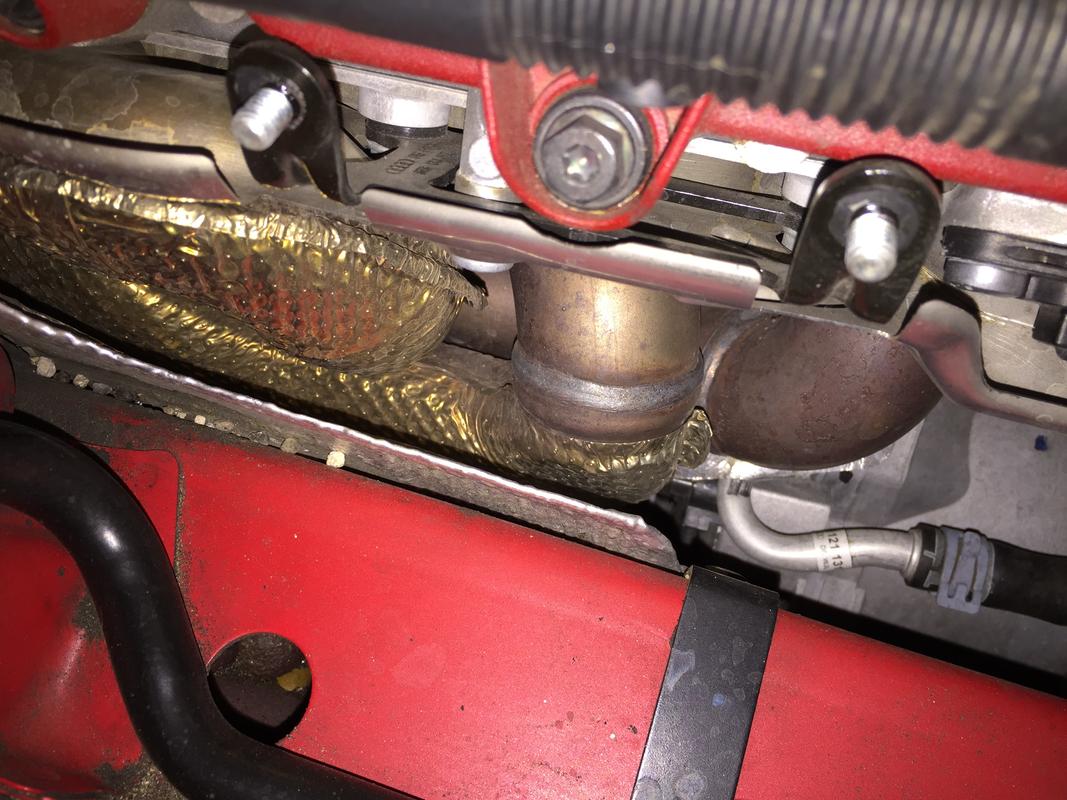
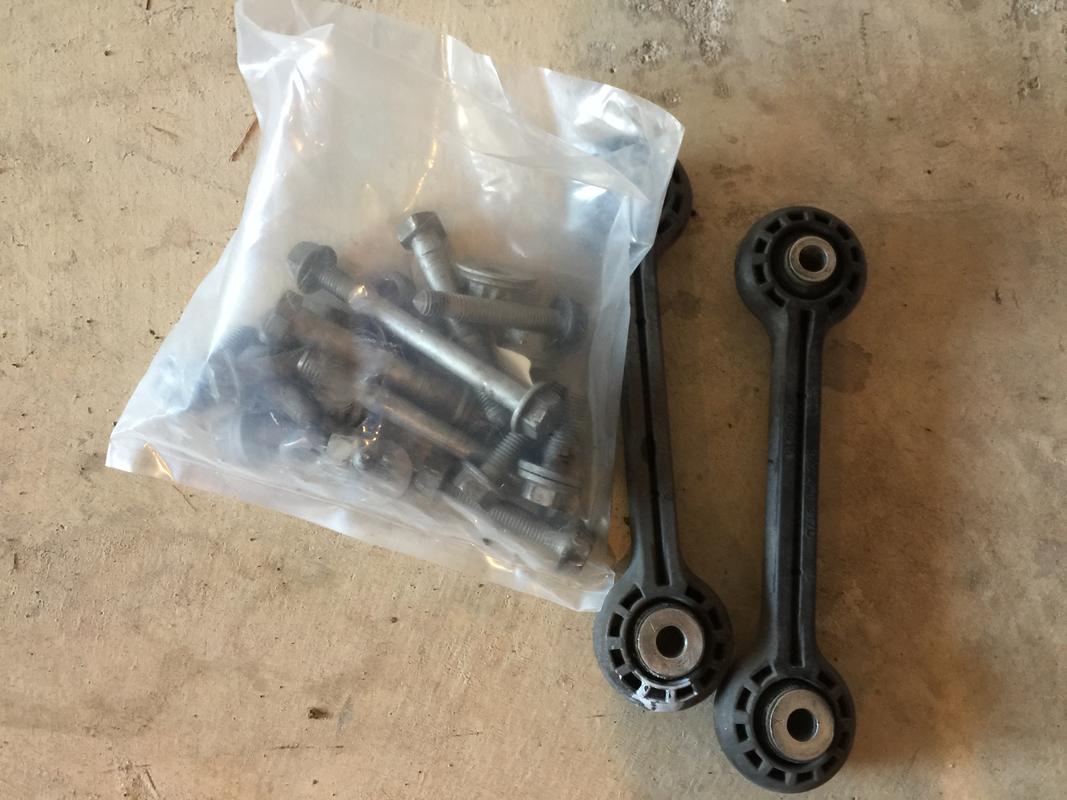
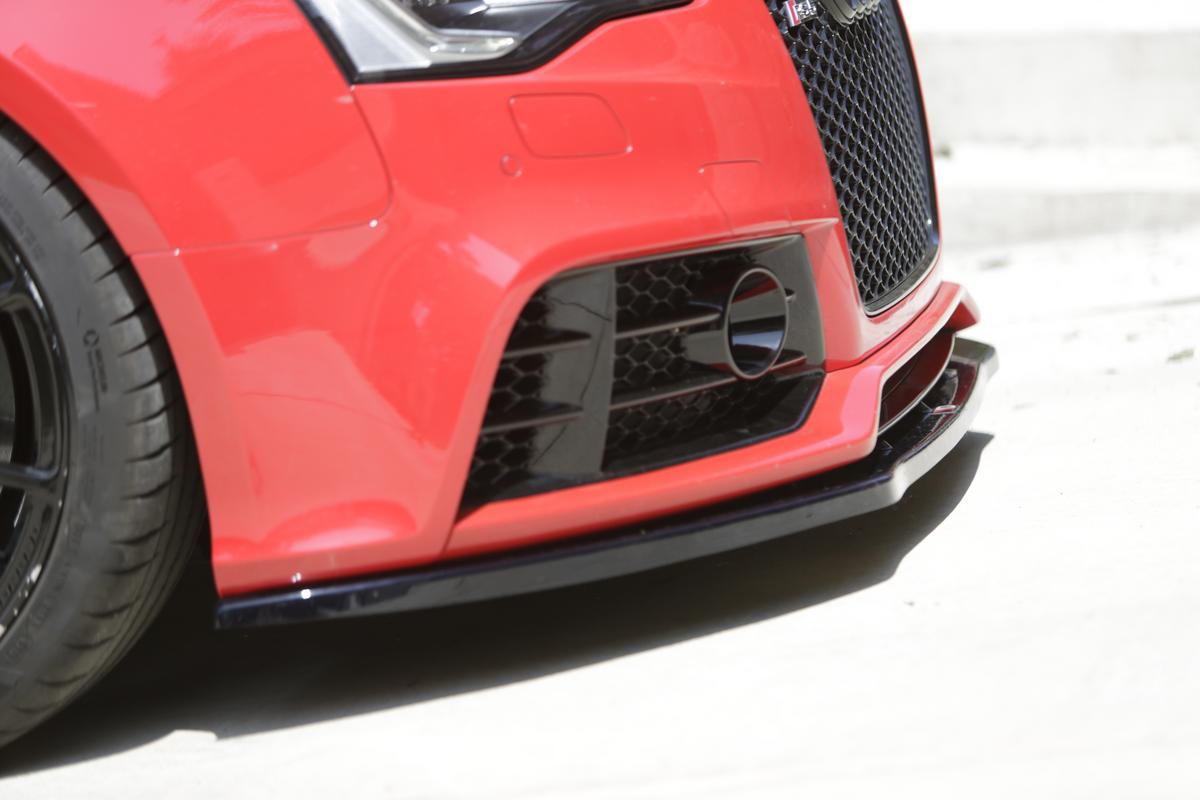
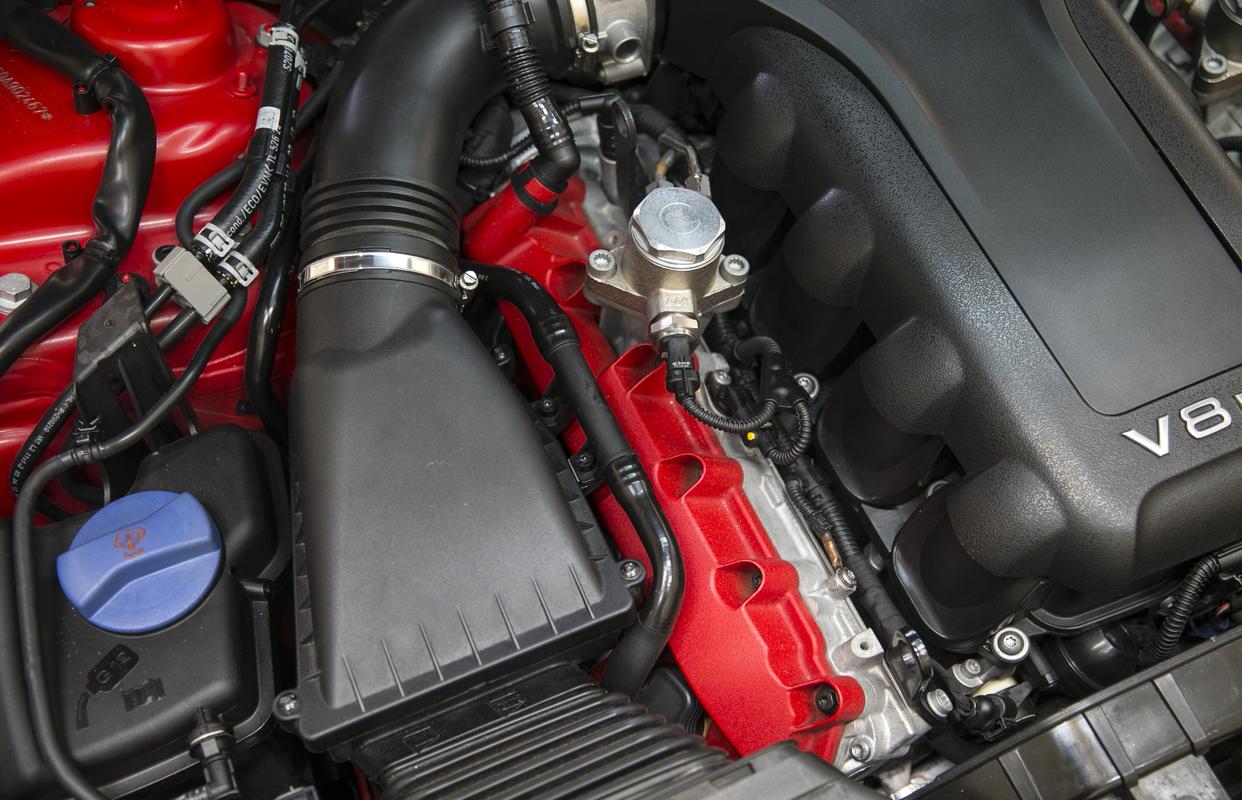
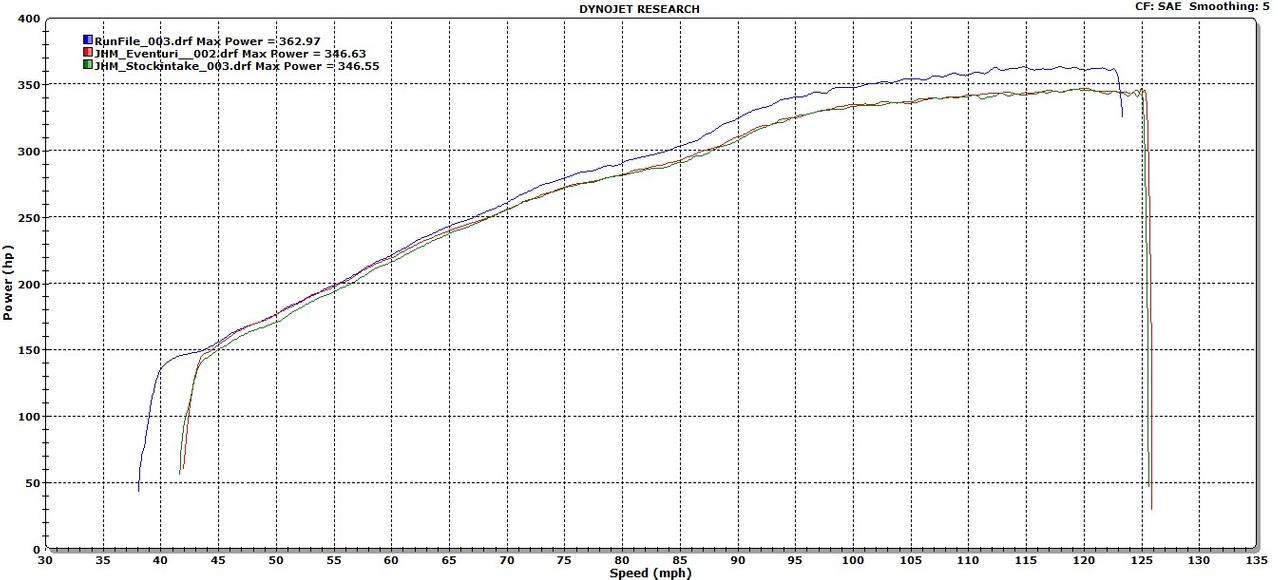
Shot of the resonated downpipes:

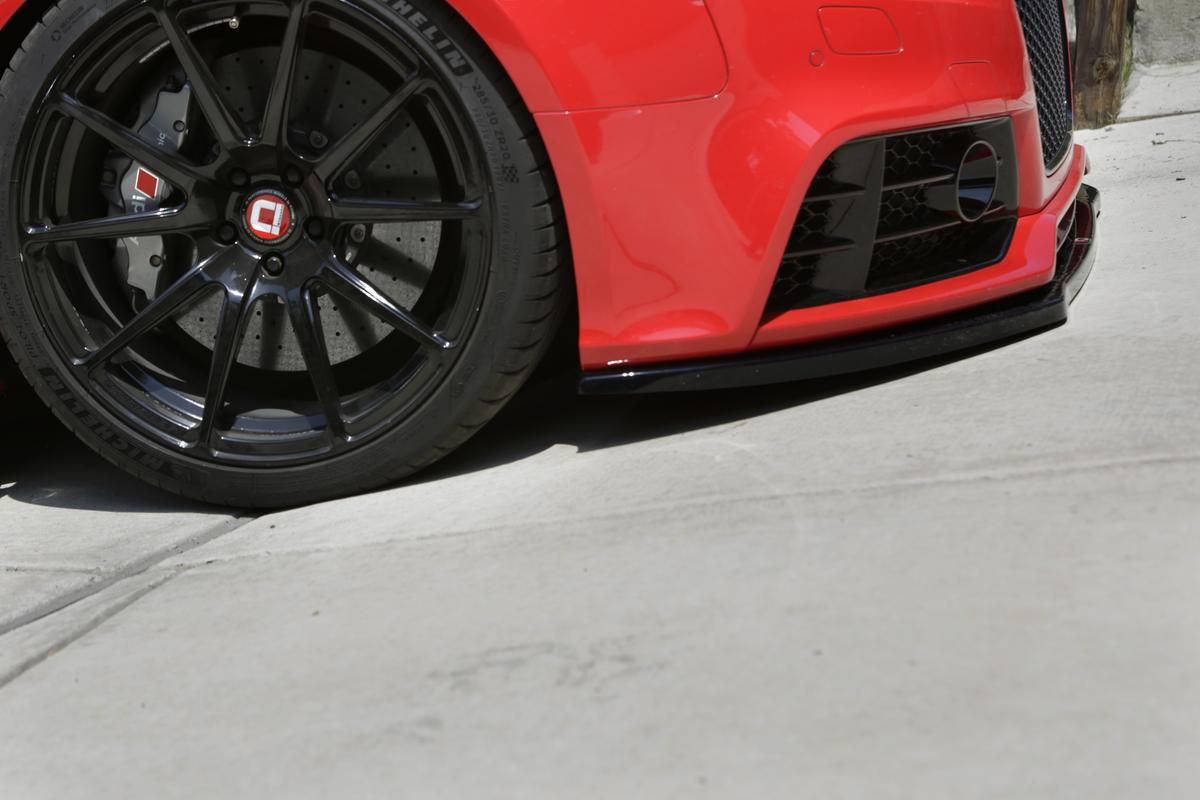
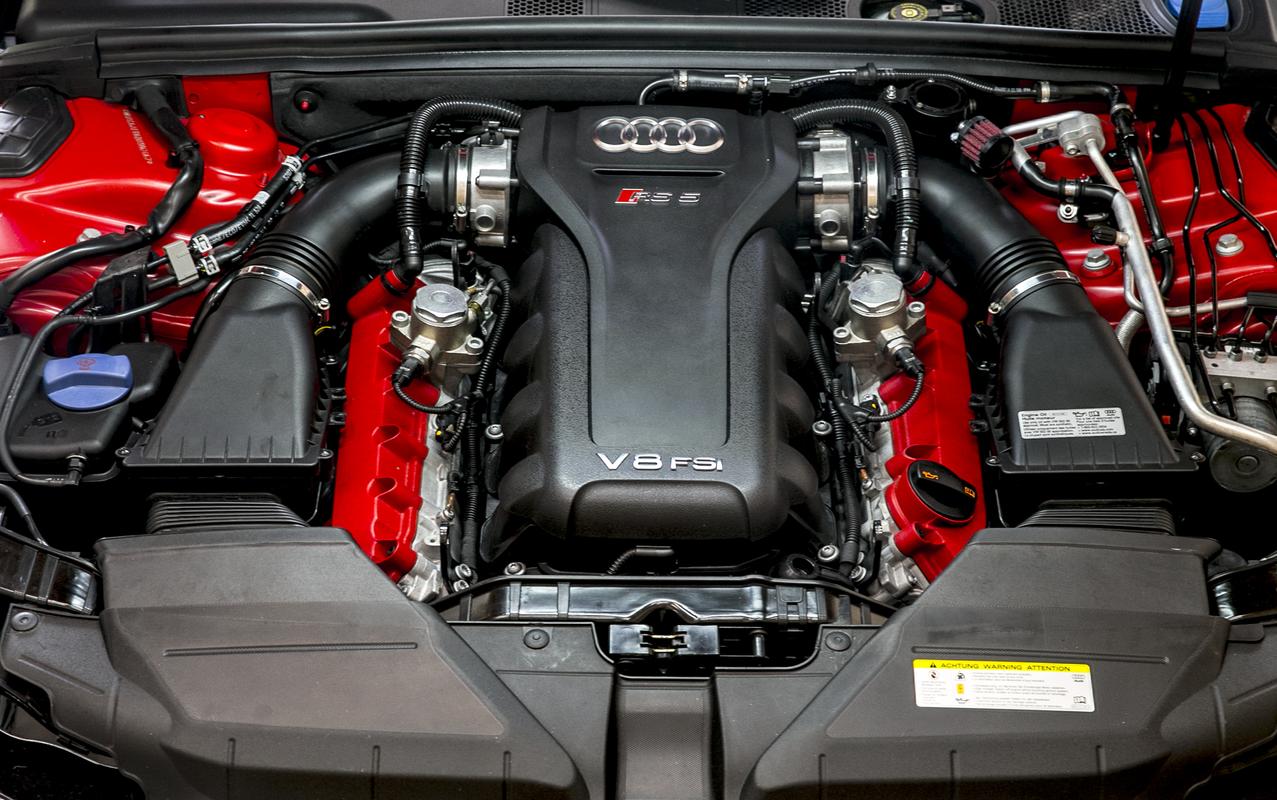
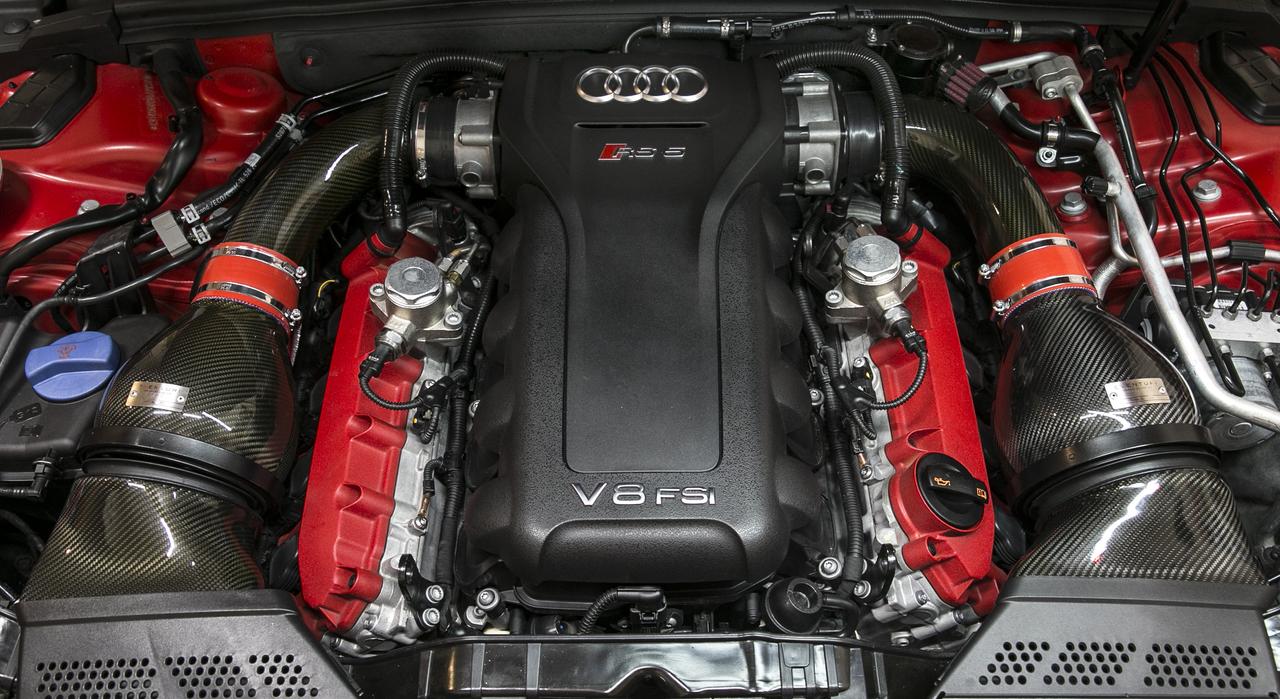
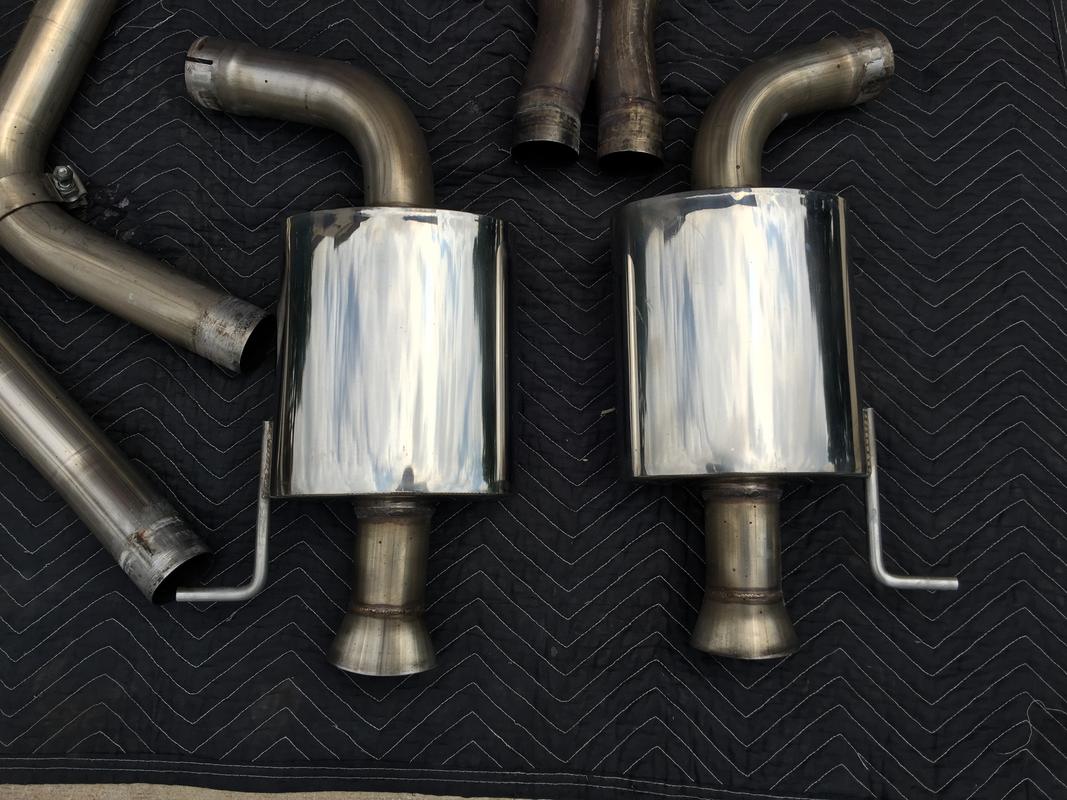
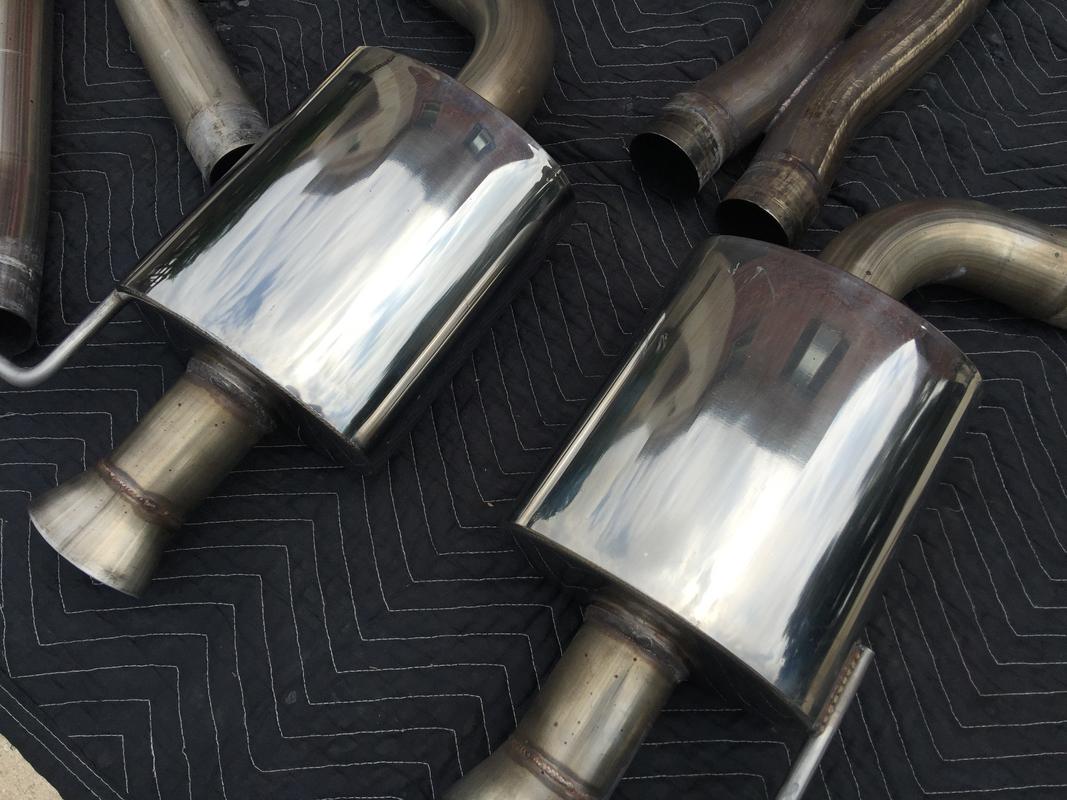
Resonated and non-resonated:

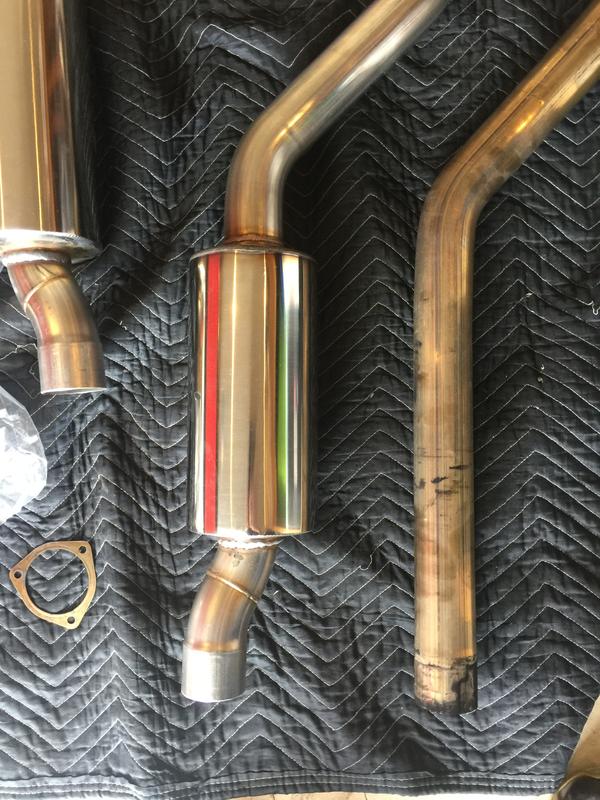
Of interest, one could theoretically swap between the resonated and non-resonated just by swapping out the post-flange section of the downpipes. The flanges, and their angle, look identical. I actually thought about just swapping the rear section but one of my band clamp nuts decided to just spin and not actually come off. I pulled them in their entirety to rectify the situation as they say.

First video with the resonators on, cold start.
[video=youtube_share;7Z43yzGrngo]https://youtu.be/7Z43yzGrngo[/video]

New video, AWE Touring exhaust, hot start, revving and hard acceleration from outside the car.[video=youtube_share;GQentg1MXP8]https://youtu.be/GQentg1MXP8[/video]

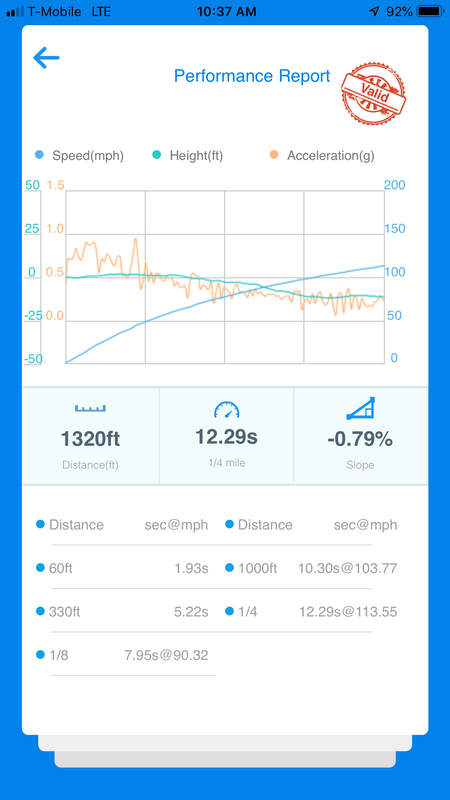
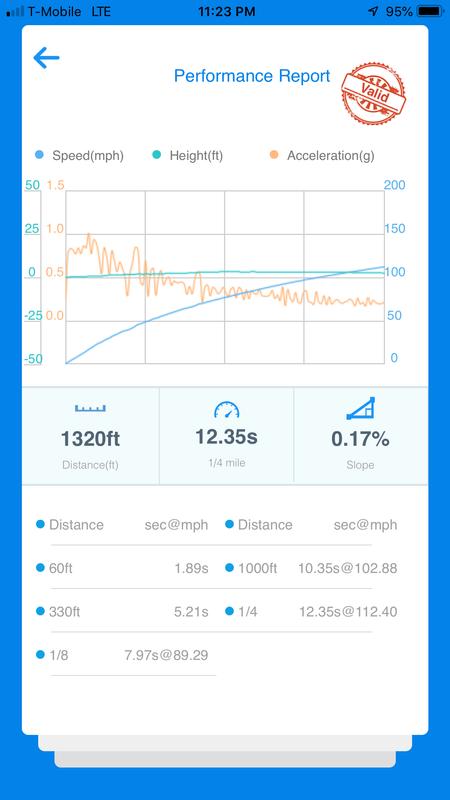
I’m going to start logging engine parameters since, other than the exhaust, the car is “currently” stock. I want a baseline of how the car performs under various conditions. With the weather changing so much as of late, it’s a good time.

I’ve actually already logged air/fuel and IAT’s (air intake temps) using an iPhone and bluetooth OBD dongle. The sample rate is very slow despite having the Kiwi3 dongle. I’m getting maybe 2-3 samples a second. I’d like to see 8-10 for greater resolution. Reading more, it may be ECU limited, not the interface.

I’ve had a Ross-Tech VCDS USB cable for a few months now but used it for the first time yesterday to reset my service indicator. I also plan on changing a few adaptations, specifically disabling the automatic seat heating level change as well as adjusting oil service intervals to 5K miles.

Here are the codes for those two…

Disable seat heating level 3 to level 2 after 10 minutes.
[08-Auto HVAC]
[10-Adaptation]
[Channel 50] level 3 to 2; adjust value as required; default value = 10 (minutes); value 0 = off
[Channel 51] level 2 to 1; adjust value as required; default value = 0 (minutes)

Set Oil Change Interval to 5k Miles
[17 – Instruments][Adaptation – 10] ->Channel 50 (Basic Distance Value for Oil Change Fixed Service Interval)
Set to 80
(1 interval = 100 km, therefore 80x100km = 8000km = ~5000mi)

For how to data log with the VCDS, go here; http://www.ross-tech.com/vcds/tour/logging.php
Related; http://www.ross-tech.com/vcds/tour/m-blocks.php

There’s a open source/freware program called VC-Scope which allows you to graph data in real time and play back files.
http://www.ross-tech.com/vag-scope/index.html

Unfortunately it’s still not exactly what I’m looking for as the resolution (speed at which it logs data) can be very slow. Ross-Tech recommends the following;
[I]" The sample rate for viewing and logging data is largely determined by each controller in the car. There are a few things you can do to speed up the rate for a given controller. First, logging one group at a time, rather than two or three, will help greatly. In order to get the highest sample rate possible go to the Options screen and set Blk Int to 25 and Char Int to 0. Note, however, that this may cause unreliable communications with some controllers. Changing KP2 time to a smaller value speeds up the sample rate in Measuring Blocks on control modules that use the KWP-2000 protocols. Try setting it to 0. If any of these adjustments cause unreliable communications, change them back closer to the defaults. If in doubt, use the Restore Defaults button!

In Engine controllers using KWP-2000, there is a [Turbo] button when using a HEX interface… This can significantly speed up sampling, in some cases to over 30 samples per second. See the Measuring Blocks page for more information. In Engine controllers using UDS, there is a “Group UDS requests” checkbox that can improve sample rates. See the Advanced Measuring Values page for more information."[/I]

Related info to logging speed here: http://www.ross-tech.com/vag-com/tour/option_screen.html

The Ross-Tech software is very “Windows”. It’s most definitely not a WYSIWYG program like most folks find in modern operating systems and programs. So…once you log lambda from the on-board wide band sensors on the RS5, you’ll need to take those values, dump the .csv file into Microsoft Excel. Yes, you’ll need launch that lovely program. For air/fuel ratio, you’ll take the lambda voltage and multiply it by 14.7 across the board. You can then chart it and see what your air/fuel ratio looks like across your rpm range.

There’s a really good performance logging guide created by user jran76 here:
http://www.audizine.com/forum/showthread.php/611658-How-To-VCDS-Performance-Logging

I used to tune on the street and I do not recommend it unless you find somewhere that’s seriously isolated. I my younger, less than optimal years, I’d go out very late at night, say 2-4am, on the highway and make data logging/tuning runs. There were stretches of the highway that would see virtually no traffic and it was long and straight with no hills. I’d log from 40 to 140mph repeatedly. I was young and stupid and I do not recommend it. At the time, it was the best way to load the engine properly and take into account real world conditions. It was very risky and I never ever did it around other cars. I could “feel” any changes and it was also the best way to monitor knock and EGT’s. It was also pretty fun (still, so so stupid looking back) as the car was a measly 2500 pounds and had about 603hp at the wheels. It’s fun nailing fourth at 85mph and having the car go sideways. Really.

Anyway, logging can be quite fun and and informative. When I was tuning/logging, had a very good understanding of how the engine operated, timing schematics and optimal air/fuel, EGT, IAT, knock, peak ignition pressure, fuel supply and duty cycle, etc…what the engine needed to stay intact and how far I could push things. There’s very, very little technical information on the RS5’s engine unfortunately. I hope that once JHM really delves into their RS5, they’ll share a bit of info with us geeks.

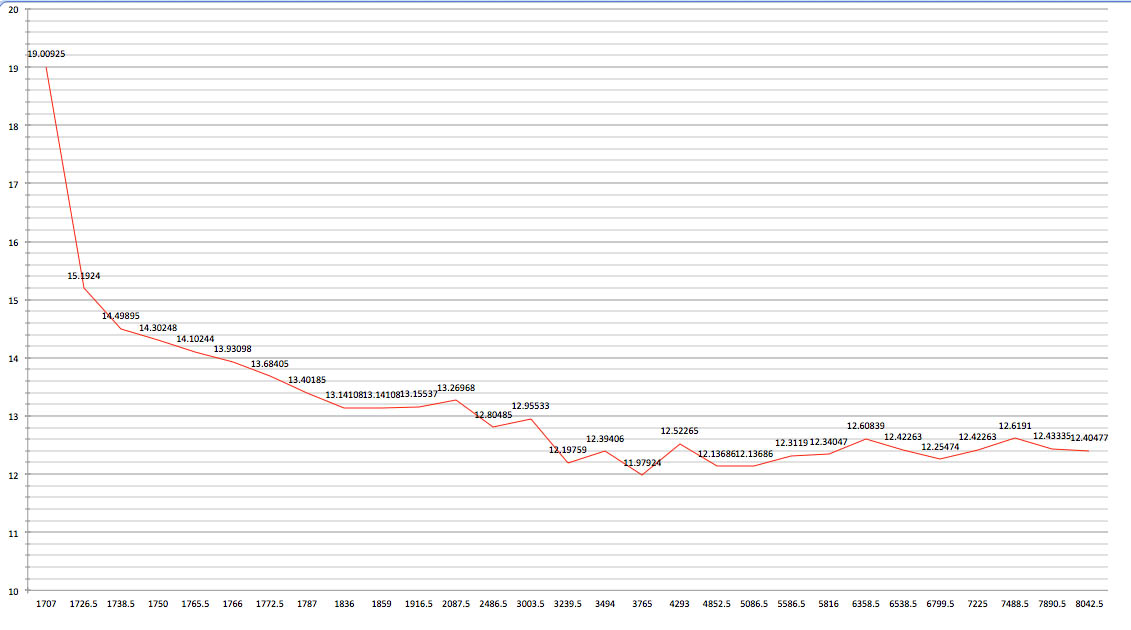
From the few logs I’ve done, surprisingly, the air/fuel ratio is pretty dialed in, hovering around 12.3:1-12.4:1 at WOT above 4k rpm. I’ll try to plot something out and post it here but again, the resolution just sucks. Which may be why it’s so nice and flat.

Edit: This isn’t my best one, I Have a third gear pull but I’ve somehow misplaced the file.

A few very small mods, new carbon fiber valve stems with the Audi rings on the tip. Surprisingly high quality for the cost. Metal threads so you’ll want to use a dab of anti-seize.

I had a few squeaks along the sunroof so I did a cleaning and lube using this really expensive magic in a bottle, aka Krytox 105…$35 for that little thing but man does it work. Took care of the sunroof squeak as well as a squeak I had on the driver’s door window without taking off the interior panel.

Next I need to recalibrate the driver’s side window. It doesn’t drop down quickly enough and catches ever so slightly on the rubber frame when you open the door.

Edit: I later used the Krytox to take care of squeaks coming from the trunk area. I thought my sunroof squeak had returned but it was actually the bump stops on the trunk. A very small amount was applied to all the plastic stops. Completely eliminated all the squeaks over uneven pavement/driveways/speed bumps, etc…eerily quiet in that regard now. I’ll post some photos illustrating where to lube. Still getting a pop from the sunroof area. Need to investigate more.

I’ve been meaning to do a photo shoot for months now and it seems like the weather always gets in the way. I live in a major metropolitan area so that means Sunday morning is the ideal time. Got up early and hosed off several days worth of rain and gunk, packed the trunk with camera gear and a ladder and headed out to check out a few locations. I work Saturday nights so it makes it difficult to prepare in advance when the weather is so up and down. I didn’t get out the door early enough for the great morning light so I relegated the adventure to a scouting trip. Regardless, I found some great locations and worked with the light I had. I have tons of images to process and I’ll be posting a small grouping here as they get toned and cropped. I don’t do a lot of heavy photoshop work and pretty much shoot “as is” and use the light to my advantage. If anyone has photo-related questions, ask away.

So a few updates. I’ve now installed the following:

-034 Motorsports rear subframe bushings
-ECS Tuning rear-most differential mounts
-eBay special solid transmission brace

Out of all of them, I believe the subframe braces made the most difference. I already had the Apikol Red differential brace (front) which is why I probably didn’t notice the ECS mounts as much. The solid transmission mount increases vibration at idle but I don’t notice it anywhere else. I am detecting slightly more noise from the rear with the subframe mounts but it’s minuscule.

I’ve spent the past few weeks acquiring all the nuts/bolts and aftermarket parts to do some work on the front and rear suspension. I received my 034 Motorsports solid rear end links yesterday so I should be ready to go.

I’ll be installing the following;
-034 Motorsports Density Line upper shock mounts
-ECS Tuning front sway bar end links
-New upper control arm bushing for the Stern adjustable arms (someone installed the wrong bushing)
-034 Motorsports rear sway bar end links

All the nuts/bolts need to be replaced and their cost is almost as high as the aftermarket parts. I may try to do all of this tomorrow if possible but I may put it off a week as I may try to hit the dyno on Monday and don’t want anything holding me up from going.

Whelp, I’d made the decision to tackle all of this tomorrow but unfortunately the bushing size for the upper control arm is 46.5mm OD and my bearing press OD is 44.5mm. I don’t think I’ll have enough on the bushing shell to push it out or in. So I’ve ordered a press and pull set that has a 46mm bushing. Won’t be here til late next week. Grr

I decided to install the 034 Motorsports rear sway bar end links this morning before heading to work so I could asses them on their own with the H&R rear swaybar. Figured it would take me an hour tops given that it’s four bolts. Whelp, too a bit longer, mostly due to limited space for the top inboard-facing bolt and nut. The bottom one literally takes five seconds to remove.

There are no instructions on assembly or installation on the 034 site. BUT it’s pretty straightforward. Standard disclaimer, this is my experience and if you undertake this on your own, it’s at your own risk and expense. I offer no warranty or protection from you screwing things up or even hurting yourself.

Tools I needed
-A jack and two stands
-Block of wood
-Torque wrench that’ll read down to 29 ft.lb.
-Shorty ratchet for sockets
-16 and 17mm sockets, long and short, can be all 3/8 depending on your tool set.
-16 and 17mm wrenches of various lengths. A good set of shorties and ratcheting set work well.
-If you don’t have those, 5/8” will work to get them off.
-Patience
-Synthetic high tack lubricant (optional)
-Small, battery-powered impact gun (optional) for removal of bottom bolts. Can be done by hand though.

A few pointers.
-The bushing’s smaller end goes into the bearing on each side. There are four bushings per link, two for the top, two for the bottom.
-I used a little bit of synthetic grease on the outer side of the bushing where it fits into the bearing. I did NOT lube the inside of the bushing as it would collect on the threads and throw off your torque reading.
-I did lube the solid part of the bolt aft of the threads.
-Make sure you have plenty of 16mm sockets and wrenches, preferably a stubby and/or a ratcheting wrench. A 5/8th’s works in a pinch to get everything off.
-The new hardware is 17mm.
-The original nuts/bolts are not on there very tight, so no breaker bar needed. You can use a reasonably long wrench and some muscle to get them off.
-Take the tires off. Yes, technically, you can get them off with the tires on the car but it’s far easier with the tires off.
-A stubby 3/8 ratchet with a long 16mm and 17mm socket will make getting the nut on and off that much easier. Trust me.
-You’ll need a jack to get the car up obviously, but make sure to put it on stands as you’ll need the jack and a block of wood to push one side of the suspension up a bit for alignment purposes. More on that later.

All nuts are torqued to 29.5 ft./lb. plus 90 degrees. The first link I did took me a good 50 minutes, mostly figuring out the best position to be in to remove and install stuff. Definitely jack up both sides and take the tires off. The last link took me ten.

The bearings will loosen up a bit over time but as of right now, there’s no additional noise whatsoever. I didn’t get to hammer it and I couldn’t tell any difference initially until I arrived at a proper set of corners. The very preliminary results is that the rear end does indeed feel tighter transitionally with very very slight increase in willingness to rotate. I need a bit more time to fully assess. Should go well with the front end links once I get them installed.

Two end links and the associated hardware. Comes with it which is one reason why I purchased these over Eurocodes. No dust boot though. Once you open everything, you’ll notice there are eight bushings, four bolts, two nuts and three washers. The bottom bolt screws into the lower control arm housing so there’s no nut on the opposite side.

Stock, ugly end links.

Notice the smaller end of the bushing. The two meet in the middle of the bearing and provide support for the bolt. Small end goes inside the bearing. It’s a fairly exact fit so they’ll stay in there while you move stuff around.

Getting the top nut/bolt off is a bit of a trick due to tight spacing. If Audi had only used a different lower control arm design, with a nice triangle-shaped hole, it’d be cake. But no…Germans.
Anyway, just be patient and figure out the best combo to remove the nut and bolt. I found the shorty ratchet with a 16mm socket worked best. I put a ratcheting wrench on the bolt head. You’re not able to get a ratcheting wrench on the bolt head because there’s not enough clearance in between the bolt and the damper shaft.

Once you get the old links off, assemble the top portion of the link, washers and bushings on both sides. Stick the bolt through the link, then through the end of the sway bar. Put the washer on the bolt, then the nut. Make sure the bushing is in there too. Hand tighten, then once you hit the nylon portion of the lock nut, use the shorty ratchet again. DON’T fully tighten it.

Now here’s the tricky part (and the reason why you don’t fully tighten it). You’ll need to line up the hole in the end link with the hole in the lower control arm. The easiest way to do this is to use a jack under one side of the suspension. Place a block of wood on top of the jack and use the rear rotor as a jack point (unless you’ve converted to ceramics!). It won’t take much. Eventually, it’ll mostly line up and there is play in the end link to facilitate. You should be able to thread it in by hand. Sounds difficult but it took virtually no time. Another tip, LEAVE the jack there. Don’t move it as it pretty much aligns the holes on both sides of the car.

Torque both nuts down to 29.5ft.lb. The suspension does not have to be at ride height before torquing as they’re spherical bearings and the end links are non-adjustable.

Move on to the other side and repeat the above. And you’re done!

Ended up purchasing a used Eventuri intake for the car along with the Gen II filters. I wasn’t going to put them on initially but I needed to see how long it’d take me to swap them on for testing purposes. That’s my story and I’m sticking to it. I also wanted to get some seat time with them installed before the temps rose dramatically over what they’ve been as of late. Butt dyno calibration.

Was a fairly straightforward swap but you do have to be very patient in lining everything up. The driver’s side was easier than the passenger’s side in that regard. I also paid very close attention to the seal in between the front scoop and the bell of the intake. The passenger’s side had been mounted wrong and it deformed the seal into an awkward shape that didn’t seal. I fixed that and made that seal the priority and adjusted everything else accordingly.

One deviation, I did not install the front scoop first. I installed the bell (filter housing) first and hand tightened the 10mm bolt through the housing’s bracket and to the car. I then installed the scoop and worked on positioning the bell to the scoop before securing the 10mm bolt with a ratcheting closed end wrench. It’s a necessity to have one if you want to maintain your sanity.

Swapping out the filters is fairly straightforward. With the filter housing in hand, remove the t-bolt band clamp. You’ll have to pry a bit to separate the base mounting plate and filter from the rest of the housing. I used plastic interior trim pullers. Once it’s separated, the filter is exposed as is the worm gear clamp holding it to the base. Loosen the clamp to it rotates freely. Take the same interior trim puller to gently apply some pressure between the base and the bottom of the filter. It gets stuck on there over time but it’ll eventually pop free. Just work your way around the circumference. Piece of cake. Don’t forget to take notice of how the bracket is lined up/rotated in relation to the Eventuri tag at the top.

I took the car out for a run and there’s definitely a difference, especially from about 4K on up to redline. There does seem to be a bit more throttle “snap” down low. Changes the exhaust note (for the better) and there is more sound from the intake side. I’ll be dyno testing the intake vs. the stock airboxes with K&N filters. Fortunately, the Eventuri I bought had an extra set of scoops so I can swap the OEM ones back in with just two bolts.

Random gratuitous shot of the OEM headers. We don’t see them much so why not?

I knew today would be painful. My plan was to yank both front suspension assemblies, replace the top rubber mounts, one control arm bushing and the front sway bar end links.

Going in, 034 Motorsports Density Line upper shock mounts, an OEM style heavy duty bushing and ECS Tuning front sway bar end links.

For bushing removal, you’ll need a push/pull kit. I purchased this one off of eBay for less than $100. The bearings that come with it suck and will break after your first use but you can get by without them.

Ready for battle.

I started by taping off the line for the center cap and the top of the rotors. I could use this to “load” the suspension with the jack and tighten various nuts/bolts to spec.

I also have a set of race ramps which allow me to have the suspension loaded with the tires on. These are super light. Best way I can describe them is they feel like styrofoam but they have the ability to support 1500 lbs. each. They weigh about a pound. Cool stuff

I used the most excellent ECS Tuning guide to installing coilovers as it had all the torque specs and the steps are spot on. You can download the PDF off of the ECS website.

I jacked the car up and removed both front wheels. No need to have the car with the suspension loaded just yet. I covered the ceramic rotor with a towel, just in case. I then took a measurement of the spring perch height and came out to 5omm. The passenger’s side came in at about 53mm but I changed it to 50. I took the measurement because I’ll be loosening the bottom spring perch to relieve spring tension and allow me to remove the top mount.

I released the spring tension with the assembly still in the car but for the other side, I did it with the assembly out of the car. Per James’ suggestion, I have a screwdriver with a cut-off tip that I use to adjust it. But I also picked up a Bilstein wrench just to have it.

I purchased a schwaben ball joint breaker tool and it made removing the tie rod end super easy. Took like a minute and came apart without drama and no damaged dust boots. Highly recommended.

I did have to remove the lower strut mount fork. I couldn’t figure out an easy way to get it out with it still on the bottom of the damper. It actually saves quite a bit of time removing it as the shock tower to chassis brace and the damper come right out, easy as pie. I could have saved myself a good 30 minutes if I’d removed it from the start. Be sure to purchase the spreader bit off of the ECS website. It ensures you don’t damage the lower mount and allows for easy removal of the damper from the lower fork mount.

Once out, the arm with the “bad” bushing rotated freely whereas the OEM rubber style mount had a very limited range. I took off the arm that needed the bushing replaced and then used my bushing removal kit. Found the right press out size and assembled everything. There’s one cup that matches the outer size of the bushing shell and another, larger cup that the bushing gets pressed into. Both have slots so you can see your progress.

Assembled and ready to be pressed out.

And it’s out! It literally took 10 seconds and came out very, very easily. I was expecting a struggle but it didn’t happen. I did grease everything in the assembly to remove any friction.

So I didn’t see this coming…Once i got the offending bushing off, I realized it was a poly bushing, most likely a Powerflex black race bushing (Edit, it’s a Whiteline bushing). It was a bit wide for the space it’s designed to fit into and I could see the end of the polyurethane had deformed a bit. Here it is next to the new OEM-style bushing.

Closeup of the serial number on the bushing. So this is why the suspension was squeaking without a doubt. EDIT: It’s actually a Whiteline polyurethane bushing. I don’t know if these are what Pacific German Performance had put on way back when or if they’d all been replaced with OEM style and the dealership installed them. Honestly, other than the slightly deformed end, and the squeak, they looked pretty good. Going to take the bushing apart and inspect it.

I put the new bushing in the freezer for a bit and used synthetic grease on the inside of the control arm. Made putting the new bushing in just as easy as removing the old. You can put the new bushing/arm on the upper mount and torque to spec out of the car. Just line it up with the other arm. The reason why they say to do it at ride height is the rubber only has so much rotational movement. By positioning the arm appropriately, you’re achieving the same thing.

At this point, having nothing go wrong, I was practically laughing out loud at how easy everything was. Then I tried to remove the top nut on the damper. Huge PITA. I did have the Schwaben tool specifically for this but it was still difficult.

OEM rubber mount on top, the 034 density line on the bottom. The original mounts showed wear. If you’re going to swap springs or go with coil overs, definitely get these top mounts.

I cleaned and reassembled the damper and top mount assembly and got everything back in fairly easily. It’s a bit of a struggle to get the strut/top mount up and in and then get one of the mount to chassis bolts threaded. Just takes a bit of muscle but easily doable by yourself.

I adjusted the ECS end links to OEM length and installed them per their instructions. I will say this…the top bolt is a huge, huge, HUGE pain to get in. I was cursing and I must have struggled for a good hour. I found that it would go in and then wouldn’t turn by hand. I figured i was cross threading it. Not the case. Once you get to that point, put a 17mm shorty on it and twist away. Goes right in after that.

I moved on to the passenger’s side and it went more quickly as I didn’t stop to take photos and I’d taken my time on the driver’s side. With the knowledge from the first ECS end link, the second one went in much easier. I did run into one snafu, the starter threads on the top of the Bilstein damper were tweaked. Couldn’t get a nut on it. I also couldn’t find my master thread repair kit and tried to use small files to repair the threads to no avail. So I ended up using a high speed cutoff wheel to grind a few threads off. Problem solved.

For the final step, adjusting the end links, I put the car up on the race ramps. I adjusted them for no load and finished buttoning everything up.

All told it took me a whopping 7 hours. To make matters worse, I discovered that the passenger side had one poly bushing too. Wasn’t obvious as it was even in the bore unlike the other which stuck out like a sore thumb. I’d only ordered one bushing and one nut/bolt for the driver’s control arm so I cleaned and lubed it with Krytox. Next time I have any work to do on the suspension, I’ll take care of the other bushing. I could probably do each side in less than two hours now. But I can think of better ways to spend a Sunday.

Leftover bag of (used) bolts, LOL.

I didn’t have a chance to take the car out until late today. Dead silence from the suspension. I did have a slight klink initially but it disappeared. Assuming this is the end links breaking in. I’ll most likely put it up on blocks again tomorrow and see if they need further adjusting. But not hearing any creaking from the front suspension was very nice for a change. I still get a “pop” from the sunroof over big inclines. If anyone has any suggestions on that one, I’d like to hear it. Have a feeling I’ll need to remove the liner.

Did a little video showing how to install the CR-15. I know it’s super simple but what the heck, I had the footage. Working on the spark plug installation video next while I wait for the Spurs to loose tonight.
[video=youtube_share;3lPQIdnZ-w4]https://youtu.be/3lPQIdnZ-w4[/video]

Spark plug change video
[video=youtube_share;A8RlqyZwLIA]https://youtu.be/A8RlqyZwLIA[/video]

Oil changes just got a whole lot easier. ECS Tuning, 25% off, couldn’t pass it up. Ordered some extra pucks for the pinch welds and jacking the car up when needed.

Despite the fact they had plenty of tread left, I jettisoned the Sumitomo HTRZ III tires today. I went with Michelin Pilot Sport 4s tires after I had a transformational experience with the Super Sports on another car. I would categorize the Sumitomo tires as very “Bridgeutone-Esque” with a very firm sidewall, good mid-corner stability and ok braking. They really reminded me of the RE050A’s.

I went up in size, from a 275/30/20 to the 285/30/20. The Sport 4s is slightly more square than the Pilot Super Sports in the same size and I’m much happier with how the wheel wells are filled out by the 4s. I’m not a fan of the stretched look and the Sumitomos looked very stretched. I now have a modicum of rim edge protection.

Not much to report on the driving front other than the increased bump compliance. I noticed it immediately over sharp bumps even at low speeds. They seem to roll more smoothly and make less noise. I could actually hear my exhaust more at lower revs/speed than I could previously. It was a notable difference.

It’ll take me a few weeks to really discern the handling differences and if I’ll need to make any changes. I’m expecting much better braking and more front end bite on aggressive turn-in than with the Sumitomos.

Pics of the Michelins;

The Sumitomos. Notice the edge of the rim really sticks out past the sidewall.

Have to say I’m really impressed with the Pilot Sport 4S. It would have been good to compare to the super sport back to back but no complaints. Dry braking is phenomenal. As in I could use more brakes. Stops from 100+ are like hitting a wall with zero ABS engagement. Time to upgrade to the Pagid RSC1 pads. In turns, I’ve added a good 5mph, maybe even 10mph in speed through some corners. A comfortable margin too, not on the edge. I can only imagine how good Sport Cup 2R’s must be.

Other than that, I was bored and installed a front splitter and side skirts last night after work. I finished up this morning before temps started to climb. I think it’s supposed to be a balmy 108 degrees tomorrow.

I’ll get better photos soon. For now I just have a few quick shots with the iPhone.

Car is still up on jacks here but it’s impossible to photograph the lip with the car fully in the garage.

Here’s a quick guide on how to install them. First, send wife to Austin for a girl’s weekend. Have house to self when you get home from work. Proceed with installation until you’re finished. It’s that easy.

But seriously, it wasn’t terribly difficult as it’s obvious how things line up. It does necessitate full removal of the under tray and the forward under tray. Good thing I did this as I caught a mistake made by the local Audi dealer. They’d changed my oil last time (Audi Care) and the rubber isolator that fits under the radiator and keeps air from going around said radiator wasn’t put on correctly. It was actually hanging out the bottom of the forward under tray which is a black plastic piece that sits in front of the main metal under tray. So…I snapped that back into place and buttoned everything up correctly. They didn’t have the under trays aligned correctly either.

So that’s basically the worst part of it, having to take out and reinstall the under tray system. There’s one other tip I have and that’s to have the five bolts on the forward edge of the splitter face down so the locking nut is secured from underneath the diffuser. That’ll allow you to slide the forward plastic under tray back in and lock it into place. Otherwise it’ll hit the bolt protruding up and you’ll have to take it all out again and rearrange. Ask me how I know.

One thing, the “front” side of my garage has a step up. When I park, nose in towards the house, the front of the car is high enough to get over this step. With the diffuser, and I knew this going in, it’s basically about 1mm above at best.

I think I’ll be backing in from now on but I do have a short but steep driveway. I’ve heard backing up, uphill with the DSG is not a good thing. Anyone else hear this? I’ve done it before but if I do this day in and day out, I’m wondering if I could prematurely wear out the clutch packs or something worse.

Whelp, I definitely scrape backing down the driveway. I’ve found a way to get up and down without scraping involving extreme entry angles. Drove around town today and it’s basically a concern everywhere, I’ll have to relearn where I can and can’t go with reckless abandon. It’s going to be interesting to say the least. I would not be a happy camper if the front splitter was expensive dry carbon.

A few pics. First, the step in my garage. I can simply back in or stop prior to getting to the step.

Getting into the garage over the initial lip isn’t an issue at all.

Looking good backing down the driveway…

Snap! Houston, we have contact.

A few photos to highlight the front splitter and side skirts. The gloss of the matches the front grille and side grilles well. The black optics of the window trim is more satin.


Forgot to post this totally random information when I was checking over the car and had a wheel off. The forged Klassens weigh about 26 pounds. Weighed the entire wheel tire package and it came in a 54 pounds even. The tires are 28 pounds each. So the wheels are actually two pounds lighter than the tires. Go figure.

But now I’m thinking I can probably loose three pounds per wheel with a different design. Grr.

Headed on a long road trip next week and taking the RS5.

I’ll be changing the oil, having the alignment checked and generally going over the car on Sunday and Monday. Tires are brand spanking new with a road warranty.

I’ve started to make a list of what I have or think I need for the trip in no particular order.
-Basic tool kit with various bits, sockets and screwdrivers
-Slime emergency tire repair kit w/air pump, tire plug kit
-Large assortment of road trip music burned onto the HD (plus USB thumb drive backup)
-Mechanics gloves
-LED Flashlight
-Rain gear, jacket and umbrella
-Tire gauge
-Radar detector, Escort Max360 w/Escort Live subscription
-Phone charger
-A liter of 50/50 premixed Audi-specific coolant
-Car cleaning kit (thinking maybe a washless cleaner and a bunch of microfiber towels
-Paper towel roll
-Eight gallons of high octane coffee
-Catheter and pee bottle (I kid)
-Road trip food. I don’t eat fast food or anything that’s processed so I’ll have a good-sized cooler with me.
-Seam weld puck if I have to jack the car up. Maybe I should bring something hard and flat to put underneath a jack.
-Jumper cables

If it were 1976, I’d add a six-pack but you know, progress. :slight_smile:

I’d bring my aluminum quick action jack but I think that’s a bit much and I’m not that paranoid. I did think about getting one of those electric/hydraulic jacks though…

The car does not burn or leak oil in between changes so I’m not taking any with me. Anything else that’s a “must have”? I’ll of course have a smartphone with me. Doing the trip alone and it’l be about 1300 miles in two days over, unfortunately, some rather boring highways. Then 1,300 miles back with a majority of the driving again over two days. Lots of stopovers on the way back though.

Time for some new wheels! Bottom right. I think it’ll give me a nice increase in ground clearance and keep my front splitter intact.

Ok I kid. Over at Blackjack Speed Shop right now (Tim Duncan is not hanging out this early in the morning) for an alignment check. Doesn’t feel out of whack but new tires and a 3,000 mile road trip, I’m not taking any chances.

New alignment numbers. Everything was pretty good except for toe. Looks like it’s easy to knock the toe numbers out of spec. I ended up going to -1.4 degrees all around for camber and kept everything else in spec. I was starting to get some vibration on my last set of tires and it was likely due to the toe being out.

Oil change using the extraction methodology
[video=youtube_share;P4i0Nsnl2Yc]https://youtu.be/P4i0Nsnl2Yc[/video]

Airbox Removal
[video=youtube_share;nw7ddg6lS8Y]https://youtu.be/nw7ddg6lS8Y[/video]

A few more DIY videos

Transmission
[video=youtube_share;EPdEquH8sXg]https://youtu.be/EPdEquH8sXg[/video]

Service Position/Bumper Removal
[video=youtube_share;ABMYaGlohSc]https://youtu.be/ABMYaGlohSc[/video]

Dyno Run with JHM Stage 1
[video=youtube_share;D3cZhn8g_JM]https://youtu.be/D3cZhn8g_JM[/video]

AWE Touring vs Track
[video=youtube_share;F_NmzDBgk-A]https://youtu.be/F_NmzDBgk-A[/video]

Thought it’s about time for a Michelin PS4S review. I had them installed last July and I’ll need to double check what my mileage was at the time but I think it was right around 46,000 miles. I’m at 55,000 miles and I’ve been rotating them every 3K miles. Had the wheels off today to change the brake fluid and I decided to measure the tread depth across the tire to see how things are wearing.

I’m using the 285/30/20 size and it has four main radial grooves. I’ve labeled them outer, outer middle, inner middle and inner. Overall they’re wearing quite well and a lot of that comes down to alignment. More on that later. I believe the tread depth new is 8mm.

Tread depth in mm
Passenger Front
Outer-6.24mm
Outer middle-6.47
Inner middle-6.56
Inner-6.17

Driver Front
Outer-6.40
Outer middle-6.42
Inner middle-6.4
Inner-6.2

Passenger Rear
Outer-6.20
Outer middle-6.57
Inner middle-6.50
Inner-6.21

Driver Rear
Outer-6.5
Outer middle-6.59
Inner middle-6.31
Inner-6.18


If I’m shedding 2mm every 10,000 miles and there’s 6mm of usable tread before hitting the wear indicators, I’ll get 30,000 miles out of these tires (about three years). That’s pretty bad ass given their performance.

The tires were recently rotated and unfortunately they did rears to front and crossed them. I had one tire which had a slow leak and it turned out to be the rim bead that was leaking. They rotated the tires while they were at it.

Overall no real complaints to speak of. I’ve used the Pilot Super Sport on a previous car and really liked them. Basically the PS4s hasn’t ever given me a concern. It’s a big step up in the braking dept. and handling wise, it’ll handle anything you throw at it on the street. They warm up very quickly and have a ton of grip dry or wet.

They have started to get a bit noisier. I have a very low frequency drumming which I think is coming from the rear at 70mph. Nothing below or above. Rotating the tires did not help so I think it’s just the tires making noise. Rotating them didn’t change the noise. Could be a wheel weight. It’s very slight and the radio has to be off to hear it.

They’re still doing very well in the wet. No complaints.

I may revisit my alignment numbers. A fairly recent weekend canyon run had the car feeling somewhat unstable, especially under braking and a bit nervous overall. Part of it, I think, was the pavement and grading. I’m going to go to Audi this time and have them check the alignment. I have the adaptive cruise control which, if adjustment is necessary, adds $200 to the bill. I’ve had two alignments at a performance shop and the acc is working just fine. Heck, I even had the car in service position. So maybe I’ll get lucky.

My best drag run to date.

Carbon cleaning the RS5, part 1.
[video=youtube_share;zlLmz4pmlSU]https://youtu.be/zlLmz4pmlSU[/video]

Carbon clean part two.
[video=youtube_share;uQnOu0W4GGQ]https://youtu.be/uQnOu0W4GGQ[/video]

After a recent back road session in Mexico, I made the decision to bleed the brakes sooner than I had planned. My confidence in them had been waning due to fade after repeated high speed stops. That’s not supposed to happen with CCB’s. Initial bite was off the charts good and like any powerful CCB system, I actually noticed the issue about a month or two after purchasing the car and I thought it was a pad issue for various reasons. As of late, it just wasn’t linear even for one hard braking event. I just used more force to compensate and the car would brake just fine. I had decided to replace the pads at some point with either the Pagid RSC1 or RSC2 pads.

I’d been putting off the pad swap and wanted to get measurements on the original pads first to determine wear rate. I already had a few bottles of brake fluid ready and I was going to do both at the same time. After my recent stint in the twists, I decided to go ahead and bleed the brakes first before swapping pads. just to see if that was the issue. Cheap stuff first, right?

Anyway…I decided to do a how-to video for brake bleeding. Set everything up, got the car up on blocks and was ready to roll. I open the brake fluid reservoir, pulling up the cap and the attached fluid level sensor. Lo and behold, the brake fluid was BLUE!

Why is this such a shock? Because ATE Super Blue hasn’t been legal to sell in the U.S. since 2013.

In addition, Audi specifies changing the fluid out every two years. My car had four Audi Care installments and the dealer did all of the services up until the 45K service. At some point, the fluid should have been changed. Twice.

Now is it possible someone just had a few containers of Super Blue lying around and used them? Sure but there have been many new fluids introduced since 2013 which are superior. Seems kind of strange. I’m willing to bet that Pacific German (Shawn, correct me if I’m wrong!) originally swapped in the Super Blue back when he owned the car and it hasn’t been touched since.

No wonder I was getting fade! Six years on the same brake fluid. Heck, even five! Not good.

I went ahead and changed over to Motul 5.1 which I’ve used before and like for street-driven ABS-equipped cars. If I were tracking, I’d go with something like Motul RBF or Castro SRF. I haven’t pushed the brakes hard yet but that sensitivity is back and there’s more initial bite. Sort of reminded me the first time I used the CCB brakes in the RS5; you have learn how to use them and recalibrate your braking foot.

I’m super anal when it comes to brake bleeding as I’m not a fan of any dead travel in the brake pedal. I went through two liters and used every last drop. Bled each wheel twice.

I’m super disappointed I didn’t catch this right off the bat. I just assumed, incorrectly, the brake fluid would have been changed with the Audi Care package at least twice in the car’s lifetime. Maybe the brake fluid isn’t part of the Audi Care package but I’m going to inquire and see if it is. If it is, it makes me wonder what else the dealer didn’t do.

Forgot to add my pad thickness…

I’m at 55k and as far as I know, the pads are original. The minimum thickness for the CCB pads is right around 8.4mm including the backing plate. I’m a long ways away from that as I believe the original thickness is 16.8mm. Not 100% sure on that. A rough calculation has them lasting to 96,000 miles or approximately another 41,000 miles if my numbers are correct.

Pad thickness CCB fronts (8.4mm minimum thickness)
-Driver 12.68mm
-Passenger 11.98mm

Pad thickness rears (EBC Reds) (8.8mm minimum thickness)
-Driver 9.78
-Passenger 9.53

The rear pads don’t have much life left. Good time to upgrade!

Here’s a little how-to video on bleeding the brakes. The car now stops exceptionally well and I can pretty much engage ABS with just a bit more pressure. The effort is now consistent throughout the braking event though so it really was the fluid and not the pads. It’s warming up so we’ll see how hard the car will stop with a bit of heat in the asphalt.
[video=youtube_share;92h3UOXfwCM]https://youtu.be/92h3UOXfwCM[/video]

Throttle body cleaning how to video. Takes less than an hour if you’re not also shooting footage of it. [:D]

[video=youtube_share;xG7fsUOHuMc]https://youtu.be/xG7fsUOHuMc[/video]

I went to the local 1/4 mile drag strip last night, hoping to take advantage of the cold weather and make a sub-12 second run. The track has been closed for a few months and this was their first test and tune night. I was planning on experimenting with tire pressure and shifting techniques as well as logging a few runs.

Unfortunately, everyone and their mother was at the track. The line was easily 100 cars long (two lines!). My first run came 2.5 hours after my arrival due to the number of cars as well as a bunch of ratty “drag only” cars breaking. Seems like it’s the semi-pro guys that always ruin the night. Oh and the primed/rusty Hon…Acura that blew it’s tranny on the start line. Good times.

So instead of thermally managing my temps down, I was managing them up, trying to time everything just right. Knowing I may only get one run in, I managed to red light my first time after accidentally deep staging. I never red light. Ever. So…that run by Dragy, was a 12.3. When you red light, the track system starts to record your ET even though you aren’t moving. My trap speed was, according to the track, 115mph, three mph higher than the Dragy reported and I trapped the same on my second run.

My second run was a measly 12.5 and I actually managed to spin the rear tires. I chose the left lane this time but it no longer had any grip thanks to the Acura blowing its transmission. Neither 60ft. was exceptional and I ran 45psi front and rear this time hoping for a hint of wheel spin. Recorded a 1.89 and a 1.97 (second run) on both the time slip and the dragy, no wheelspin on the first run that I detected but I may have been too busy cursing over the red light. Since I sat there for half a second, the late model Camaro got a good jump on me. I reeled him in at 3/4 of the track and just drove right by. Was kind of nice. Most of the late model Mustangs were running 13’s or even 14’s. A Nismo 370 was in the 15’s. There was a Golf R with mods who said he was running low 12’s but I never caught any of his runs.

Even though the entire night was pretty much a cluster*ck, it was still fun. I used to spend a lot of time at the drag strip and now, every time I go back, I remember just how much fun I have. I love the smell of race gas in the morning.

I don’t think there’s an 11.9 in the car, mostly due to the transmission. I could probably drop it down to a 12 flat if I had a chance to experiment with tire pressure and damper settings. I ran my dampers on the firm side. If there’s a next time, I’ll soften them up. I’m on the original TCU software from 2013 too. It’s never been updated. I’ll have to wait patiently for the JHM stage 2 software I guess!

I do worry about premature wear but honestly, it doesn’t seem faze the car at all. It just goes like stink and I never get any funny smells, sounds or behavior. The TCU software probably does a great job of preventing damage when launching and if you look at the R8/Lamborghini guys who hit the strip, they’re launching the car a hundred times with no issues. Wheel hop is generally bad for longevity of drivetrain parts and my RS5 has none. I’m also not making 20 runs a night although it’d be great to get five or six in. Wishful thinking at my drag strip.

Knock on wood, I haven’t had a single thing go wrong with the car but I do know others who have. I do go above and beyond maintenance-wise As the car sits though, everything is pretty under stressed. If I throw a supercharger on it, it’ll need supporting mods and there’s a high risk I could break things like axles or CV joints (at the strip) for which there’s no replacement other than OEM currently. That’s the price of speed though.

Spent the day Saturday tearing up the “twisted sisters” roads in Texas hill country. Truly spectacular roads. It rained cats and dogs and the Audi group was the fastest, by far, of all the car clubs that went out that day. The F cars and Corvettes really held us up at times. But huge props to the Ferraris for even going out in that weather. Detailers everywhere were rejoicing. They must have been hammered with all the business come Monday.

HUGE props to Michelin PS4S tires. Just absolutely killer in the rain. I had maybe 90% of the grip I would in the dry. The car was just covered in grit at the end, spent Sunday giving her a thorough clean so the birds could sh*t on it come Monday.

The JHM tune was spectacular. Just pulled like a freight train from down low and up top. Mostly third gear tight stuff but the car just ripped and I could steer with the throttle. On an AWD car. Just awesome. I’d been on some of these roads before but somehow missed the two really good ones. There were two other RS5’s on the journey but I didn’t spend much time with them in the twisty bits as we all got somewhat separated due to traffic. There was also a supercharged R8, two TTRS, an RS3, S4’s and S5’s, lots of killer stuff.

There was a “pro” photog sitting near the top of one of the mountains snapping pics so I bought one. Rest are my photos.

So I’ve been tinkering. Been working on a few things to say the least. Asher got me thinking about the air pump hoses which run over the top of the valve covers and I couldn’t let it rest. I’ve spent weeks redesigning and sourcing parts to come up with something that’s “bolt on” and doesn’t necessitate cutting the stock hoses. It’s fully reversible.

This is the working prototype. I have a few other changes I’m making and I’m also going to machine a special adapter to eliminate a few of the components and make it more simple to manufacture. Yes, I’m making more in case anyone else wants an air pump relocation kit. Will work with the OEM airbox and with the Eventuri intake. It may work with others as well.

Anyway, we all know what they look like and once seen they can’t be unseen. They really are an eyesore.

And with the hoses rerouted. So much cleaner.

The Eventuri with the hoses rerouted.

There’s a good deal of heat coming off of the headers despite the heat shield on them so I had to source components which would take sustained 300 degree temps. The hose itself is also abrasion resistant and won’t chew up other components. There’s an additional heat shield tube over the critical section to further ensure there’s no burn through. In addition, the hose has to be a certain size to ensure proper flow yet remain small enough to pass through and underneath the intake without being pinched. Took me forever and a day to try and engineer something that’ll work and is completely reversible. The heat shielding will be black in the future although I also have red for those who have Misano cars or want a bit of contrast. You really won’t see it without really looking so the black is best for an OEM look.

If anyone is interested in a kit, shoot me a PM. I’m still finalizing a few components and details so it’ll be a few weeks before I start making them en masse.

Hey James, the cost of some of these esoteric and model-specific components is pretty high for what they are so I like to keep them intact. If someone wants to return the car back to OEM, it’s easily done. There is one ear (oettinger) clamp which needs to be clipped with a set of bull-nosed pliers but it literally takes three seconds (I shot video of course!). Other than that, it’s really easy to install. I’ll have an installation video as well as written instructions once I have all the final components on hand and at least one assembled for someone else.

The vented container at the top, that’s actually for the transmission. If you really push these cars (or any S-Tronic) hard at the track or on the back roads of “Mexico”, the OEM transmission case vent can pop open (by design) as the fluid heats up and expands. At the very least, you’ll smell it. Some can bubble out and sit on top of the transmission as well. The contain is designed to prevent both the smell and the fluid escaping. It’s essentially a catch can-like setup but there’s no fluid separation. It’s very similar to a radiator overflow. In addition, drag strip guys can overfill (from the top) the ATF fluid to prevent possible starvation issues under high g launches. I know some of the S5 and S4 guys experience this and as the RS5 gets faster, it’ll be a useful item to have.

I had a little escaping so I went ahead and whipped something up. The way it’s set up, any fluid is contained in the unit and there’s no smell. As the car cools down, fluid is free to drain right back into the transmission. It’s not as big a problem on the RS5 just yet but track day cars may want to utilize one. I can make more of those as well. Also easy to install surprisingly as I found a clever way to do it from the top of the car. No hand shrinkage required.

The RS3 and TTRS can both experience ATF fluid burps and full-on pukes when tuned. I know one individual who’s actually had ATF fluid up his windshield and over theft side of his engine bay. Not exactly safe on a mid-10 second car and the smell is truly something to be experienced to fully understand. It’s not something you’d want to try and clean out of your engine bay.

The vent/overflow container mounts on the firewall with a bracket. No drilling, no extra holes or anything. It utilizes existing threaded holes. Fits surprisingly well right there too. No rubbing on anything.


I originally had it near the ABS unit as there was a space and an unused bolt hole. Unfortunately this doesn’t allow for the fluid to drain back via gravity.

The picture below is the top of the transmission. The black cap in the center of the image is the vent and the car’s firewall is the out of focus portion in the right side of the frame. The discoloration on top of the transmission is ATF fluid that bubbled out during some testing runs.

On the catch can thing…I may end up doing something later on. I just finished a thermostat design which is being whittled up out of billet aluminum as we speak. In theory, it’ll help our cars run cooler overall and bring the auxiliary radiators fully online sooner. Need to test it out on my car first of course. If it works, I may add catch cans to remove some of the volatiles and water. I already change my oil every 5K and it’ll be necessary to do so when running at overall lower temps. I also have another bolt-on affair in the works to improve heat exchange via the OEM radiator. It’ll also be cross platform compatible on all 4 and 5 series (A4/S4, A5/S5/RS5).

CARBON CLEANING IS REAL.

Busy morning. Drove over to the local dyno, JMS Racing, here in San Antonio. The dyno is well maintained and super consistent. I took the opportunity to get a good baseline before I start making changes. Just a few iPhone photos, I was using the big cameras to shoot video.

Strapping her down…

OEM intakes.

And now what you’re all waiting for. Numbers. I made three runs, hot and humid here as always. The OEM airboxes have K&N drop-in filters and I’ve not cleaned them. I’m guessing I have about 8K miles on them. Plugs were changed at 36K miles, oil change about 2K miles ago, carbon cleaning was done last fall so it’s probably been six months, have to go back and look. Tire pressure was what I always run, 42f, 38r. I run this pressure daily so I test at this pressure. I only raise or lower it when I go to the drag strip.

Interestingly, the last run made more power than the first as the car was most likely fully up to temperature and the ECU released the Kraken. Stage 1 JHM tune, exhaust is the AWE Touring. (Get to it already!)

I made almost 20hp at the wheels with just carbon cleaning. I had around 50K miles when I cleaned, probably 52K? I’m at 58K currently. That’s a power gain you can actually feel.

I have the dynojet files and I’ll post them up with comparisons to past runs on the same dyno but for now, I have an iPhone shot with all three runs along with my highest, pre-carbon cleaning run which is the 346hp run. Run #3 was 362.97 but I’m rounding up to 363. Deal with it. :slight_smile:

As I said earlier, I did shoot some video but I have to shoot “part deux” in the coming weeks. Haven’t decided if I’ll make this a separate video or not.

And now for the really good news. George installed new LED lighting and even upgraded his fans. And sitting in the corner was all of the new Dynojet software and hardware! What does this mean? It means I’ll be able to get torque readings in the future. Right now the plan is to make one more run on the current software to keep things consistent. But moving forward, I’ll have access to hp and torque curves. And the shop is about five miles from my house as the crow flies. No more 2.5 hour drives to Austin to use a busted-up dyno. I told him I’d come over on a Saturday morning and help him install it. I was that excited.

Even though we’ll be going to new software, I’m hoping it won’t be too far off the old numbers. Even so, we’ll know the delta and can extrapolate from there. He’s a pure tuner through and through so it’s incredibly important his dyno is consistent.

So there you have it. Bring on JHM stage 2!

AWE is out and ready to be sold if anyone is interested. I have it listed in the for sale section. I am willing to separate the downpipes from the rest of the exhaust. With the resonated downpipes, it’s called the Touring and with the rear section, it’s called the Track (uses OEM downpipes).

Resonated downpipes

Track exhaust


First start with the JHM exhaust! Opinions and review coming, just need to spend some time with it and let it break in as well.
[video=youtube_share;TpJ502A3bVY]https://youtu.be/TpJ502A3bVY[/video]

As promised a few graphs comparing various runs all done on the same dyno, same operator, same software.

Gratuitous waiting on dyno pic.

First graph is where I started vs. today (well, pre-JHM exhaust). You’ve come a long way baby. Lower graph is OEM ECU. Only “power” mod on the car is the AWE exhaust. The plugs have 20K more miles on them than the first dyno run.

This is my best run pre and post carbon cleaning. Both JHM stage 1, both with the OEM airboxes, K&N drop-in filters and the AWE exhaust. I take that back…I threw in an Eventuri run as well which was also with the JHM Stage 1.

These are the three latest, post carbon cleaning runs in order from first to last run (3 total).

All three of the post carbon cleaning runs together on one graph.

Let me know if you want to see anything else. I can mix and match at will.

[video=youtube_share;TpJ502A3bVY]https://youtu.be/TpJ502A3bVY[/video]

This is sort of a PSA post and others may know about it. I thought there was some discussion a while back but I have too much sh*t in my brain to remember. Anyway…while I was installing the new exhaust I decided to adjust my dampers to full hard. I’d been unhappy with their general lack of ability to dampen the springs effectively. They’ve been on the car for, I’m guessing, 50,000 miles. Seems reasonable they need a rebuild.

Anyway…I shot the last exhaust video driving around with them fully cranked. Ride was less than stellar and the car was all over the place. Not happy, I jacked the car up and adjusted all for corners, going to full soft first, then back up to full hard, then down two clicks. I thought I’d be back to where I was prior at best.

Completely wrong assumption.

They feel “new” to put it mildly, like they do not need rebuilding. Can’t explain it but I think when you keep them at a single adjustment point over time, the shim stacks can become misaligned. Cranking them from one end of the spectrum to the other then backing off to your desired setting realigns them. The latter I knew but I’m quite surprised the shim stacks can get misaligned like that. Maybe big hits do it. Dunno. All I know is I now get that perfect amount of damping where everything is perfectly controlled. One dip then level. Prior I’d get maybe two to three undulations on some bigger dip-type bumps.

If you feel your dampers have faded a bit, try doing something similar before giving up on them. I’ll most likely do this every few thousand miles or at least every oil change.