
Yes lock them in the long runner. 90% of your driving even aggressive you’ll be in the log runner zone and I have locked a few people on the long runner and then a few others on the gutted intake and Its a night and day difference. You can tell a VERY VERY noticeable difference in power gain with the long runner over the gutted intake
I had mine “gutted” before I knew that, and then I tossed away the parts. Is there a way to do this without the original parts? or does anyone have a set of extra flaps lying around?
I can look and see if I have an old intake manifold around.
I had 4 extra intakes at one time. I locked 2 with great success gave 1 away to someone in need (it was good just needed slight repair) I know I have one extra somewhere. It can be saved. I just have to find it. Where are you located?
I would cut some sheet metal to fit the gap with a small overlap and then epoxy them in.
Still with all the plastics removed as the plastic get porous and end up going straight for the cylinders.
Just see my picture above.
Does anyone have a IM removal guide that has pictures? Or do I just need to get a workshop manual at this point and show everyone myself lol


Thank you so much ! I’m about to tackle this tomorrow
Questions: Where can I get those wrench heads from? If I have a wrench can I just torque those by hand? And what all tools do I need I know I need a triple square head and torx bits
I didn’t have the wrench heads, just did the by hand-torque  .
.
This job can be done with regular tools such as:
T30
Pliers, for the hose clamps.
Wrenches
A flat headed screw driver is handy for the connectors
Triple squares for the motor mount
Torque wrench
1 Like
That’s what I was planning on doing anyway lol thank you for the tips!
The wrench heads are called crows feet and you can get them at any hardware or even harbor freight.
Almost all of the tools maybe not the tripple square. You can get them at most auto stores.
The funny thing is once you do this once. You will see it not too bad. If you get stuck post on here and most of us that have done this will be able to help you on the fly
I sent you a pm.
If you decide to cut some sheet metal to lock them in long position, do you think you can make a template? I may want to have my mechanic do the same. I think I have an oil leak from the oil filter housing, so I’m gonna have to have him remove the IM soon.
You totally don’t need to do the sheet metal. Once the OEM flaps are sealed or seated in their proper place they seal very well.
Lock the OEM flaps and epoxy them them at the base and at each arm pivot point. Then remove the motor arms from the actuator tab.
Mixofia. Search for junk yards in your area. Even a broken intake can be helpful to you.
If you epoxy everything as Justin said, you should be safe.
The sheet metal is handy if the plastic a total mess or already removed.
I’ve officially started my project with an engine flush using 2 cans of liqui moly. I need to drain the coolant as well correct?


Great work… If you take enough time and have some basic idea on this its not too bad of a job…
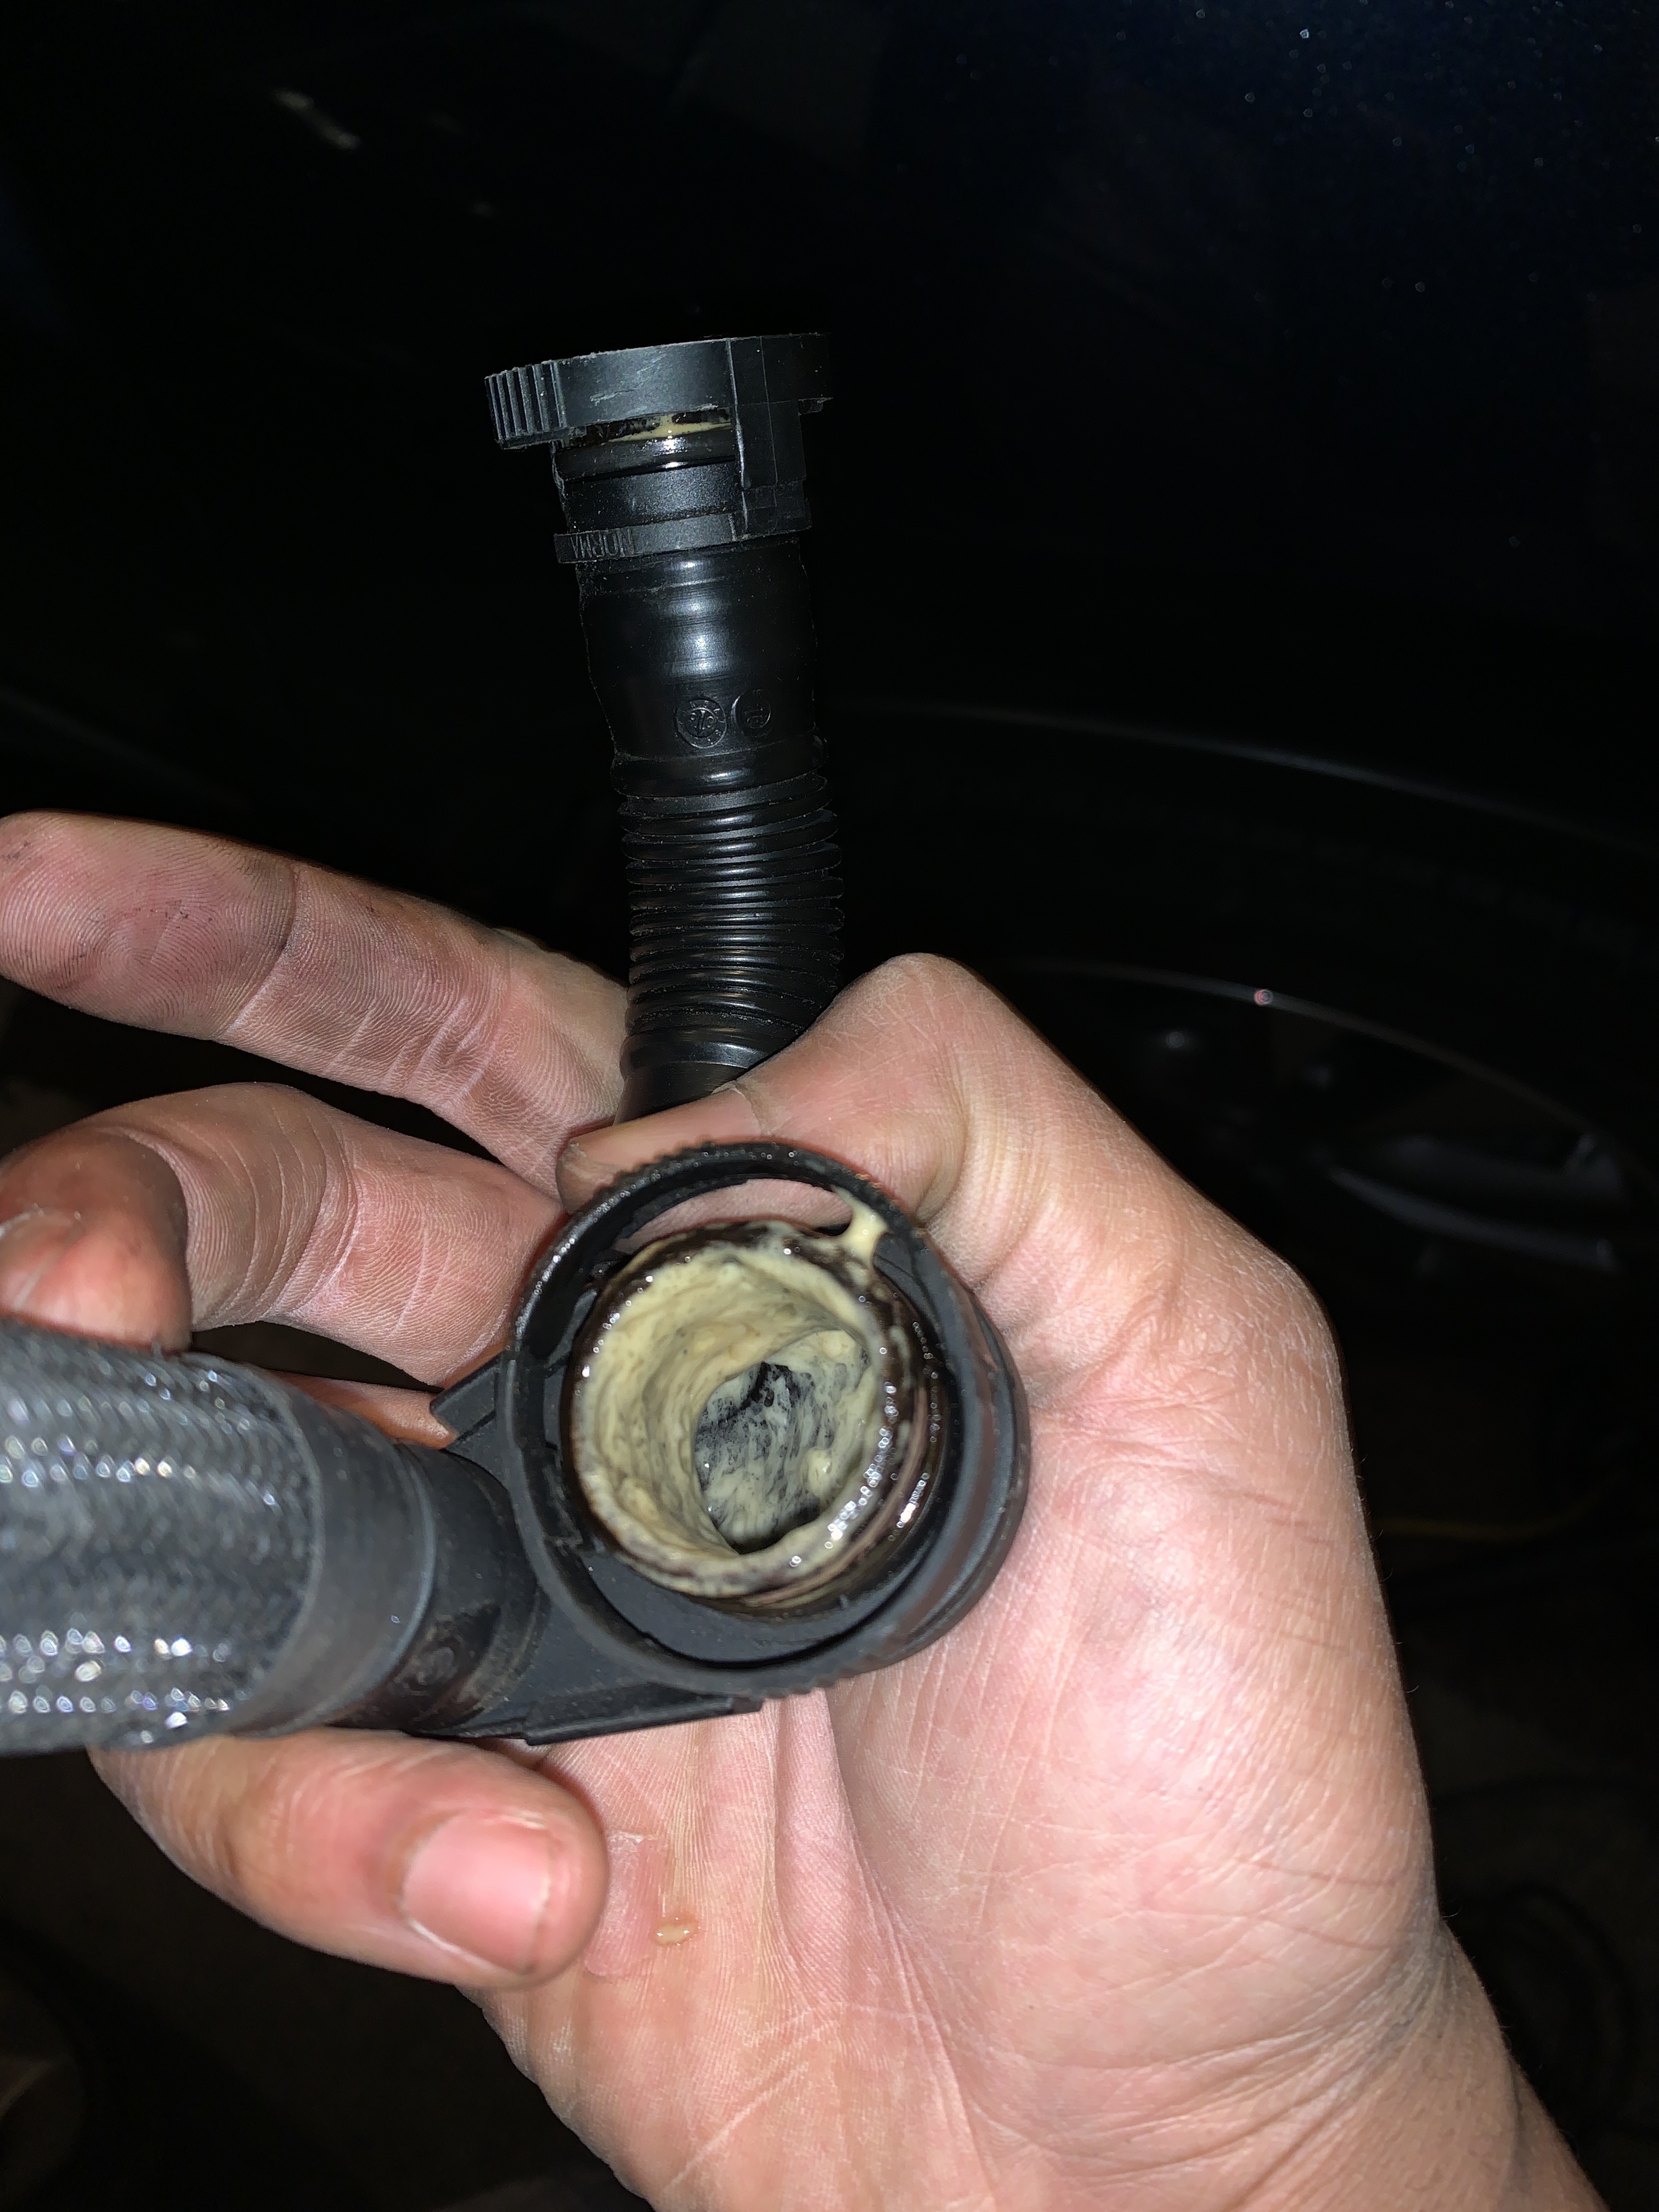
The PCV isn’t too bad. Water can get into the crank case through humidly or a number of other ways. So it’s not too bad to see the collection on the PCV.
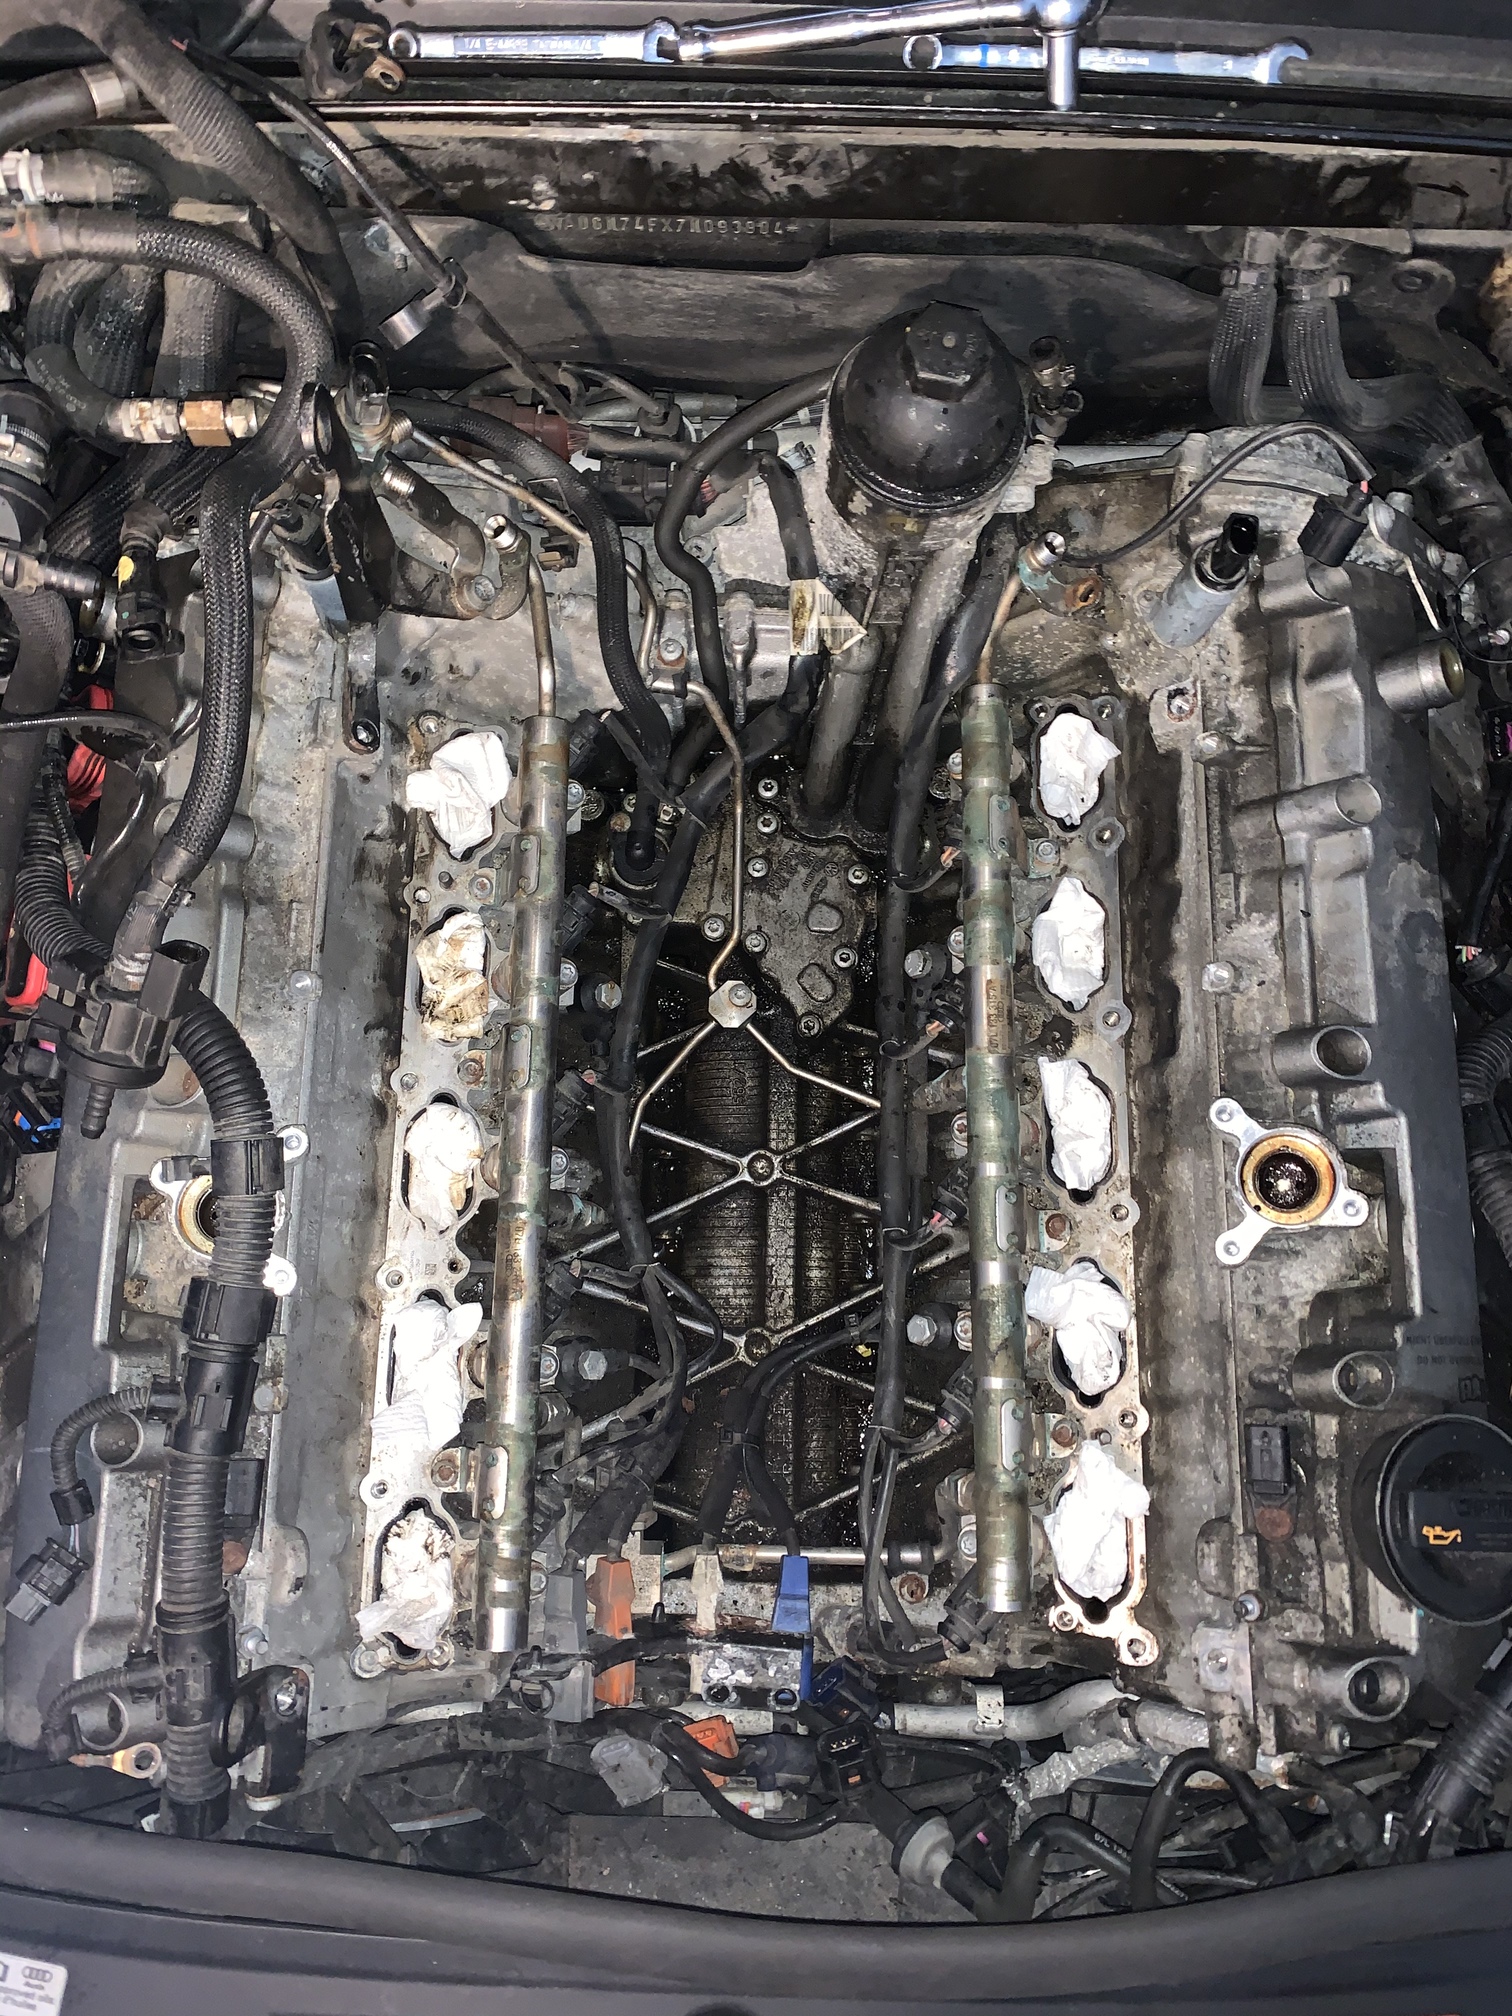
From the pictures the plugs look generally how they would depending on the miles. If you have oil in the plug holes then you should strongly look into doing the valve cover gaskets.
It’s hard to tell from the last picture (i Ifxed it for you) I don’t see any standing oil so your oil filter seals should be ok.
Check your intake.
How do the valves look with the carbon.