
This is another picture intensive thread which may be familiar to some as it was originally posted in March 2019. I have copied the text from the original thread and pasted in new links to the pictures which were lost when the forum was changed.
******* originally posted March 3, 2019 ******
This is a companion thread to the one created for the engine teardown and rebuild.
I figured I would create a new thread for the benefit of those looking for transmission specific info without having to scroll through pages of engine pictures to find what they are looking for.
There are no operational issues with the transmission. I am only disassembling it partially to address some ATF and gear oil leaks that I have.
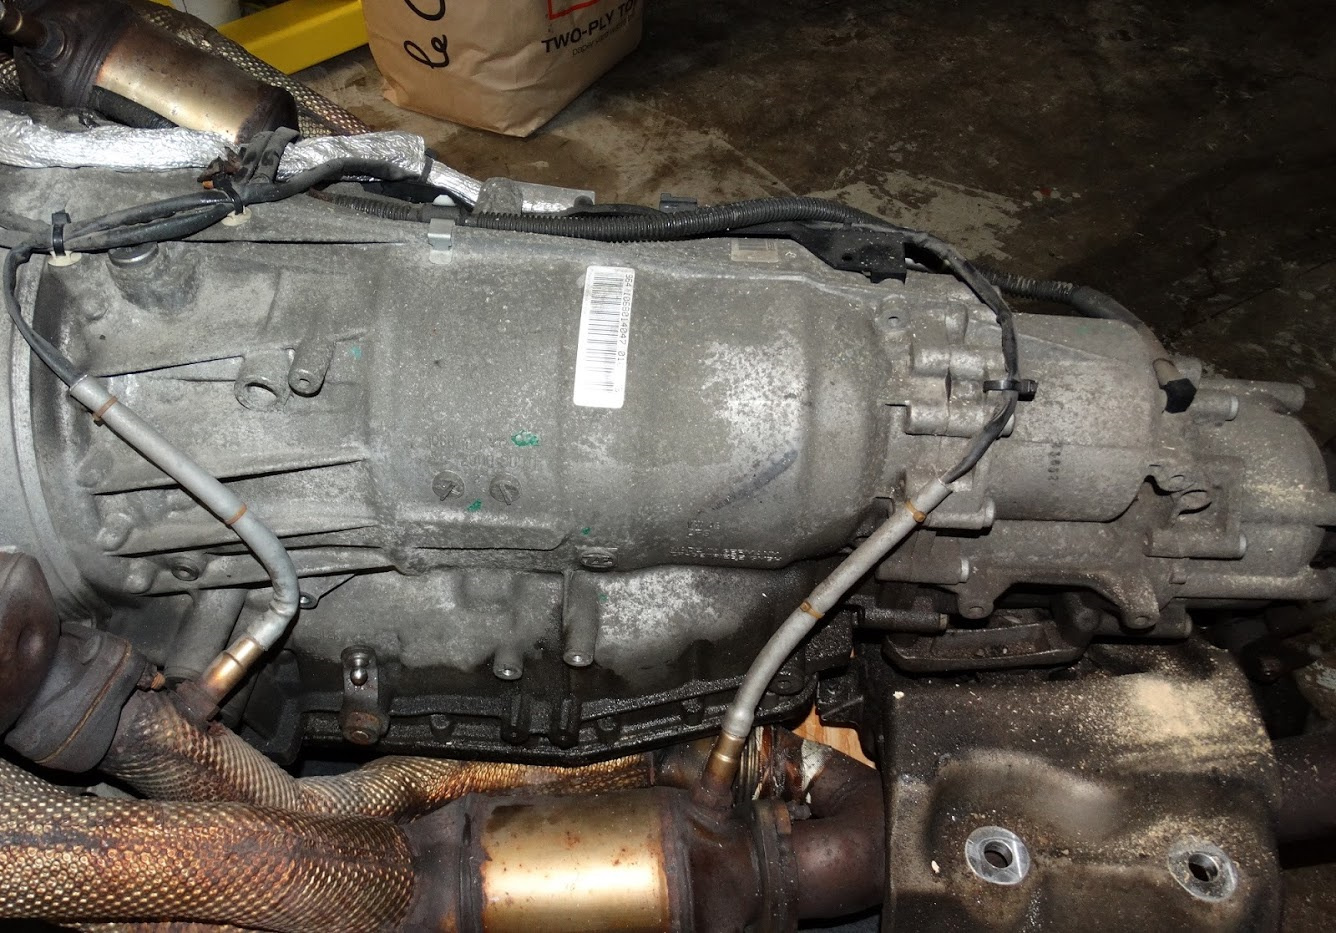
Here are a few pics showing the areas of leakage that I am going to address.
The nearly horizontal line of staining along the length of the transmission looks like a weeping pan gasket so that will be replaced along with a filter and ATF change.
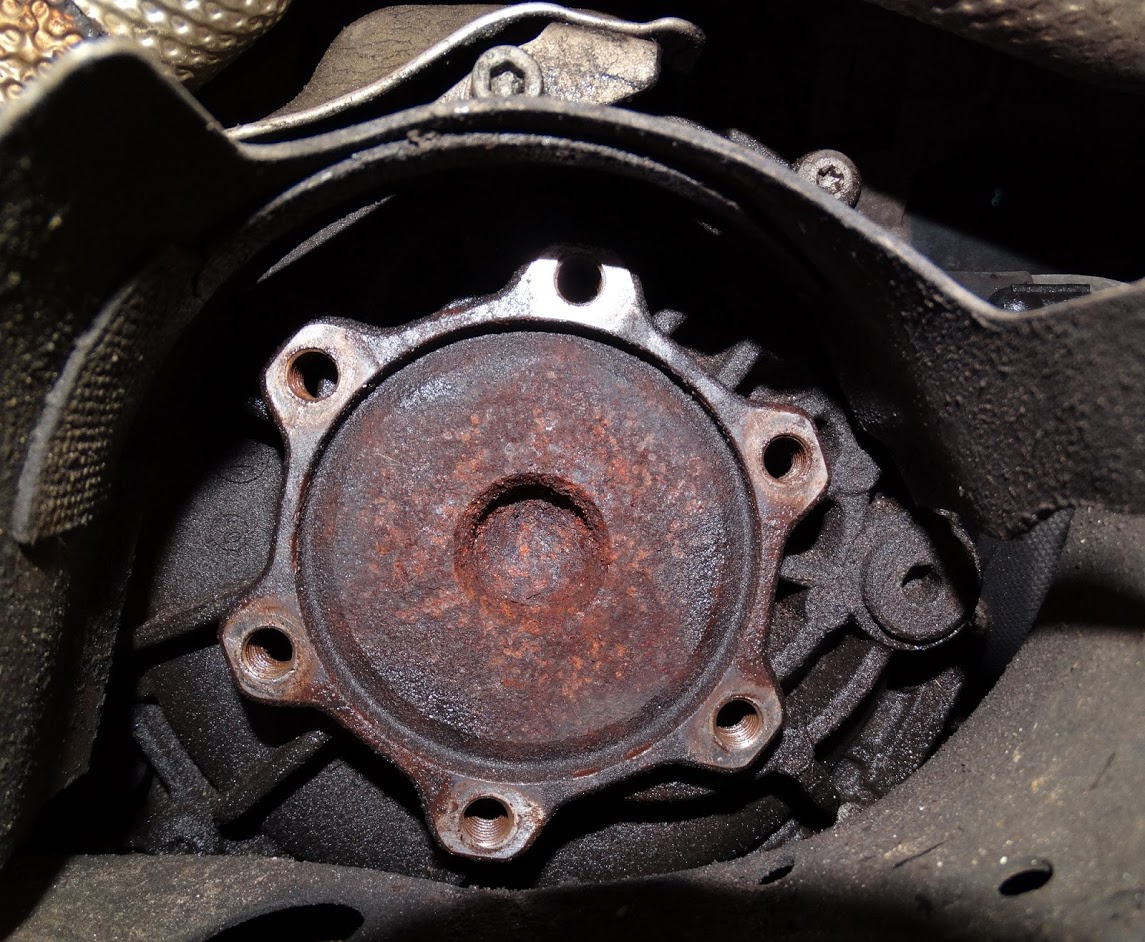
This next picture shows what looks like gear oil leakage from the front RH drive shaft seal.
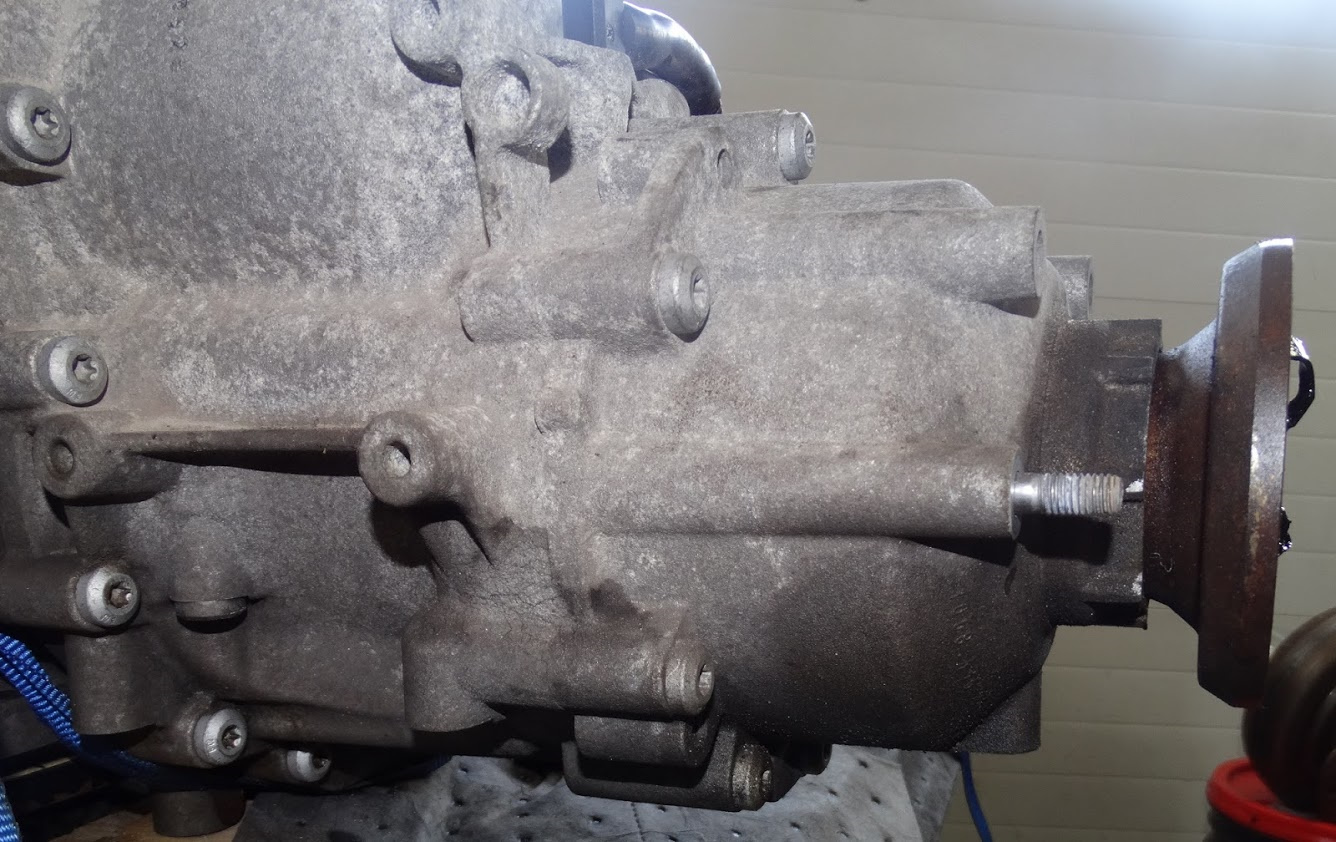
This third image shows what looks to me like ATF leakage from the rear drive shaft end of the housing for the centre differential
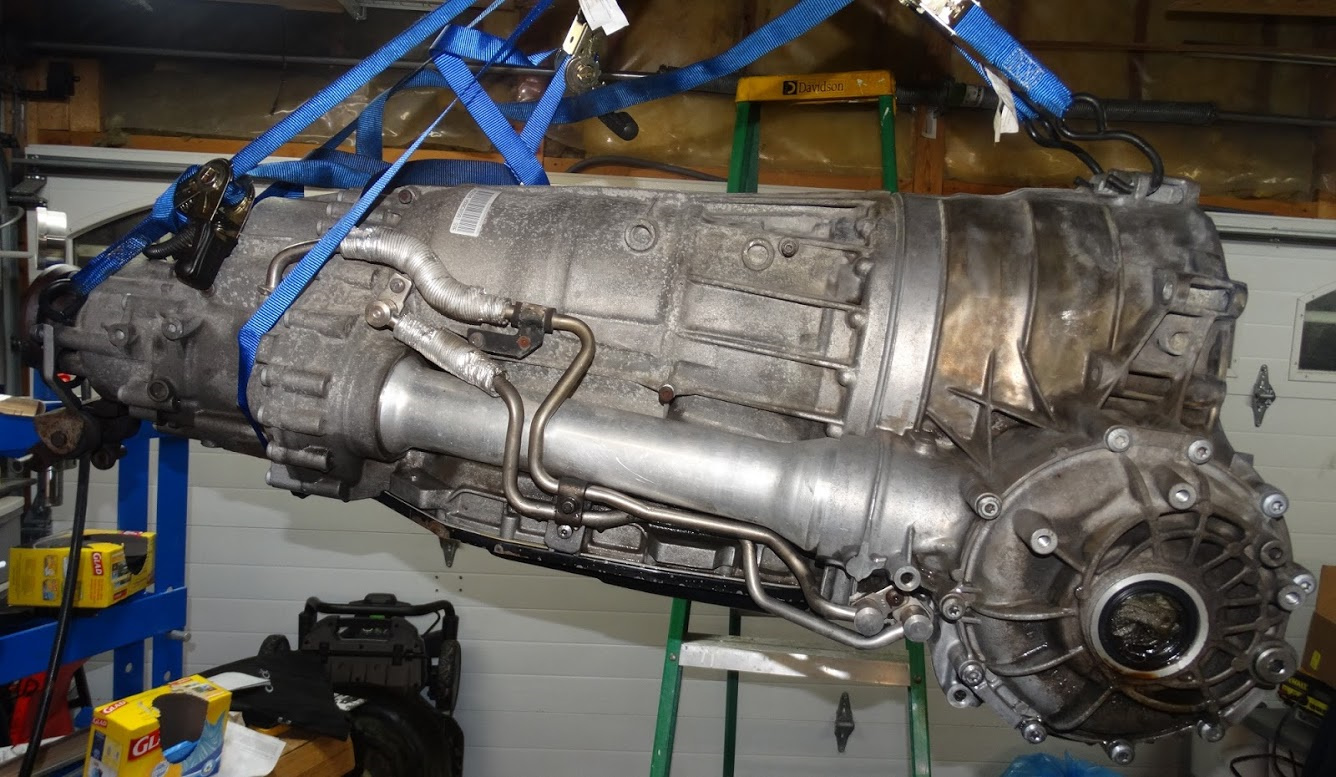
Any transmission work should always start with a thorough cleaning of the outside of the casing to minimize the possibility of any foreign material contaminating the system.
Here is what it looks like after some time with Simple Green and a scrub brush. It would have gone much faster if it was summertime so I could have taken a pressure washer in the driveway to it.
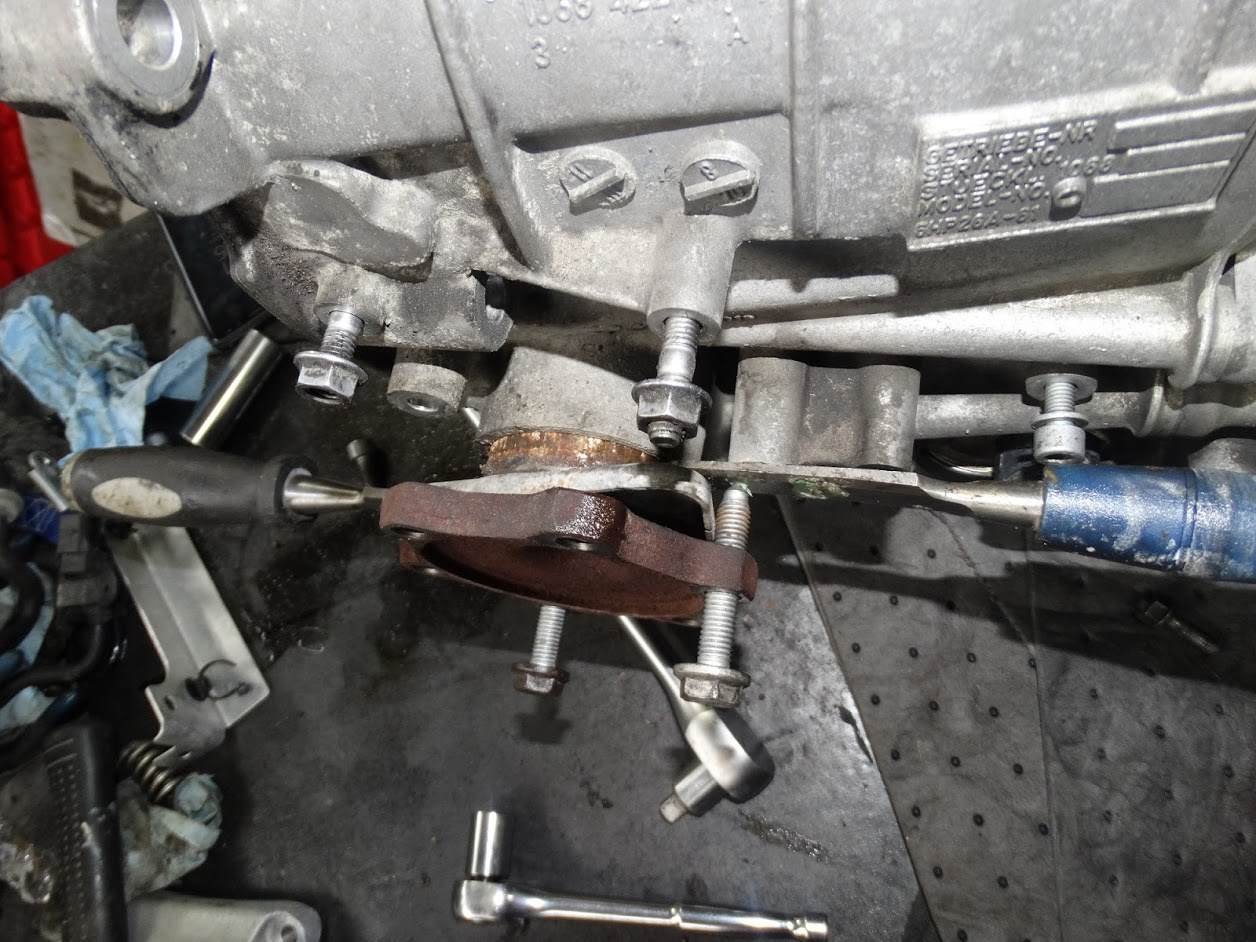
Both the left and right front LH flanged drive shafts can be removed in the same way. A couple of old chisels placed in behind and a couple of bolts through the flange to pull it out.
This is a shot of the LH one being removed. If you are not replacing the axle seal, care needs to be taken when removing the LH side so that the splined end of the axle does not drop down and damage the seal when the shaft is removed. I am replacing the seal so it really did not matter in my case.
With the RH flanged drive shaft removed, the differential cover can be removed by just undoing the bolts. This of course will allow all the gear oil to drain out.
Here is a shot with the cover removed.
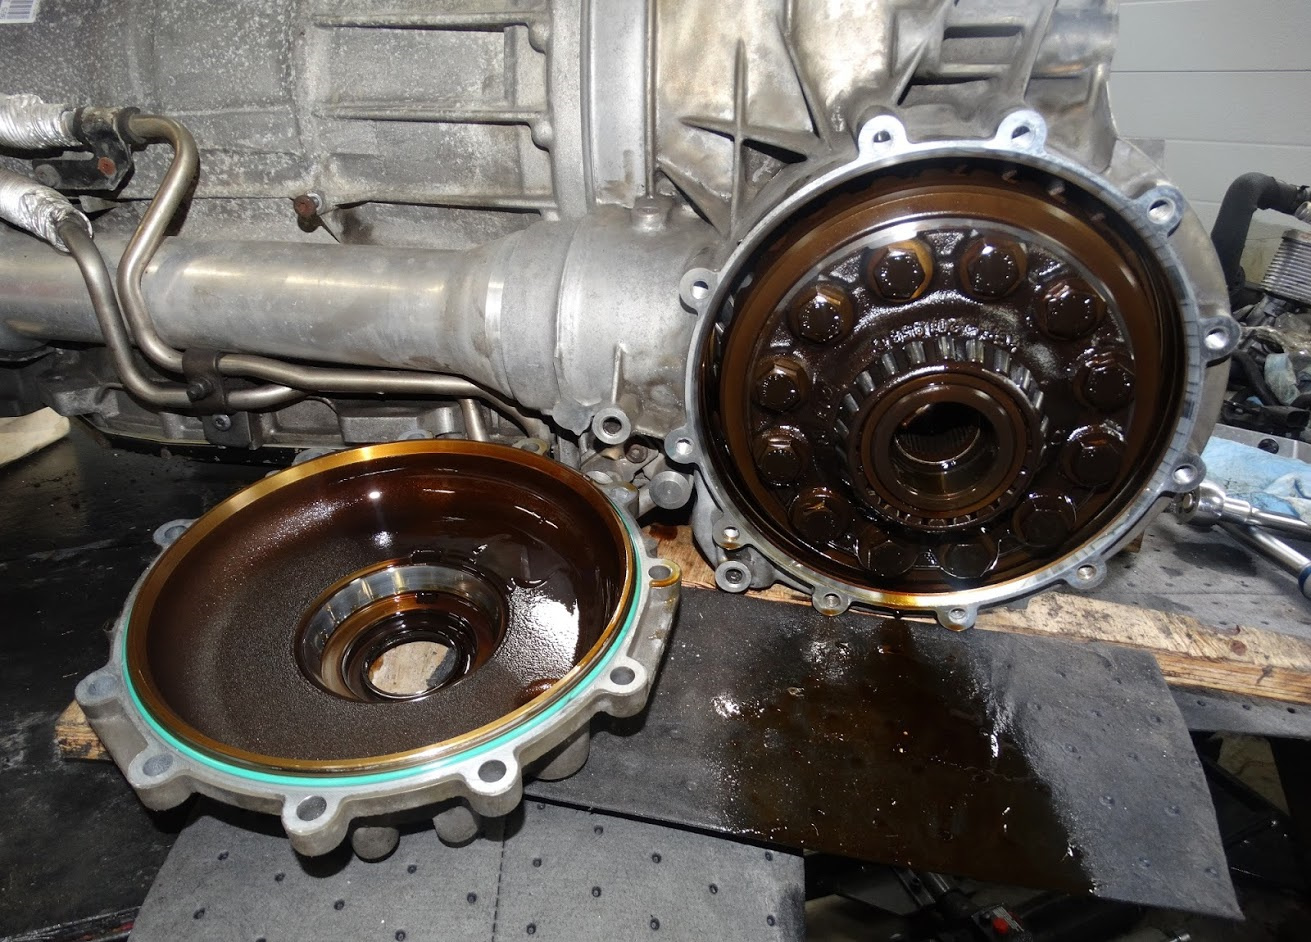
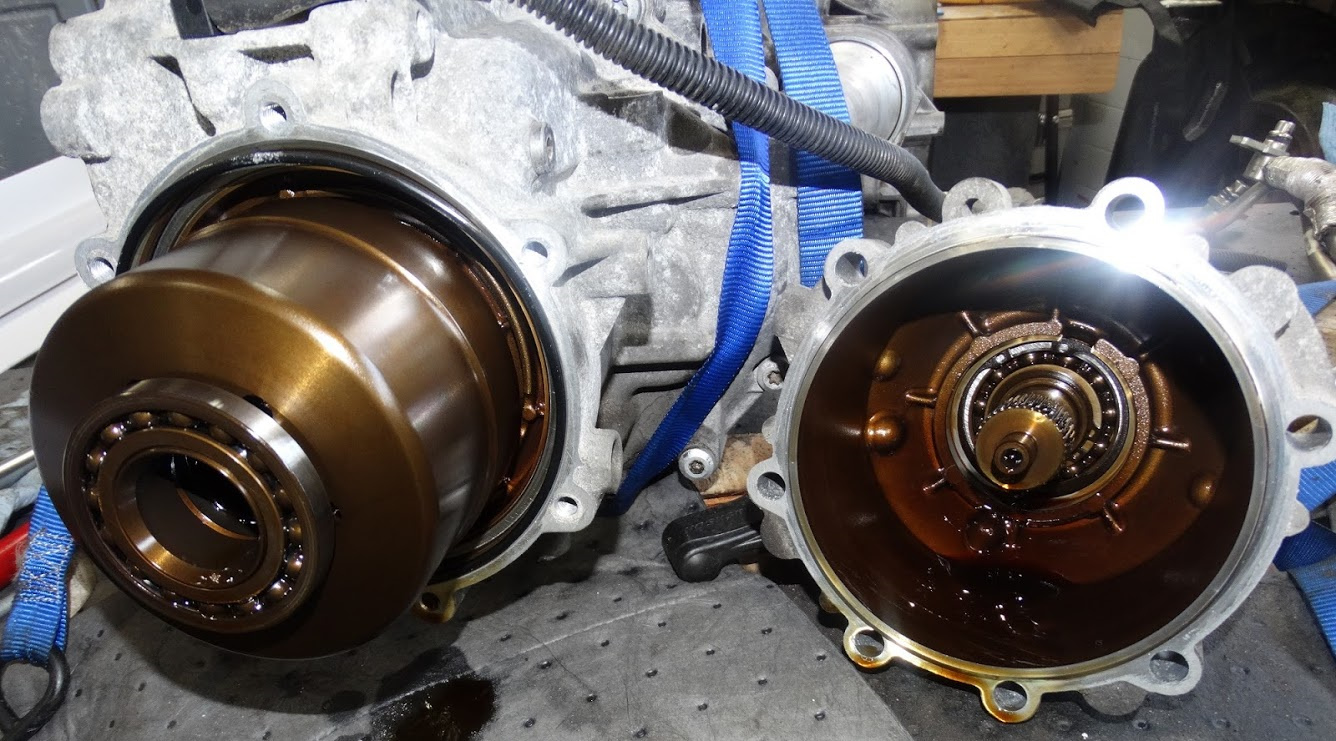
and another with the differential removed (it just pulls out)

With the LH drive shaft removed, the torque converter can be just pulled out. It contains a volume of ATF and is fairly heavy. For ease of removal, you can thread a handle into one of the holes to allow you to keep it level as it is pulled out so that the shaft seal is not damaged.
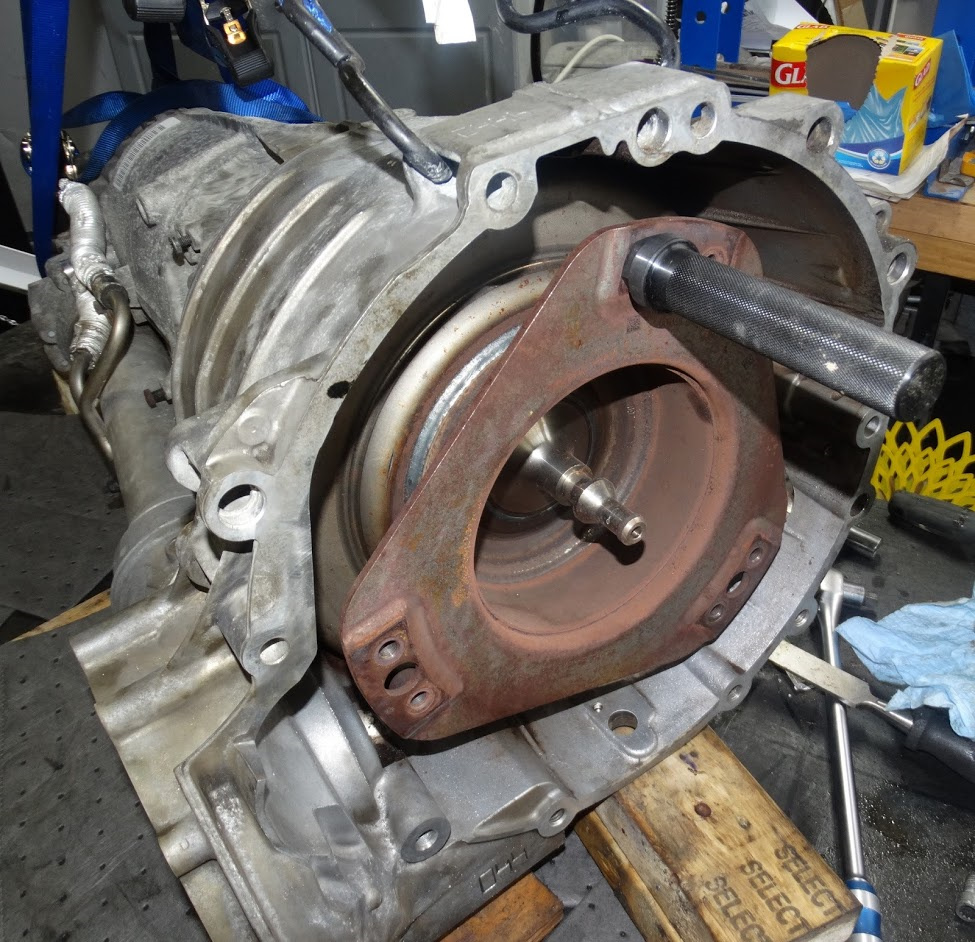
Here is a shot of the inside of the bell housing. It was not as clean inside as I thought it would be. If you look at the left hand side shaft seal, you can see evidence that it was leaking as well.
g
Next up was the removal of the centre differential housing. After removing a few bolts, it just pulls straight off.
Last, but not least for removal was the transmission pan. Here is a shot of the pan removed. There is some build-up of wear metals on the magnets but not an alarming amount given the mileage on the vehicle [250 000 km (~155 000 miles)].

And here is another shot looking up at the underside of the transmission

That is the extent of the disassembly that is going to take place.
I am waiting now for a few remaining seals to come in before I start the re-assembly process.
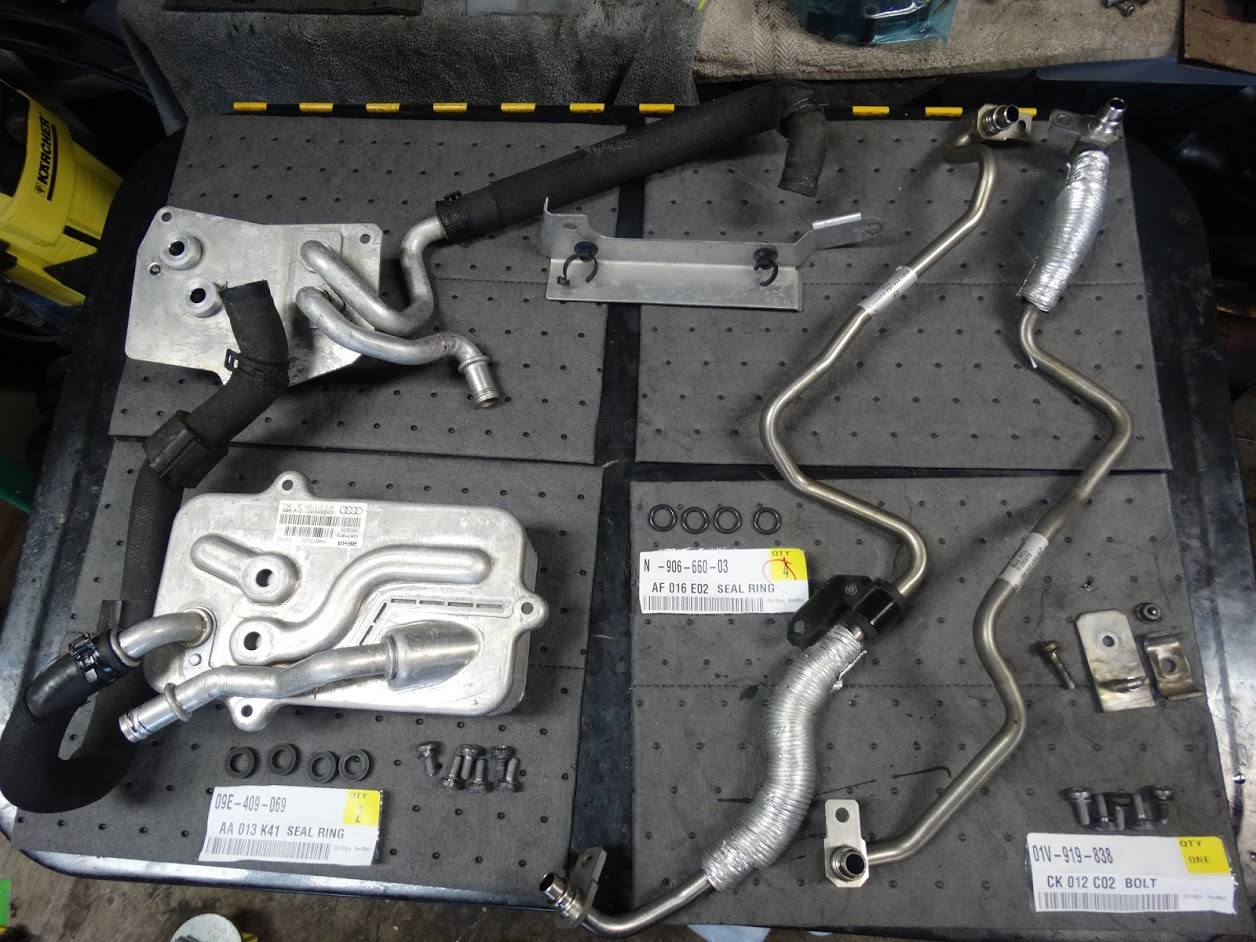
Here are a few other parts that I removed but did not insert pictures of in the original post.

They are the feed and return oil pipes from the transfer case to the oil cooler. They both have o-ring seals on both ends that will need to be replaced.
There are also two oil coolers.The larger one on the left is for ATF; the other is for the gear oil. They have two seals each which will need to be replaced as well.
I also found the following link to the ZF 6HP26A-61 Spare Parts Catalog. It contains a lot of useful information as well as a breakdown of the complete transmission which you will not find in the online version of ETKA.
http://www.vaglinks.com/Docs/Catalogues/ZF.com_6HP26A_61_Catalog.pdf
It has taken quite a while to round up all the seals, fluids and assembly tools that I felt I needed to complete the work on the tranny.
I removed the pan and kept the tranny suspended horizontally for a few days to allow as much ATF as possible to drain out. In this position, it is far less likely for any foreign material to get inside as I also use the garage for wood projects in the winter.
Here is a shot of the pan, gasket, strainer and bolts. The 13-bolt pans require that the bolts be replaced whereas the 24-bolt ones do not. Also, the 13-bolt pans use a metal gasket and the one for the 24 bolt pans is paper.
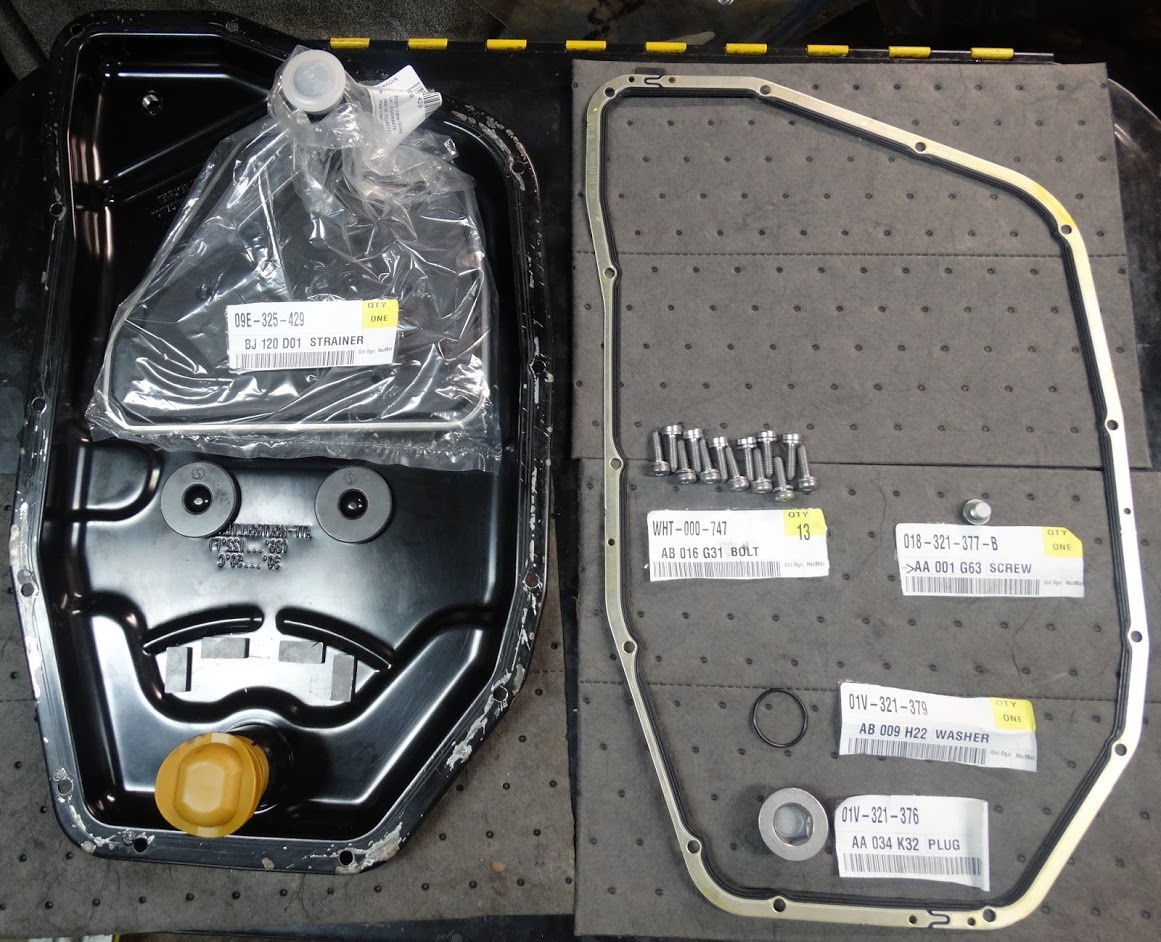
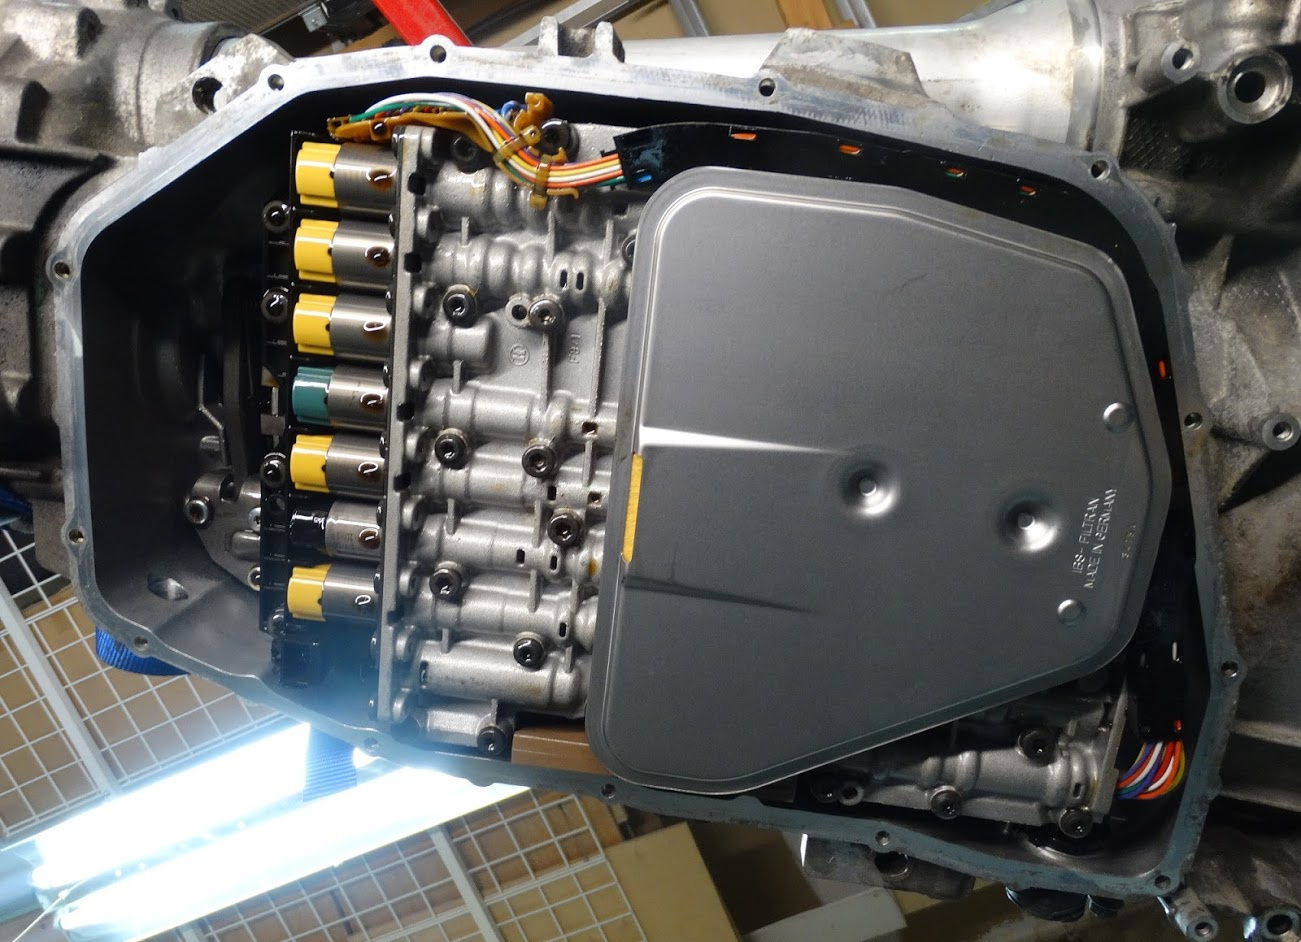
Here is a closeup of the mechatronic unit with the new strainer installed.
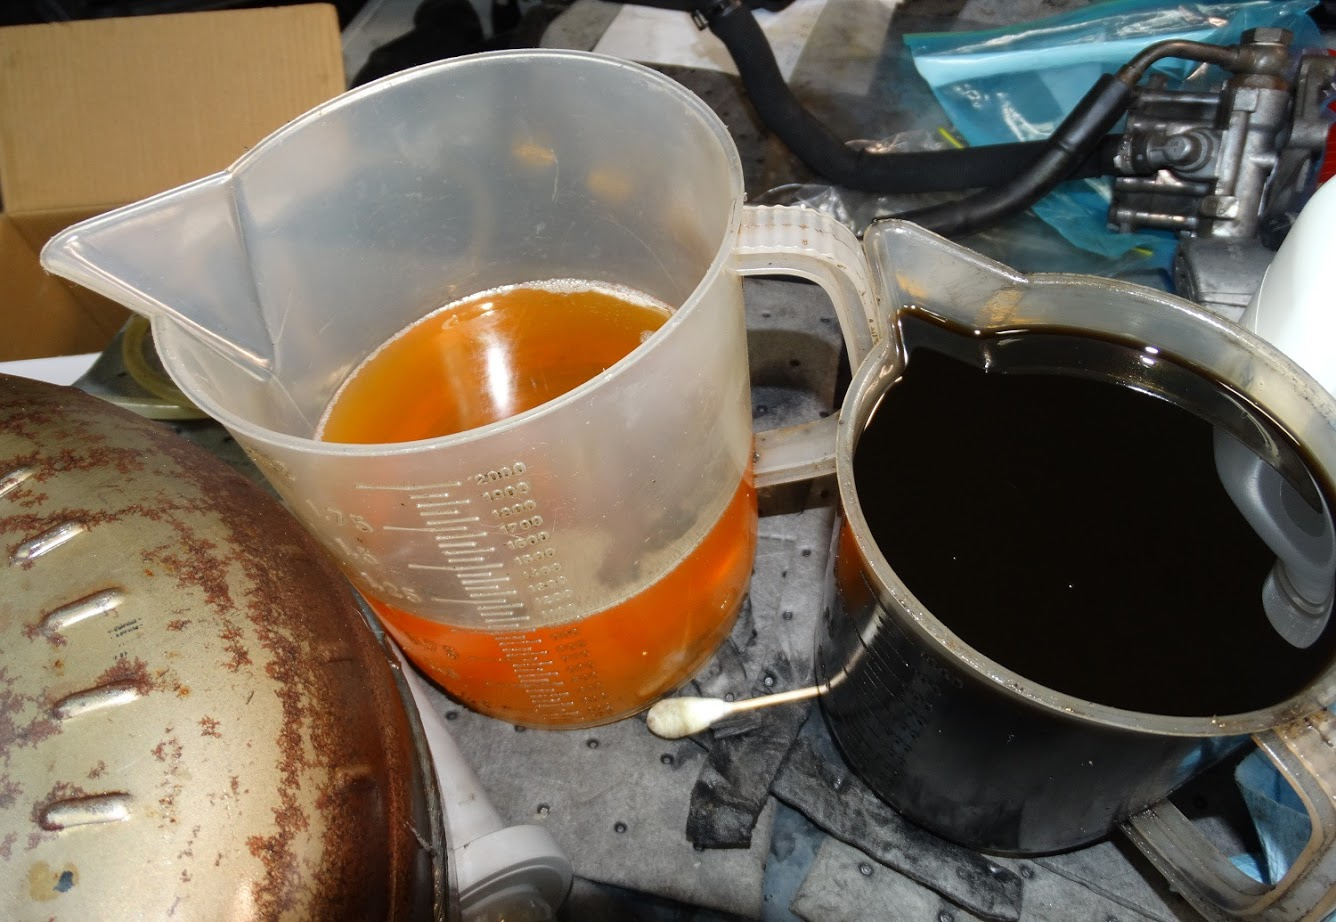
The torque converter was removed and I was able to suction 1L of very dark ATF out of it. Here is the old fluid vs the new that will be going in.
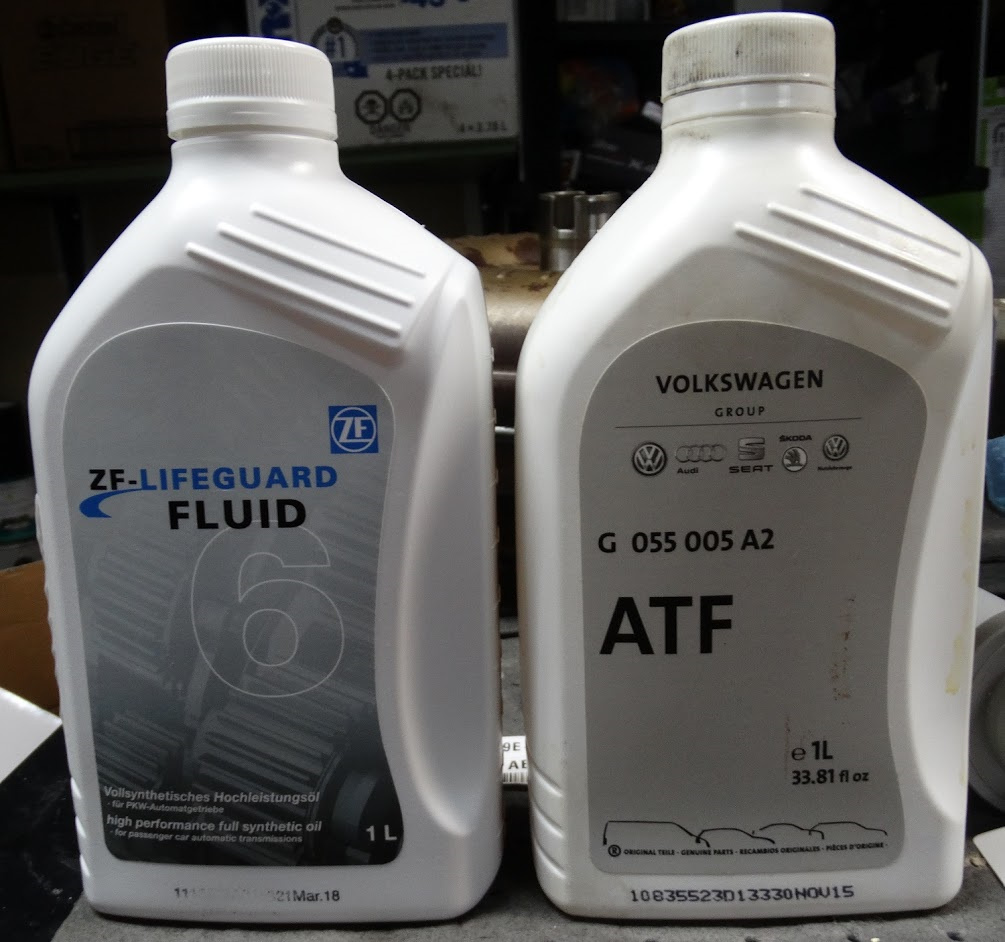
For ATF, I decided to go with ZF Lifeguard 6 as that is what ZF specifies (of course) and you can buy it a lot cheaper than the Audi rebranded stuff. I had a container of some Audi ATF kicking around and you can see that it is an identical container to the ZF ATF with a different label on it.
With the ATF pan installed and TC removed, I stood the transmission on its end to allow the balance of the gear oil to drain out. It also makes it much easier to do additional cleaning and torque bolts properly
The gear oil and ATF coolers were both cleaned, flushed out and checked for leaks using low pressure air.
Here is a shot of the coolers and pipes with the new seals and o-rings labelled. Before I removed the pipes, I thought that was just heat shielding wrapped around them because they do sit near one of the cats. They are actually flex sections.
I should note that most of the small fasteners on the transmission take a T27 bit whereas T30 is the small bit of choice on the engine.
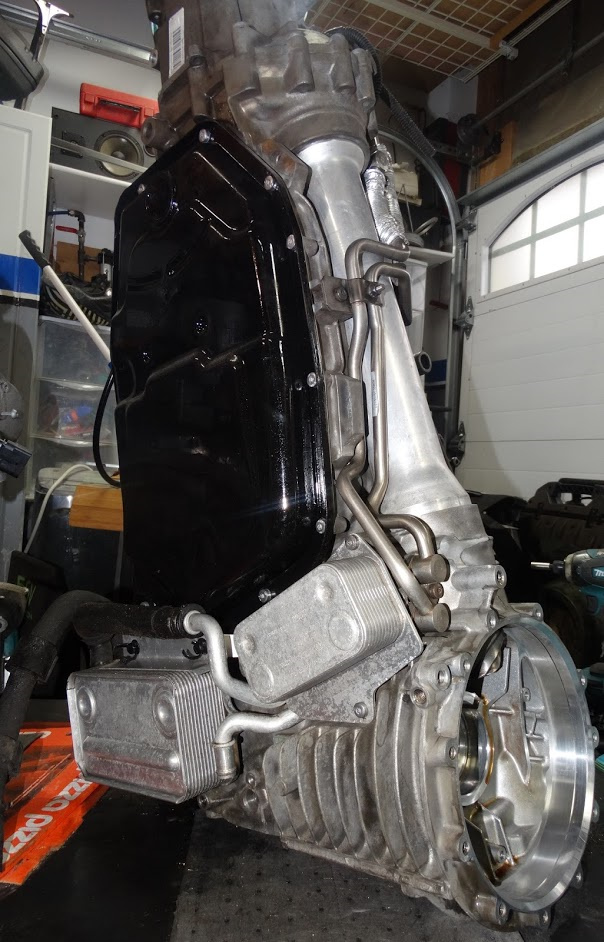
Here are the oil coolers and piping installed
That will be it for this post as I still have to organize a bunch of the other pictures I took during the rest of the assembly process.
The transmission is all back together now and I am hoping to find time to bolt it up to the engine this weekend.
This is the point where I left this thread off on March 28th, 2019. I still have a lot of pictures to go through and the accompanying text to compose.