
i left my tumble plates out too…
my guess was they also ‘cover’ the valve seal from the airflow but still I prefer nog to gunk up my engine with carbon.
OK, so last question/comment:
Those dividers possibly helped keep the broken off IM Flap pieces from getting all the way down into the port and possibly jamming against the valves.
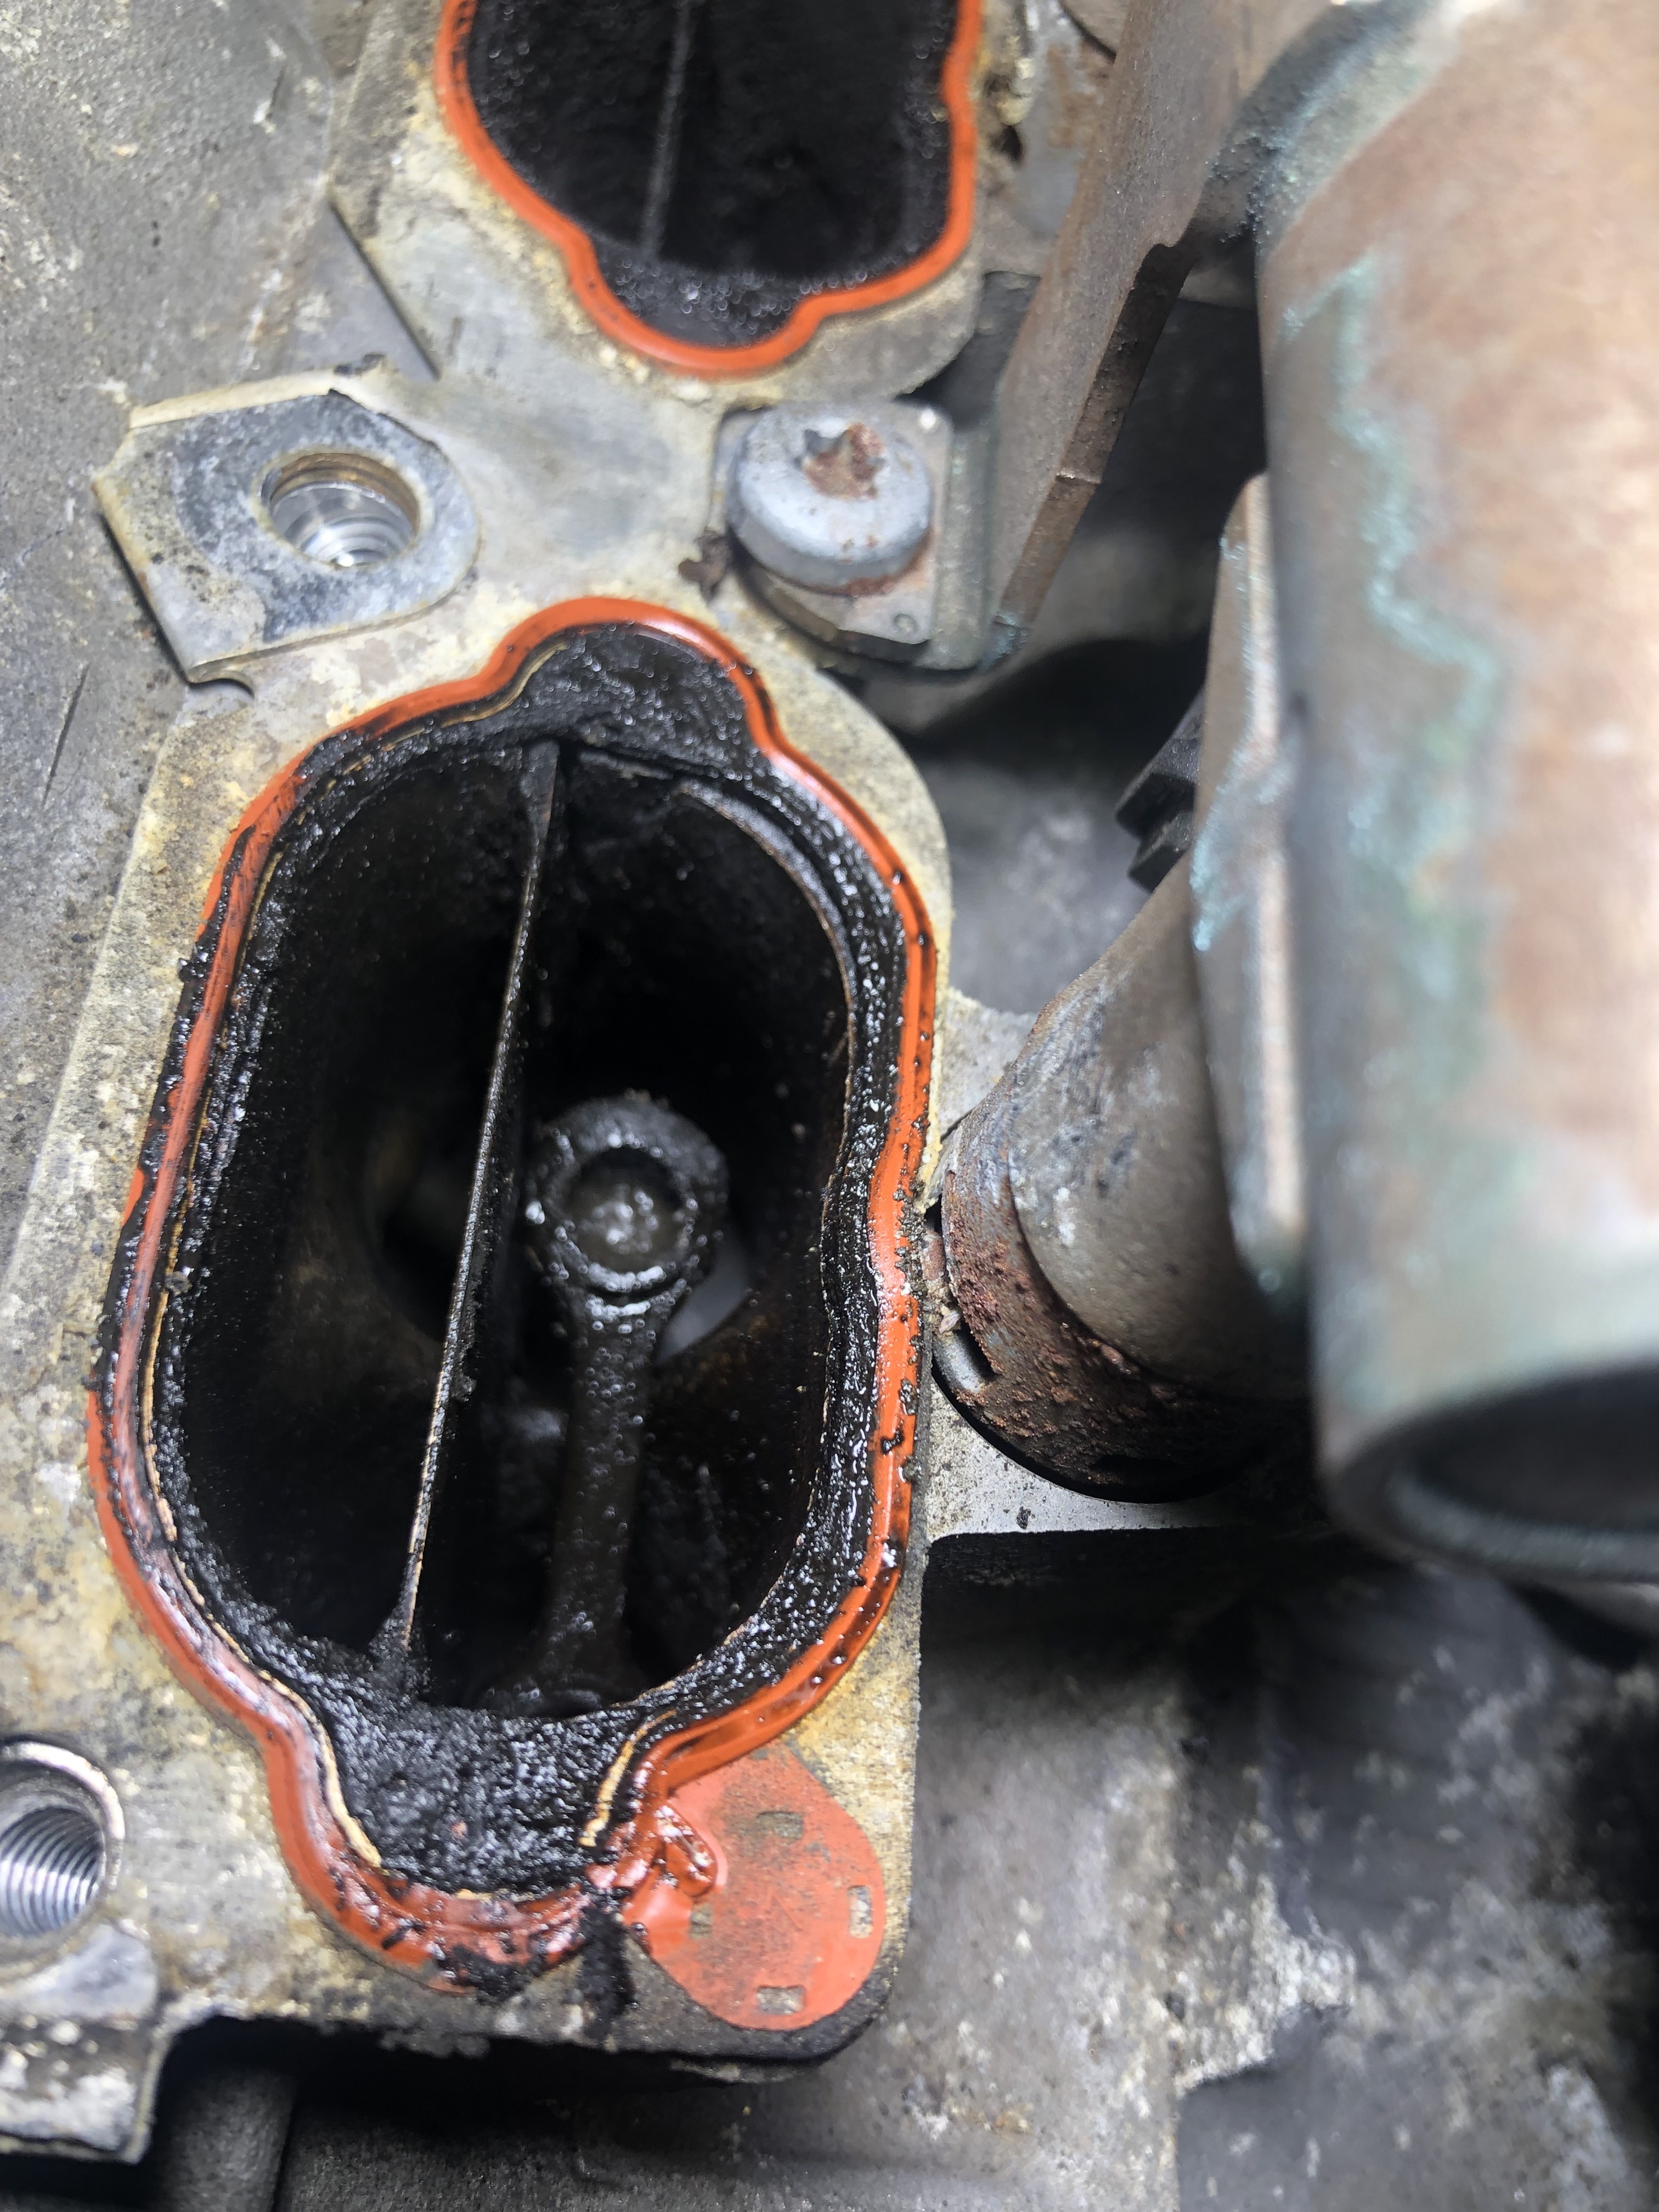
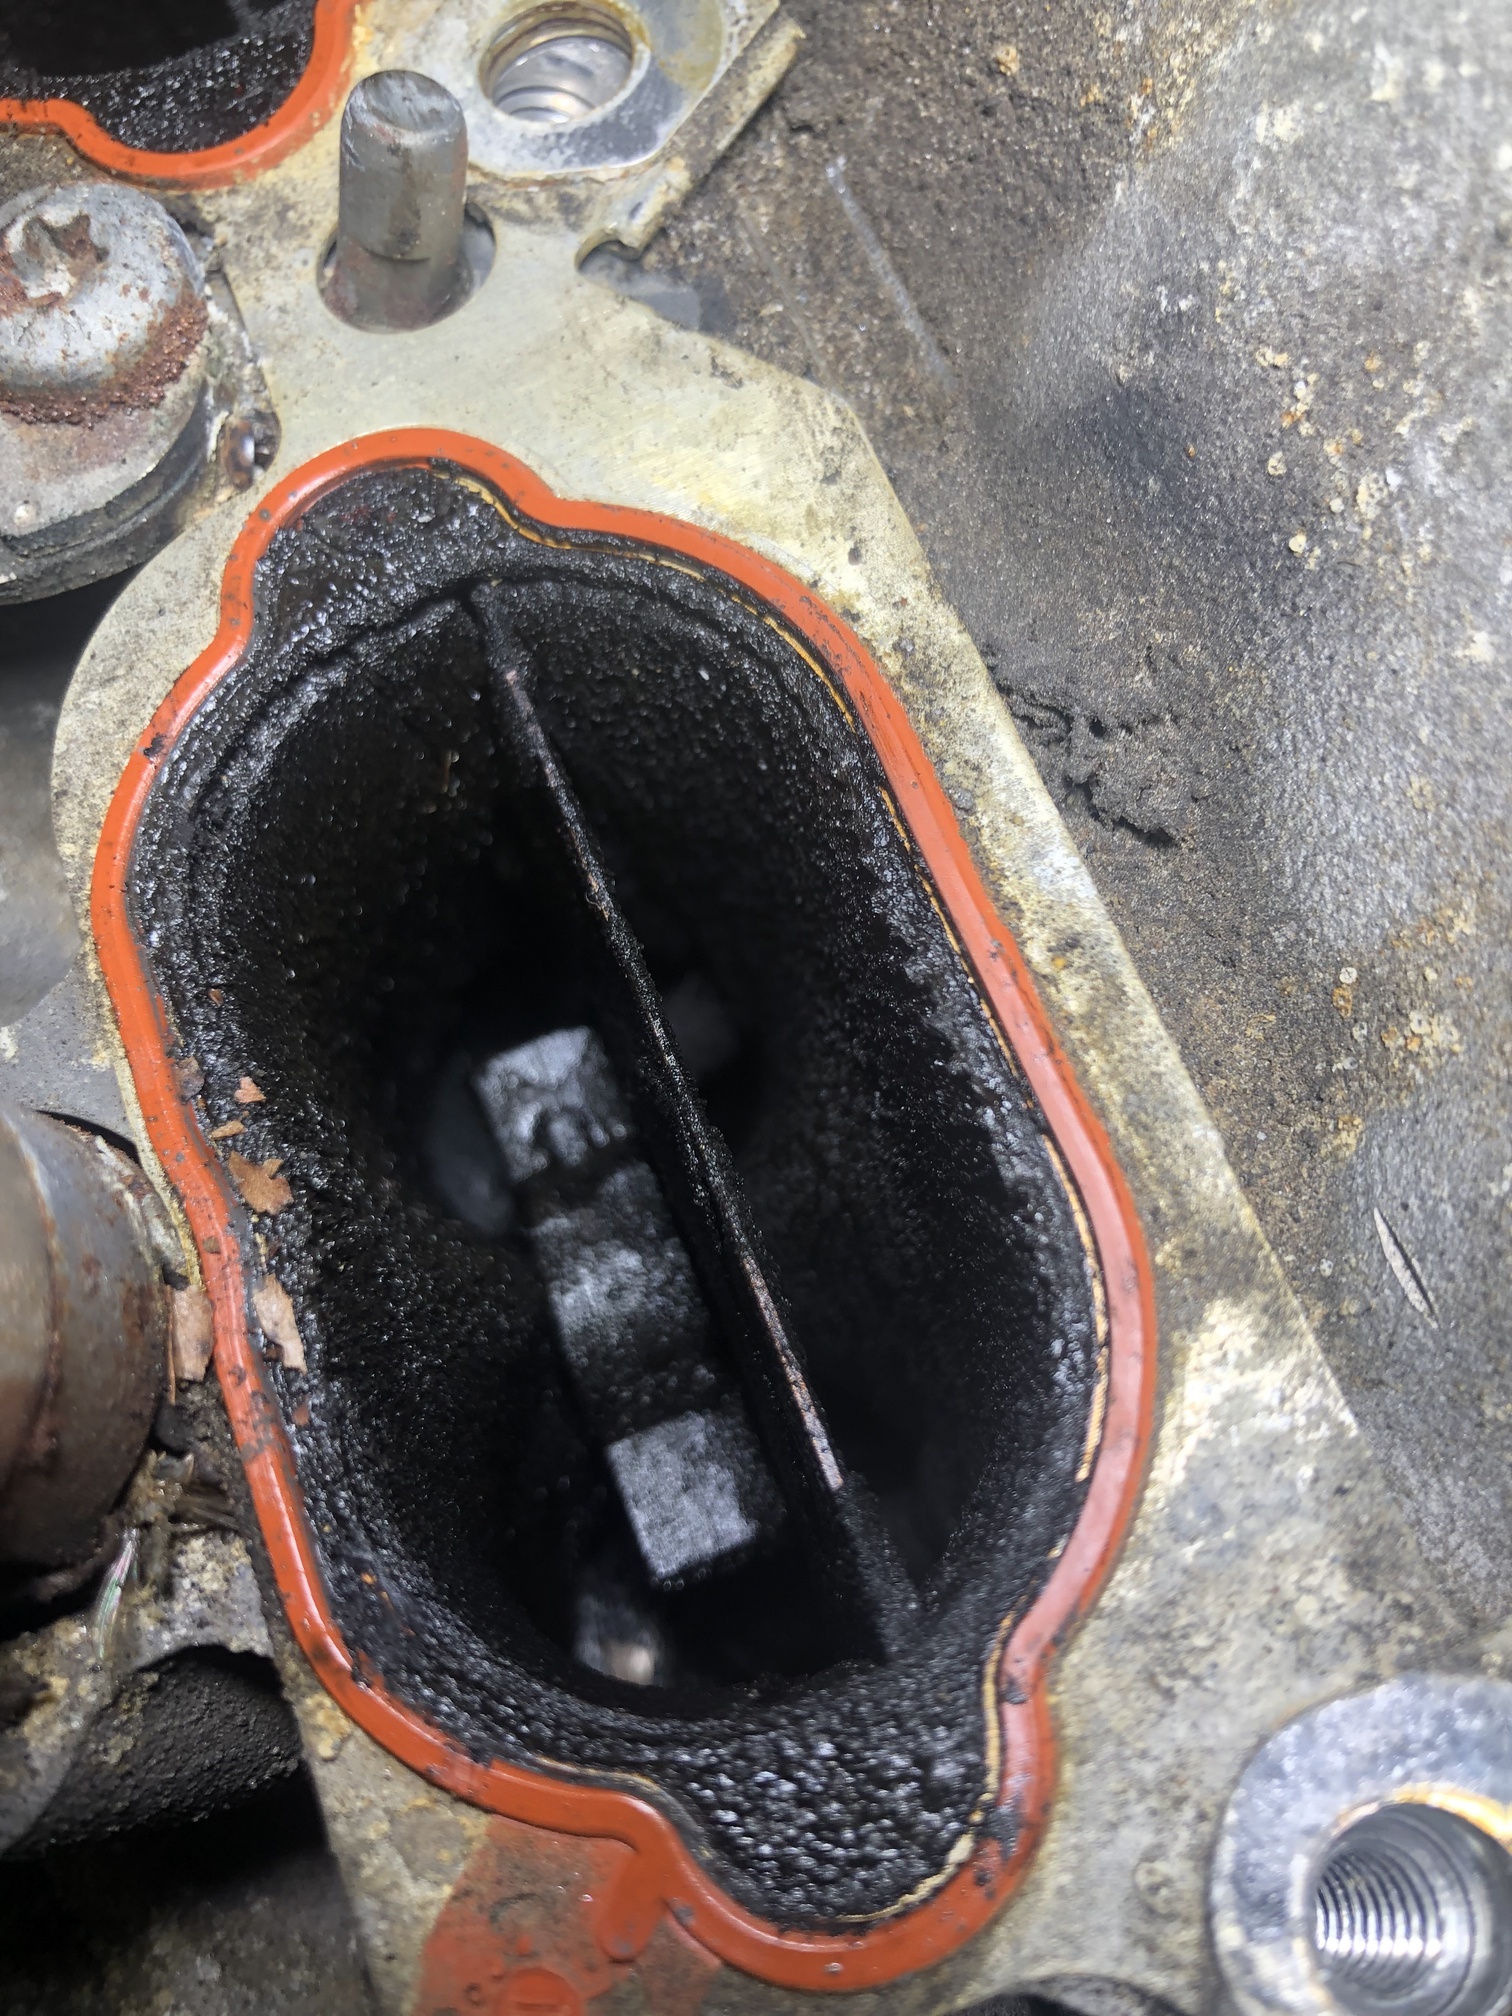
If my IM disintegrates again, could I be looking at a catastrophic engine failure where the broken part jams a valve open and bends the valve/destroys the piston?
Ed
I guess the answer is: yes that’s possible…
I am about done gathering information about the dividers, I will make a decision about them soon. Thanks for the feedback.
A minor update. The majority of the time has been spent cleaning. I am not sure what has been worse, cleaning the valves or cleaning the components going back on the car (valves probably win).
Sprockets & chains are back on. I acquired a knock off of the Audi tool to hold the sprocket as the initial torque was set (a bit of a contortion doing both the pre-load and torquing myself) The covers are also back on (both upper and lower). I had premarked the sprockets with paint (that is pretty important) so that they would be oriented the same way they came off. For the lower, I shaved down the one alignment pin as Bentley says, but I used a few old bolts to draw the cover in so I could get the 6 bolts that go through the upper covers into the lower cover. Other than that it has been by the book. You need one of those low profile ratchets there and comparative wrist torquing since only 1 bolt was accessible with the torque wrench.
For anyone interested, it takes about 1 tube of the sealant to do the cam girdles & all 3 timing chain covers. Applying that stuff was also difficult. They need to make the ears of the tube wider so you can get a better grip, but I got it done, and it seems on correctly, before it skinned up too much.
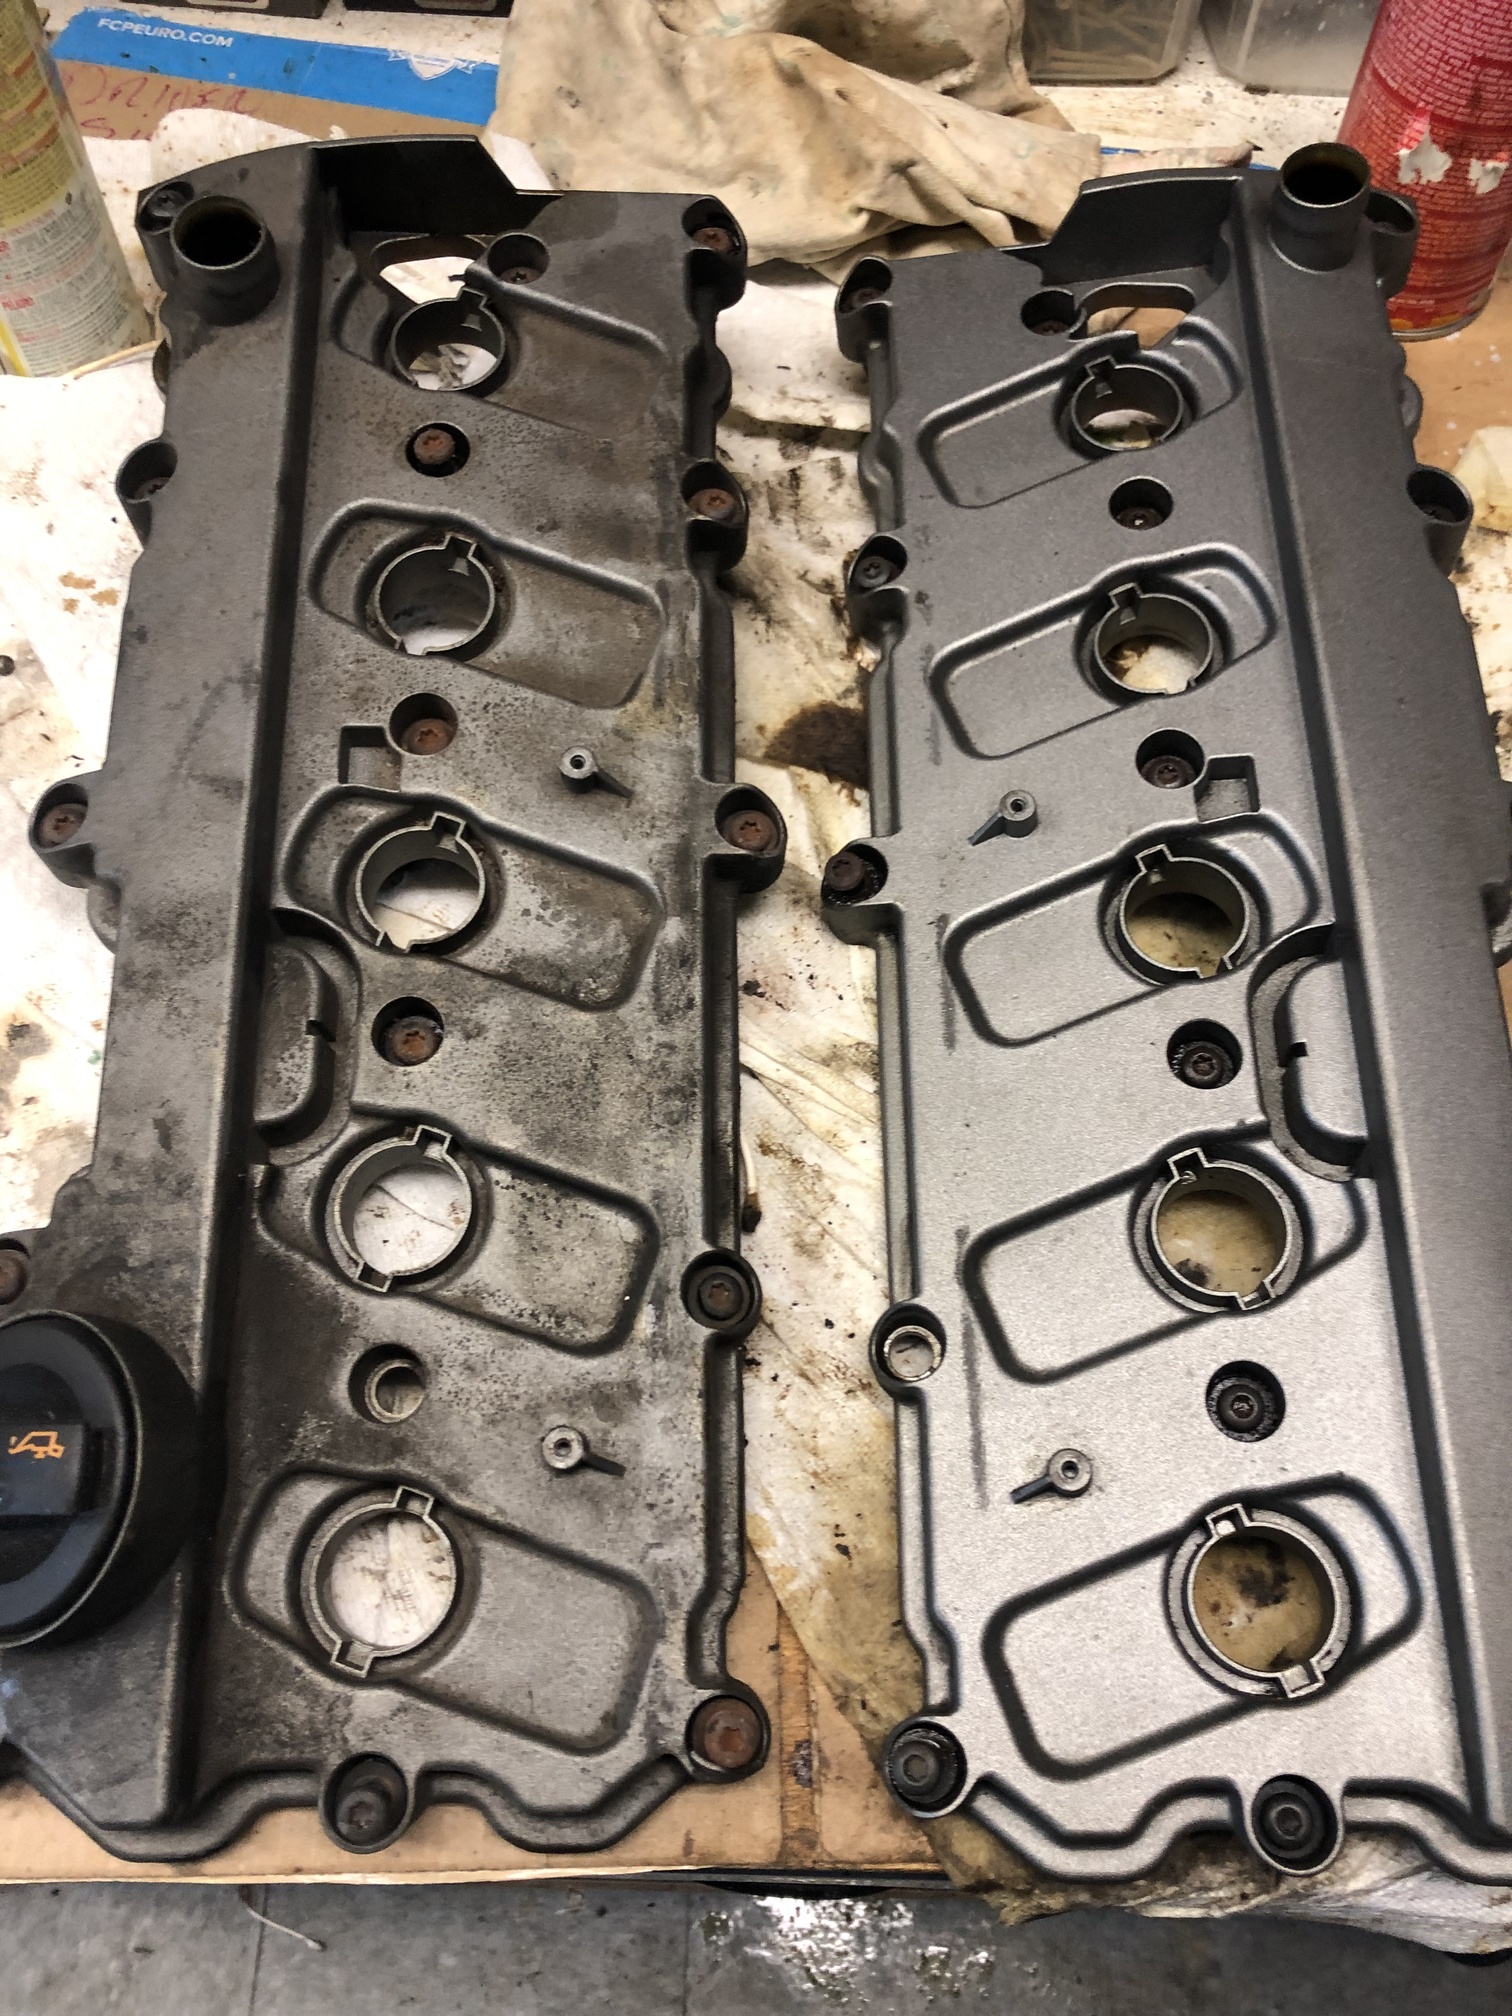
The valve covers were also cleaned up. I was confused by a mention in the Bentley about if the gasket was damaged, get new bolts. However upon cleaning I found out why. Each bolt has it’s own freaking O ring. I “think” they are OK, but since they are accessible, if any leaks, I can replace it without too much grief.
Tomorrow I’ll make one last (hopefully) trip to Audi to get the rest of the parts. They somehow found a aux water pump in New Orleans and got it to me. There is one hose (the water pump return hose) that is another week out, but if I don’t get it before I am done I will deal with that later.
Once I am back, valve covers will go on. I will have another look at the valves and send a scope down the spark holes to see how the cylinders look, and if they are good start getting the IM on. We’ll see how far I can get.
Parts table and parts going back on tables are starting to get cleared out, so that is a good sign.
Ed
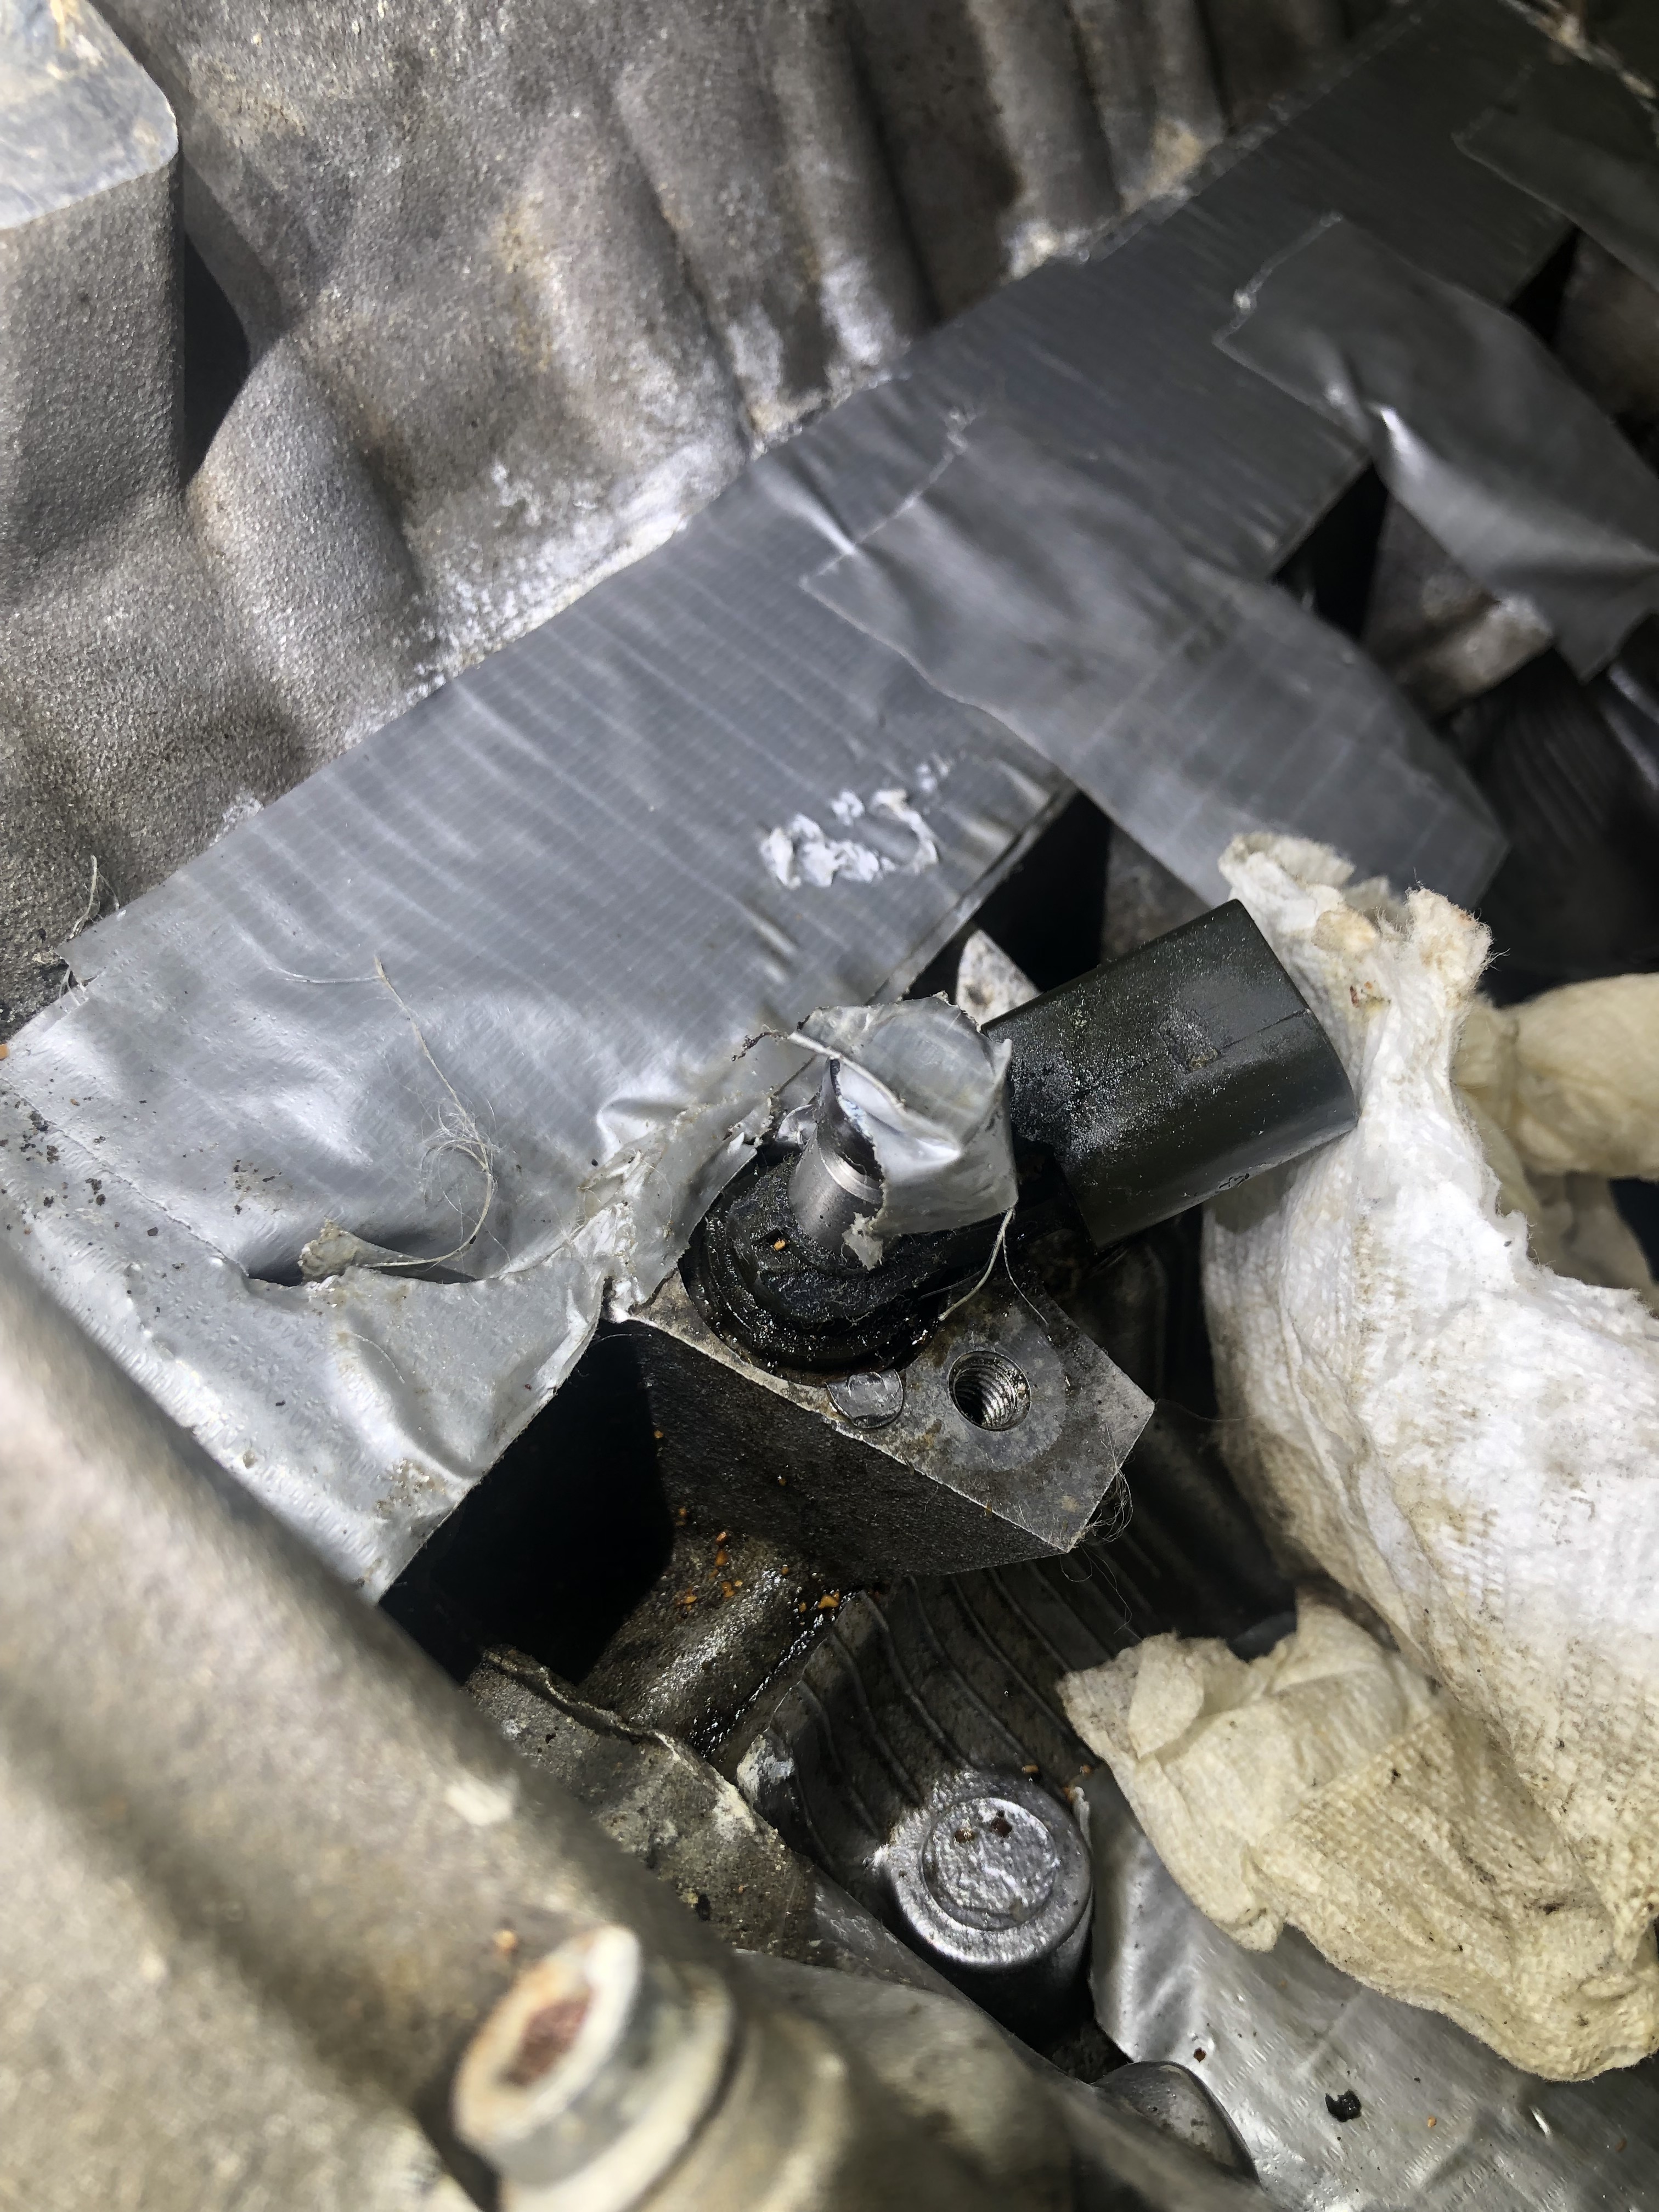
I should have gone after the injectors earlier, but I was worried about getting debris in the cylinders. So (if you have read the other post you already know this) I had trouble pulling 3 of the injectors. The first problem was the first injector, and a creaking noise I thought was the injector walking itself out was the plastic groove and body cracking. As soon as I saw that I stopped and moved to other injectors. I had sprayed all of them with PB blaster, and most of the other injectors came out with only mild resistance. Cylinder 10 and 6 were another story. Since I was already more attune to the behavior of the injectors being pulled using the special tool (a knock off set that had everything I needed) #10 being a problem was a surprise. While #6 was stubborn (so I backed off trying to get that one out) #10 just disintegrated as I was applying nominal effort:
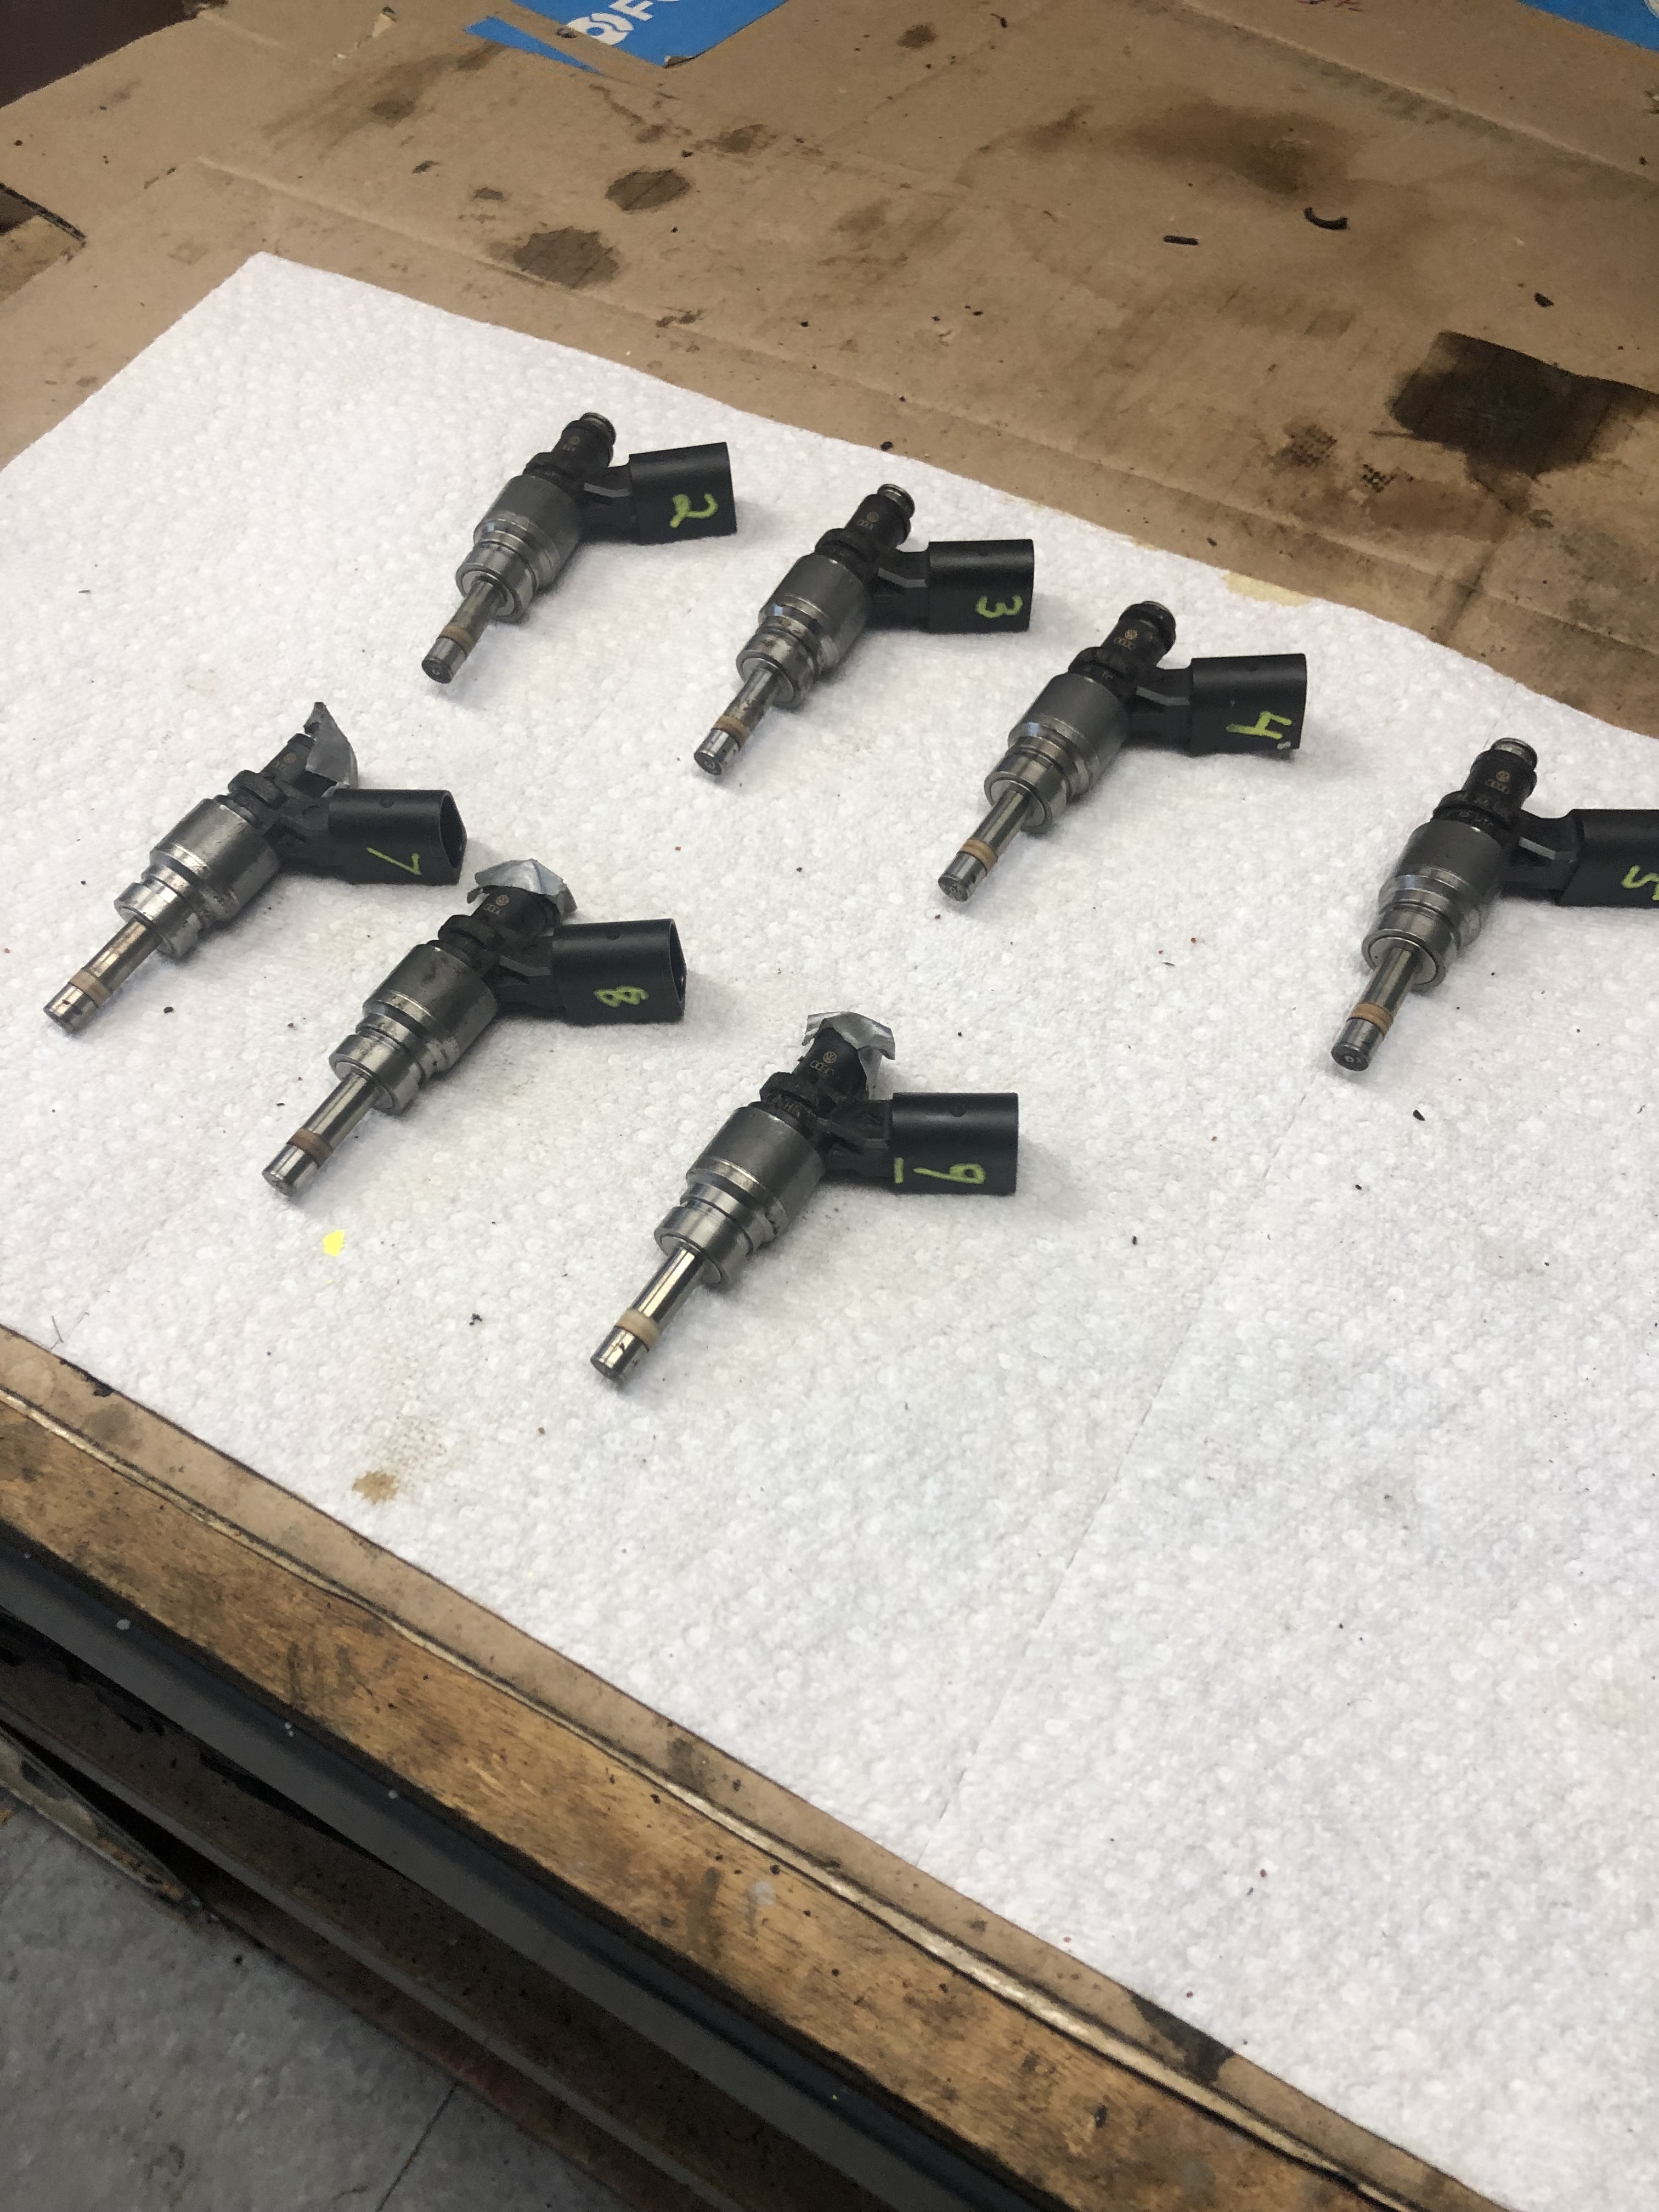
The other 7 exited without much fuss:
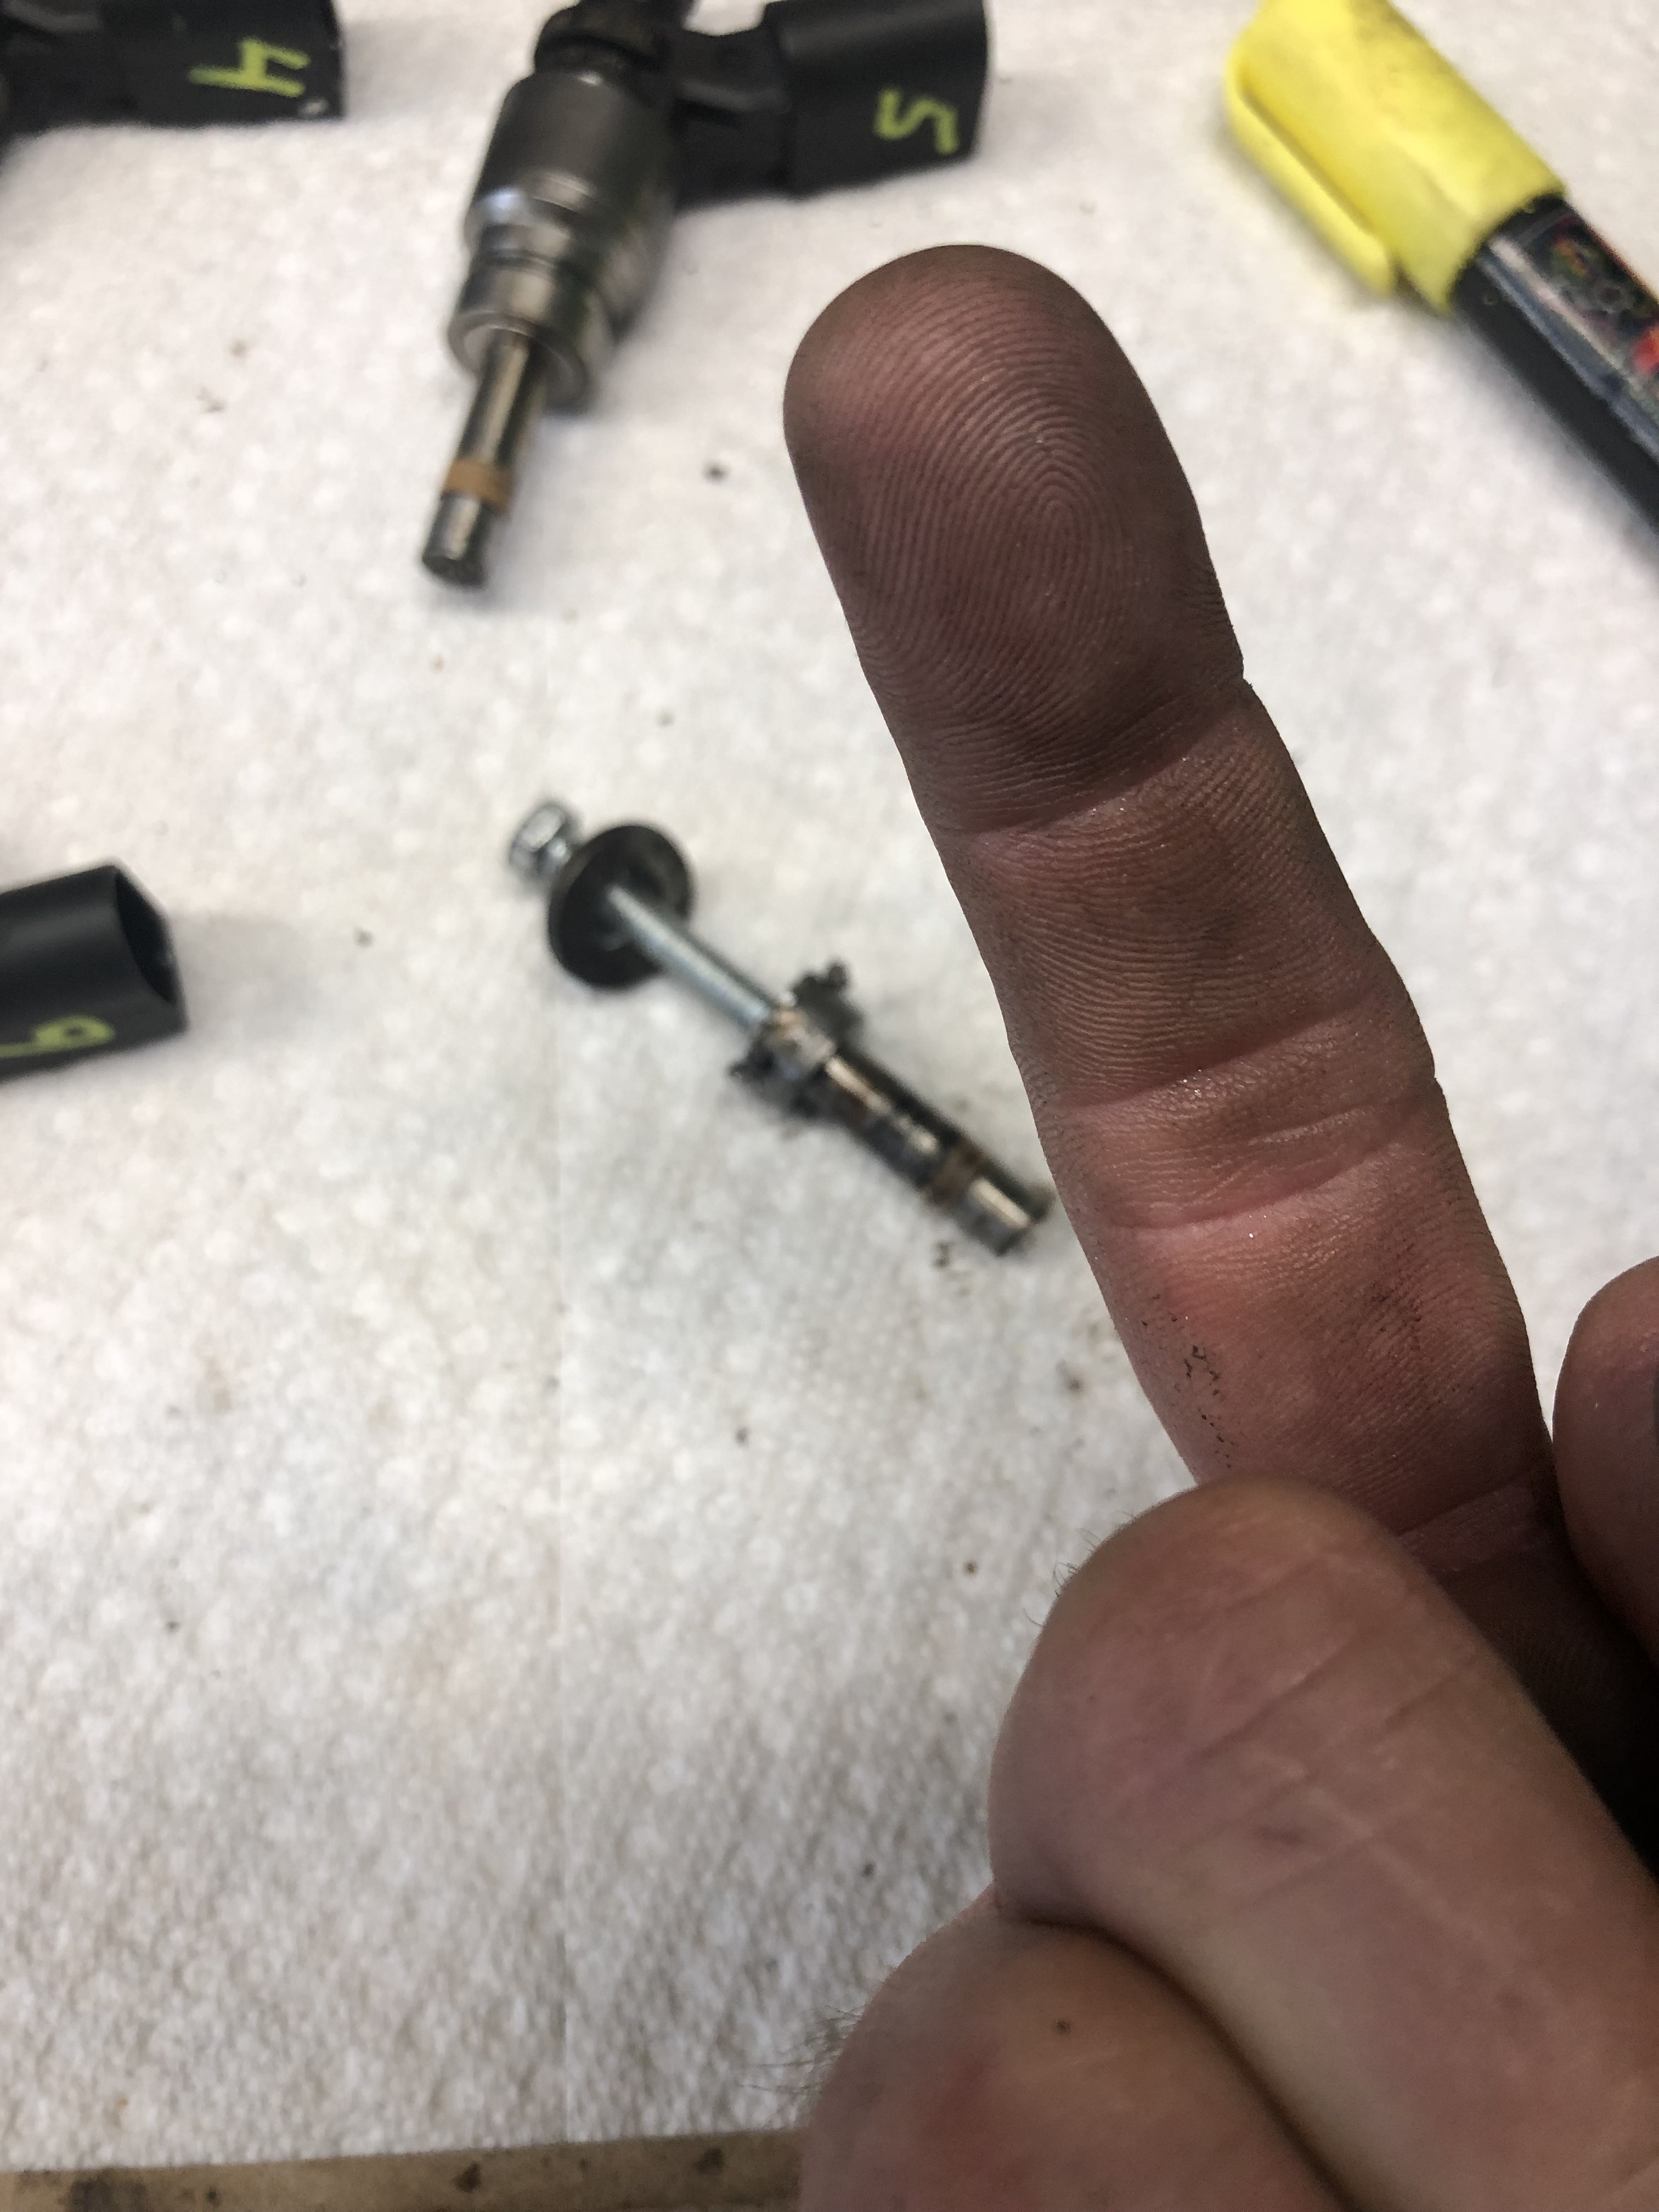
Cyl # 6 finally came out, intact. #10 came out with the aid of vise grips and some leverage, but when I used the same technique on #1, what I thought was movement, was the top half of the injector separating from the bottom, leaving me with this inside the head:

With some advice and moral support from Eng, I was able to drill (several steps up in drill bit thickness required due to the hardness of the injector) then accidentally pry up the round piece you see with the holes in it (that thing just spins if you try and tap through it). That allowed me to carefully tap (I did not want to further complicate things by having a broken tap stuck in there), insert a bolt and with the aid of some washers, use of the impact puller, then the screw puller the F’in thing came out:
I was quite relieved that I did not have to undo almost everything I had already done (it would have required removing the valve covers, the chain covers, the cam sprockets, the cam girdle and then I could pull the F’in head) to push the injector out from the cylinder chamber side. That would also have incurred the costs of all the one time bolts, and re-RTV’ing stuff. I just didn’t want to go there.
After recovering from the psychological beating I took over that, I started to check on the few other items I was missing. I managed to make that trip to Audi, only to find they were still missing an important hose (which should be there tomorrow).
I did get some items I ordered from Amazon (injector testor & seafoam) to help me clean the injectors in my ultrasonic cleaner, and a fellow forum member had retained his injectors that he had replaced and graciously sold me his used ones (they should be here sometime this week) to replace the 2 I trashed. Hopefully the gear I have will help me make sure whichever 2 I pick work. Worst case, I pull the IM off while the engine is in the car and deal with it. Whatever happens it is MUCH better than pulling the frikkin’ head.
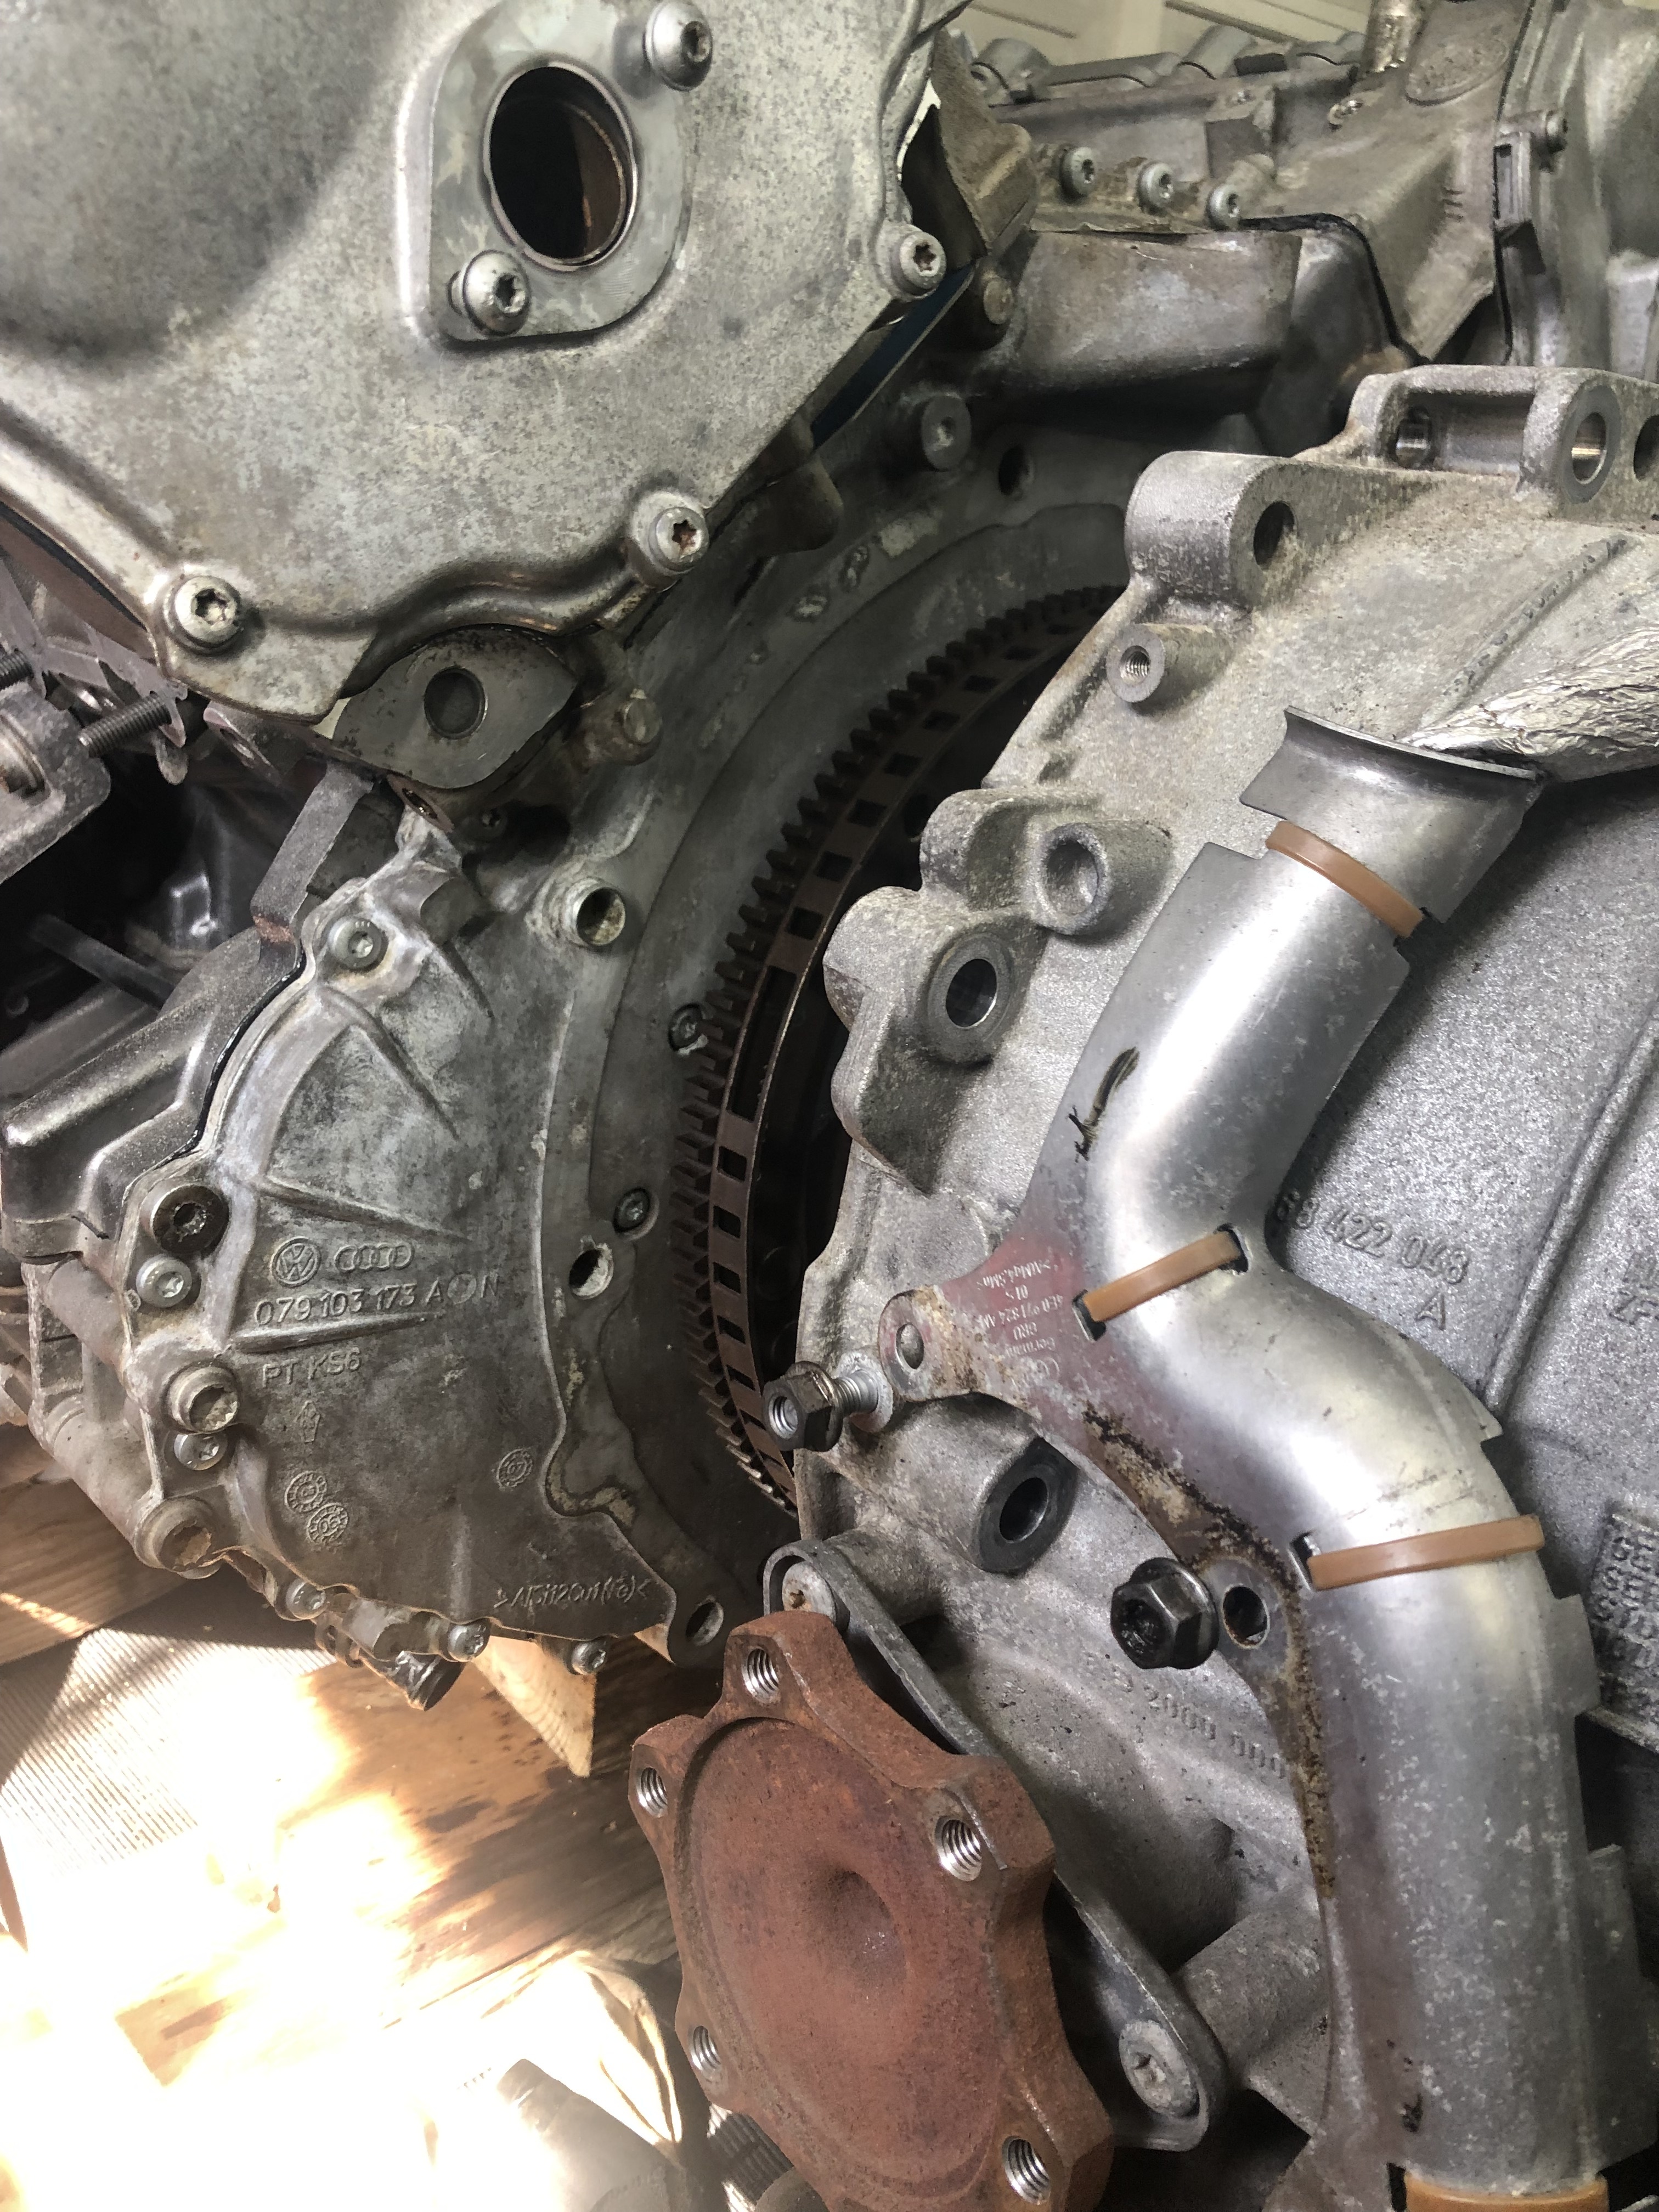
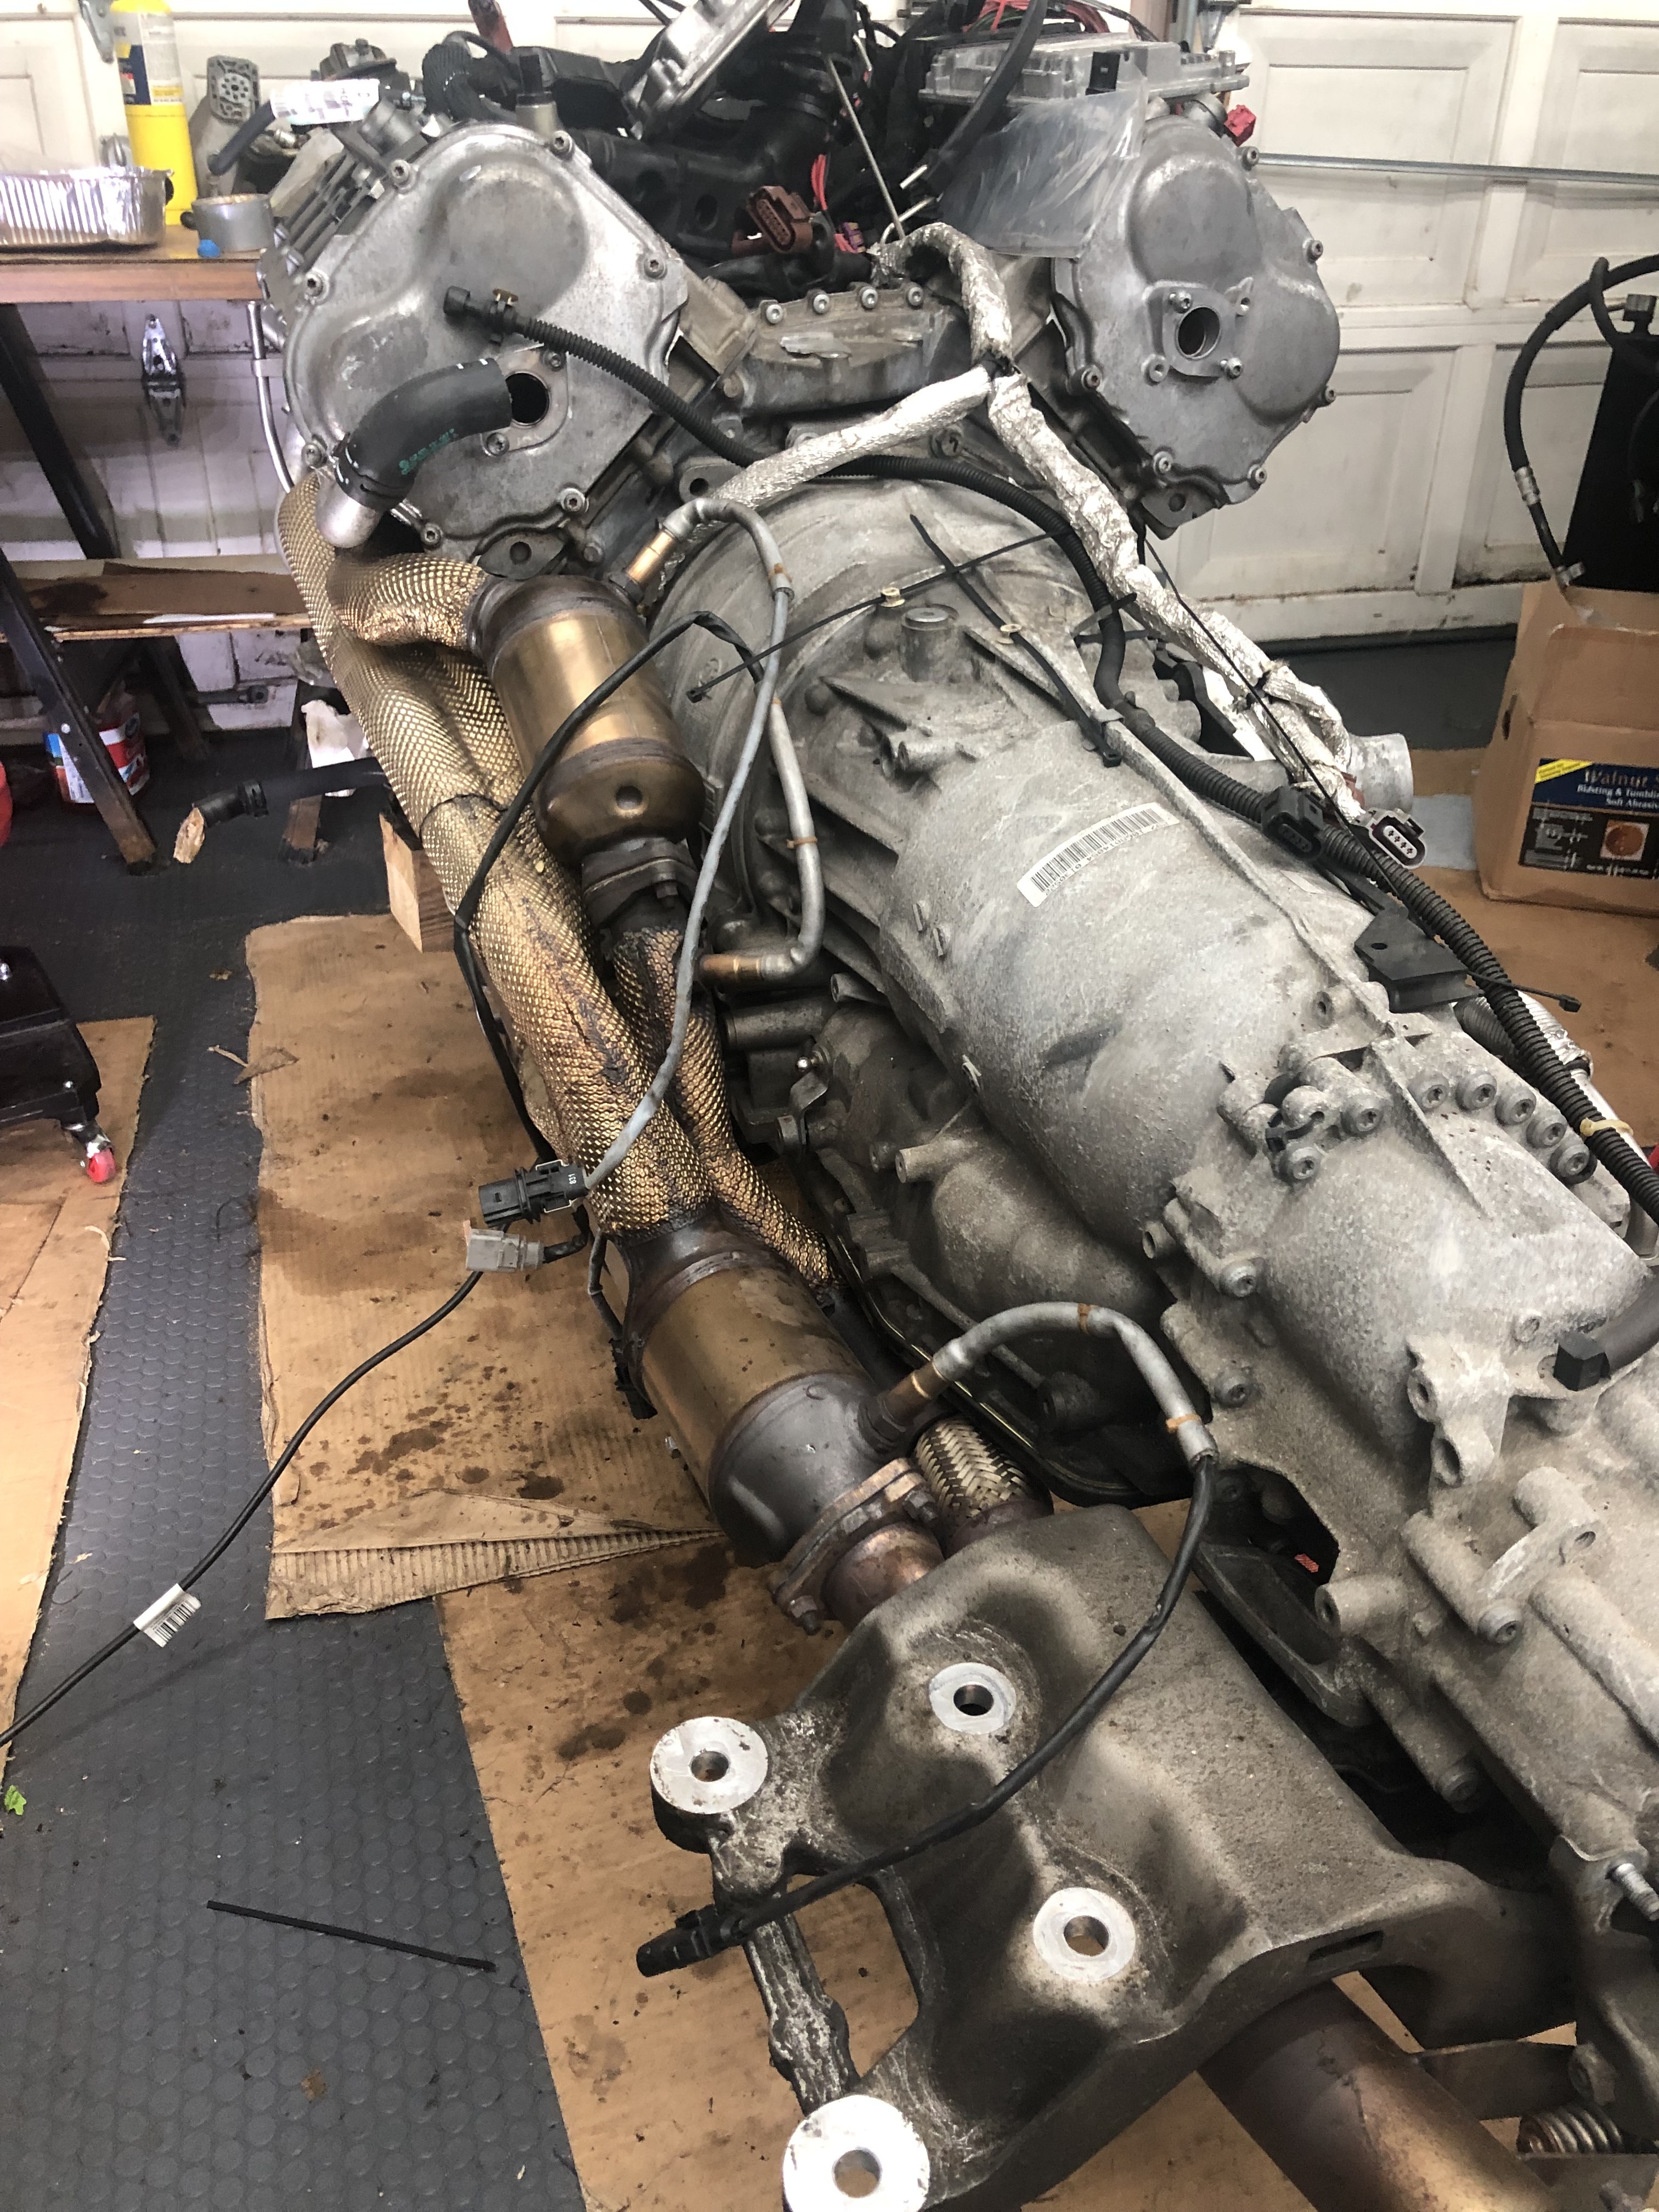
Anyway, one of the items I was waiting on was the RMS special tool. I had read about using a liter Sprite bottle and saw some guys who just pushed them on, but there was no way I was going to take a chance on that thing leaking, and for $125 it was worth every penny to make sure there were no issues. The seal set perfectly and I was able to re-attach the drive plate and start moving the transmission back into place. It is very helpful to have a transmission jack to do this. There are adjustments on the jack that help with the angles involved, and it was fairly straightforward to align the engine and transmission before pulling it together:
I had numbered the bolts before removing them to make re-assembly easier, and between moving the transmission jack and wheeling the engine on the platform jack, pulling the transmission in was no big deal. I did not worry about the torque converter holes lining up since I knew I could rotate the engine and stop the torque converter from rotating to get everything lined up later.
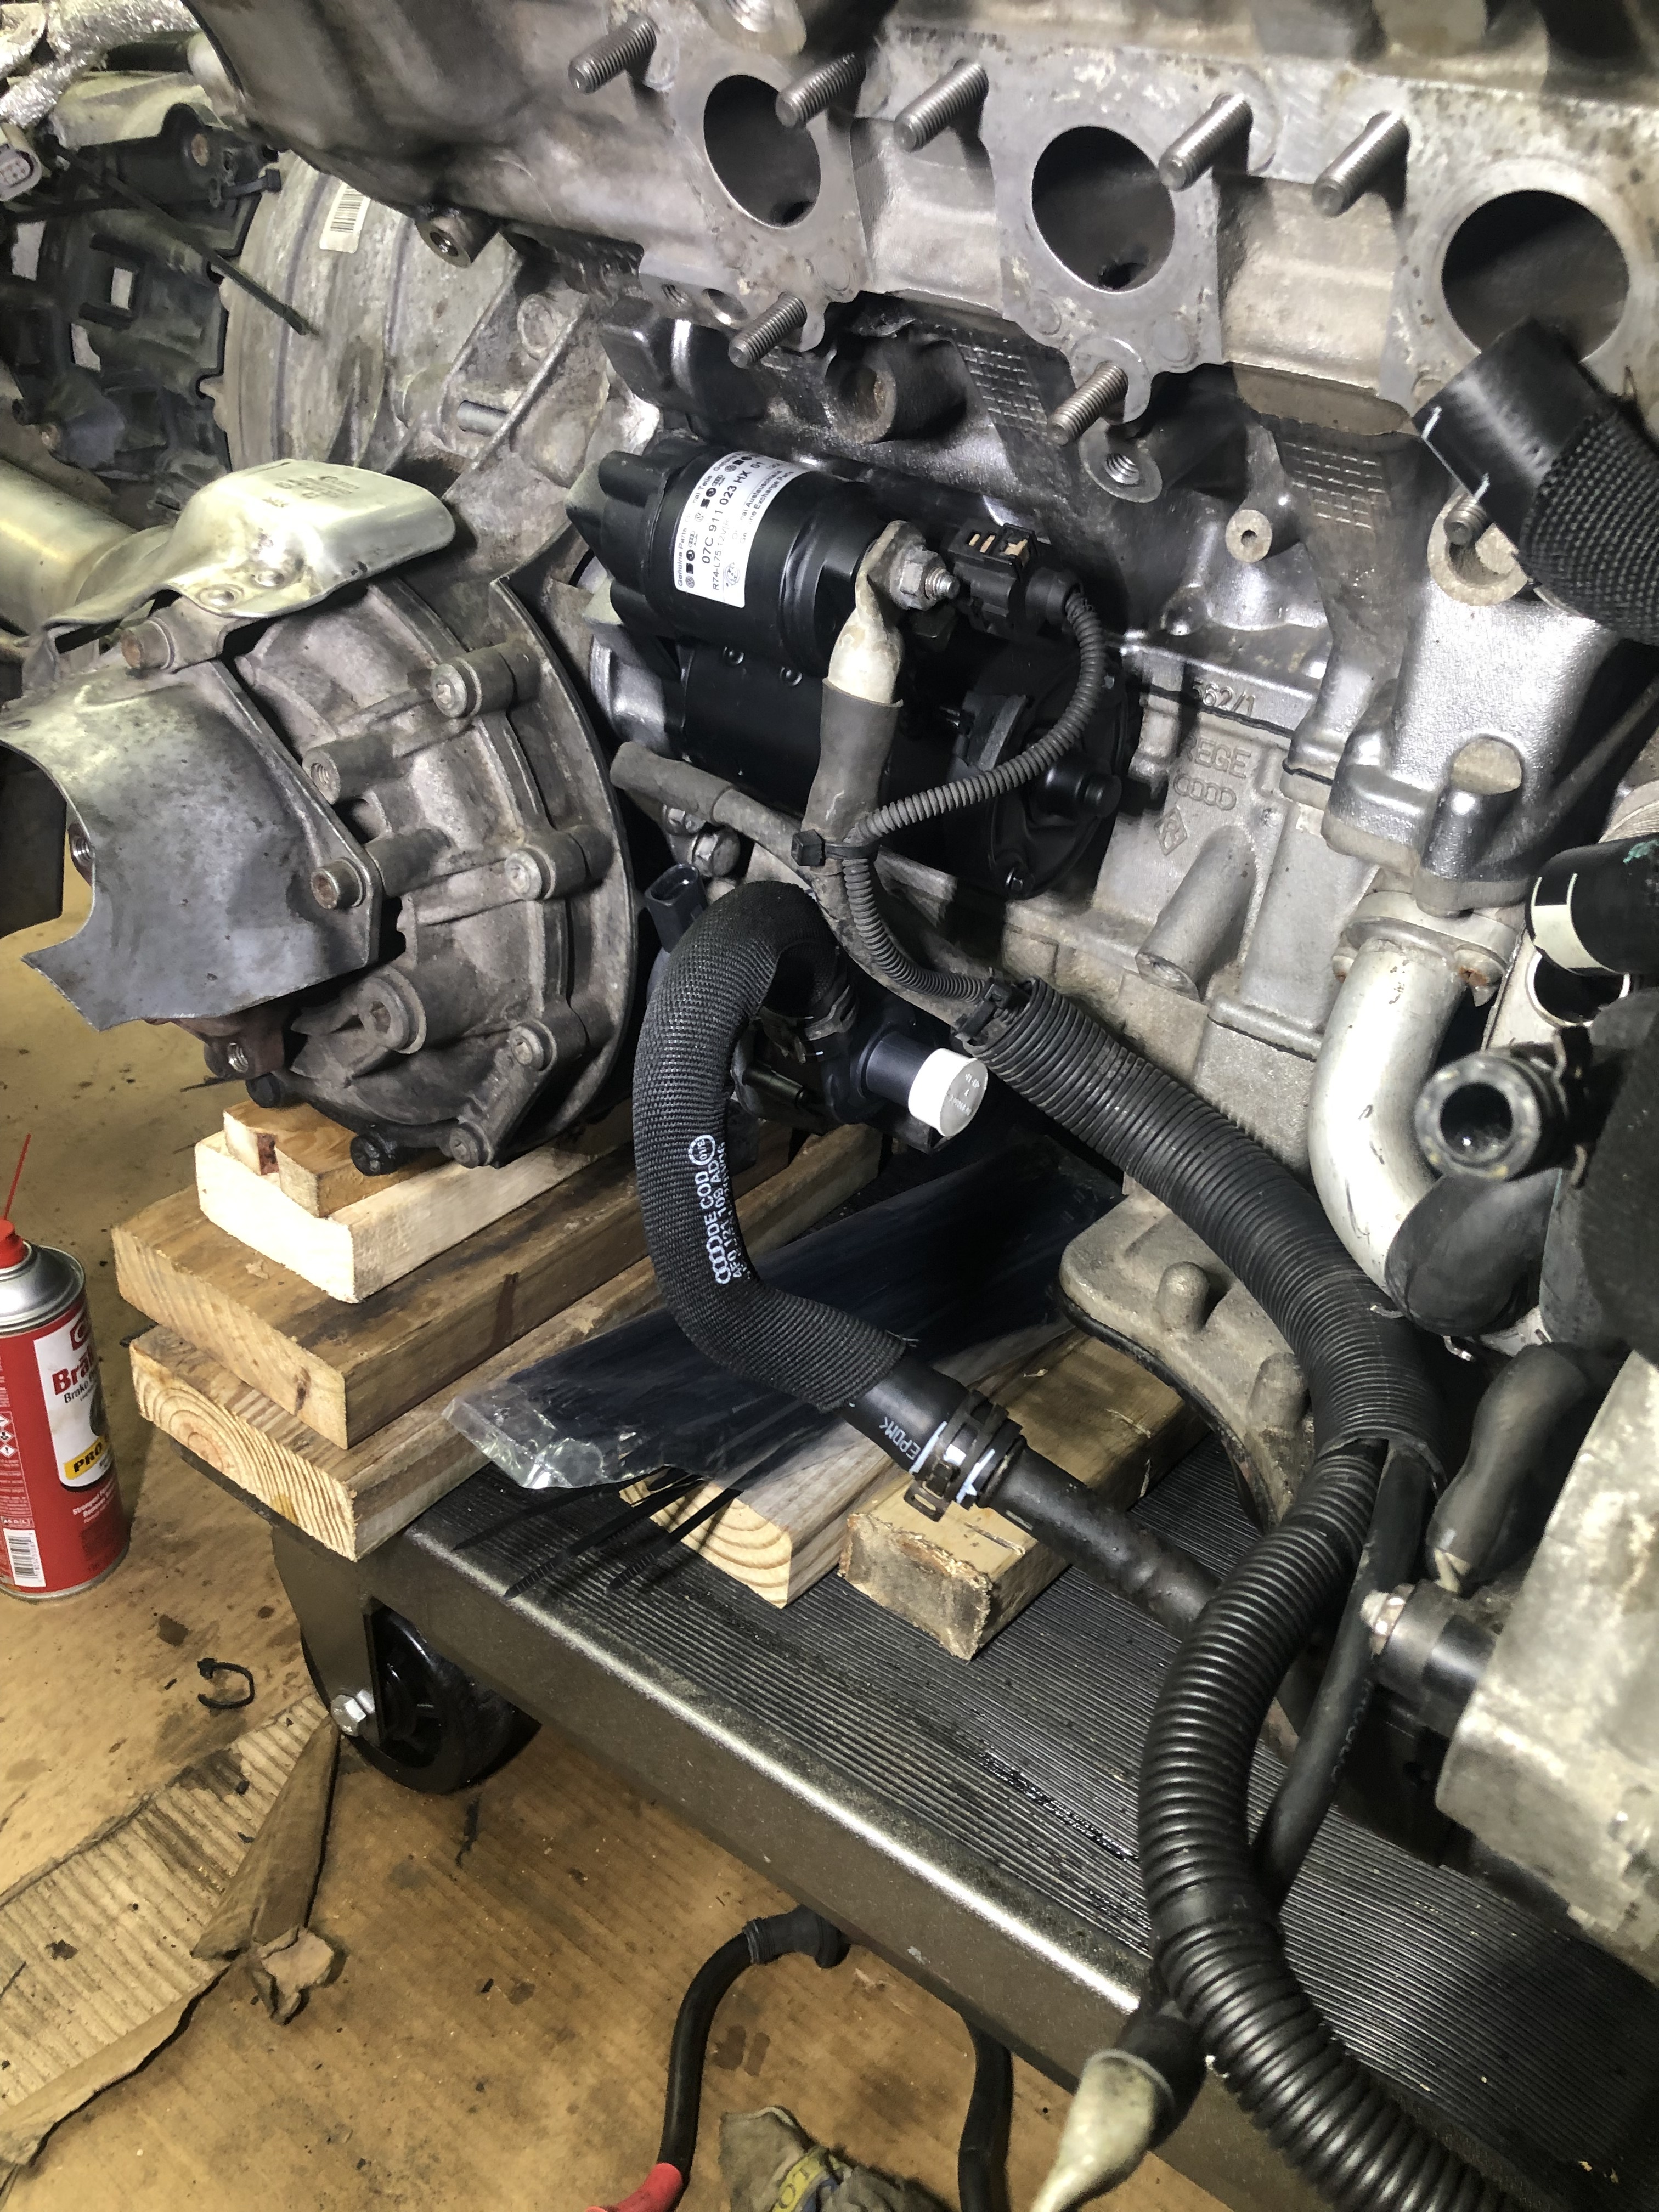
After they were all bolted up, and the support blocks re-positioned under the transmission, I was able to get the reman’d starter in and part of the cooling hoses/aux pump:
Since I did not have the one hose piece I needed to get he passenger exhaust on, I finagled the driver exhaust on (took some time to figure out how to support the pipe portion in a way that let me get the headers onto the new exhaust studs) and reinstalled the coolant pipe (along with some new rubber) and the dipstick tube:
Hopefully the hose is at Audi tomorrow so the other exhaust will be on. Then I will turn my attention to the cleaning the injectors. I also have 8 new O2 sensors to go on, I decided to do all 8 together rather than 4 and 4.
Oh, while re-assembling things, I came across this piece:
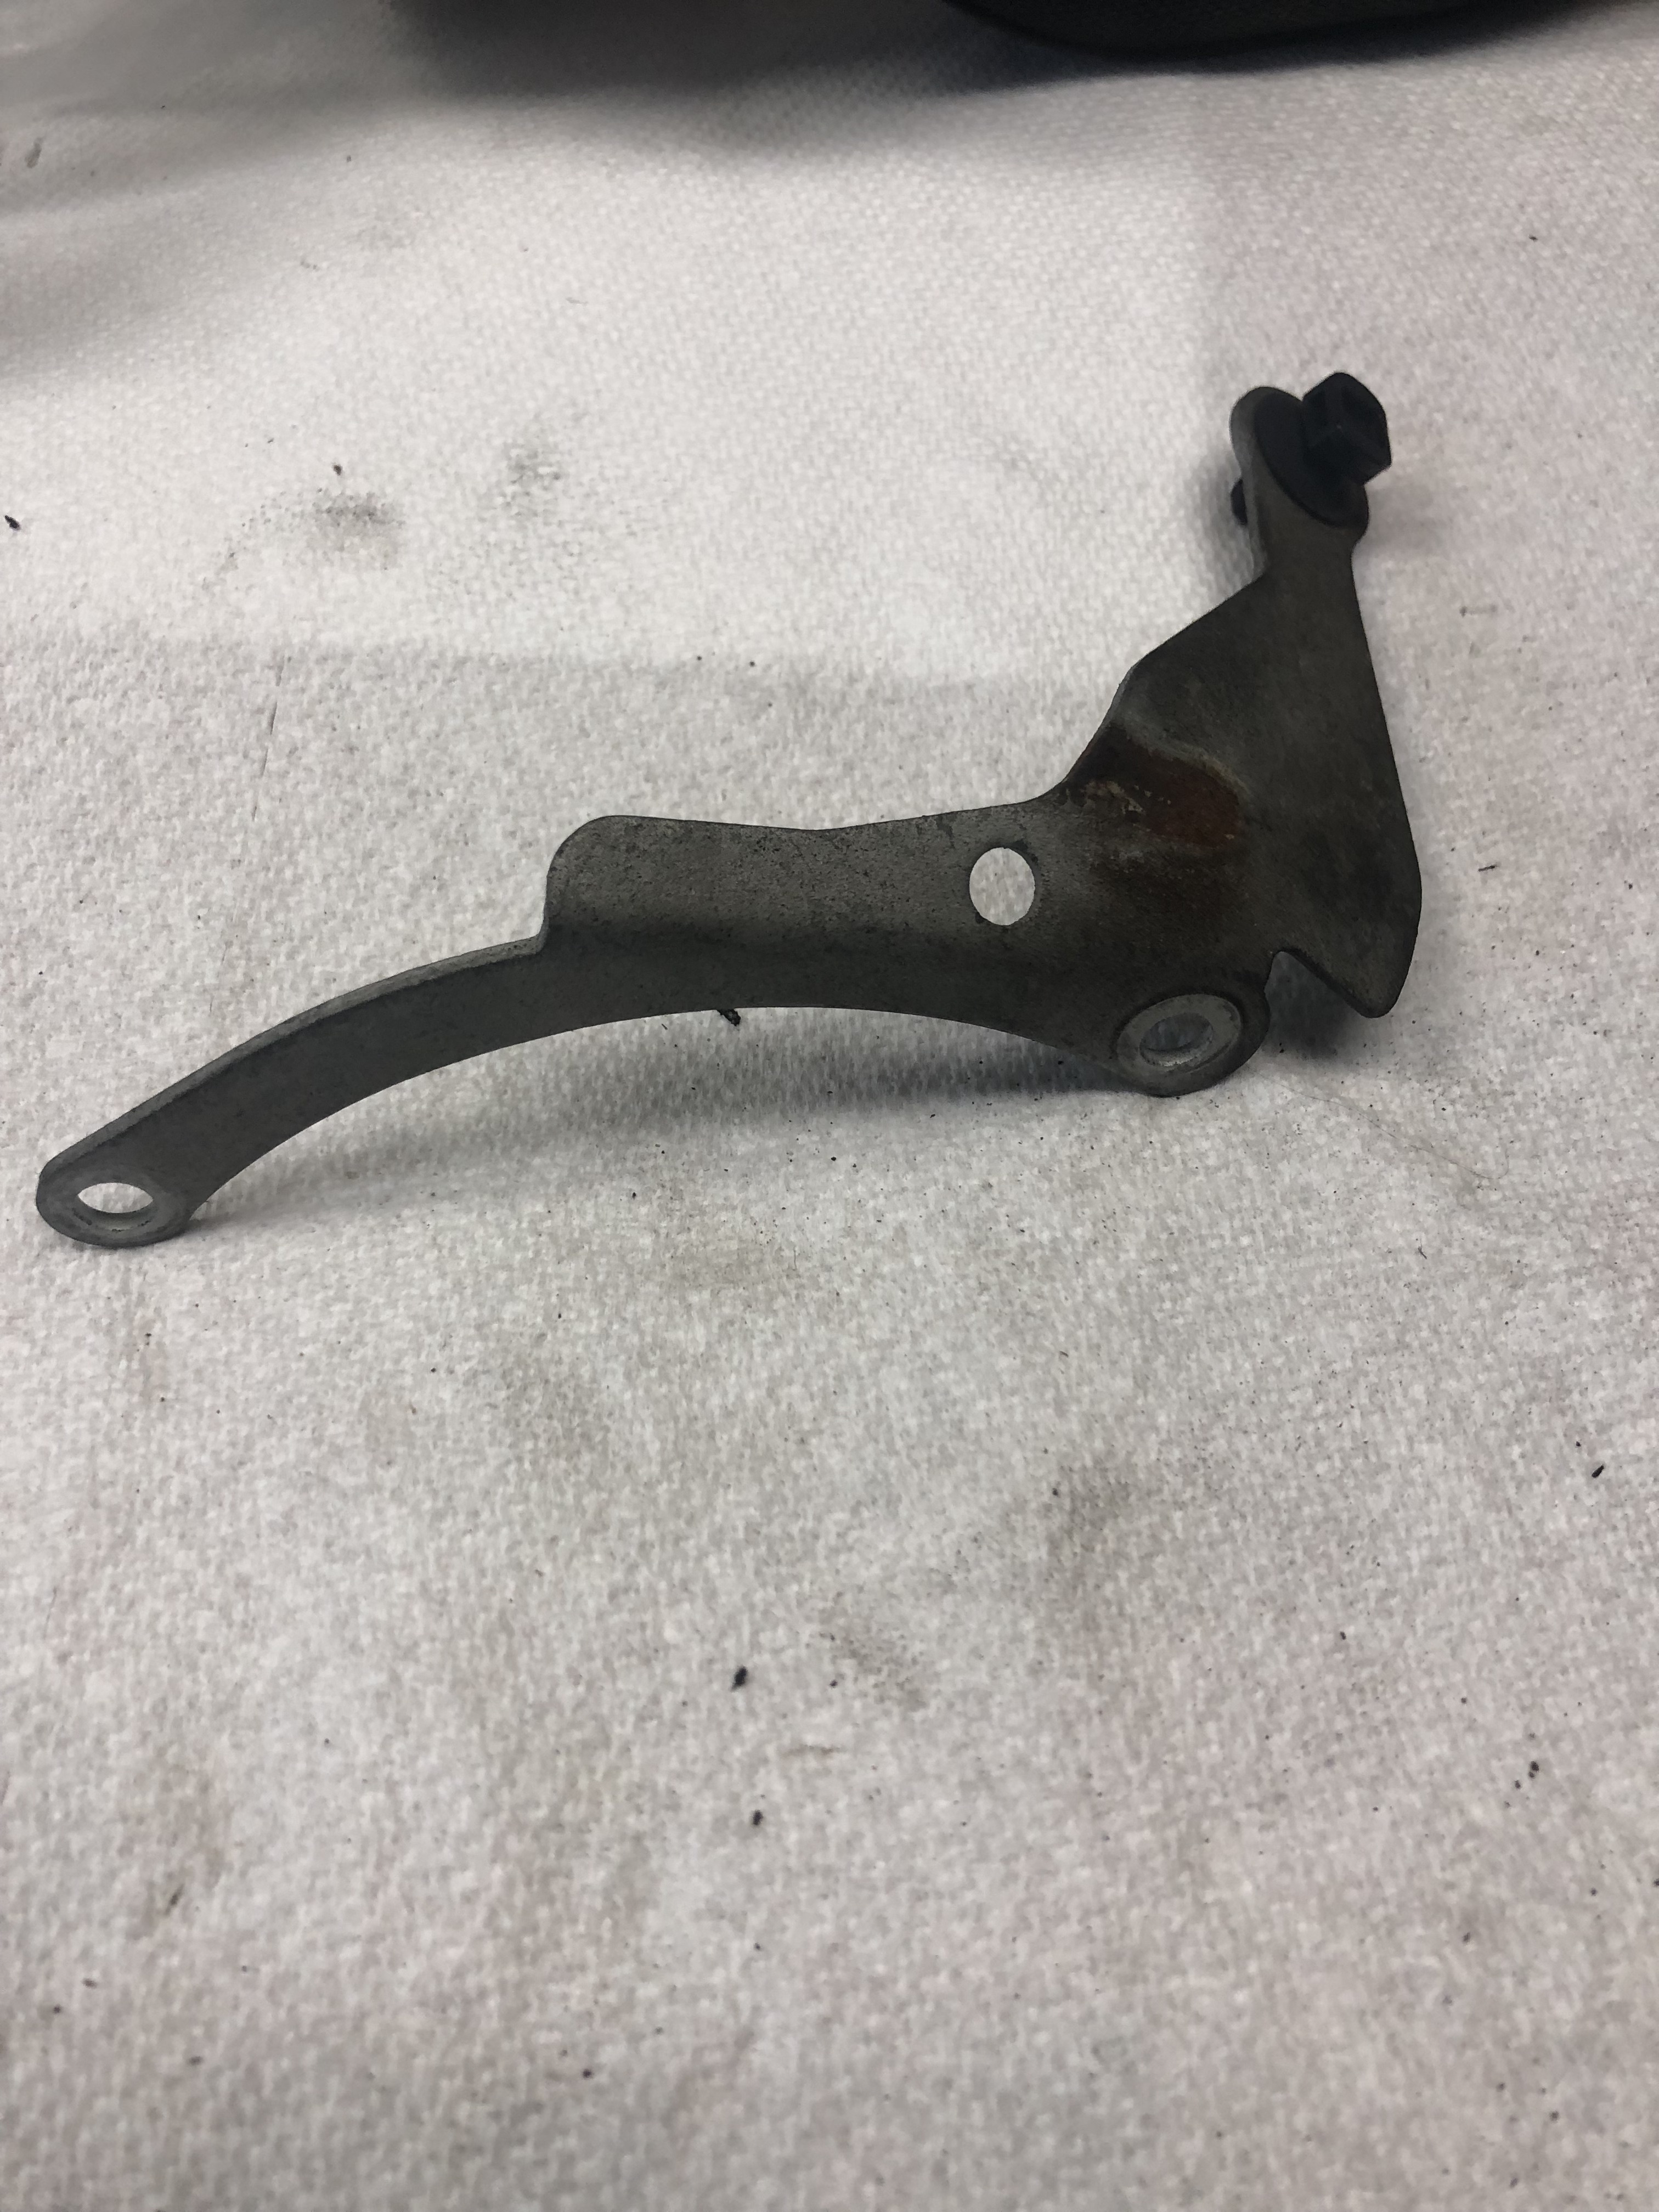
I was perplexed, because unlike almost everything else, I had not labeled or ID’d this thing. I think it is the extraneous bracket on the passenger cam chain cover that makes pulling that side’s valve cover a PITA, and that it supports nothing, so unless someone tells me I am wrong, it will remain off.
That’s all for now. The injector saga was a close call, but I am nothing if not tenacious.
Ed
Superb effort Ed. Great to see the progress. I had also asked the same question about that pass bracket F*%$ that thing.
If I remember correctly, people have bent that thing up and away.
If when you first got to it there was no wire tie binding anything to it, then my memory is correct. So in your case, you may not have to remove it to accomplish what you want.
For me, unless someone else speaks up, it ain’t going back on.
Ed
Got lucky again, and collected everything Audi owed me. Passenger side exhaust is back on, coolant pipes re-attached and new rubber pieces replaced (as well as a new coolant sensor). Most of the new hoses are back on, including the auxiliary pump, with the exception of the return line to the water pump. The pictures I had taken have been a great help orienting myself on re-assembly.
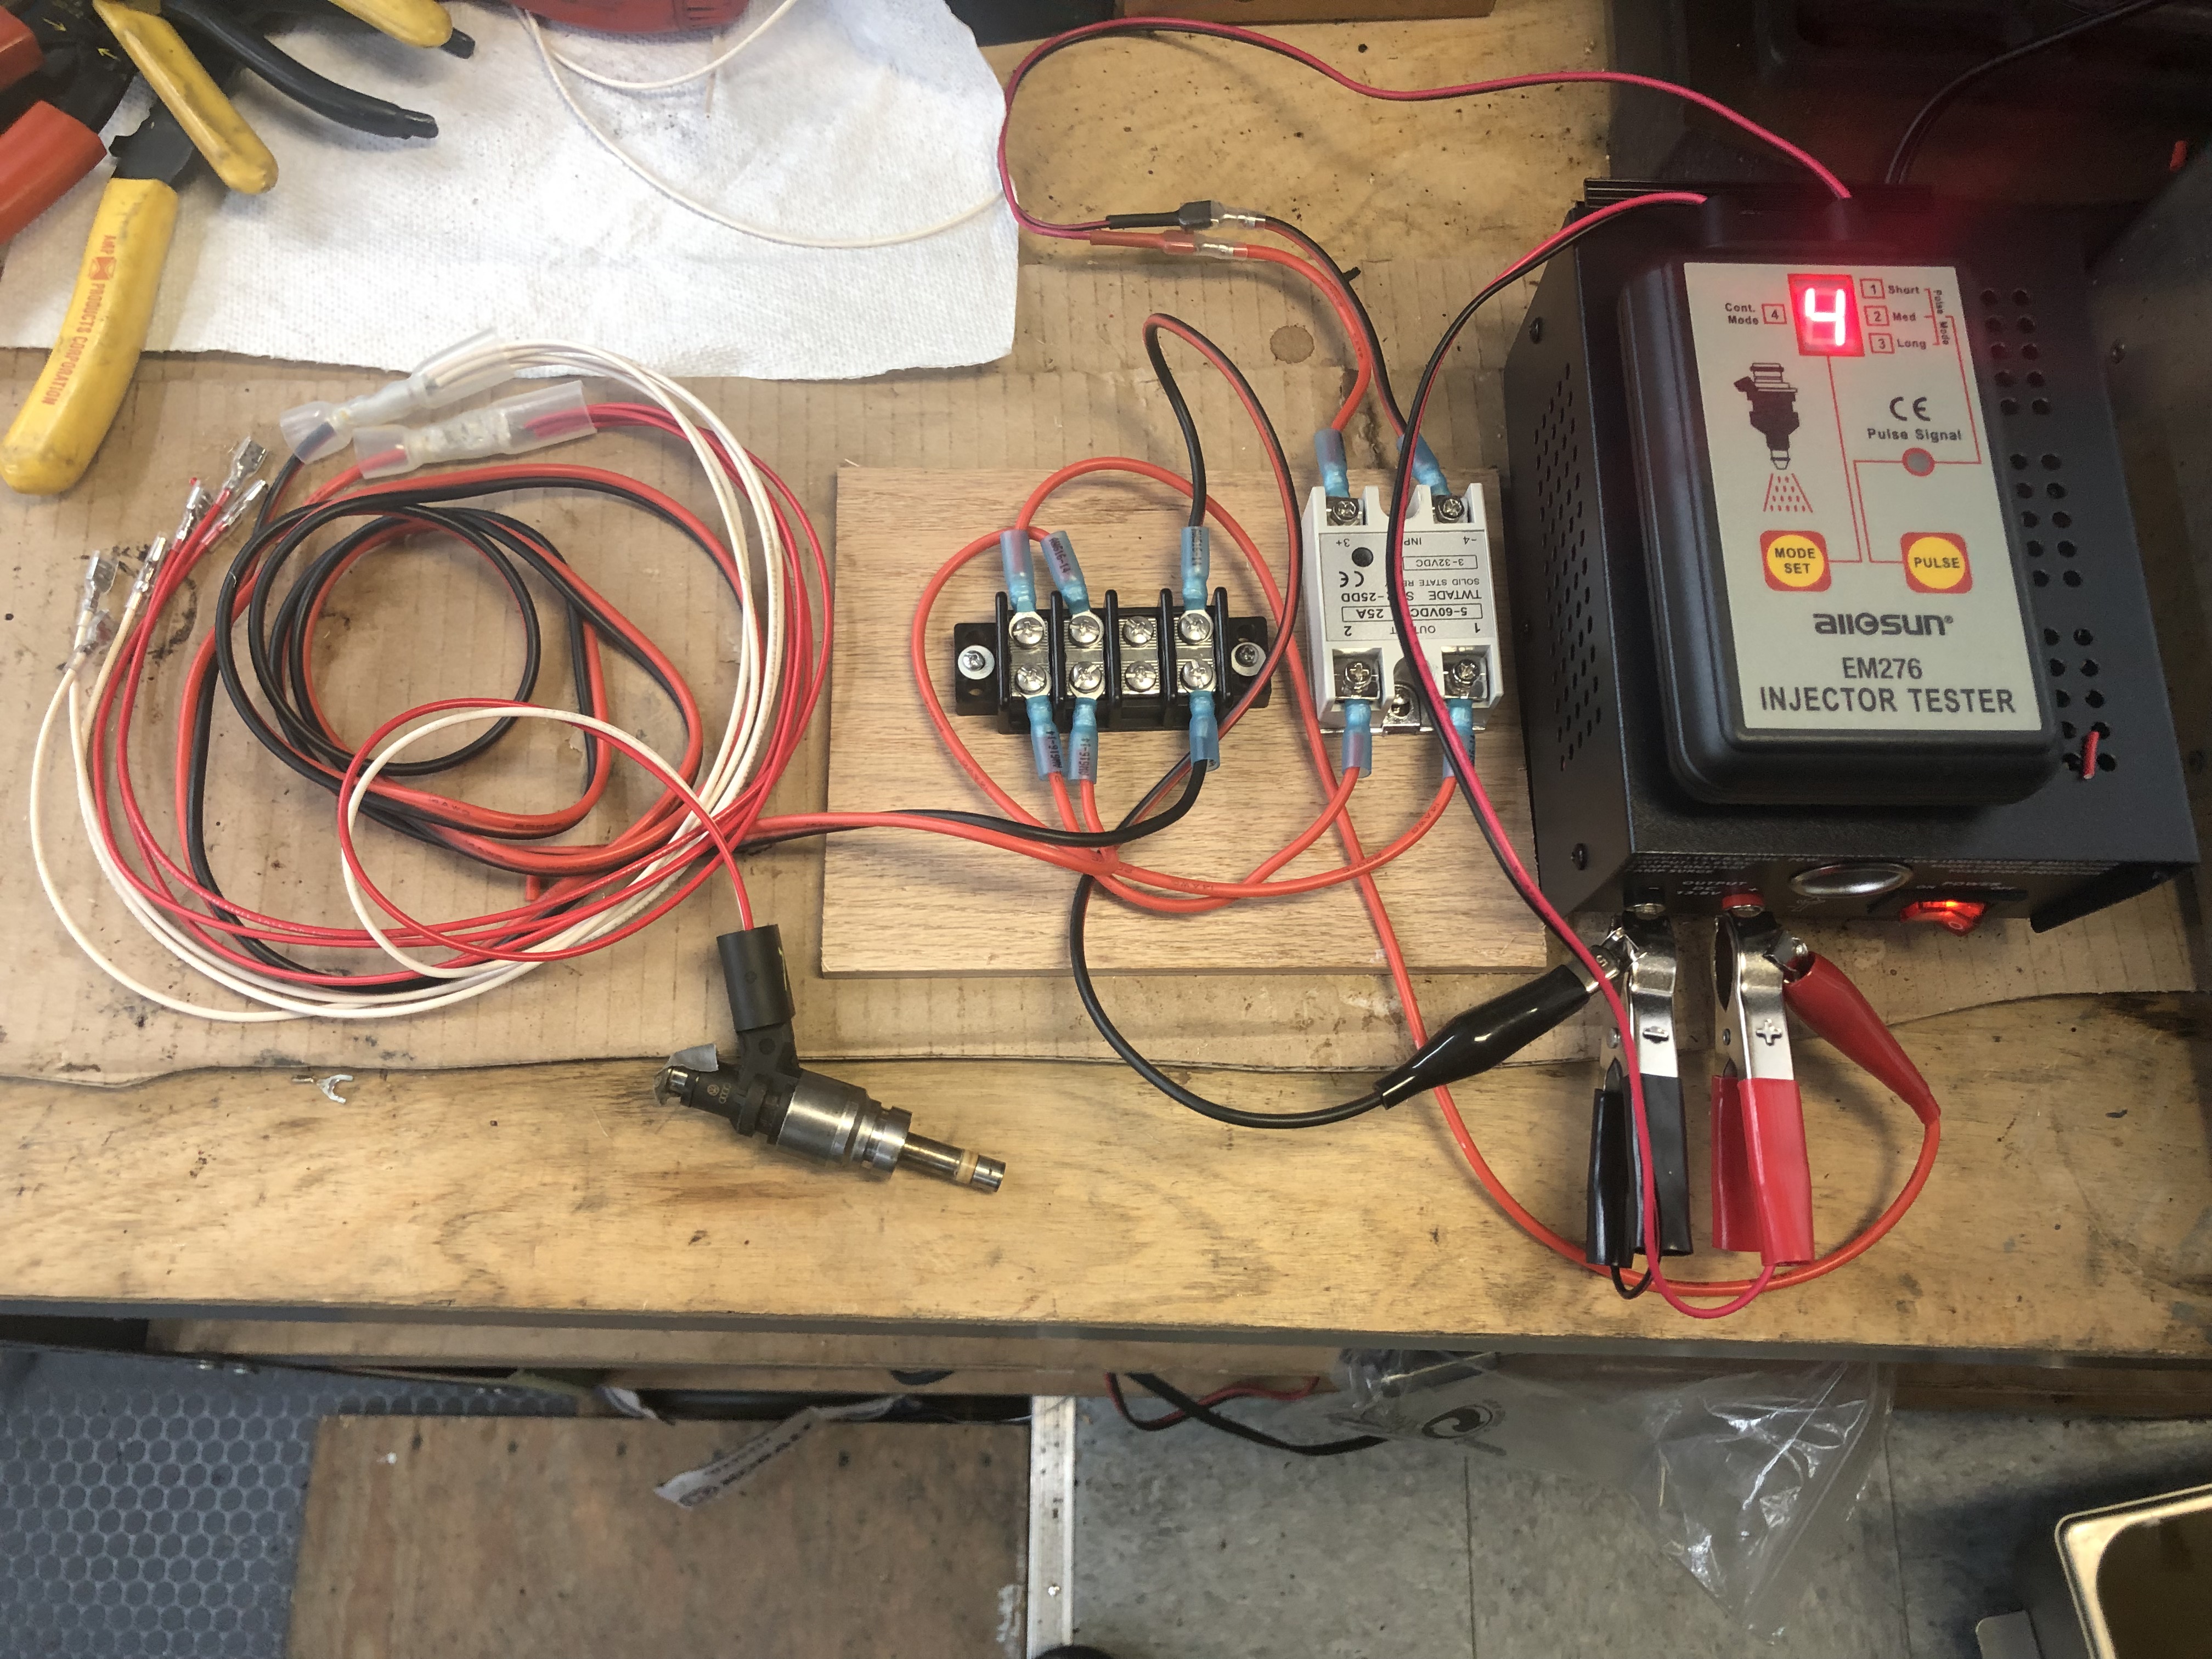
I started putting together my injector testing/cleaning rig. I have a pulse generator and saw where a guy had rigged it to test multiple injectors. I have a relay and some other simple electrical connectors on order. That will allow me to test fire 4 injectors at a time in the ultrasonic cleaner. I won’t get the gear until Saturday, so I may start with 1 at a time until then.
I still have the O2 sensors to swap out and I will make the repair to the T-stat connector (I also crushed a connector accidentally before I tied everything up on the transmission - I have to order that one - I keep forgetting to).
I also can install the new motor mounts and then I will be in a holding pattern until the injectors are back in. My endoscope crapped out on me (it wasn’t very reliable to begin with), so I will be looking for a replacement to let me check the cylinders and make sure there is no crap in there.
I could have done a better job staging everything, but the scope of the project was so large and I was using multiple sources for parts, including special tools and the result was a complicated jigsaw puzzle that had it’s own effect on the time line. If I ever do this again I will be better prepared.
It will be several days before I have an update, but I should be able to report significant progress by then.
Ed
I got the rest of the hoses in place on both sides of the engine (the WP return line was not supposed to make it, but it did last shipment).
The O2 sensors went in well. Two had to have an splice deal put together but the rest worked out well. The heat shield required more finagling to get in place, but after a couple of adjustments, it was seated well with all the tie wraps back where they should be.
Passenger side exhaust went in easily and I turned my attention to the injectors, including building my test rig. Used in conjunction with my ultrasonic cleaner, and some compressed air, I am hopeful I did a good job cleaning them up.
Well my rig looked impressive and worked for one 4 injector cycle. Then it was one by one after that. Whenever I hooked up a second injector the pulser stopped. It was a nice diversion for a bit:
The injectors all cleaned up pretty well, except one had something funky in its throat that I could not identify or remove, so I cleaned a few more and used one of them instead. The knock off Injector tool worked well and while I almost screwed up one teflon O ring, i managed to recover by trimming a tiny bit that I had forced out of the groove. The assembly drift worked well and only injector 1 (the one that was stuck in the head) was a little more difficult to get in place. I was cranking along at a pretty good pace so I didn’t get any shots of the injectors and what they looked like after cleaned.
I made a mistake with the exhaust re-install. Looking over at my table of stuff removed to separate the transmission, I saw an “L” shaped metal shield. It took me a couple of looks, but I found it. There are two heat shields on the wire harness that travels down the driver side of the transmission, this was the outer one. That meant the exhaust had to come off, and in an abundance of caution I acquired new nuts and a gasket.
That caused another delay, but I was able to get back on track, replaced the fuel injectors and saw another unexpected issue: most of the tabs that hold the wiring harness in place. For $150 a shot, I wasn’t replacing them. I used a smaller tie wrap with a medium tie wrap captured by it and secured that assembly to the based of the plastic part of the injector. I then wrapped the medium tie wrap around the notch at the top and cinched it down. They seemed to do a good job. With the injectors seated, I used a small amount of oil on the O rings and slid the fuel rail in place and secured it. Next were most of the hard fuel lines. With the exception of the two feed lines for the driver side HPFP and the smaller feed line for the passenger side, they were secured in place.
I ran into an oddity with the JHM spacers. The passenger side spacer needed to have the two gasket alignment holes reamed so the gasket would sit flush. Other than than and some maneuvering to get the rearmost bolt on the driver side to settle in place, the IM was secured without incident. Next the HPFP’s and fuel lines were secured and that was where I ran into what will hopefully be my last scare. The new height of the IM seemed to bind up the hard fuel lines to the HPFP on the passenger side, and I wasn’t paying attention as I spun the nut on. It was off kilter and I started to cut the brass with the stainless nut. Fortunately I was able to pull it off, re-align the fuel line so it wasn’t pulling the nut off axis and forced it back on course. Since only the first thread was scuffed up, I got lucky. I secured the rest of the fuel lines to torque with my new set of crows feet and placed the throttle plenum on top to call it quits.
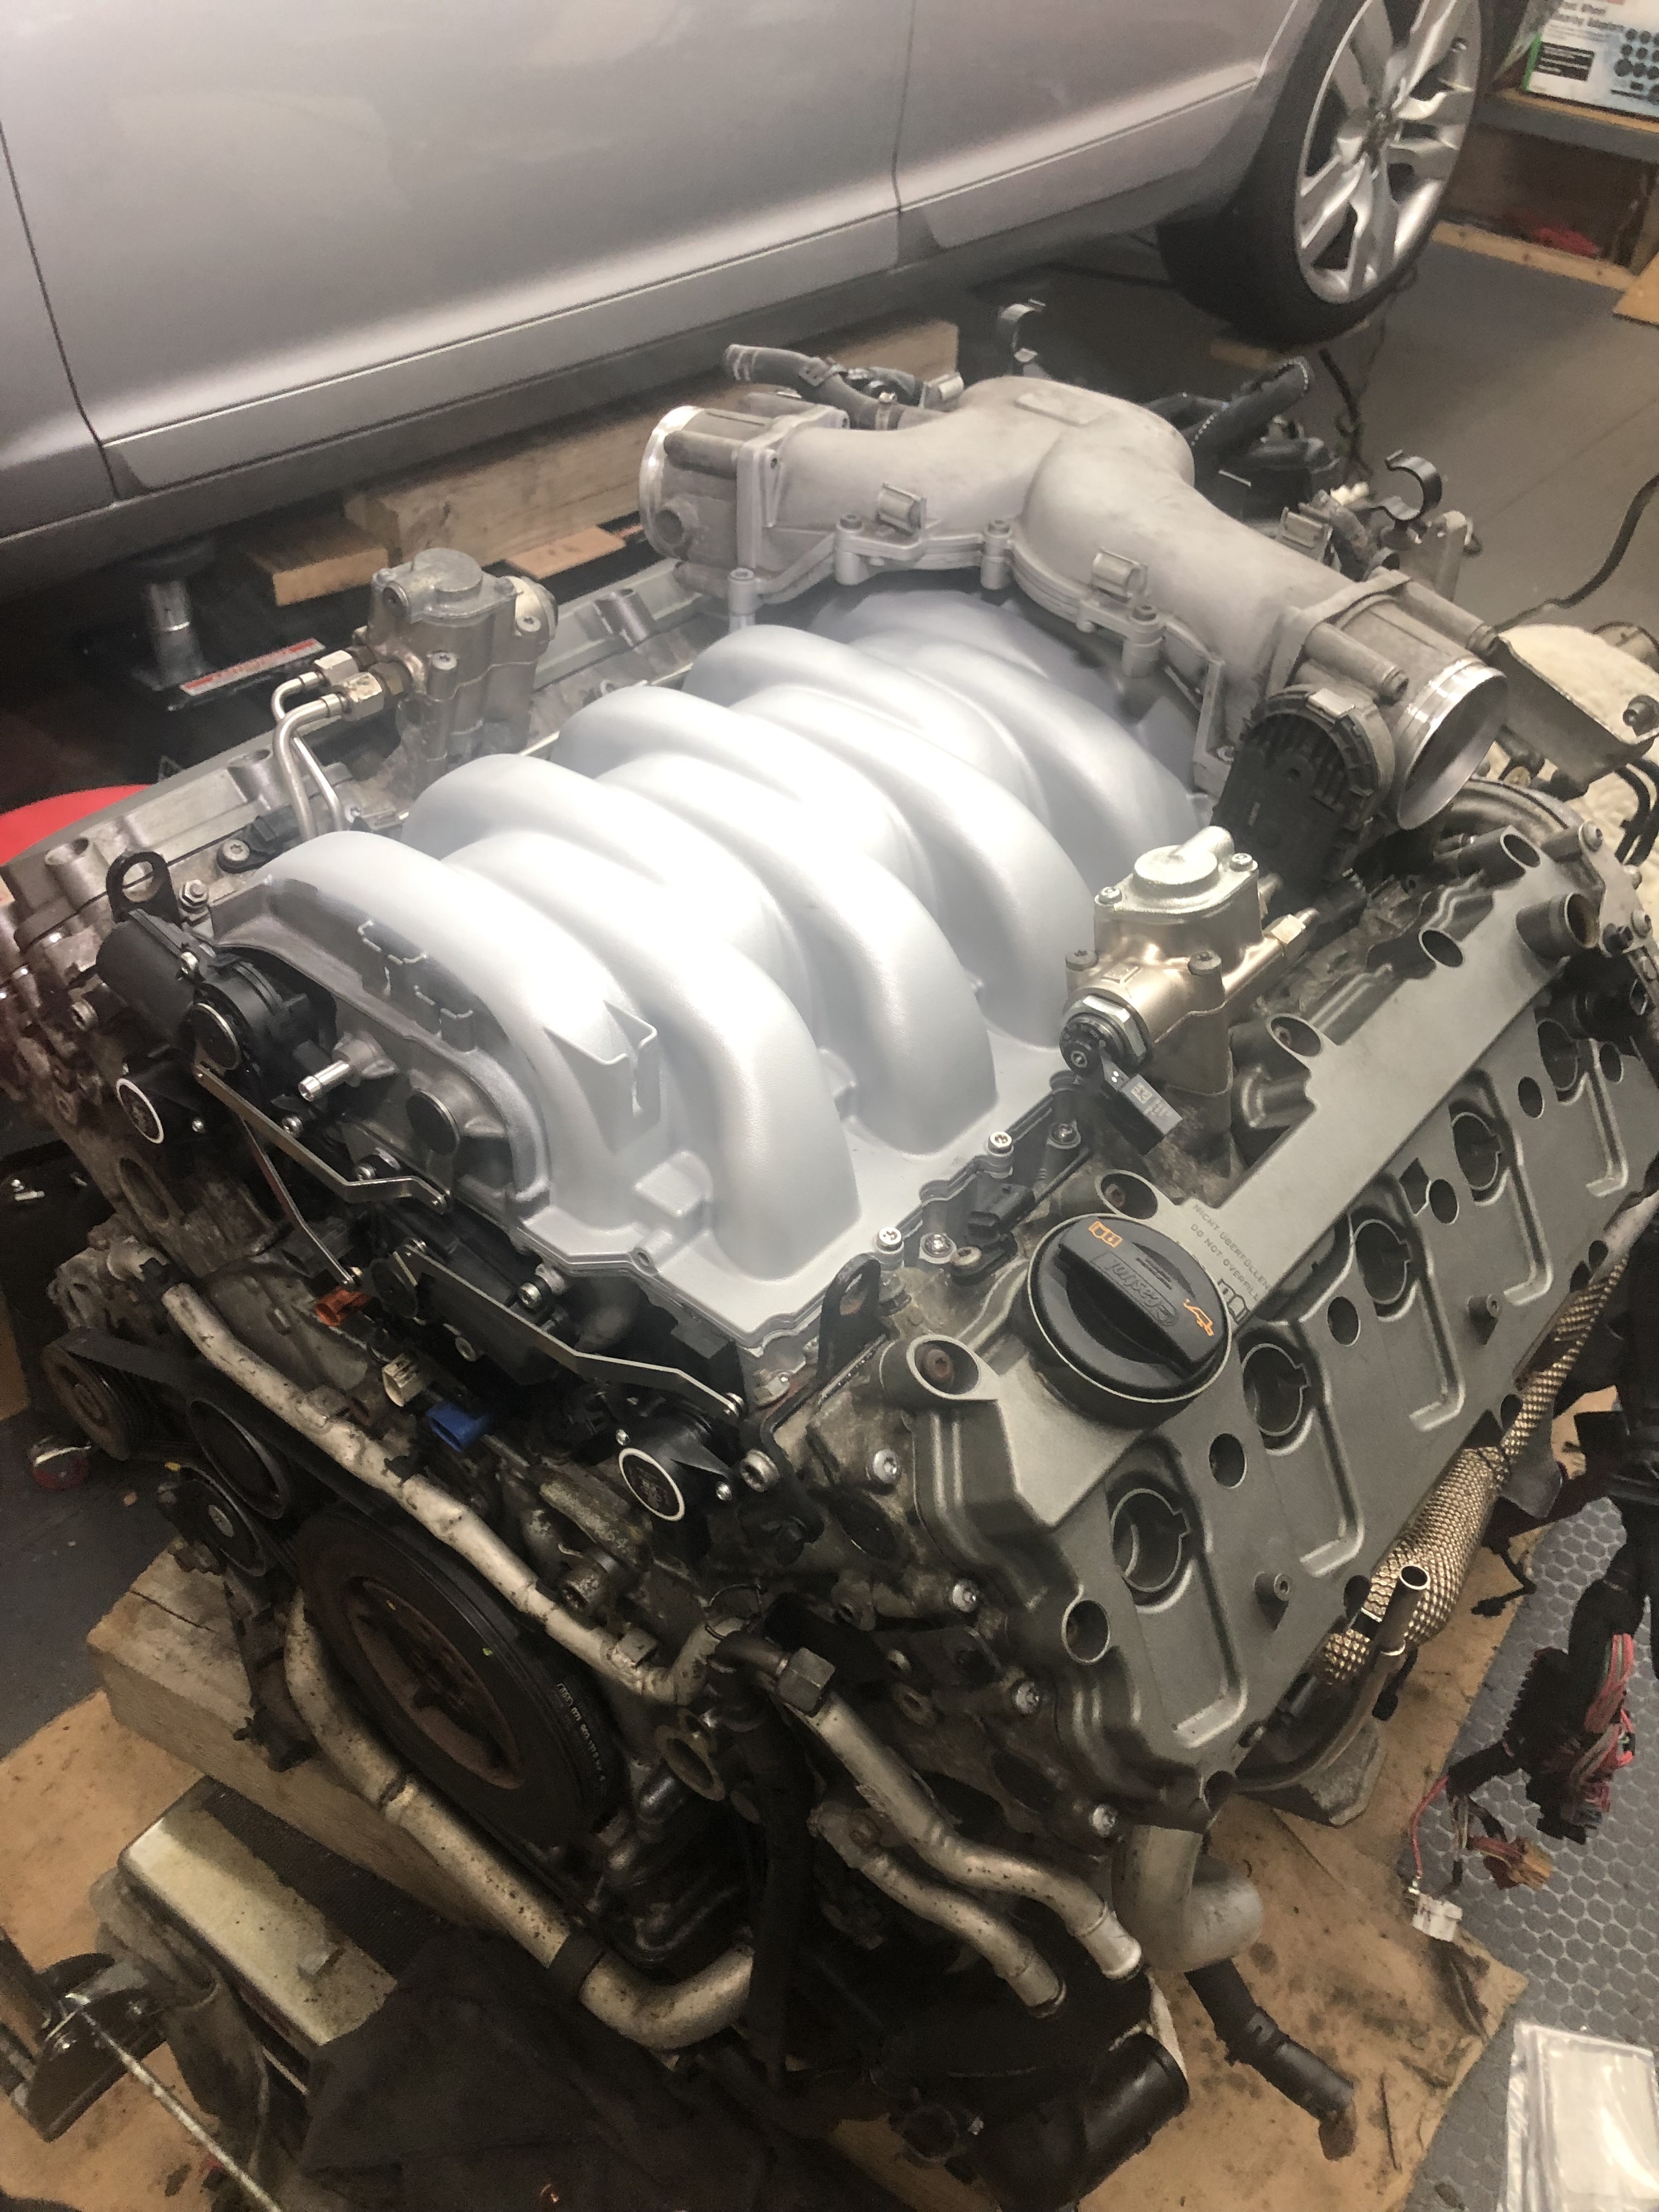
There isn’t too much left to do before slipping it back in place so if I can get a few days without losing power (we had a nasty storm blow threw yesterday) I should be figuring out how to put this thing back in. Of course as I type this out goes the power… ugh.
Ed
Looking good. Just a reminder. After you put the motor back in. DO NOT FORGET to remove the motor lift brackets. Those motor lift brackets on the front of the heads will now be in the way of the intake TQ arm with the spacers added.
Most of us just remove them and place them in the tool box or parts shelf in case you need them again later.
Looks awesome! Regarding the intake spacers - remove both the fronts but keep both the rear ones in place right?
Will do.
Does anyone know what is up with the throttle plenum to IM bolts & torque?
The front two off the TB’s crank down fine at 9 nm, but the rears do not. I snapped two bolts trying to get to torque (had to use my scope to dig one out from under the IM - not fun since they are aluminum). They can barely hold 7 nm anything more and I feel I am going to snap one again.
Everything else has been right on using the Bentley, including all the torque-to-yield bolts. Freaked me out when the first one cracked, fortunately the head was still attached, the second popped right off and went spinning down into the valley.
Well back to the last few pieces to go on before I wheel it in position and start moving it back into the bay.
Ed
I had 2 that broke on me too my guess was they are single use stretching bolts…
Yep, except there is no torque to yield instructions in the manual and the manual does not say to replace the bolts. Also, I used the stretch bolts from the lower timing chain covers to replace the bolt I broke twice.
Anyway, I hope I do not have a vac leak when I finish installing the engine.
Ed
For non-mechanically loaded connections, it appears the Bentley manual uses standard tightening torques based on fastener diameter. For example, all the 6mm, grade 8.8 bolts are tightened to 9Nm.
It does not recognize that the bolts used in this location are aluminum. The tightening torque needs to be reduced accordingly to recognize the decreased bolt steength.
There is always a vacuum in the intake so there is never any pressure trying to push the connection apart. As long as the gasket and mating surfaces are in good shape and the bolts are tightened evenly, it is not going to leak. I torqued all mine to 6.5Nm and never looked back.
Interesting since the lower timing cover bolts are all aluminum and torque to yeild.
I’ll have to check their labeling and see what the difference is. Anyway, the engine is sitting back in the bay slowly being maneuvered into position. It was a fight getting it over the hump out one garage door into the other, but it’s not too far off in it’s alignment.
I will be using the engine hoist to reposition the subframe, so I will do my final adjustments then. Even so I am only off about an inch on the trans mounts and less than that with the engine:
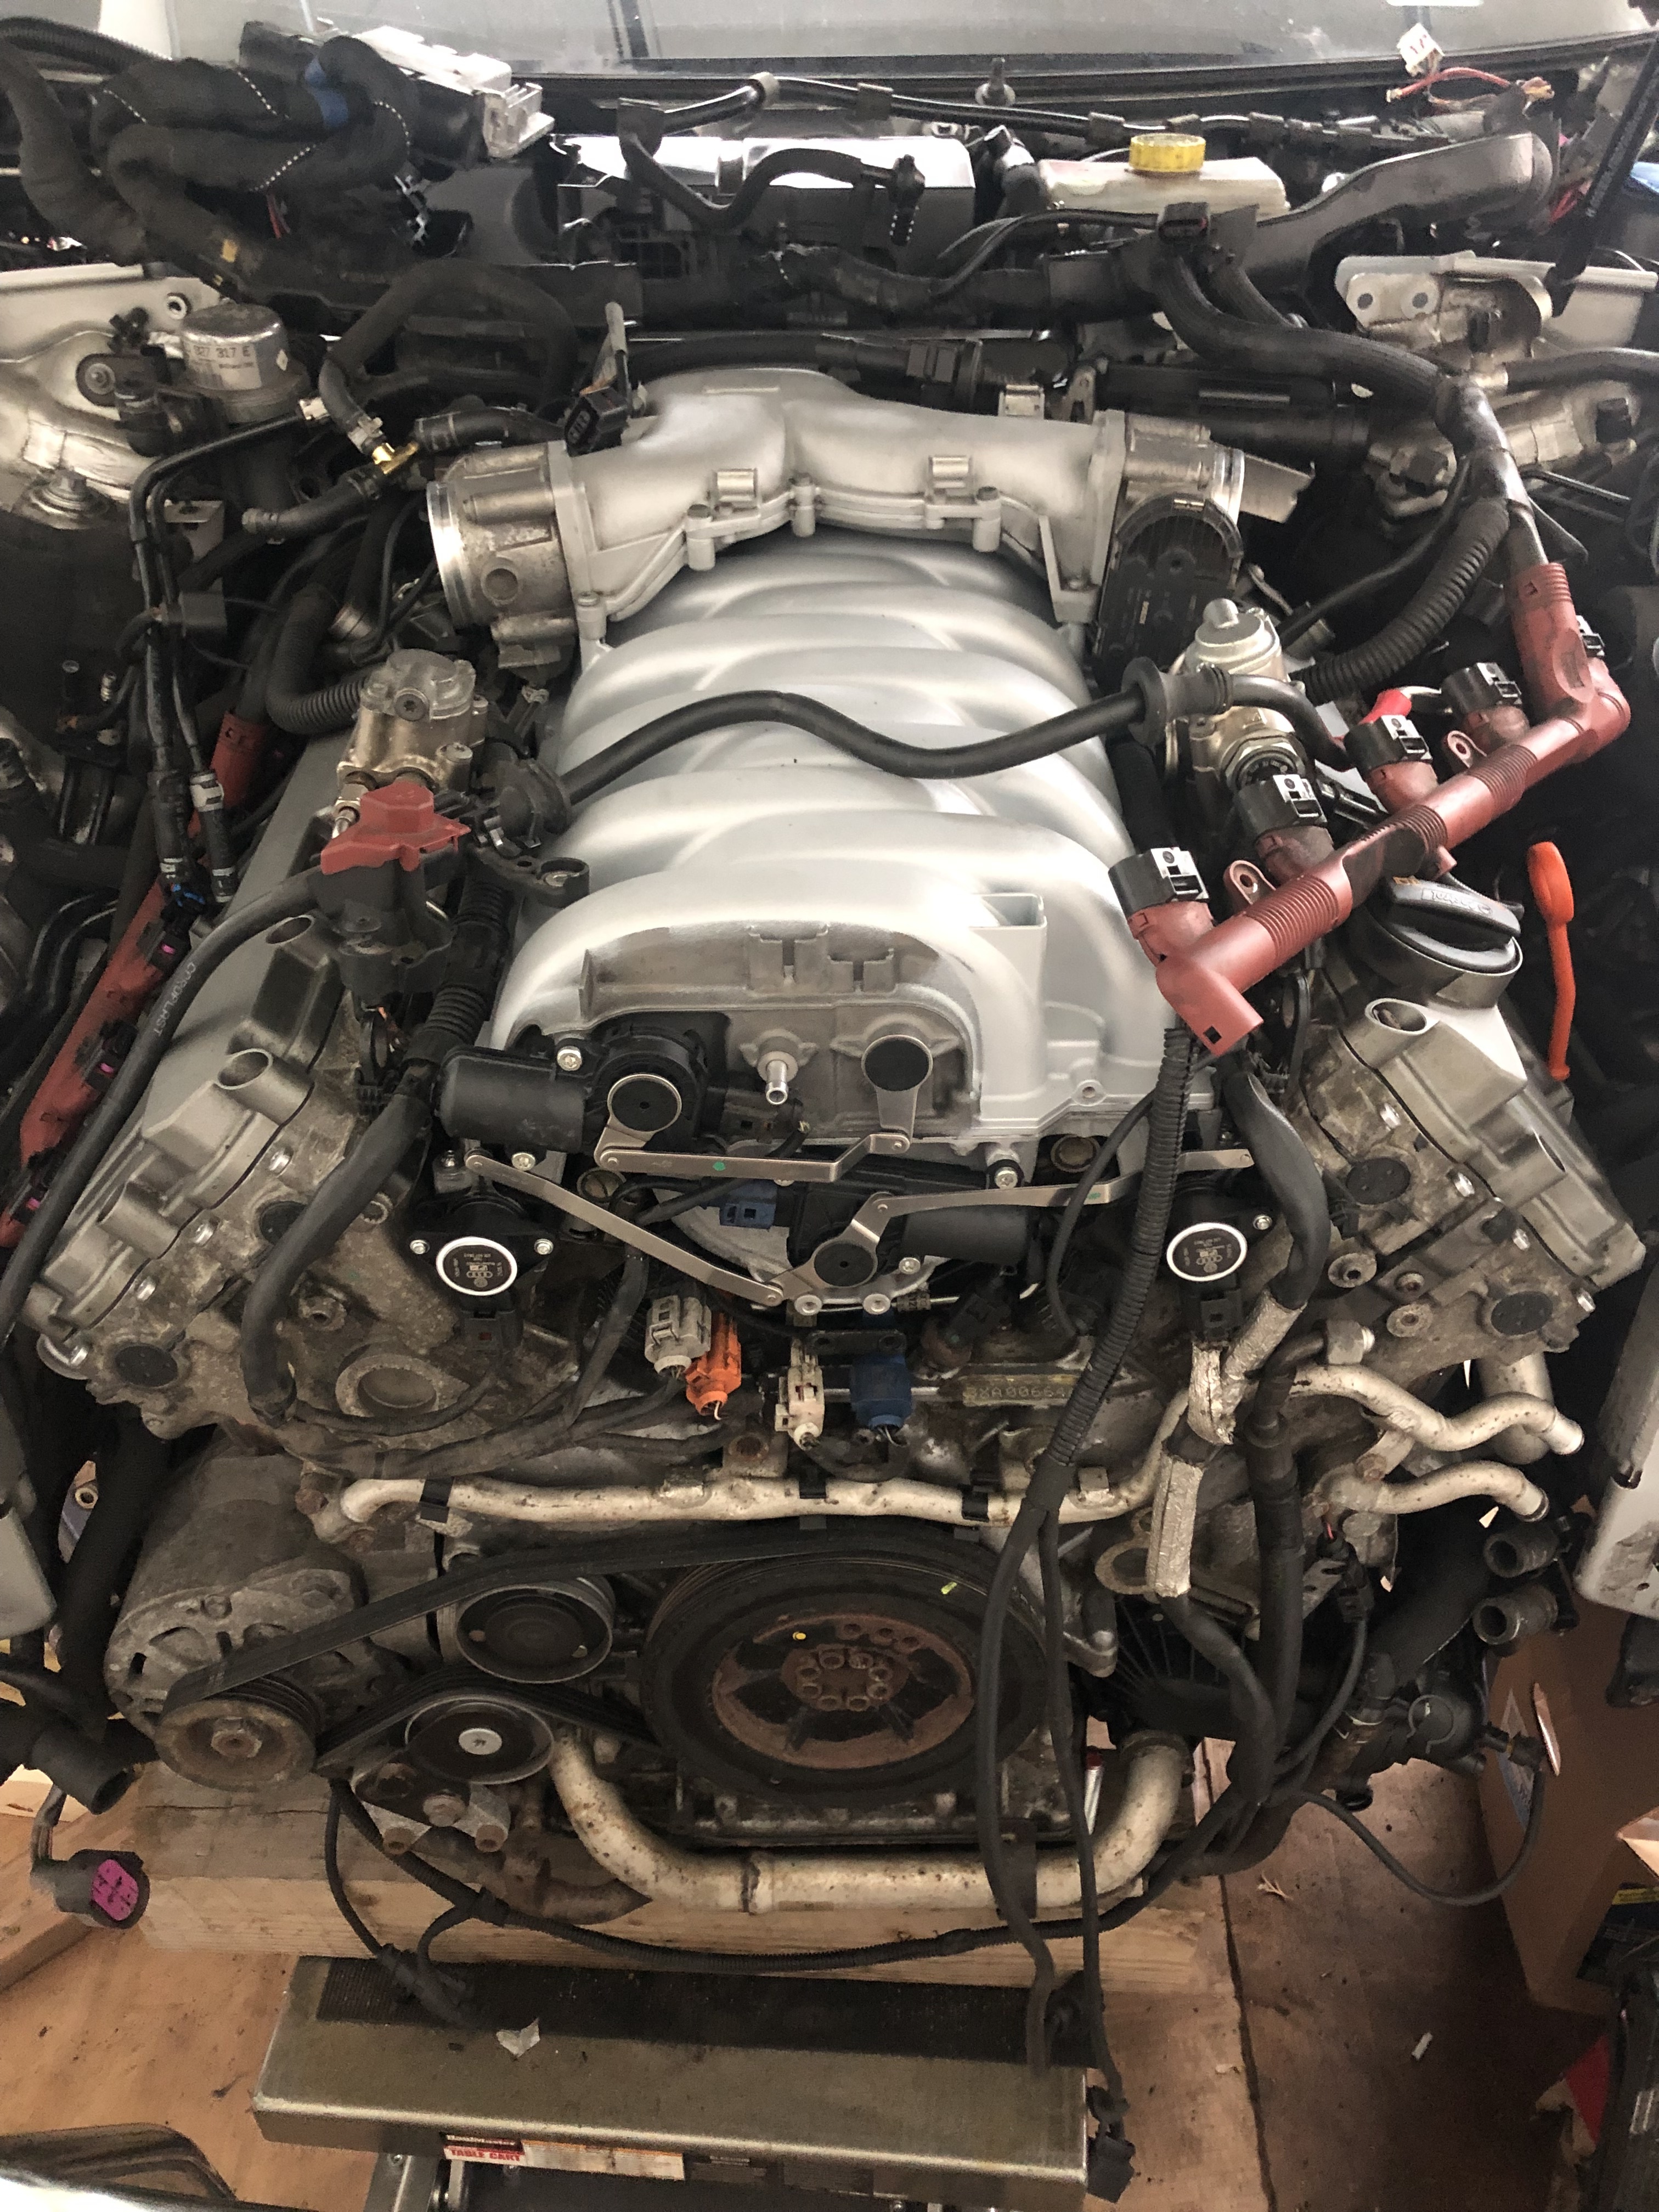
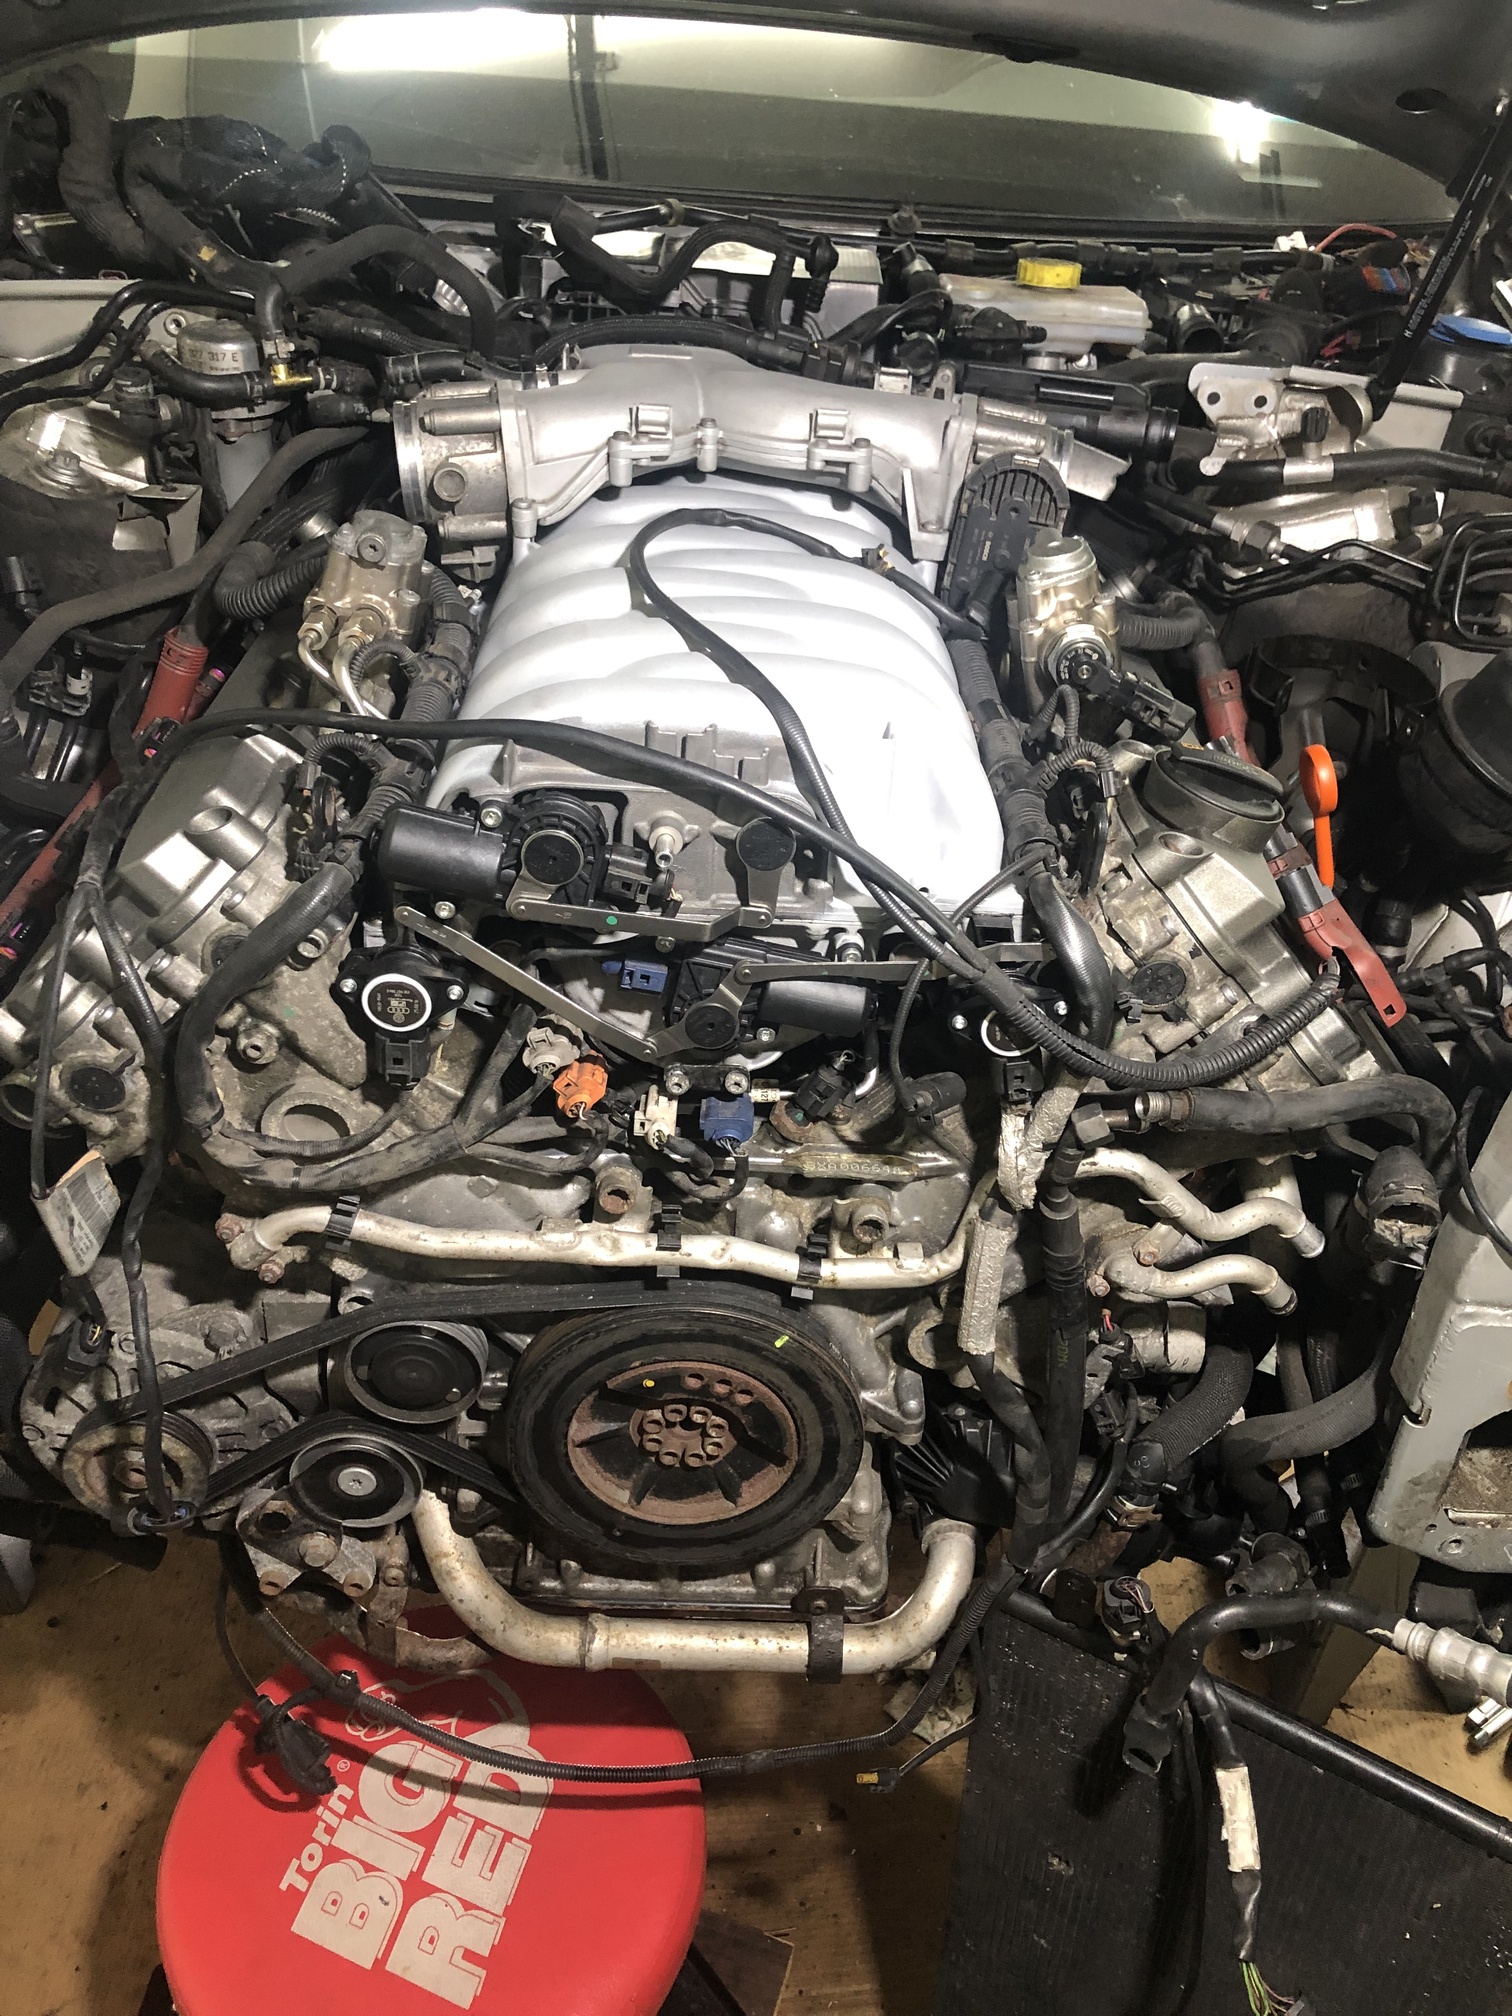
Engine view:
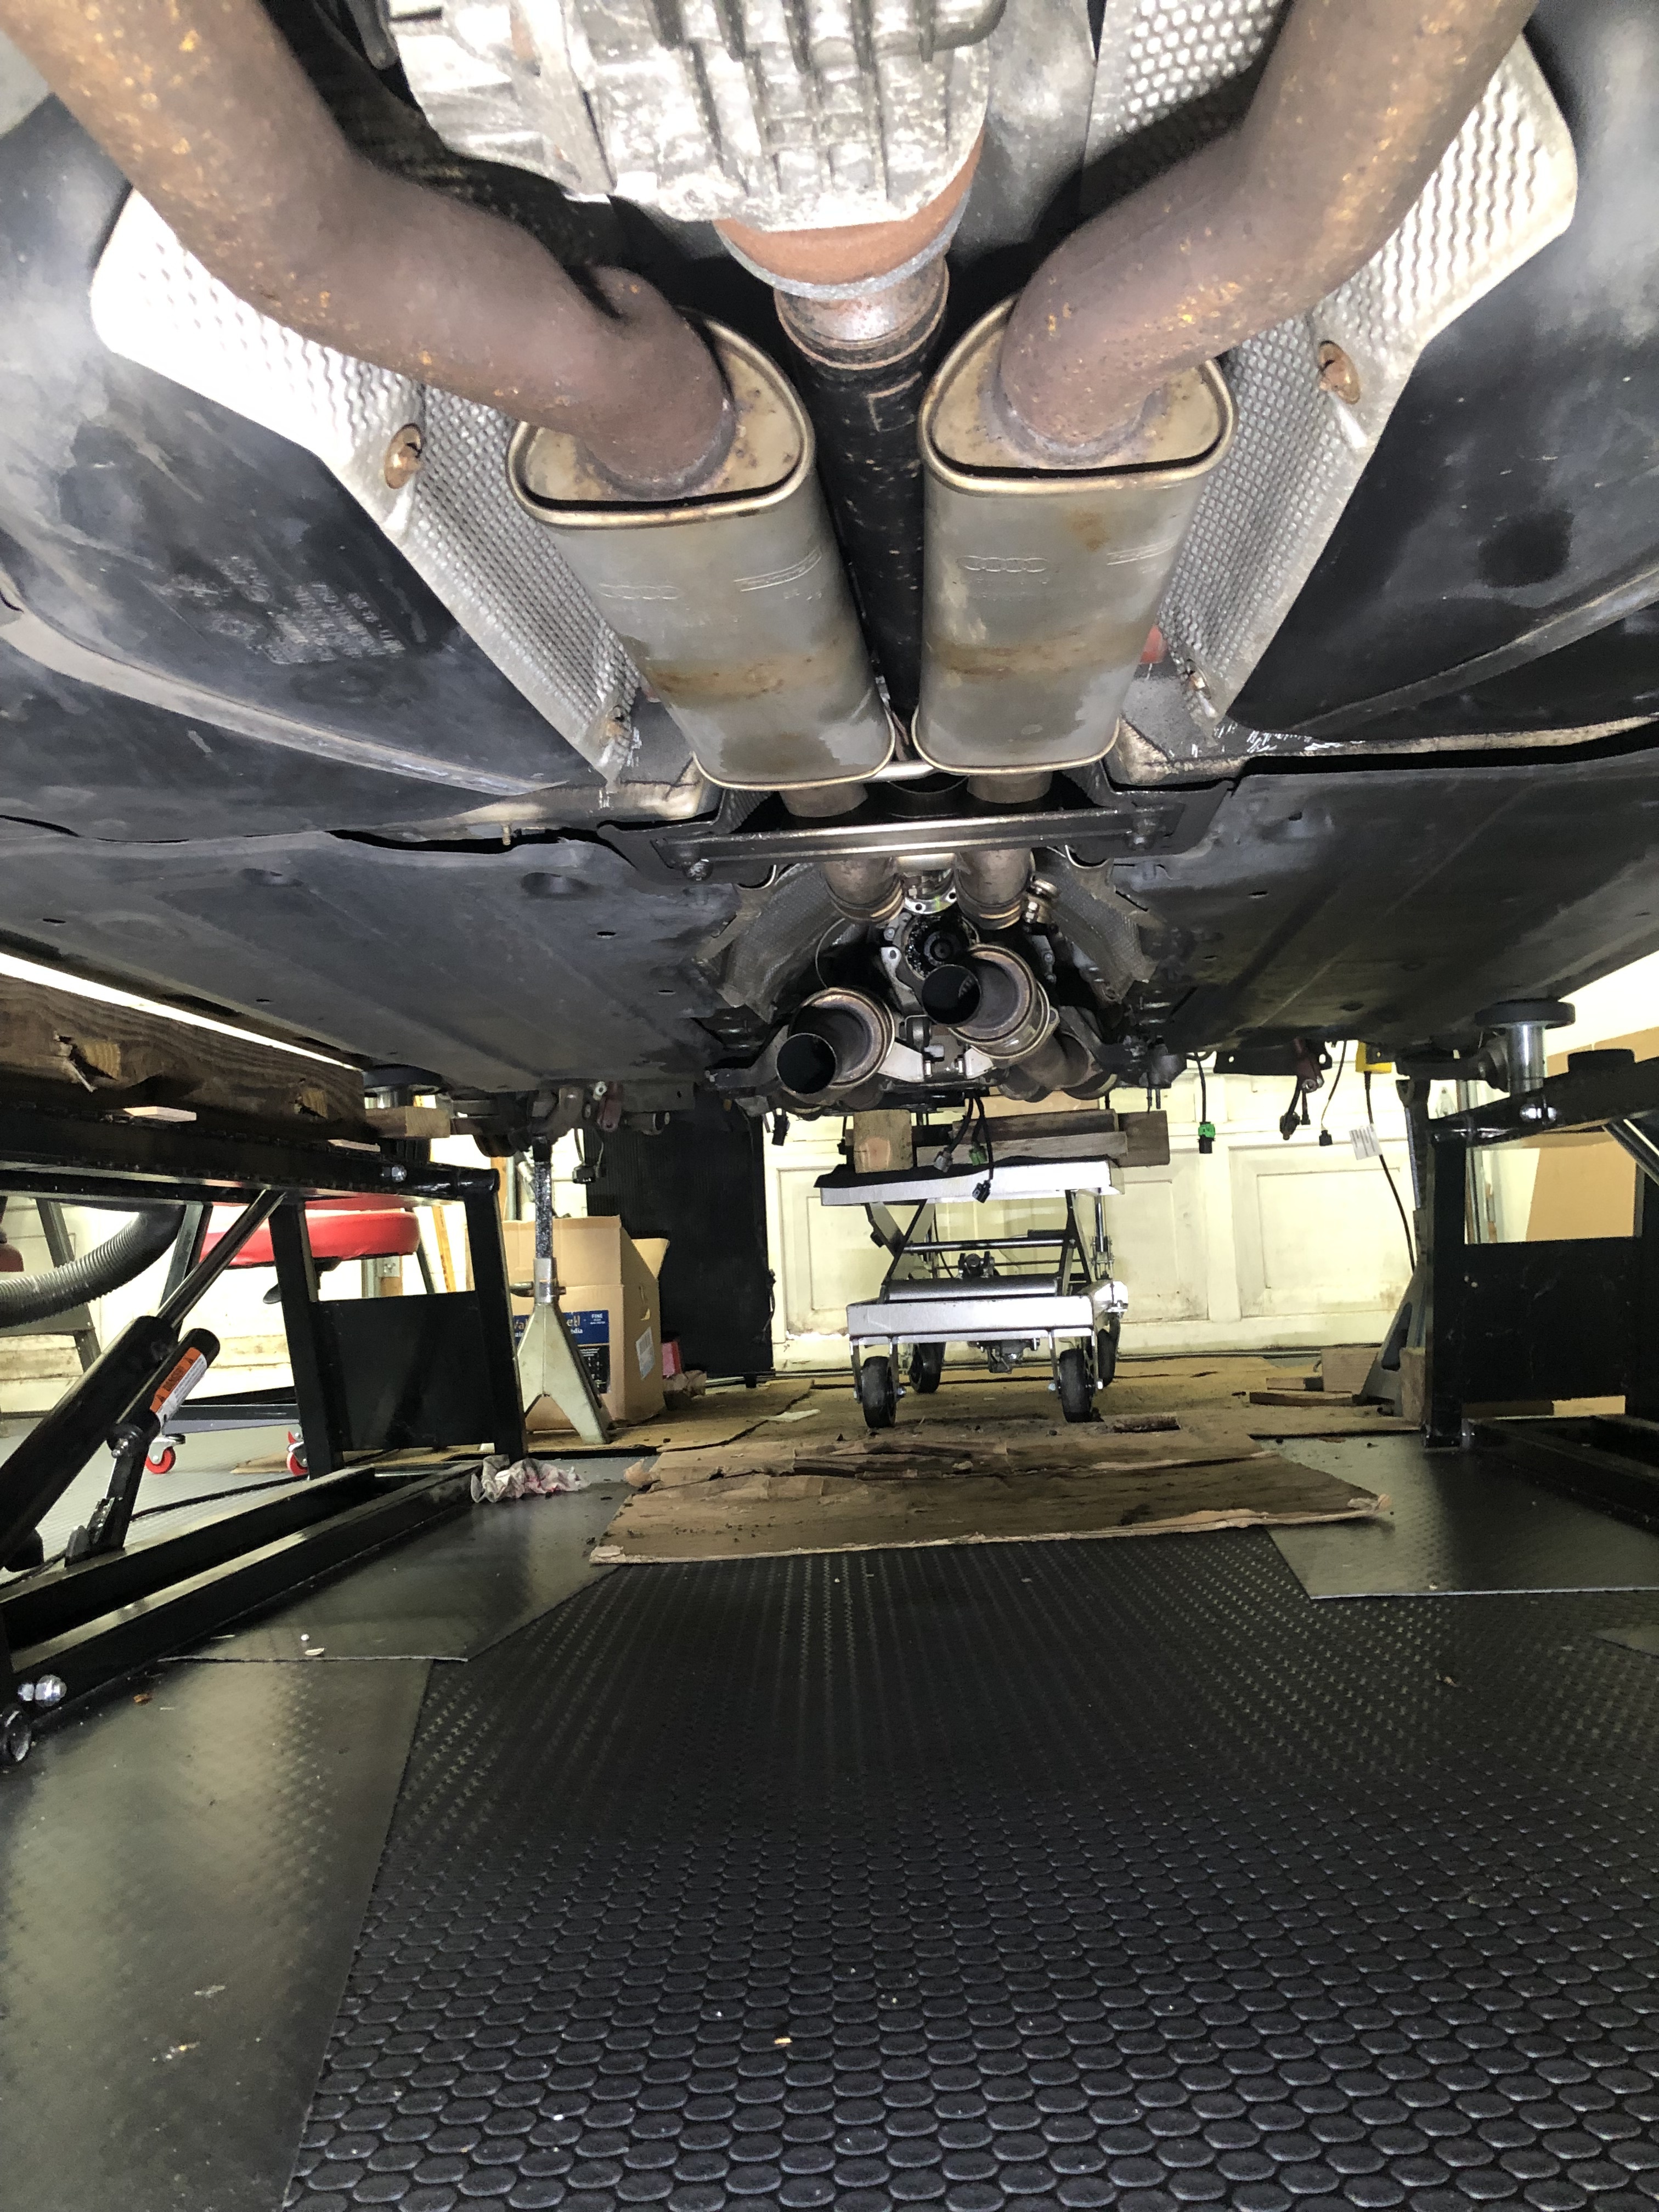
From the underside looking forward at the transmission:
I will start working on the subframe and connections that are not done yet, then get it bolted back into place. So far I think my restart process is going to be:
- Reinstall Engine - fill Coolant/Oil but leave spark plugs/coils out
- Pull Fuel pump fuse (looks like ST2 Fuse 1 Passenger side - do I need to do anything else like pull the HPFP connectors?)
- Spray Windex into cylinders (I scoped them and a couple had some minor debris around the edges and a little gook on the cylinder wall near the intake valves), and crank the engine. My hope is that is crap will be washed out the spark holes, rather than the exhaust tract. I read about this in one of the carbon clean posts, but I forgot to add it to my document. I’ll find the reference again and make sure I do what needs to be done.
- One more scope of the cylinders
- Install the sparks/coils
- Reinstall the fuel pump fuses
- Cross my fingers and toes and crank it up
All of this will be done without hooking the drive train back up, just in case I have to pull it again. Working in IT, the last thing we do is screw anything down or tie wrap anything in position that we don’t have to until we know it works - it’s the kiss of death to do otherwise.
If you have any suggestions let me know.
So the engine sits physically back in the bay. Note to self: When you can’t find the torque settings for the engine mount upper bolts, do not forget about it since torquing them down when the engine is partially back in is a nightmare.
I had just completed reattaching the shift cable, hooked up the engine hoist and using the platform lift I positioned the subframe. I kept using the engine hoist and placed a 3 ton jack on the transmission to hold everything in place. I decided I would give things a once over to make sure I did not have anything out of position or mis-routed. Doing that I brushed up against the mounts and noticed they were not firmly in place. I was able to drop the engine enough, remove the frame rail attachments at the bottom of the mounts, and with a variety of sockets/attachments get enough torque to tighten them down. There was no way to get a torque wrench on those bolts, so the wristometer was employed.
After taking a break to regroup, I was able to get the subframe and trans crossmember secured. Using the hoist actually made the job easier as I could maneuver the engine without too much force. The marks I made on the frame rails, body and subframe pieces were critical in aligning everything back up.
Engine back home:
I’m going to spend the balance of the evening hooking everything back up before installing some of the ancillary components like the coolant expansion tank and the radiator/condenser/fans. The wiring harness and some of the hoses will take most of the time I have available.
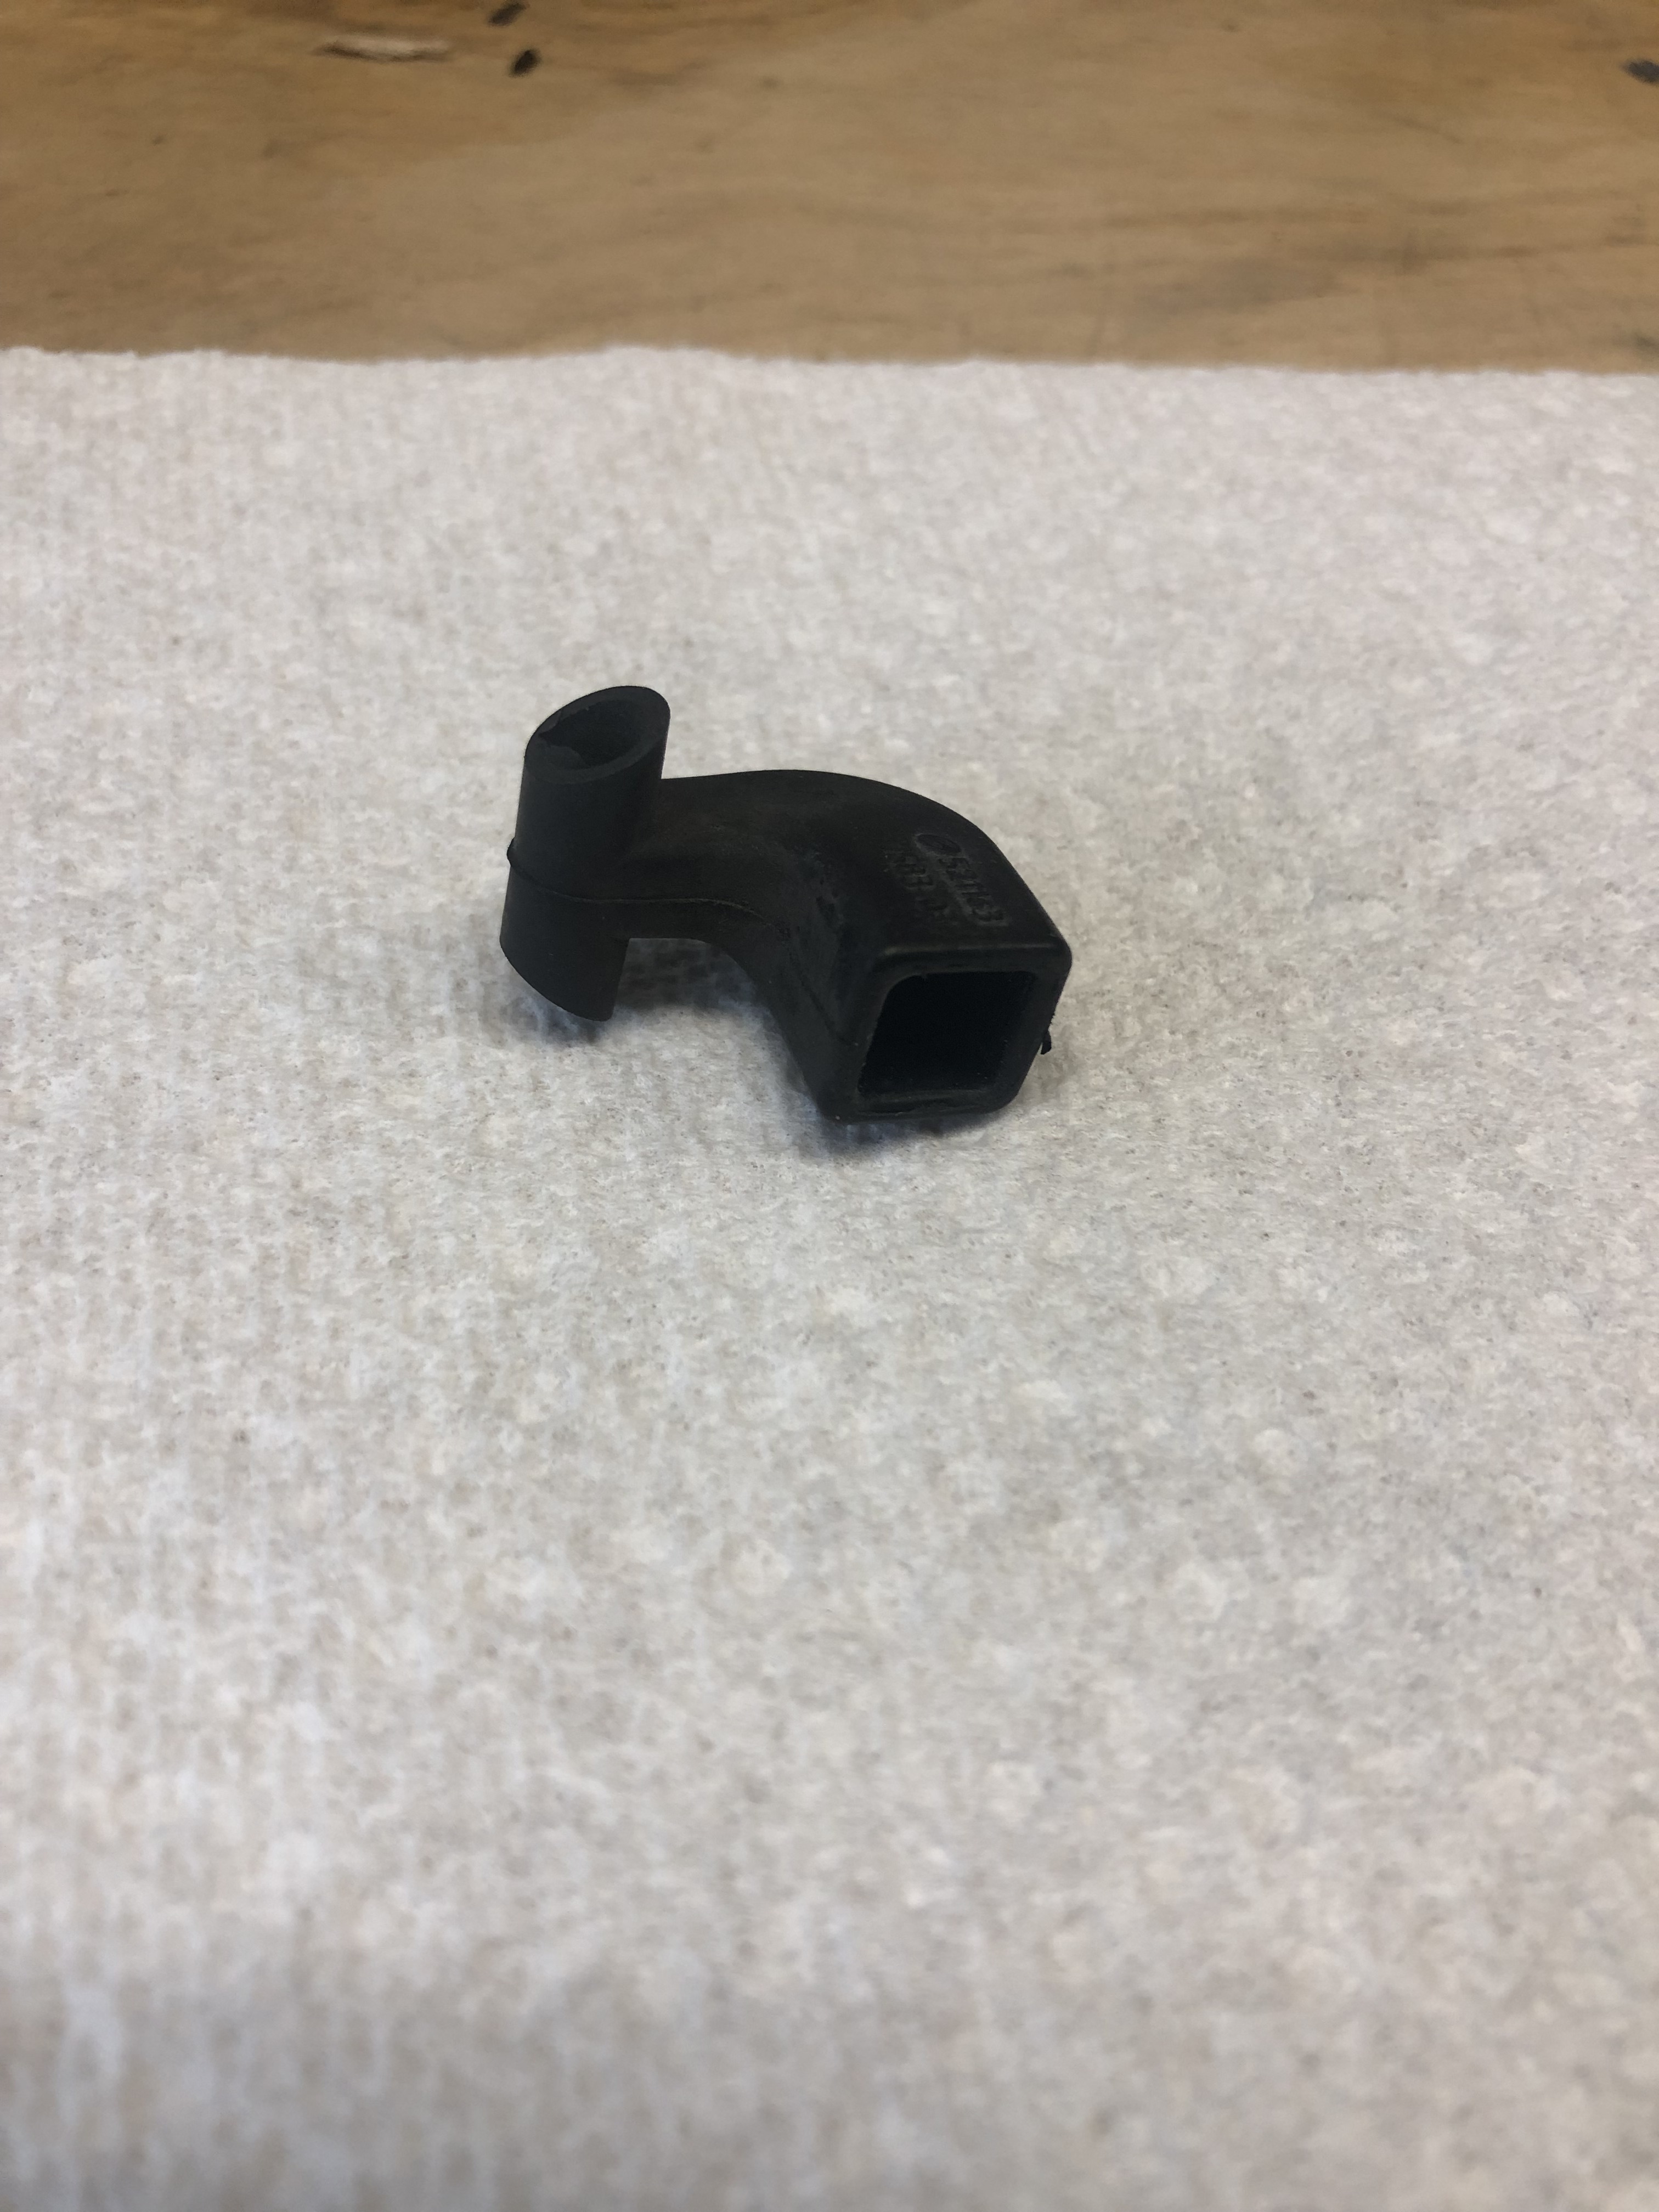
I came across this piece and I have no idea where it goes. It seems to be a vent of some kind with EPDM 14 stamped on one side and a number: 521163 7583-03 on the other. I must have inadvertently knocked if off during the process, but I do not recall when and I haven;t run into any square type fittings that it would plug on top of. Anyone know what it might be:
Anyway, back to work.
Ed
Got everything hooked up, filled with fluids, got her started and I am getting timing chain noise.
To say the wind is out of my sails would be an understatement. I was hoping it was oil pressure needed to be built up, but I did not want to run it too long (maybe 3 minutes). At first the oil was low, so I topped it off and restarted with no real change in the noise.
Unless it truly is oil pressure that needs to build, I am looking at having to drop, pull the trans off and redo the timing chain area - the problem is I noticed nothing out of sorts when doing the work and no funky noises when rotating by hand. The worst thing was that there really was no wear back there, but at 200,000 miles I didn’t want to leave it unattended.
I have a sound clip of it, but I am not sure how I can share that here since I can only upload image files.
I am going to take a break, give one of my buddies a call and figure out my next move. The engine and valve train sound smooth, but I only was idling so who knows. I’ll grab some codes tomorrow to see if there are any clues there and do some research into what I could use the VCDS for to help me figure out what I need to fix before pulling it.
At least I left the drive train disconnected.
Man I am just totally deflated. This was engine pull number 3 for me (2 Audi’s & a 911), and I was pretty cautious the whole way through.
Ed
I think I dodged a bullet. While I need to go over everything (cam deviations primarily and other things) the noise is gone.
I had forgotten the PS Pump was in the rear in this car, and while I filled the reserviour, as soon as I started the engine it must have sucked whatever was in there through the system. Since I was avoiding touching anything with the drive train still disconnected I wasn’t getting any PS rack sound to help me figure out what was going on.
I had this thought last night since the noise was primarily a grinding cyclic noise. Went out this AM, found the level below the dipstick, added more (I might have to siphon off a tiny bit) and the noise is gone.
I have got one other noise to track down, a high pitched whine, but I shut it down and headed back in for some breakfast & coffee and to settle my nerves a bit. All I could think about last night was having to drop the engine again. I still have to check a bunch of things, but at least that major hurdle has been passed.
Ed
I have to get the steering angle sensor functioning to clear an ABS fault, but there are no misfires.
In Engine I or II I am not sure if the 93 block shows cam shaft deviation, so I still have to find where to look for that, but on a bright note, there are no misfires (of course this is only at idle).
I have a brake booster fault, but I think until I get the sensor straightened out and can clear that, that fault will stay.
The whining/whistle noise appears to be from the PCV valve, though I have not messed with the connections to see if there is any change in noise.
Right now I am pressing out/in the bushings on the front and rear LCA’s (I had a little vibration previously and since I have replaced the upper bushings and the tie rods - inner and outer, these are the only other ones to look at. The rough running could also have contributed, but since they are original , after 200K I think it is time.
I am still breathing a sigh of relief over the PS pump being the noise. Engine is smooth and normal sounding now (with the exception of the whine/whistle).
The goal is to get the car off the lift today and see how it drives.
Ed