Advice Requested - CEL's (cam position actuators & intake flaps)

Looking good. Just a reminder. After you put the motor back in. DO NOT FORGET to remove the motor lift brackets. Those motor lift brackets on the front of the heads will now be in the way of the intake TQ arm with the spacers added.

Most of us just remove them and place them in the tool box or parts shelf in case you need them again later.

Looks awesome! Regarding the intake spacers - remove both the fronts but keep both the rear ones in place right?

Will do.

Does anyone know what is up with the throttle plenum to IM bolts & torque?

The front two off the TB’s crank down fine at 9 nm, but the rears do not. I snapped two bolts trying to get to torque (had to use my scope to dig one out from under the IM - not fun since they are aluminum). They can barely hold 7 nm anything more and I feel I am going to snap one again.

Everything else has been right on using the Bentley, including all the torque-to-yield bolts. Freaked me out when the first one cracked, fortunately the head was still attached, the second popped right off and went spinning down into the valley.

Well back to the last few pieces to go on before I wheel it in position and start moving it back into the bay.

Ed

I had 2 that broke on me too my guess was they are single use stretching bolts…

Yep, except there is no torque to yield instructions in the manual and the manual does not say to replace the bolts. Also, I used the stretch bolts from the lower timing chain covers to replace the bolt I broke twice.

Anyway, I hope I do not have a vac leak when I finish installing the engine.

Ed

For non-mechanically loaded connections, it appears the Bentley manual uses standard tightening torques based on fastener diameter. For example, all the 6mm, grade 8.8 bolts are tightened to 9Nm.

It does not recognize that the bolts used in this location are aluminum. The tightening torque needs to be reduced accordingly to recognize the decreased bolt steength.
There is always a vacuum in the intake so there is never any pressure trying to push the connection apart. As long as the gasket and mating surfaces are in good shape and the bolts are tightened evenly, it is not going to leak. I torqued all mine to 6.5Nm and never looked back.

Interesting since the lower timing cover bolts are all aluminum and torque to yeild.

I’ll have to check their labeling and see what the difference is. Anyway, the engine is sitting back in the bay slowly being maneuvered into position. It was a fight getting it over the hump out one garage door into the other, but it’s not too far off in it’s alignment.

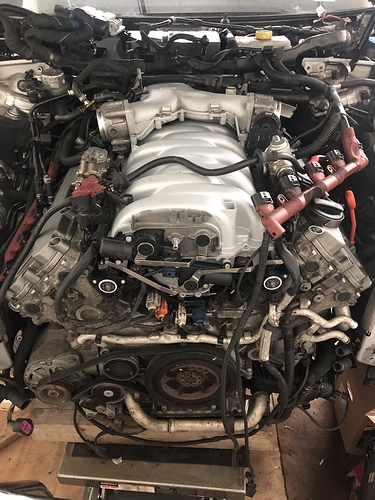
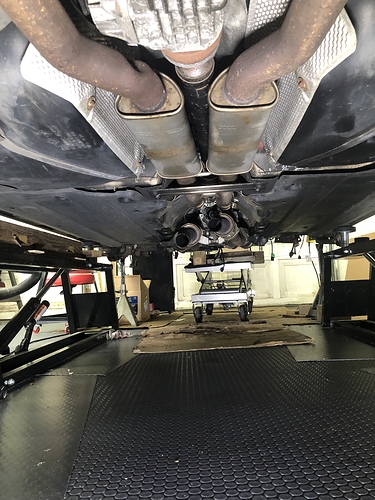
I will be using the engine hoist to reposition the subframe, so I will do my final adjustments then. Even so I am only off about an inch on the trans mounts and less than that with the engine:

Engine view:

From the underside looking forward at the transmission:

I will start working on the subframe and connections that are not done yet, then get it bolted back into place. So far I think my restart process is going to be:

  1. Reinstall Engine - fill Coolant/Oil but leave spark plugs/coils out
  2. Pull Fuel pump fuse (looks like ST2 Fuse 1 Passenger side - do I need to do anything else like pull the HPFP connectors?)
  3. Spray Windex into cylinders (I scoped them and a couple had some minor debris around the edges and a little gook on the cylinder wall near the intake valves), and crank the engine. My hope is that is crap will be washed out the spark holes, rather than the exhaust tract. I read about this in one of the carbon clean posts, but I forgot to add it to my document. I’ll find the reference again and make sure I do what needs to be done.
  4. One more scope of the cylinders
  5. Install the sparks/coils
  6. Reinstall the fuel pump fuses
  7. Cross my fingers and toes and crank it up

All of this will be done without hooking the drive train back up, just in case I have to pull it again. Working in IT, the last thing we do is screw anything down or tie wrap anything in position that we don’t have to until we know it works - it’s the kiss of death to do otherwise.

If you have any suggestions let me know.

So the engine sits physically back in the bay. Note to self: When you can’t find the torque settings for the engine mount upper bolts, do not forget about it since torquing them down when the engine is partially back in is a nightmare.

I had just completed reattaching the shift cable, hooked up the engine hoist and using the platform lift I positioned the subframe. I kept using the engine hoist and placed a 3 ton jack on the transmission to hold everything in place. I decided I would give things a once over to make sure I did not have anything out of position or mis-routed. Doing that I brushed up against the mounts and noticed they were not firmly in place. I was able to drop the engine enough, remove the frame rail attachments at the bottom of the mounts, and with a variety of sockets/attachments get enough torque to tighten them down. There was no way to get a torque wrench on those bolts, so the wristometer was employed.

After taking a break to regroup, I was able to get the subframe and trans crossmember secured. Using the hoist actually made the job easier as I could maneuver the engine without too much force. The marks I made on the frame rails, body and subframe pieces were critical in aligning everything back up.

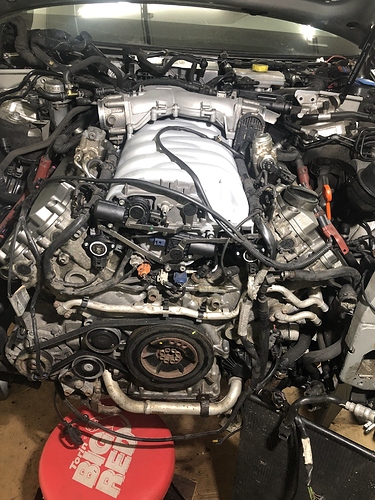
Engine back home:

I’m going to spend the balance of the evening hooking everything back up before installing some of the ancillary components like the coolant expansion tank and the radiator/condenser/fans. The wiring harness and some of the hoses will take most of the time I have available.

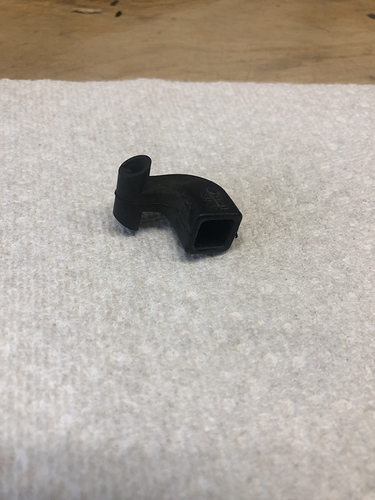
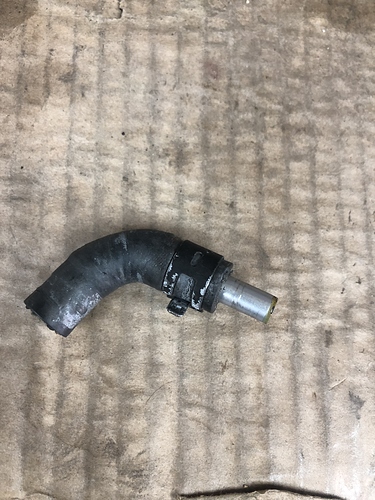
I came across this piece and I have no idea where it goes. It seems to be a vent of some kind with EPDM 14 stamped on one side and a number: 521163 7583-03 on the other. I must have inadvertently knocked if off during the process, but I do not recall when and I haven;t run into any square type fittings that it would plug on top of. Anyone know what it might be:

Anyway, back to work.

Ed

Got everything hooked up, filled with fluids, got her started and I am getting timing chain noise.

To say the wind is out of my sails would be an understatement. I was hoping it was oil pressure needed to be built up, but I did not want to run it too long (maybe 3 minutes). At first the oil was low, so I topped it off and restarted with no real change in the noise.

Unless it truly is oil pressure that needs to build, I am looking at having to drop, pull the trans off and redo the timing chain area - the problem is I noticed nothing out of sorts when doing the work and no funky noises when rotating by hand. The worst thing was that there really was no wear back there, but at 200,000 miles I didn’t want to leave it unattended.

I have a sound clip of it, but I am not sure how I can share that here since I can only upload image files.

I am going to take a break, give one of my buddies a call and figure out my next move. The engine and valve train sound smooth, but I only was idling so who knows. I’ll grab some codes tomorrow to see if there are any clues there and do some research into what I could use the VCDS for to help me figure out what I need to fix before pulling it.

At least I left the drive train disconnected.

Man I am just totally deflated. This was engine pull number 3 for me (2 Audi’s & a 911), and I was pretty cautious the whole way through.

Ed

I think I dodged a bullet. While I need to go over everything (cam deviations primarily and other things) the noise is gone.

I had forgotten the PS Pump was in the rear in this car, and while I filled the reserviour, as soon as I started the engine it must have sucked whatever was in there through the system. Since I was avoiding touching anything with the drive train still disconnected I wasn’t getting any PS rack sound to help me figure out what was going on.

I had this thought last night since the noise was primarily a grinding cyclic noise. Went out this AM, found the level below the dipstick, added more (I might have to siphon off a tiny bit) and the noise is gone.

I have got one other noise to track down, a high pitched whine, but I shut it down and headed back in for some breakfast & coffee and to settle my nerves a bit. All I could think about last night was having to drop the engine again. I still have to check a bunch of things, but at least that major hurdle has been passed.

Ed

I have to get the steering angle sensor functioning to clear an ABS fault, but there are no misfires.

In Engine I or II I am not sure if the 93 block shows cam shaft deviation, so I still have to find where to look for that, but on a bright note, there are no misfires (of course this is only at idle).

I have a brake booster fault, but I think until I get the sensor straightened out and can clear that, that fault will stay.

The whining/whistle noise appears to be from the PCV valve, though I have not messed with the connections to see if there is any change in noise.

Right now I am pressing out/in the bushings on the front and rear LCA’s (I had a little vibration previously and since I have replaced the upper bushings and the tie rods - inner and outer, these are the only other ones to look at. The rough running could also have contributed, but since they are original , after 200K I think it is time.

I am still breathing a sigh of relief over the PS pump being the noise. Engine is smooth and normal sounding now (with the exception of the whine/whistle).

The goal is to get the car off the lift today and see how it drives.

Ed

Good updates. Generally a very high pitcched whisle is a small leak of air getting sucked in like its a whissle. Check throttle body and Y pipe bolts along with the PCV. A good trick is to get a wet rag or towel and place it over areas where the sound is comming from. Generally if you get the noise to stop it’s because you found the leak and the vac pulled in the rag.

Also a lot of faults might not go away until you drive the car a few miles. Some of the adaptions need to run.

As for the PS sounds like you have it sorted out. But from what I found is there can be bubbles that pop up after filling and thinking its all purged. Try opening the cap and doing an end to end steering wheel turn looking to add fluid and let air excape if needed

So after a couple of frantic days, I’ve had a chance to regroup.

Picking back up from when I had the engine physically back in, I spent a great deal of time working through the electrical connections. I scoped the cylinders one more time and decided to skip the Windex treatment so I installed the sparks and coils. Starting from the top left I secured the wiring below the ECU’s, positioned the ECU’s, routed the starter and MAF/Coolant wires and finished connecting the coil wiring. Moving over to the plenum box, I reinstalled the wiring and connections, cleaned up the grounds and installed the upper strut tie bar. That allowed me to finish up the the few remaining connections and route the couple of lines that traverse across the front of the cowl area.

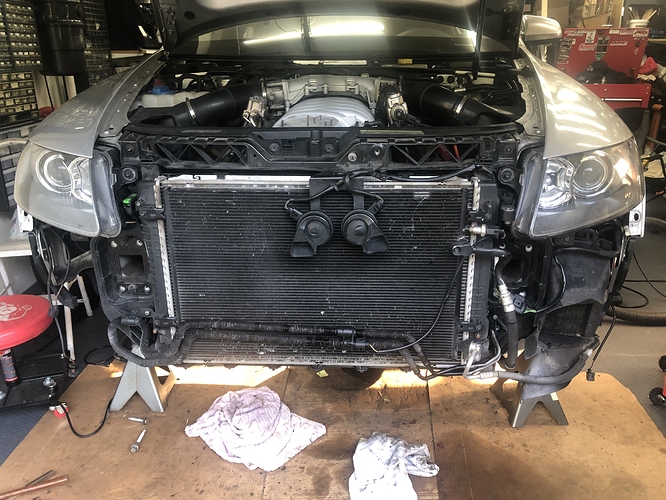
Next were the fuel and PCV lines, then I worked on the connections underneath the car. and only connected what I had to to test run the car. That included the exhaust and the O2 sensors and the transmission coolant sensor (I think that’s what it is). I removed the front engine hoist points and tie wrapped the air lines going to the front of the manifold. Next came the lock carrier, radiator, condenser and PS cooler. Since I had done this before, it was mainly from memory, but again I only hooked up what I had to.

One of the tools I had picked up along the way was a Schwabben Coolant fill tool. It serves two purposes:

  1. Leak test of the coolant system
  2. Fills the system without air getting in

That made the coolant fill pretty easy. For oil, I used Red Line with a custom mix of 0-40 and 5-50 weights - basically half and half. That gives me a small increment of heavier oil. I have been using this on the 911 for a few years. Once all that was done, the engine was ready to be test fired:

When I opened the door for the first time in a month, I smelled a mouse who had left this Earth. I looked briefly but could not locate his body. I’ll spend some more time later looking for his carcass, but I needed to clear the faults before starting for the first time. Using the key it cranked and started after a bit, ran a bit rough, but smoothed out. I turned it off, then restarted and it ran more normally, however the grinding began. As I mentioned it was just the PS pump and low fluid, but I didn’t know that at the time and called it quits for the night.

I had poured some Pentosin in until it reached the cold mark on the dipstick, but as noted in the panicky post, all of it was sucked in and I needed another half quart to satisfy the pump. I did that the next day. Thank God it was not the timing gear.

Working on the suspension requires some significant strength. At 58, even though I am in decent shape, I do not look forward to those tasks. I had left the drive train disconnected for two reasons:

  1. In case I needed to pull the engine I wanted the minimum connected to have to disconnect
  2. I wanted to work on the LCA’s since they were both original.

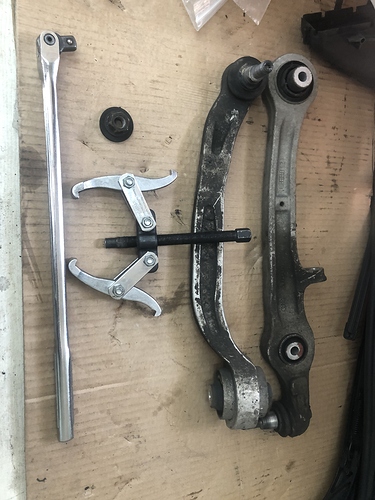
A while ago I acquired a 20 Ton cheapo press from HF. Really all you need is a higher quality bottle jack when the cheap one fails. I made the purchase when I had paid a local shop to press in some bushings a few years ago and they did a really crappy job. It has come in handy for a variety of suspension related tasks. The LCA’s on the S6 are fairly substantial:

Pulling the LCA’s was fairly straightforward. I temporarily reattached them to the subframe so the assembly wouldn’t twist when breaking the retaining nut free with a breaker bar. Once the nut was out of the way, I used a tie rod puller to pop the LCA’s out. Both ball joint pullers were too narrow to make it around the LCA ball joint cylinder.

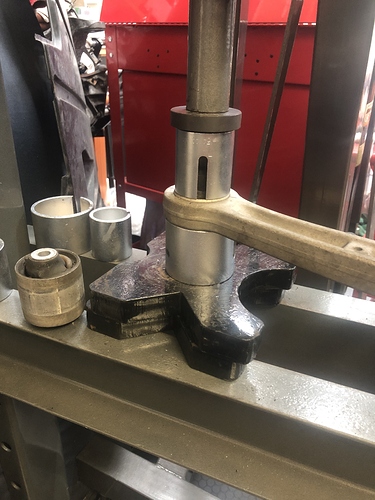
Once they were out, I moved over the to the press and removed the inside bushings and replaced them with new Audi bushings.

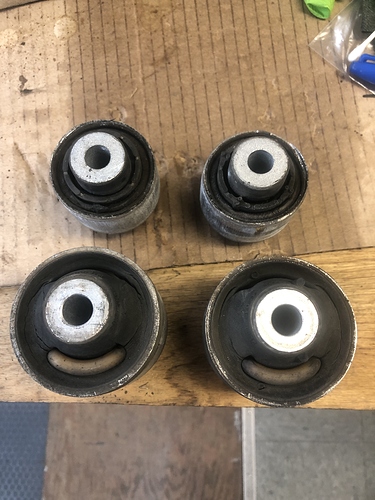
The old bushings weren’t horrible, but they were definitely worn, with the passenger side worse than the driver side:

The nuts holding them on are an unexpected 21 mm. While I have a socket for 21, I do not have a combination wrench at 21 mm. Removing them was fine, but installing required some creative thinking. I wound up using a C clamp to pull the LCA’s into the orifices on the knuckle and using 22 mm combination wrench and the torx bit to keep them from spinning when the clamp wasn’t sufficient. I finished connecting the LCA’s along with the shock, but did not tighten them to torque. I installed the drive shafts but also did not torque down the outer bolt, only the inside bolts.

I did torque down the subframe, installed the cross member, but I still must connect the rear drive shaft, which I will do tomorrow. Once that is done I’ll get the Quickjack back to a normal configuration and measure for the suspension height after installing the wheels. That will allow me to put it back in the air, use a jack to jack up the suspension on both sides and torque down the various pieces.

As mentioned the only whine is what I think is the PCV valve, but I will look at that later. I also still need to find the measuring blocks to make sure the cams are set properly.

It feels good to be moving forward again without any surprises.

Ed

Gee whiz, the last few things just beat the crap out of me.

First getting the driveshaft bolted back up was a interesting feat of power and geometry. There is very little room to wield a torque wrench there, and adding the fun of engaging and disengaging the parking brake made for a nice little warm up exercise routine. Little did I know what was in store for me with the suspension bolts.

I got the SUV adapters off the Quickjack, which is easier said than done since the car moves down and forward as it drops, so positioning the jack stands becomes interesting. But since this was my second go around (first was when I dropped the 997’s engine) it wasn’t too bad.

Then came jacking the suspension up on both sides and torquing everything down. First, would it have been that difficult to design things so you could actually get a freaking wrench on the bolt heads a little easier? Second, 70 nm and a 180 turn on those bolts is a bitch. I think if you can press 250, you’d be OK, but there are 4 of them to do. The sways and shock bolts are a breeze by comparison.

I still have to get the nose back on, but I am trashed right now, so that will wait until tomorrow.

I still have the whistle, and I haven’t started to track it down yet, but I will.

That is all.

Ed

Everything is back together, though I have to move the lock carrier into a service position so I can replace the correct O ring on the larger AC compressor connection.

I took it for a spin, without the nose on, and it accelerated, turned and stopped normally going at neighborhood speeds. The traction control light also went out, but I do need to scan again. I pulled it back in to get ready for the O ring.

I did some more looking at the whine, wound up breaking another throttle plenum bolt, removed the plenum, replaced the gasket with a new one I purchased (the new IM already had one on it) and the noise … got horribly worse. From a whistle I could deal with to a sonically damaging high pitch, high volume one.

I checked the bolts one more time, then started moving things around, when I moved the air valve on top of the throttle plenum the noise changed. Then moving my gloved hand around the driver side throttle body and the hose that connects the valve to the IM piece that connects to the PCV valve it changed more.

I decided that hose must have a leak, well not exactly. After getting everything out of the way and trying to disconnect the hose, this is what I had in my hand:

My guess is that is a pressed in fitting that shouldn’t pop out. While this may not be the source, it is now epoxied in place waiting 24 hours for it to dry and test.

Ed

Well that was not the source, nor was the throttle body gasket.

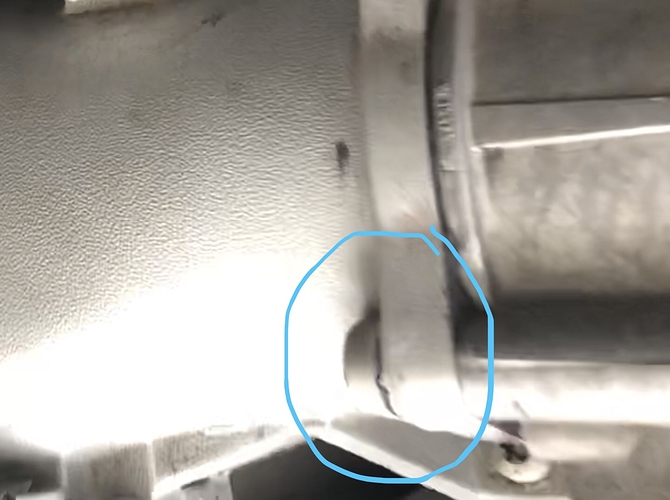
I have a cracked throttle plenum. What looks a scrape on the top is actually a hairline crack. Not sure how it happened since I am pretty careful with parts I pull off. I used some epoxy and it lasted about 30 seconds before air was drawn in again. O may try to rough it up a bit to see if I can get the epoxy to grab, but I need a new one. Anyway a new one is big bucks, so I will be checking some yards to see what might be out there.

No misfires, and except for a failed coolant reservoir cap, all connections seem to be tight and holding. I may have to postpone the inspection if I can’t get something quickly since that whine is ear splitting drive you crazy loud.

So, I will probably have one more post before wrapping this up.

Oh, one last time: How do you post a spreadsheet or a PDF? The button above is for images only.

Ed

I share your pain. I’ve got a noticeable crack where one of the throttle body bolts anchor on the driver side.

I’m tempted to take it off and try to epoxy it together. But I’m not sure how that will affect the TB bolt. And part of me thinks I shouldn’t touch it until I have access to a replacement. But that means I can’t remove the IM to glue in those flaps.

I would leave it alone unless you have an alternative.

Ed

@mixofia you can remove the intake with the throttle bodies still mounted…
so you don’t have to loosen the bolts.
I just changed it along with new bolts and gaskets it was 517 euros here.

1 Like

Yeah they are pricey. I found a used one with a 90 day warranty for $200 US.

Ed